
Popular categories
Looking for a yarn?


|
||||||||||||||||||||||||||||
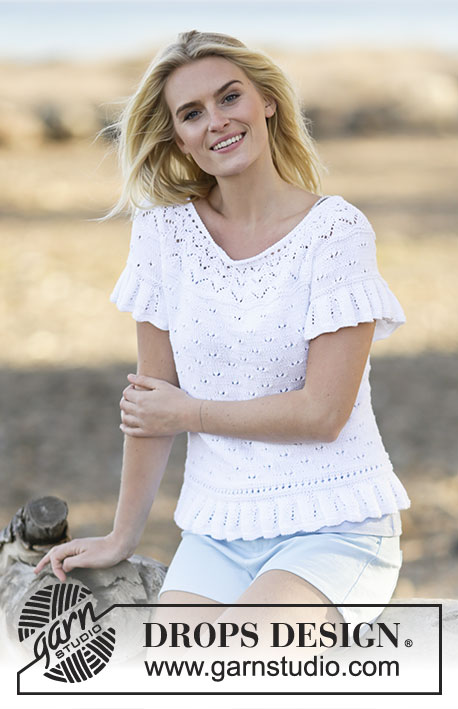
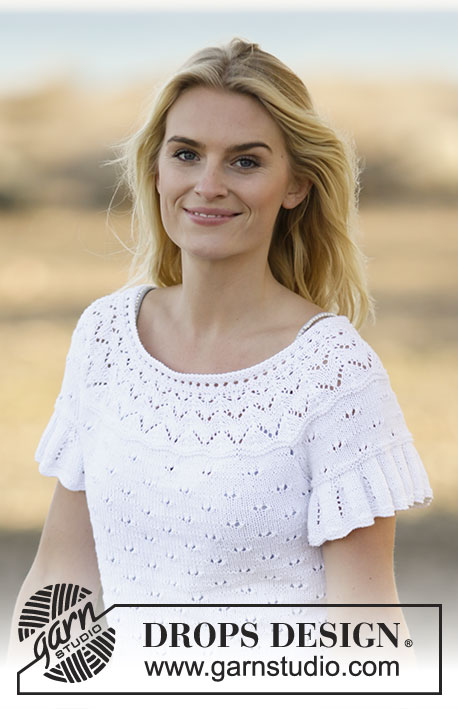
White Romance |
||||||||||||||||||||||||||||
 |
 |
|||||||||||||||||||||||||||
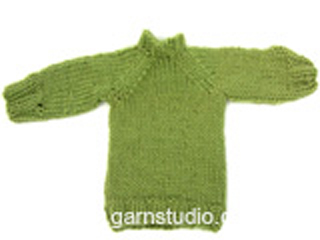
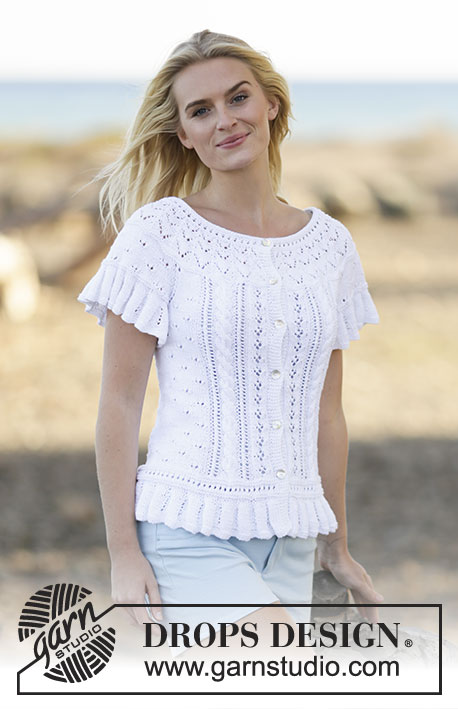
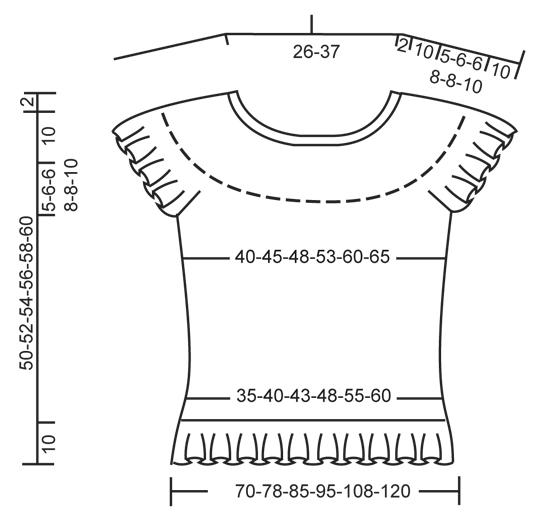
Knitted DROPS top with lace pattern, short sleeves and round yoke in ”Safran”. Size: S - XXXL.
DROPS 159-12 |
||||||||||||||||||||||||||||
|
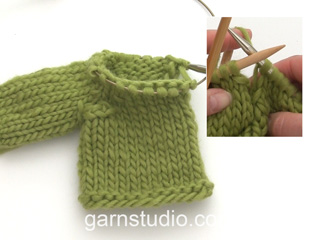
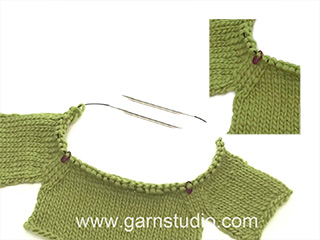
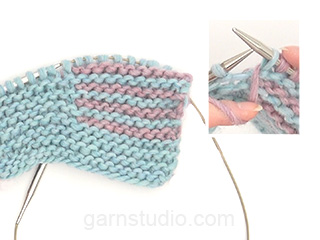
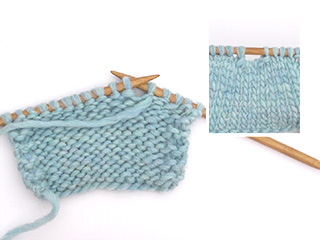
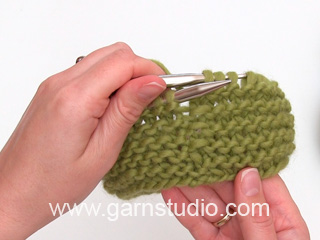
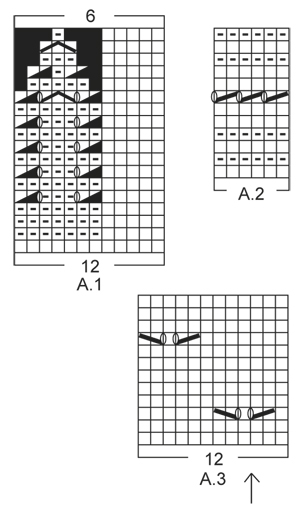
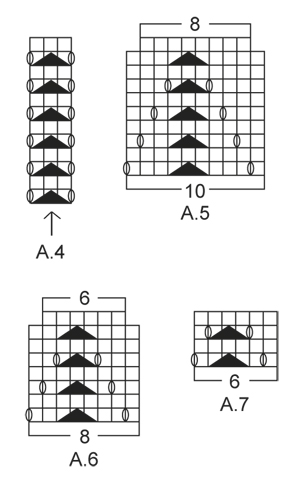
GARTER ST (in the round on circular needle): * K 1 round and P 1 round *, repeat from *-*. 1 ridge = 2 rounds. PATTERN: See diagrams A.1 to A.7. The diagrams show all rows in pattern seen from RS. INCREASE TIP: Inc 1 st by making 1 YO. On next round work YO twisted to avoid holes - work inc sts in stocking st. RAGLAN: Dec for raglan on each side of A.4 in every transition between sleeves and body. Dec as follows after A.4: Slip 1 st as if to K, K 1, psso. Dec as follows 2 sts before A.4: K 2 tog. ---------------------------------------------------------- BODY: Worked in the round on circular needle. Cast on 336-372-408-456-516-576 sts on circular needle size 2.5 mm with Safran. Work 2 ridges in GARTER ST - see explanation above. Switch to circular needle size 3 mm and work pattern according to diagram A.1. When A.1 has been worked 1 time vertically, there are 168-186-204-228-258-288 sts on needle. Then continue pattern according to diagram A.2. After A.2 K 2 rounds while AT THE SAME TIME inc 0-6-0-0-6-0 sts evenly on last round = 168-192-204-228-264-288 sts. Insert 1 marker at beg of round and 1 marker after 84-96-102-114-132-144 sts (= the sides). Then continue pattern according to diagram A.3. REMEMBER THE KNITTING TENSION AT THE SAME TIME when piece measures 12 cm, inc 1 st on each side of both markers - READ INCREASE TIP (= 4 sts inc). Repeat inc every 4-4-4-5-5-5 cm a total of 6 times in each side = 192-216-228-252-288-312 sts - NOTE: Work inc sts in stocking st. Continue to work until piece measures 35-36-38-38-40-40 cm. Work next round as follows: Cast off 5-5-5-6-6-6 sts for armhole, work 86-98-104-114-132-144 sts (= front piece), cast off 10-10-10-12-12-12 sts for armhole (i.e. 5-5-5-6-6-6 sts on each side of marker), work 86-98-104-114-132-144 sts (= back piece) and cast off the remaining 5-5-5-6-6-6 sts. Put piece aside and knit the sleeves. SLEEVE: Worked in the round on circular needle. Cast on 144-156-156-168-168-180 sts on circular needle size 2.5 mm with Safran. Work 2 ridges in GARTER ST - see explanation above. Switch to circular needle size 3 mm and work pattern according to diagram A.1. When A.1 has been worked, there are 72-78-78-84-84-90 sts on needle. Work 2 ridges. AT THE SAME TIME on last round cast off the middle 10-10-10-12-12-12 sts mid under sleeve = 62-68-68-72-72-78 sts remain on needle. Put piece aside and knit another sleeve. YOKE: Slip sleeves on to same circular needle as body where armholes were cast off (without working them first) = 296-332-344-372-408-444 sts. AT THE SAME TIME insert 1 marker in first and last st on both sleeves (= 4 markers). Beg mid back and continue pattern as before on body AT THE SAME TIME work A.3 on sleeves (arrow in diagram should match middle of sleeve, beg on same row in diagram as on body). Work in addition A.4 in every transition between body and sleeves (arrow in diagram should match against st with marker). When 2 rounds have been worked in the round over all sts, beg dec for RAGLAN - see explanation above (= 8 sts dec). Repeat dec on every 4th round 4-5-5-7-7-8 times in total = 264-292-304-316-352-380 sts. Work 2 ridges over all the sts while AT THE SAME TIME dec 4-12-4-6-12-10 sts evenly on 1st round = 260-280-300-310-340-370 sts. K 2 rounds. Now beg dec for round yoke and work pattern in the round according to diagram A.5 (= 26-28-30-31-34-37 repetitions on round – NOTE: Switch to a shorter circular needle when needed). When A.5 has been worked 1 time vertically, work A.6 instead of A.5. When A.6 has been worked 1 time vertically, there are 156-168-180-186-204-222 sts on needle. Now work A.7 instead of A.6. When A.7 has been worked 1 time vertically, work an elevation in the back of neck. Insert 1 marker mid front. Beg mid back and K until 14-14-16-16-18-20 sts remain before marker. Turn, K back until 14-14-16-16-18-20 sts remain before marker in the other side. Turn, K until 30-30-34-34-38-42 sts remain before marker. Turn, K back until 30-30-34-34-38-42 sts remain before marker in the other side. Turn, K until 46-46-52-52-58-64 sts remain before marker. Turn, K back until 46-46-52-52-58-64 sts remain before marker in the other side. Turn, K until 62-62-70-70-76-86 sts remain before marker. Turn, K back until 62-62-70-70-76-86 sts remain before marker in the other side. Turn and K back to beg of round. NECK EDGE: Switch to circular needle size 2.5 mm and work pattern in the round over all sts according to diagram A.2. AT THE SAME TIME on 1st round dec 22-24-24-26-30-32 sts evenly = 134-144-156-160-174-190 sts. After A.2, loosely cast off with K from RS. Top measures approx. 52-54-56-58-60-62 cm from shoulder and down. ASSEMBLY: Sew the openings under the sleeves. |
||||||||||||||||||||||||||||
Diagram explanations |
||||||||||||||||||||||||||||
|
||||||||||||||||||||||||||||
|
||||||||||||||||||||||||||||
|
||||||||||||||||||||||||||||
|
||||||||||||||||||||||||||||
|
Have you made this or any other of our designs? Tag your pictures in social media with #dropsdesign so we can see them! Do you need help with this pattern?You'll find tutorial videos, a Comments/Questions area and more by visiting the pattern on garnstudio.com. © 1982-2024 DROPS Design A/S. We reserve all rights. This document, including all its sub-sections, has copyrights. Read more about what you can do with our patterns at the bottom of each pattern on our site. |
||||||||||||||||||||||||||||


With over 40 years in knitting and crochet design, DROPS Design offers one of the most extensive collections of free patterns on the internet - translated to 17 languages. As of today we count 304 catalogues and 11422 patterns - 11422 of which are translated into English (UK/cm).
We work hard to bring you the best knitting and crochet have to offer, inspiration and advice as well as great quality yarns at incredible prices! Would you like to use our patterns for other than personal use? You can read what you are allowed to do in the Copyright text at the bottom of all our patterns. Happy crafting!
Comments / Questions (43)
For example on the 3rd round after the first increases there are 4 stitches left at the end of the round and I’m not sure whether to knit those stitches as normal or do the pattern.
26.02.2021 - 15:19DROPS Design answered:
Dear Nova, see previous answer, make always sure that the eyelet pattern fit in height, it shouldn't be displaced. Happy knitting!
26.02.2021 - 16:17When doing the body and the A3 and making the increases on either side of the markers I notice that those extra stitches will throw the alternate pattern out where the holes should be. Is that how it’s supposed to be?
26.02.2021 - 15:08DROPS Design answered:
Dear Nova, the increased stitches should be worked in A.3, this means at the beg of A.3 work the new stitches as a new repeat reading diagram from the left towards the right (= there should be always 7 sts before the next K2 tog, YO in the lace pattern. And at the end of A.3, work the new stitches as a new repeat of A.3 (reading from the right towards the left). Hope this will help. Happy knitting!
26.02.2021 - 16:16Er der en venlig sjæl som kan fortælle mig, om A4 skal strikkes både før og efter markeringerne (altså 2 gange) eller kun 1 gang?
11.06.2020 - 20:09DROPS Design answered:
Hej Annette, A4 skal strikkes én gang i hver raglanovergang og der skal tages ind på hver side ifølge forklaringen til RAGLAN øverst i opskriften. God fornøjelse!
12.06.2020 - 10:19Hejsan, ska jag följa A4 längre än de 12 varv diagrammet visar? Till minskningen av raglan är klar? Med vänlig hälsning, Tanja
26.05.2020 - 14:47DROPS Design answered:
Hej Tanja, ja stämmer, följ A4 till minskningen av raglan är klar. Lycka till :)
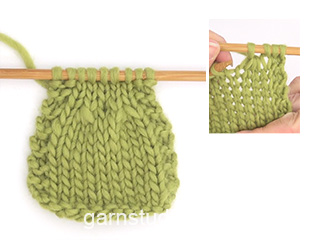
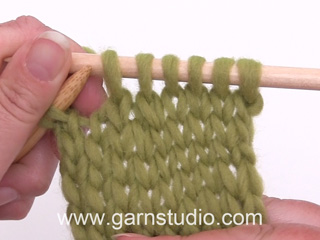
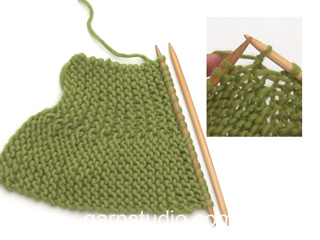
05.06.2020 - 09:14Hi could you clarify the back elevation for me, should i knit every row - ie 6 rows - to obtain garter stitch or should i knit and purl to achieve stocking stitch, whilst doing the elevation Thank you
01.08.2019 - 17:50DROPS Design answered:
Hi Laura, You knit all the rows in the elevation. Happy knitting!
02.08.2019 - 07:27Hallo, Auch mich begeistert dieses schöne Modell. Ich habe nun alle Maschen (Rumpfteil und Ärmel) auf einer Nadel gelegt. Leider komme ich hier nicht weiter. Gibt es vielleicht ein Video das mir zeigt wo genau mit A4 angefangen wird? so wie ich das verstehe ist genau der Markierer zwischen den Maschen die zusammengestrickt werden. Oder soll/darf der Markierer nun wieder entfernt werden??Vielleicht kann A4 auch weggelassen werden??
02.06.2019 - 09:59DROPS Design answered:
Liebe Gabi, A.4 stricken Sie wie folgt: stricken Sie bis 1 Masche bleibt vor der Masche mit der Markierung, 1 Umschlag, 1 M wie zum Rechtsstr abheben, 2 M re zusstr, die abgehobene M überziehen (= die Markierung in dieser Masche anziehen), 1 Umschlag = die 3 Maschen in A.4 sind jetzt gestrickt, und die Markierung ist immer in die mittlere Masche. Viel Spaß beim stricken!
03.06.2019 - 09:58Bonsoir,impossible pour moi de réussir l'empiècement.En intégrant A4, je ne parviens pas à coordonner le milieu de la manche avec la troisième maille de A3. Plusieurs fois que je tricote et détricote, compte et recompte mais non,rien n'y fait. Pouvez-vous m'aider? Je ne comprends pas🤔
28.04.2019 - 21:35DROPS Design answered:
Bonjour Agnès, A.4 doit être tricoté sur les 3 mailles à la transition entre le dos/le devant et les manches (la flèche dans A.4 = marqueur de la 1ère /dernière maille de chacune des manches). Vous tricotez ensuite A.3 sur le devant/le dos comme avant (rang suivant celui où l'on a rabattu les mailles rabattues pour les emmanchures), en même temps, vous tricotez A.3 sur les manches (= commencez par le même rang que pour le dos/le devant), en plaçant la maille centrale de la manche au niveau de la flèche dans A.3 - retrouvez ici comment centrer un diagramme. Bon tricot!
29.04.2019 - 10:44Bonjour, Je souhaite réaliser ce modèle avec une ouverture de col plus étroite. Comme le modèle Drop 170 27 pour ma taille = 23cm. Comment dois je faire svp? Merci Bonne journée
06.02.2019 - 10:19DROPS Design answered:
Bonjour Evelyne, nous ne sommes malheureusement pas en mesure de pouvoir adapter chacun de nos modèles à chaque demande, sachant en plus que le modèle cité est boutonné dans le dos (et se tricote avec un autre groupe de fils). N'hésitez pas à demander conseil à votre magasin DROPS et/ou à un forum de tricot pour toute assistance complémentaire. Bon tricot!
06.02.2019 - 13:55Ahoj, zkrácené řady na rubu pletu také hladce? Budou tam vroubky? Není vidět detail. Děkuji!
21.05.2018 - 10:22DROPS Design answered:
Milá Dagmar, ano, zkrácené řady se pletou tam i zpět hladce, budou tam vroubky a přechody mezi zkrácenými řadami se pěkně schovají. Hodně zdaru! Hana
25.05.2018 - 13:01¡Buen día! En el diagrama A3 cuando manda hacer los aumentos uno a cada lado del Mp.hago una lazada de dentro para afuera, Mp, y otra lazada. A la vuelta siguiente lo tejo como indica pero me queda un agujerillo. ¿ tiene que quedar o lo hago mal, y si lo estoy haciendo mal como debería hacerlo? Muchas gracias y un saludo.
01.05.2018 - 09:30DROPS Design answered:
Hola Ana. Para los aumentos las lazadas siempre se trabajan como puntos retorcidos. Este video te puede ayudar:
06.05.2018 - 13:15