
Popular categories
Looking for a yarn?


|
|||||||||||||
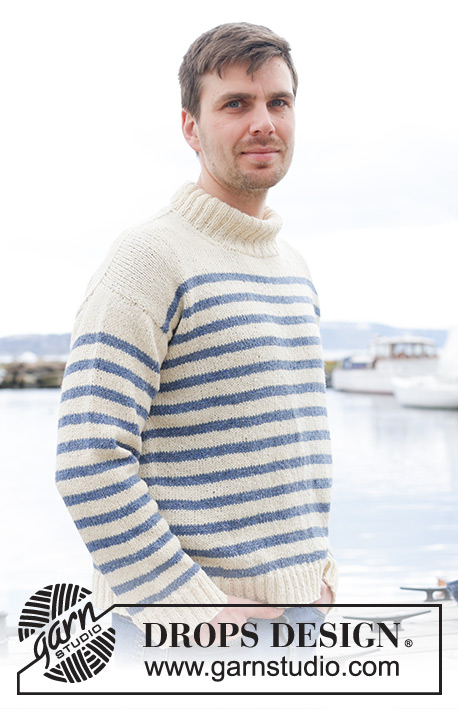
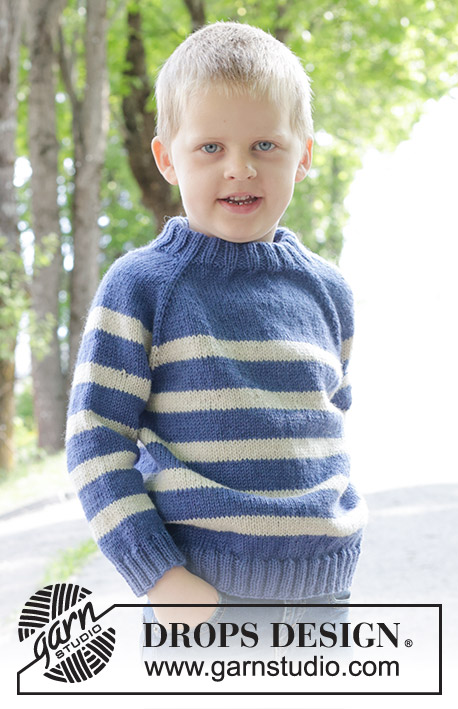
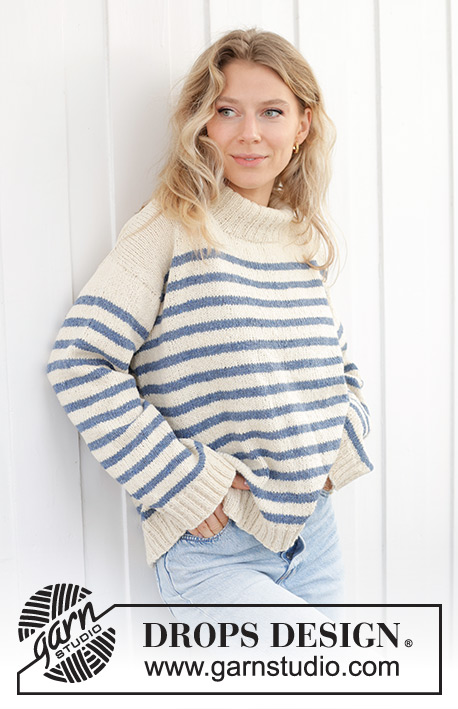
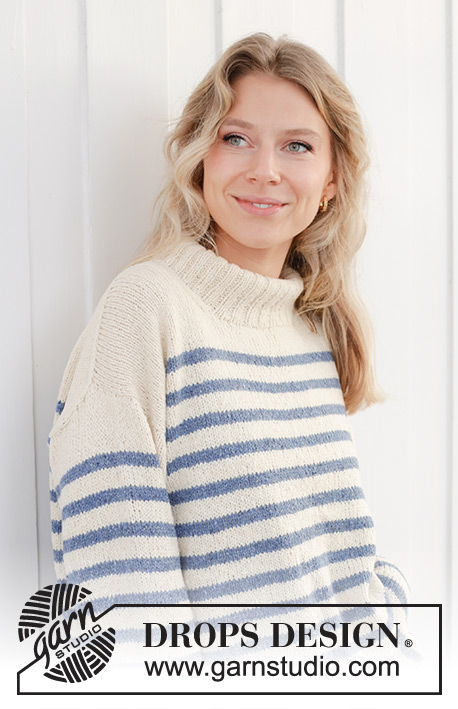
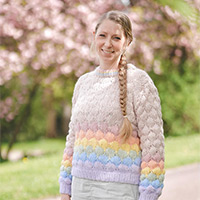
Sailor Stripes |
|||||||||||||
 |
 |
||||||||||||
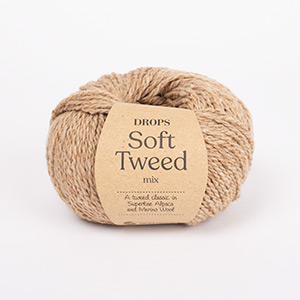
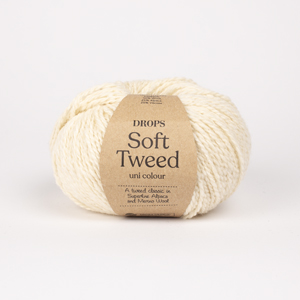
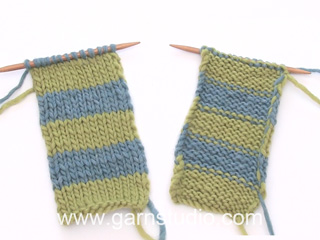
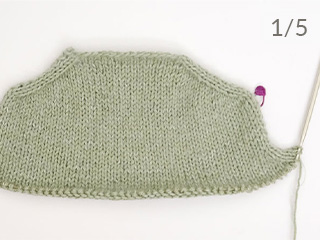
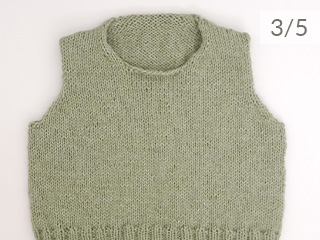
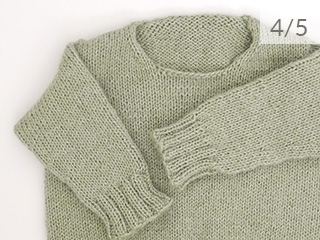
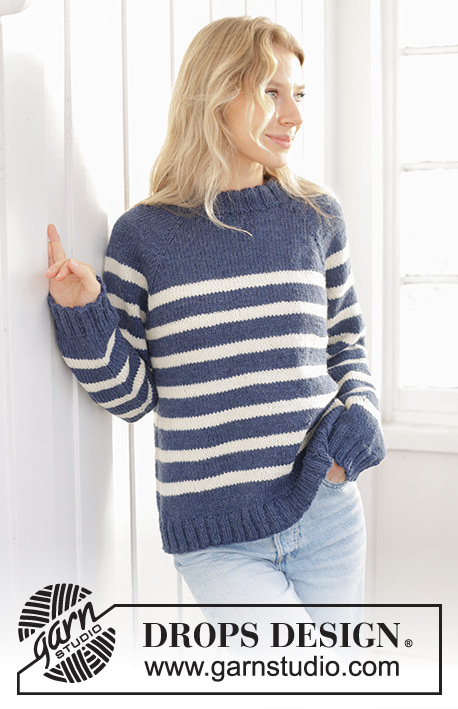
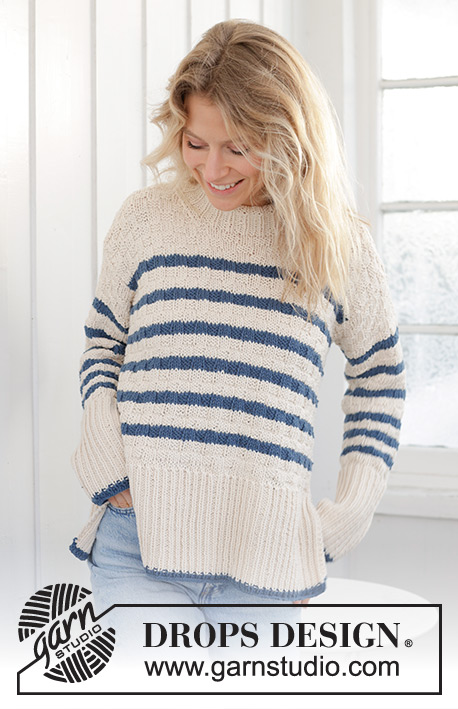
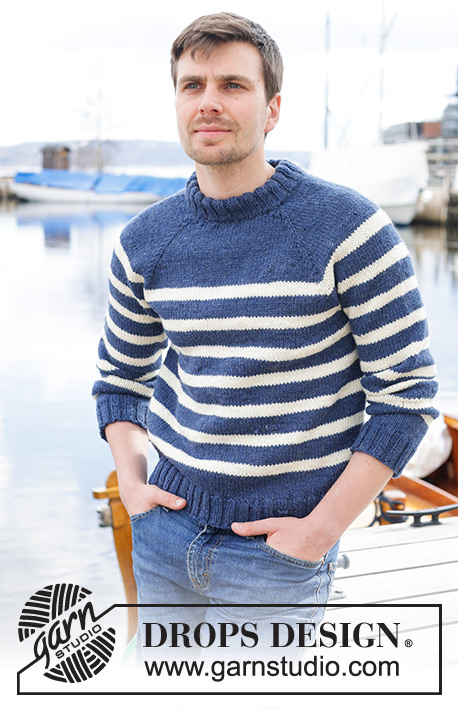
Knitted sweater in DROPS Soft Tweed or DROPS Daisy. The piece is worked top down with diagonal/European shoulders, stripes and high neck. Sizes S - XXXL.
DROPS 239-39 |
|||||||||||||
|
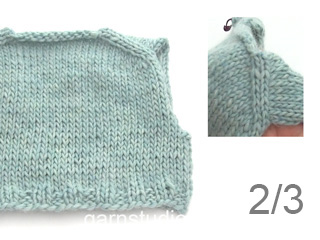
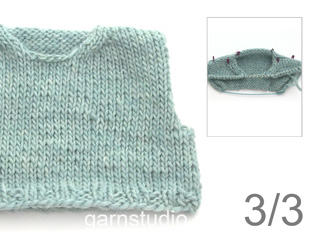
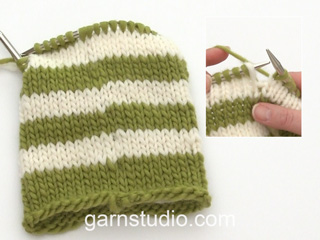
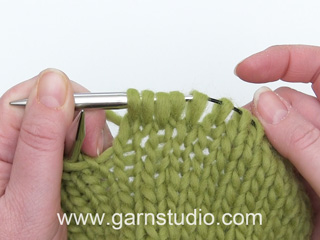
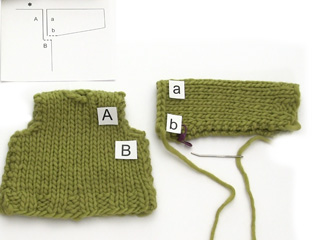
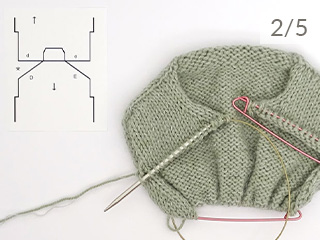
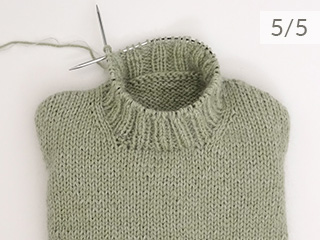
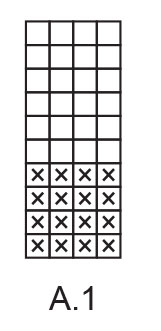
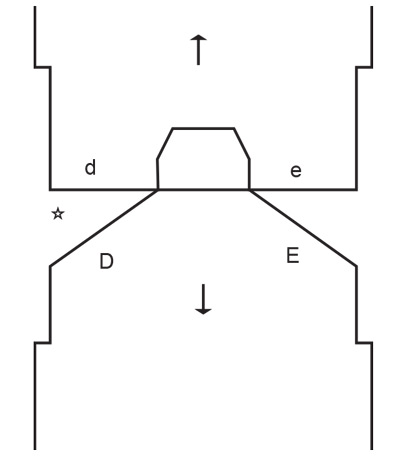
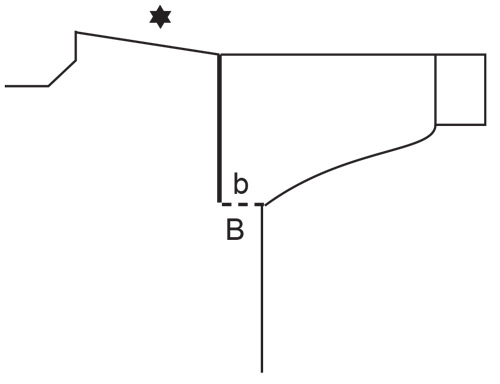
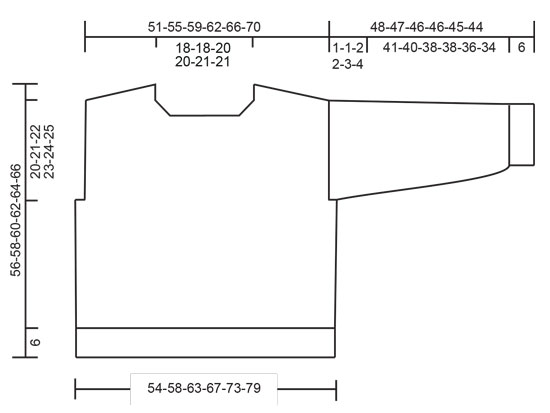
------------------------------------------------------- EXPLANATIONS FOR THE PATTERN: ------------------------------------------------------- STRIPES: See diagram A.1. STRIPE TIP (applies when working in the round): For a neater finish at the beginning and end of the round, when working stripes, work as follows: Change to the new color and work 1 round. Work the first stitch on the next round as follows: Lift up the back loop of the stitch below the first stitch on the left needle and place it on the left needle. Knit this stitch together with the next stitch. The transition will then be less visible. INCREASE TIP FROM THE RIGHT SIDE: Increase towards the left AFTER MARKER: Use the left needle to pick up strand from the front between 2 stitches from the previous row, knit the back loop. Increase towards the right BEFORE MARKER: Use the left needle to pick up strand from behind between 2 stitches from the previous row, knit the front loop. INCREASE TIP FROM THE WRONG SIDE: Increase towards the left BEFORE MARKER: Use the left needle to pick up the strand from behind between 2 stitches from the previous row, purl the front loop. Increase towards the right AFTER MARKER: Use the left needle to pick up the strand from the front between 2 stitches from the previous row, purl the back loop. DECREASE TIP (for sleeves): Decrease 1 stitch on either side of the marker-thread as follows: Work until there are 3 stitches left before the marker-thread, knit 2 together, knit 2 (marker-thread sits between these 2 stitches), slip 1 stitch as if to knit, knit 1 and pass the slipped stitch over the knitted stitch. ------------------------------------------------------- START THE PIECE HERE: ------------------------------------------------------- SWEATER – SHORT OVERVIEW OF THE PIECE: The back piece is worked back and forth with circular needle, top down until the armholes are finished. Stitches are knitted up along each shoulder and increased for the neck, then the front piece is worked back and forth with circular needle until the armholes are finished. The body is joined and finished in the round with circular needle. Stitches are knitted up for the sleeve, the sleeve cap is worked back and forth with circular needle, then the rest of the sleeve in the round, with short circular needle/double pointed needles. The neck is worked to finish. BACK PIECE: Cast on 39-39-43-43-47-47 stitches with circular needle size 4 MM = US 6 and color off white DROPS Soft Tweed or DROPS Daisy. Purl 1 row from the wrong side. Insert 1 marker inside the first 3 stitches on each side. Keep the markers inside the 3 stitches as you work onwards. Work stockinette stitch back and forth, AT THE SAME TIME increase AFTER the marker at the beginning of the row (right side) and BEFORE the marker at the end of the row – read INCREASE TIP FROM RIGHT SIDE. On the next row (wrong side) increase in the same way - read INCREASE TIP FROM WRONG SIDE. Increase like this from both the right and wrong side a total of 34-38-40-44-46-50 times. REMEMBER THE KNITTING GAUGE! After the last increase there are 107-115-123-131-139-147 stitches and the piece measures approx.12-14-14-16-16-18 cm = 4¾"-5½"-5½"-6¼"-6¼"-7" from the cast-on edge. Continue with color off white until the armholes measure 4-5-5-6-7-8 cm = 1½"-2"-2"-2⅜"-2¾"-3⅛" (measured along armhole). Work now A.1 back and forth over all stitches, repeating the pattern in height - read STRIPES. Continue until the piece measures 15-16-16-17-18-19 cm = 6"-6¼"-6¼"-6¾"-7"-7½" (measured along the armhole) and A.1 has been worked a total of 3 times in height. Put stitches on a thread and put aside. Work now front piece as explained below. FRONT PIECE: Start on the right shoulder (when the garment is worn). Knit up from the right side 34-38-40-44-46-50 stitches inside 1 stitch along the shoulder on the back piece (i.e. 1 stitch in each row) with color off white. Purl 1 row from the wrong side. Work stockinette stitch for 6 cm = 2⅜". Now increase 1 stitch (as before) for the neck, inside the 3 stitches at the end of each row from the right side, a total of 6-6-7-7-8-8 times. After the last increase there are 40-44-47-51-54-58 stitches. Put stitches on a thread after the last increase from right side and put piece aside. Now work the left shoulder as described below. Knit up from the right side 34-38-40-44-46-50 stitches inside 1 stitch along the left back shoulder with color off white. Purl 1 row from the wrong side. Work stockinette stitch for 6 cm = 2⅜". Now increase 1 stitch (as before) for the neck, inside the 3 stitches at the beginning of each row from the right side, a total of 6-6-7-7-8-8 times. After the last increase there are 40-44-47-51-54-58 stitches. Work the next row from the wrong side as follows: Work over the 40-44-47-51-54-58 stitches on the left front piece, cast on 27-27-29-29-31-31 stitches for the neck at the end of the row, work the 40-44-47-51-54-58 stitches from the right front piece = 107-115-123-131-139-147 stitches. Continue with stockinette stitch. When the piece measures 14-15-17-18-19-20 cm = 5½"-6"-6¾"-7"-7½"-8" (measured along the armhole), work A.1 until the piece measures 25-26-28-29-30-31 cm = 9¾"-10¼"-11"-11⅜"-11¾"-12¼" and there are 3 stripes matching the back piece. Now join the back and front pieces for the body. BODY: Continue the stripes and work the 107-115-123-131-139-147 stitches on the front piece, cast on 6-6-10-10-14-18 stitches at the end of the row (in side under sleeve), work the 107-115-123-131-139-147 stitches from the back piece and cast on 6-6-10-10-14-18 stitches (in side under sleeve) = 226-242-266-282-306-330 stitches. Continue A.1 in the round until the piece measures 50-52-54-56-58-60 cm = 19¾"-20½"-21¼"-22"-22¾"-23⅝", measured from the top of the shoulder on the front piece – finish after a couple of rounds of color off white. Knit 1 round and increase 22-26-26-26-30-30 stitches evenly spaced = 248-268-292-308-336-360 stitches. Change to circular needle size 3 MM = US 2.5. Work rib (knit 2, purl 2) for 6 cm = 2⅜" with color off white. Bind off a little loosely. The sweater measures approx. 56-58-60-62-64-66 cm = 22"-22¾"-23⅝"-24⅜"-25¼"-26", measured from the top of the shoulder on the front piece. RIGHT SLEEVE: Use circular needle size 4 MM = US 6 and color off white. Knit up from the right side 32-34-34-36-38-40 stitches from the bottom of the armhole and up the back piece to the shoulder, then 53-55-59-61-63-65 stitches from the shoulder, down the front piece to the bottom of the armhole = 85-89-93-97-101-105 stitches. Insert 1 marker in the middle of the row – used to measure from. Start from the wrong side and work stockinette stitch back and forth for 1-1-2-2-3-4 cm = ⅜"-⅜"-¾"-¾"-1⅛"-1½". Now join the sleeve and work in the round with short circular needle/double pointed needles. Insert 1 marker thread at the beginning of the round (mid under sleeve), let the marker thread follow upwards. When the sleeve measures 3-3-3-4-4-4 cm = 1⅛"-1⅛"-1⅛"-1½"-1½"-1½", work A.1 - remember STRIPE TIP. AT THE SAME TIME when the sleeve measures 4-4-5-5-6-7 cm = 1½"-1½"-2"-2"-2⅜"-2¾" from the marker-thread, decrease 2 stitches under the sleeve – read DECREASE TIP. Decrease like this every 3-3-2½-2½-2-1½ cm = 1⅛"-1⅛"-1"-1"-¾"-½" a total of 12-12-14-14-16-16 times = 12-12-14-14-16-16 stitches. Work until the sleeve measures 42-41-40-40-39-38 cm = 16½"-16⅛"-15¾"-15¾"-15¼"-15". There is 6 cm = 2⅜" left - finish after a couple of rounds of color off white. Knit 1 round and increase 7 stitches evenly spaced = 68-72-72-76-76-80 stitches. Change to double pointed needles size 3 MM = US 2.5. Work rib (knit 2, purl 2) for 6 cm = 2⅜". Bind off a little loosely, with knit over knit and purl over purl. The sleeve measures approx. 48-47-46-46-45-44 cm = 19"-18½"-18"-18"-17¾"-17¼". Sew the bottom of the armhole – see sketch. LEFT SLEEVE: Use circular needle size 4 MM = US 6 and color off white. Knit up from the right side 53-55-59-61-63-65 stitches from the bottom of the armhole and up the front piece to the shoulder, then 32-34-34-36-38-40 stitches from the shoulder, down the back piece to the bottom of the armhole = 84-88-93-97-101-105 stitches. Insert 1 marker in the middle of the row – used to measure from. Work in the same way as the right sleeve. NECK: Start on one shoulder and knit up from the right side, inside 1 edge stitch, 120-140 stitches with short circular needle size 3 MM = US 2.5 and color off white. Stitch-number must be divisible by 4. Work rib in the round (knit 2, purl 2) for 10 cm = 4". Bind off. If you want a double neck, fold it to the inside and sew a couple of stitches on each side to keep it in place. |
|||||||||||||
Diagram explanations |
|||||||||||||
|
|||||||||||||
|
|||||||||||||
|
|||||||||||||
|
|||||||||||||
|
|||||||||||||
|
Have you made this or any other of our designs? Tag your pictures in social media with #dropsdesign so we can see them! Do you need help with this pattern?You'll find tutorial videos, a Comments/Questions area and more by visiting the pattern on garnstudio.com. © 1982-2024 DROPS Design A/S. We reserve all rights. This document, including all its sub-sections, has copyrights. Read more about what you can do with our patterns at the bottom of each pattern on our site. |
|||||||||||||


With over 40 years in knitting and crochet design, DROPS Design offers one of the most extensive collections of free patterns on the internet - translated to 17 languages. As of today we count 304 catalogs and 11422 patterns - 11417 of which are translated into English (US/in).
We work hard to bring you the best knitting and crochet have to offer, inspiration and advice as well as great quality yarns at incredible prices! Would you like to use our patterns for other than personal use? You can read what you are allowed to do in the Copyright text at the bottom of all our patterns. Happy crafting!
Comments / Questions (9)
Hello, what does the pattern mean by 'Insert 1 marker inside the first 3 stitches on each side. ' Do I knit or purl 3 then place the marker or K or purl 2 and place the marker, I don't under stand what inside the first three stitches means, I am used to Knit 3 place a marker, for example. Thank you SandraM
09.04.2024 - 23:55DROPS Design answered:
Dear Sandra, it means, you start knitting your row, after the 3d stitch you place a marker, then continue with th erow, until the last three stitch, place the second marker and finish your row. Happy Knitting!
10.04.2024 - 06:05Können Sie mir bitte erklären was Sie mit auffassen meinen? Meinen Sie eine Masche aufnehmen? (Dazu nehmen) Vielen Dank
05.11.2023 - 19:15DROPS Design answered:
Liebe Frau Krüger, also ja, bei beiden ZUNAHMETIPP wird es wie in diesem Video aufgefassen/zugenommen; die Maschen von den beiden Schulter, Vorderteil, werden wie in diesem Video aufgefassen. Viel Spaß beim stricken!
06.11.2023 - 08:51Jeg er i gang med at strikke forstykket. Hvor skal jeg måle fra? Der står der skal måles yderst langs ærmegabet, men er i tvivl om jeg skal måle fra hvor jeg har lavet udtagninger til skulderen, eller om blot for- og bagstykke skal strikkes lige langt. Skal siges jeg ikke strikker striber, men blot én farve. Er kommet til det sidste stykke i opskriften inden jeg skal strikke ærmer.
18.10.2023 - 23:28DROPS Design answered:
Hej Emma, ja for og bagstykke skal være lige langt, dvs at den nederste skrå del på skulderen ligger bagpå og du måler fra øverste punkt på skulderen :)
24.10.2023 - 08:12Liebes Drops-Team, Nach der Aufnahme (dann 107 M) muss noch ein Stück gestrickt werden, bevor mit A1 begonnen wird. Muss dieses Stück 4 cm lang sein oder worauf bezieht sich die Angabe von 4 cm? LG Louisa
14.10.2023 - 18:09DROPS Design answered:
Liebe Frau Schwegler, diese 4 cm werden am Armauschnitt dh an der Seite = nach den letzten Zunahmen gemessen. Viel Spaß beim stricken!
16.10.2023 - 09:24Hallo! Gibt es vielleicht ein Video oder eine Zeichnung zu dem Streifentipp? Ich verstehe nicht richtig, wie ich die untere Masche auf die Nadel nehmen soll. Vielen Dank im Voraus!
05.09.2023 - 20:18DROPS Design answered:
Liebe Mascha, ja genau, in diesem Video zeigen wir, wie man Streifen in Runden ohne Stufe im Übergang strickt. Viel Spaß beim stricken!
06.09.2023 - 09:07Right Sleeve: My question is about where to measure from, based on the section I've included below. Insert 1 marker in the middle of the row – USED TO MEASURE FROM. AT THE SAME TIME when the sleeve measures 4-4-5-5-6-7 cm FROM THE MARKER-THREAD, decrease 2 stitches under the sleeve... So it changes what you're measuring from? Or is it supposed to still be from the first marker? Thank you
06.08.2023 - 18:47DROPS Design answered:
Dear Joey, yes, once you insert the marker thread you will measure from there, unless stated otherwise (for example, if it says from the cast-on edge). The marker thread inserted later on in the right sleeve at the beginning of the round will follow the work upwards, so it can't be used for measuring. So it's 4-4-5-5-6-7 cm from the marker "used to measure from". Happy knitting!
06.08.2023 - 22:18Ik zie dat A1 gecorrigeerd is, maar ik was al bezig het achterpand te breien. Moet ik dit nu uithalen? Komt het ook uit als ik doorga? Alleen de streep begint dan iets lager?
23.03.2023 - 22:58DROPS Design answered:
Dag Martine,
Om eerlijk te zijn weet ik niet hoe A.1 eruit zag voordat het gewijzigd is. Als het aantal naalden waarover de strepen gebreid worden gewijzigd is, wat me het meest logisch lijkt, kan je inderdaad gewoon door breien en de hoogte afmetingen aan houden.
24.03.2023 - 19:19Hej! Skulle vilja sticka denna tröja i annat garn men i konverteraren när jag skall se vilket garn jag kan använda istället för soft Tweed så finns ej 8 trådar som alternativ. Soft tweed är ju 8 trådar om jag ej förstått fel?
14.03.2023 - 20:01DROPS Design answered:
Hej Jenny, du vælger DROPS Soft Tweed, skriver antal gram i din størrelse, og vælger 1 tråd som denne er strikket i, så får du masser af alternativer op fra garngruppe B :)
15.03.2023 - 10:30Ahoi! Ich möchte diesen Pulli gern ohne Streifen stricken. Wieviel Garn benötige ich dann für Größe XL, 550 g + 200 g = 750 g? Oder etwas weniger? Vielen Dank im Voraus für die Hilfe.
12.03.2023 - 21:56DROPS Design answered:
Liebe Mascha, da wir dieses Modell nur mit Streifen gestrickt haben, haben wir leider keine Erfahrung für die Garnmenge mit nur einer Farbe, aber ja, am besten kalkulieren Sie so, es kann sein, daß wir etwas weniger brauchen. Viel Spaß beim stricken!
13.03.2023 - 10:28