
Popular categories
Looking for a yarn?


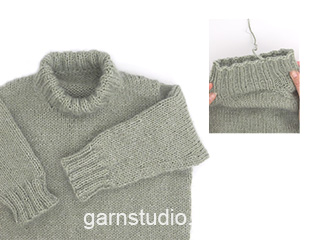
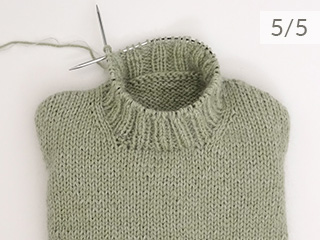
European shoulder (backpiece)
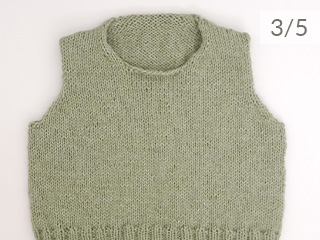
Sweaters and jackets with European shoulders have a wonderful shape, suitable for most people, where the shoulder sits slightly back and in diagonal (also called ”Diagonal shoulders”). Designs with European shoulders are worked top down, a little over-sized and usually without the need for assembly.
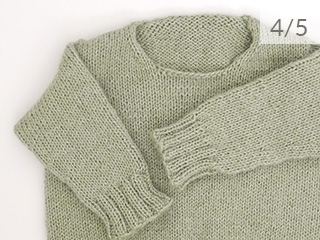
First, the top of the back piece is worked, after which stitches are picked up for the left front piece, then the right front piece. The pieces are joined, increases are worked for the armholes and the piece is continued in the round. When the body is finished, stitches are picked up for the sleeves, the sleeve cap is worked back and forth and the rest of the sleeve is worked in the round.
In this lesson, we show you step-by-step how to work the first part of the back piece and how to increase for European shoulders. We follow the pattern for a children’s sweater Sweet Peppermint (DROPS Children 47-12), size 2 years, but remember to follow the stitch numbers/increases for your chosen size!
At the bottom of the page you'll find a video which might be of help. as well as a form where you can ask our experts for help if you were to need it!
Let’s get started!
We are working with 2 yarn qualities, DROPS Lima color no. 9029, sage green and DROPS Kid-Silk color no 45, soft mint using needle size 5 mm = US 8.
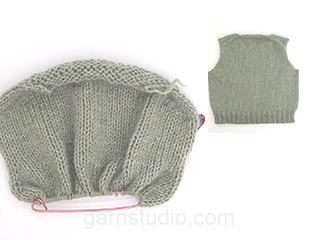
Cast on 20 stitches with 1 strand DROPS Lima, 1 strand DROPS Kid-Silk and needle size 5 mm = US 8 – or the yarn and stitch number given in the pattern you are working on. This cast-on edge is the top of the neck on the back piece. See the thick line in the measurement sketch

Purl 1 row from the wrong side.
Insert 1 marker, inside the outermost 3 stitches on each side. The markers continue inside the 3 outermost stitches on each side, every row onwards.

Now work stockinette stitch back and forth. AT THE SAME TIME increase towards the left AFTER the marker at the beginning of the row, seen from the right side, as follows:
Use left needle to pick up thread between 2 stitches from the previous row, pick up thread from front.

Knit the back loop of this picked-up stitch.


Increase towards the right BEFORE the marker at the end of the row, seen from the right side, as folows:
Use left needle to pick up thread between 2 stitches from the previous row, pick up thread from behind.

Knit the front loop of this picked-up stitch.


On the next row (wrong side) increase in the same way.
Increase towards the left AFTER the marker as follows:
Use the left needle to pick up the back loop between 2 stitches from the previous row, pick up thread from behind.

Purl the front loop of this picked-up stitch.


Increase towards the right BEFORE the marker as follows:
Use left needle to pick up thread between 2 stitches from the previous row, pick up thread from front.

Purl the back loop of this picked-up stitch.


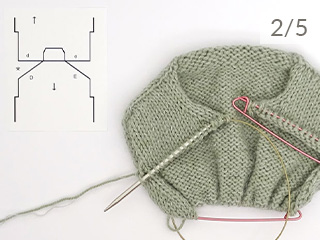
Continue like this, increasing from both the right and wrong side a total of 14 times on each side, or according to the numbers in the text you are following. After the final increase there are 48 stitches. The thick lines in the measurement sketch show how far we have come.

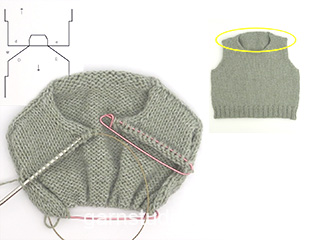
Work 4 rows without further increases.
Move the markers so they sit outermost on each side of the piece. The piece is now measured from here.

Continue with stockinette stitch back and forth for a further 5 cm = 2", or to the measurement in your text, measured from the marker outermost on the armhole.

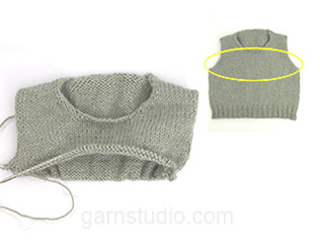
Now increase 1 stitch on each side, increasing inside the 3 outermost stitches, remember INCREASE TIP FROM RIGHT SIDE, see below. Increase every 2nd row (each row from the right side) a total of 4 times = 56 stitches.

INCREASE TIP FROM RIGHT SIDE:
Increase towards the left AFTER the marker:
Use the left needle to pick up the front loop between 2 stitches from the previous row, pick up thread from front and knit stitch in back loop.
Increase towards the right BEFORE the marker:
Use the left needle to pick up thread between 2 stitches from the previous row, pick up thread from behind and knit stitch in front loop.
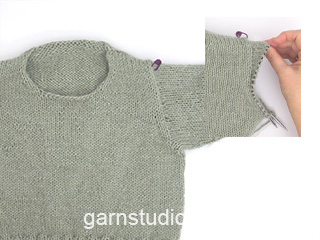
Continue working until the piece measures 9 cm = 3½", or to the measurement in your pattern, measured outermost along the armhole.
Cut the strand, place the stitches on a thread or stitch holder.


The first part of the back piece is now finished.
The next step is to work the front piece. See how to do this in our lesson: European shoulders (front piece)
Do you need help?
If you require further information about different stitches or techniques, you will find a list of videos and lessons, which might be of help:


With over 40 years in knitting and crochet design, DROPS Design offers one of the most extensive collections of free patterns on the internet - translated to 17 languages. As of today we count 304 catalogs and 11422 patterns - 11417 of which are translated into English (US/in).
We work hard to bring you the best knitting and crochet have to offer, inspiration and advice as well as great quality yarns at incredible prices! Would you like to use our patterns for other than personal use? You can read what you are allowed to do in the Copyright text at the bottom of all our patterns. Happy crafting!