The yarn cost is calculated from the pattern’s smallest size and the yarn’s cheapest product type. Looking for an even better price? You might find it on the DROPS Deals!
-------------------------------------------------------
Alternative Yarn – See how to change yarns here
Yarn Groups A to F – Use the same pattern and change the yarn here
Yarn usage using an alternative yarn – Use our yarn converter here
-------------------------------------------------------
The yarn cost is calculated from the pattern’s smallest size and the yarn’s cheapest product type. Looking for an even better price? You might find it on the DROPS Deals!
All measurements in charts are in cm.
Each of our patterns has specific tutorial videos to help you.
These step-by-step tutorials might also help you:
Why is the knitting/crochet tension so important?
Knitting tension is what determines the final measurements of your work, and is usually measured per 10 x 10 cm. It is provided like so: number of stitches in width x number of rows in height - eg: 19 stitches x 26 rows = 10 x 10 cm.
The knitting tension is very individual; some people knit/crochet loosely while others work tightly. You adjust the knitting tension with the needle size, which is why the suggested needle size only serve as a guide! You need to adjust this (up or down) to ensure that YOUR knitting tension matches the knitting tension provided in the pattern. If you work with a different knitting tension than provided you will have a different yarn consumption, and your work will have different measurements than what the pattern suggests.
The knitting tension also determines which yarns can replace each other. As long as you achieve the same knitting tension you can replace one yarn with another.
See DROPS lesson: How to measure your tension/gauge
See DROPS video: How to make a gauge tension swatch
How do I know how many balls of yarn I need?
The required amount of yarn is provided in grams, eg: 450 g. To calculate how many balls you’ll need you first need to know how many grams are in 1 ball (25g, 50g or 100g). This information is available if you click on the individual yarn quality on our pages. Divide the amount required with the amount of each ball. For example, if each ball is 50g (the most common amount), the calculation will be as follows: 450 / 50 = 9 balls.
Can I use a different yarn than what the pattern suggests?
The important thing when changing from one yarn to another is that the knitting/crochet tension remains the same. This is so that the measurements of the finished piece will be the same as on the sketch provided. It is easier to achieve the same knitting tension using yarns from the same yarn group. It is also possible to work with multiple strands of a thinner yarn to achieve the knitting tension of a thicker one. Please try our yarn converter. We recommend you to always work a test swatch.
Please NOTE: when changing yarn the garment might have a different look and feel to the garment in the photo, due to individual properties and qualities of each yarn.
See DROPS lesson: Can I use a different yarn than the one mentioned in the pattern?
What are the yarn groups?
All our yarns are categorised into yarn groups (from A to F) according to thickness and knitting tension – group A contains the thinnest yarns and group F the thickest. This makes it easier for you to find alternative yarns to our patterns, should you wish to switch yarn. All yarns within the same group have a similar knitting tension and can easily replace each other. However, different yarn qualities have different structures and properties which will give the finished work a unique look and feel.
How do I use the yarn converter?
At the top of all our patterns you’ll find a link to our yarn converter, which is a helpful tool should you wish to use a different yarn than suggested. By filling in the yarn quality you wish to replace, the amount (in your size) and number of strands, the converter will present good alternative yarns with the same knitting tension. Additionally it will tell you how much you’ll require in the new qualities and whether you’ll need to work with multiple strands. Most skeins are 50g (some are 25g or 100g).
If the pattern is worked with multiple colours, every colour will have to be converted separately. Similarly, if the pattern is worked with several strands of different yarns (for example 1 strand Alpaca and 1 strand Kid-Silk) you will have to find alternatives for each, individually.
Why do you show discontinued yarns in the patterns?
Since different yarns have different qualities and textures we have chosen to keep the original yarn in our patterns. However, you can easily find options among our available qualities by using our yarn converter, or simply pick a yarn from the same yarn group.
It is possible that some retailers still have discontinued yarns in stock, or that someone has a few skeins at home that they would like to find patterns for.
The yarn converter will provide both alternative yarn as well as required amount in the new quality.
What size should I knit?
If you think it's hard to decide what size to make, it can be a good idea to measure a garment you own already and like the size of. Then you can pick the size by comparing those measures with the ones available in the pattern's size chart.
You'll find the size chart at the bottom of the pattern.
See DROPS lesson: How to read size chart
Why do I get the wrong knitting tension with the suggested needle size?
The needle size provided in the pattern serves only as a guide, the important thing is to follow the knitting tension. And since knitting tension is very individual, you will have to adjust the needle size to ensure that YOUR tension is the same as in the pattern – maybe you’ll have to adjust 1, or even 2 needle sizes, up or down to achieve the correct tension. For this, we recommend that you work test swatches.
Should you work with a different knitting tension than the one provided, the measurements of the finished garment might deviate from the measurement sketch.
See DROPS lesson: How to measure your tension/gauge
See DROPS video: How to make a gauge tension swatch
Why is the pattern worked top-down?
Working a garment top-down provides more flexibility and room for personal adjustment. For example it is easier to try the garment on while working, as well as making adjustments to length of yoke and shoulder caps.
The instructions are carefully explaining every step, in the correct order. Diagrams are adjusted to the knitting direction and are worked as usual.
How do I work according to a knitting diagram?
The diagram depicts all rows/rounds, and every stitch seen from the right side. It is read from bottom to top, from right to left. 1 square = 1 stitch.
When working back and forth, every other row is worked from the right side and every other row is worked from the wrong side. When working from the wrong side, the diagram will have to be worked reversed: from left to right, knit stitches are purled, purl stitches are knit etc.
When working in the round every round is worked from the right side and the diagram are worked from right to left on all rounds.
See DROPS lesson: How to read knitting diagrams
How do I work according to a crochet diagram?
The diagram depicts all rows/rounds, and every stitch seen from the right side. It is worked from bottom to top, from right to left.
When working back and forth every other row is worked from the right side: from right to left and every other row is worked from the wrong side: from left to right.
When working in the round, every row in the diagram are worked from the right side, from right to left.
When working a circular diagram you start in the middle and work your way outwards, counter clockwise, row by row.
The rows usually start with a given number of chain stitches (equivalent to the height of the following stitch), this will either be depicted in the diagram or explained in the pattern.
See DROPS lesson: How to read crochet diagrams
How do I work several diagrams simultaneously on the same row/round?
Instructions for working several diagrams after each other on the same row/round, will often be written like so: “work A.1, A.2, A.3 a total of 0-0-2-3-4 times". This means you work A.1 once, then A.2 is worked once, and A.3 is repeated (in width) the number of times provided for your size – in this case like so: S = 0 times, M = 0 times, L=2 times, XL= 3 times and XXL = 4 times.
The diagrams are worked as usual: begin with the first row in A.1, then work the first row in A.2 etc.
See DROPS lesson: How to read knitting diagrams
See DROPS lesson: How to read crochet diagrams
Why are the sleeves shorter in larger sizes?
The total width of the garment (from wrist-to-wrist) will be larger in the larger sizes, despite the actual sleeves being shorter. The larger sizes have longer sleeve caps and wider shoulders, so there will be a good fit in all sizes.
Where on the garment is the length measured?
The measurement sketch/schematic drawing provides information regarding the full length of the garment. If it’s a jumper or a jacket the length is measured from the highest point on the shoulder (usually closest to the neckline), and straight down to the bottom of the garment. It is NOT measured from the tip of shoulder. Similarly, the length of yoke is measured from the highest point on the shoulder and down to where yoke is split into body and sleeves.
See DROPS lesson: How to read a schematic drawing
What is a repeat?
Diagrams are often repeated on the round or in height. 1 repeat is the diagram the way it appears in the pattern. If it says to work 5 repeats of A.1 in the round, then you work A.1 a total of 5 times after/next to each other in the round. If it says to work 2 repeats of A.1 vertically/in height you work the entire diagram once, then begin again at the start and work the entire diagram one more time.
Why does the piece start with more chain stitches than it’s worked with?
Chain stitches are slightly narrower than other stitches and to avoid working the cast-on edge too tight, we simply chain more stitches to begin with. The stitch count will be adjusted on the following row to fit the pattern and measurement sketch.
Why increase before the rib edge when the piece is worked top-down?
The rib edge is more elastic and will contract slightly compared to, for example, stocking stitch. By increasing before the rib edge, you avoid a visible difference in width between the rib edge and the rest of the body.
Why increase in the cast-off edge?
It’s very easy to cast off too tightly, and by making yarn overs while casting off (and simultaneously casting these off) you avoid a too tight cast off edge.
See DROPS video: How to bind off with yarn overs (yo)
How do I increase/decrease on every 3rd and 4th row/round alternately?
To achieve an even increase (or decrease) you can increase on, for example: every 3rd and 4th row alternately, like so: work 2 rows and increase on the 3rd row, work 3 rows and increase on the 4th. Repeat this until the increase is complete.
See DROPS lesson: Increase or decrease 1 st on every 3rd and 4th row alternately
How can I work a jacket in the round instead of back and forth?
Should you prefer to work in the round instead of back and forth, you may of course adjust the pattern. You’ll need to add steeks mid-front (usually 5 stitches), and follow the instructions. When you would normally turn and work from the wrong side, simply work across the steek and continue in the round. At the end you’ll cut the piece open, pick up stitches to work bands, and cover the cut edges.
See DROPS video: How to knit steeks and cut open
Can I work a jumper back and forth instead of in the round?
Should you prefer to work back and forth instead of in the round, you may of course adjust the pattern so you work the pieces separately and then assemble them at the end. Divide the stitches for the body in 2, add 1 edge stitch in each side (for sewing) and work the front and back pieces separately.
See DROPS lesson: Can I adapt a pattern for circular needles into straight needles?
Why is the pattern slightly different than what I see in the photo?
Pattern repeats can vary slightly in the different sizes, in order to get the correct proportions. If you’re not working the exact same size as the garment in the photo, yours might deviate slightly. This has been carefully developed and adjusted so that the complete impression of the garment is the same in all sizes.
Make sure to follow instructions and diagrams for your size!
How do I make a women’s size garment into a men’s size one?
If you have found a pattern you like which is available in women’s size it’s not very difficult to convert it to men’s size. The biggest difference will be the length of sleeves and body. Start working on the women size that you think would fit across the chest. The additional length will be worked right before you cast off for the armhole/sleeve cap. If the pattern is worked top-down you can add the length right after the armhole or before the first decrease on sleeve.
Regarding additional yarn amount, this will depend on how much length you add, but it is better with a skein too many than too few.
How do I prevent a hairy garment from shedding?
All yarns will have excess fibres (from production) that might come off as lint or shedding. Brushed yarns (ie hairier yarns) have more of these loose, excess fibres, causing more shedding.
Shedding also depends on what is worn under or over the garment, and whether this pulls at the yarn fibres. It’s therefore not possible to guarantee that there will be no shedding
Below are some tips on how to get the best result when working with hairier yarns:
1. When the garment is finished (before you wash it) shake it vigorously so the looser hairs come off. NOTE: do NOT use a lint roller, brush or any method that pulls at the yarn.
2. Place the garment in a plastic bag and put it in your freezer - the temperature will cause the fibres to become less attached to each other, and excess fibres will come off easier.
3. Leave in the freezer for a few hours before taking it out and shaking it again.
4. Wash the garment according to the instructions on the yarn label.
Why does my garment pill?
Pilling is a natural process that happens to even the most exclusive of fibers. It's a natural sign of wear and tear that is hard to avoid, and that is most visible in high friction areas of your garment like a sweater's arms and cuffs.
You can make your garment look as new by removing the pilling, using a fabric comb or a pill/lint remover.
Grey Pearl |
|
|
|
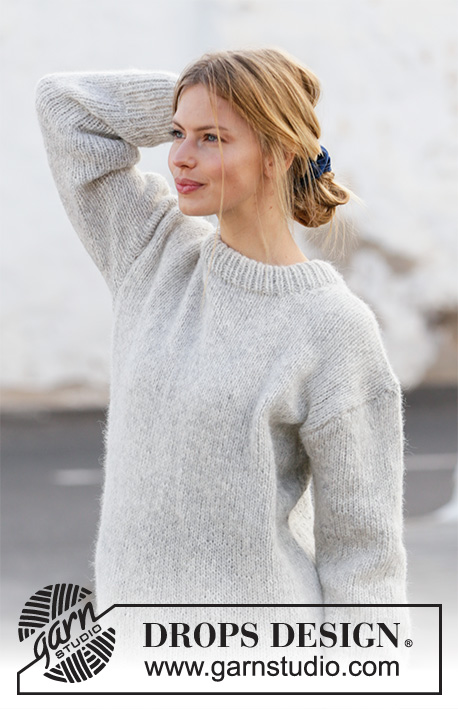
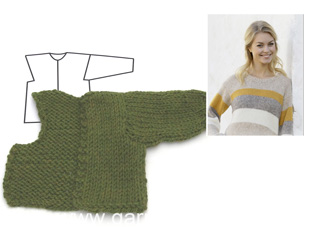
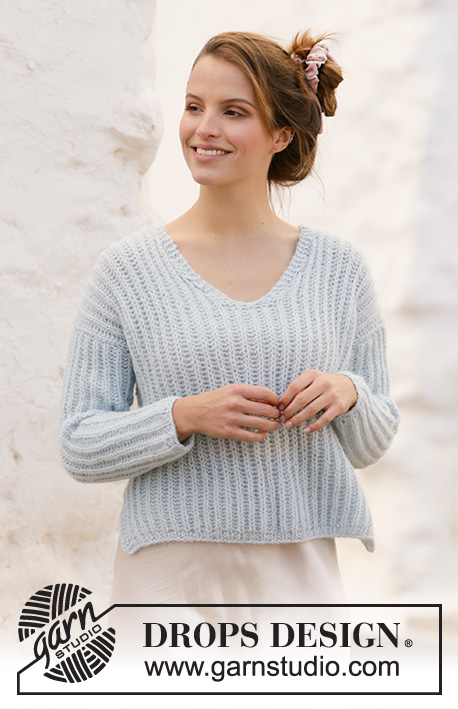
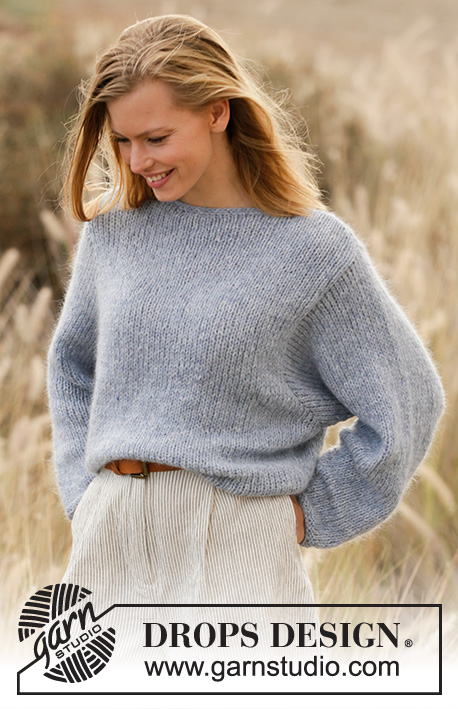
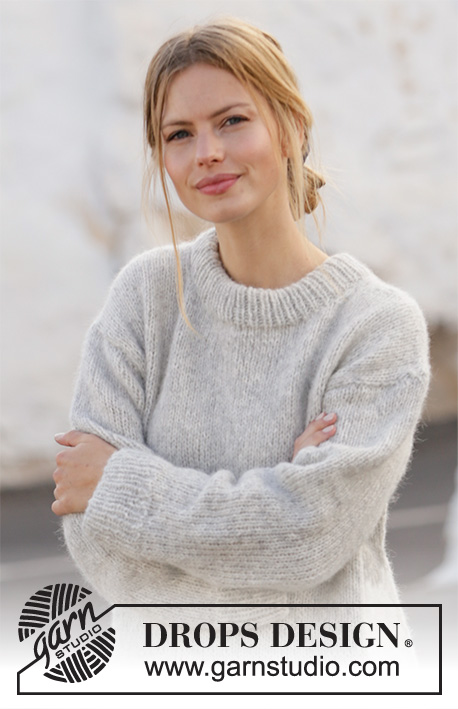
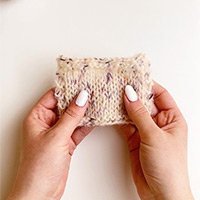
Knitted sweater in DROPS Air. Sizes S - XXXL.
DROPS 210-36 |
|
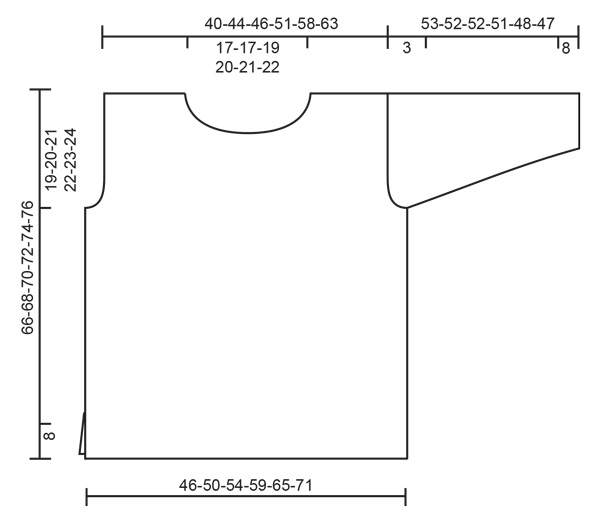
------------------------------------------------------- EXPLANATIONS FOR THE PATTERN: ------------------------------------------------------- RIDGE/GARTER STITCH (worked back and forth): Knit all rows. 1 ridge in height = Knit 2 rows. DECREASE TIP (evenly spaced): To work out how to decrease evenly, count the total number of stitches on needle (e.g. 89 stitches) and divide by number of decreases to be made (e.g. 13) = 6.8. In this example decrease by knitting together alternately each 5th and 6th stitch and each 6th and 7th stitch (approx.). INCREASE TIP (for sleeves): Start 1 stitch before the marker thread, 1 yarn over, work 2 stitches (marker thread sits between these 2 stitches), 1 yarn over. On the next round knit the yarn overs twisted to avoid holes. ------------------------------------------------------- START THE PIECE HERE: ------------------------------------------------------- SWEATER – SHORT OVERVIEW OF THE PIECE: The sweater is worked back and forth in 2 parts which are sewn together to finish. The sleeves are worked in the round with double pointed needles/short circular needle. BACK PIECE: Cast on 89-97-103-113-125-137 stitches with circular needle size 4.5 mm = US 7 and Air. Purl 1 row from the wrong side then work as follows – from the right side: 2 edge stitches in GARTER STITCH – see description above, *knit 1, purl 1 *, work from *-* until there are 3 stitches left, knit 1 and 2 edge stitches in garter stitch. Continue like this until the piece measures 8 cm = 3⅛". Change to circular needle size 5.5 mm = US 9 and knit 1 row from the right side where you decrease 13-15-15-17-19-21 stitches evenly spaced – read DECREASE TIP = 76-82-88-96-106-116 stitches. Continue with stockinette stitch and 1 edge stitch in garter stitch on each side. When the piece measures 47-48-49-50-51-52 cm = 18½"-19"-19¼"-19¾"-20"-20½", bind off for the armholes on both sides at the beginning of each row as follows: Bind off 3 stitches 1-1-1-1-1-1 time, 2 stitches 1-1-1-1-1-1 time and 1 stitch 1-1-2-2-2-3 times = 64-70-74-82-92-100 stitches. Continue with stockinette stitch until the piece measures 64-66-68-70-72-74 cm = 25¼"-26"-26¾"-27½"-28⅜"-29⅛". Now bind off the middle 26-26-28-30-32-34 stitches for the neck and each shoulder is finished separately. Then bind off at the beginning of next row from the neck as follows: 1 stitch 1 time = 18-21-22-25-29-32 stitches on the shoulder. Continue working until the piece measures 66-68-70-72-74-76 cm = 26"-26¾"-27½"-28⅜"-29⅛"-30" and bind off. Work the other shoulder in the same way. FRONT PIECE: Cast on and work as for the back piece until the piece measures 60-62-64-66-68-70 cm = 23⅝"-24⅜"-25¼"-26"-26¾"-27½". Now place the middle 20-20-22-24-26-28 stitches on 1 thread for the neck and finish each shoulder separately. Then bind off at the beginning of each row from the neck as follows: 2 stitches 1 time and 1 stitch 2 times = 18-21-22-25-29-32 stitches left on the shoulder. Continue working until the piece measures 66-68-70-72-74-76 cm = 26"-26¾"-27½"-28⅜"-29⅛"-30", then bind off. Work the other shoulder in the same way. SLEEVE: The sleeves are worked bottom up, in the round, with double pointed needles/short circular needle. The piece is then divided and worked back and forth for the sleeve cap. Cast on 46-48-50-52-52-56 stitches with double pointed needles size 4.5 mm = US 7 and Air. Knit 1 round, then work rib (knit 1 / purl 1) for 8 cm = 3⅛". Change to double pointed needles size 5.5 mm = US 9 and continue with stockinette stitch. On the first round decrease 8-8-8-8-8-10 stitches evenly spaced = 38-40-42-44-44-46 stitches. Insert a marker thread at the beginning of the round = mid under sleeve. Continue with stockinette stitch, AT THE SAME TIME when the piece measures 10-10-10-10-12-12 cm = 4"-4"-4"-4"-4¾"-4¾", increase 1 stitch on each side of the marker thread – read INCREASE TIP. The yarn overs are worked twisted on the next round to avoid holes. Increase like this 3½-3½-3-3-2-2 cm = 1¼"-1¼"-1⅛"-1⅛"-¾"-¾" a total of 11-12-13-13-15-15 times = 60-64-68-70-74-76 stitches. When the sleeve measures 50-49-49-48-45-44 cm = 19¾"-19¼"-19¼"-19"-17¾"-17¼", bind off 3 stitches on each side of the marker thread (= 6 stitches bind off mid under the sleeve), then continue working back and forth. Bind off for the sleeve cap at the beginning of each row on both sides as follows: 2 stitches 1 time, 3 stitches 1 time, then bind off the remaining stitches. Work the other sleeve in the same way. ASSEMBLY: Sew the shoulder seams. Sew in the sleeves and sew the side seams, inside the 1 edge stitch and until there is 8 cm = 3⅛" left at the bottom = split. NECK: Knit up approx. 92-106 stitches with circular needle size 4,5 mm = US 7 around the neck (including the stitches on the thread and the number divisible by 2). Work rib (knit 1 / purl 1) for 9 cm = 3½". Then bind off. Fold the rib at the top to the wrong side and fasten down. To avoid the neck being tight and turning outwards, make sure the seam is elastic. |
|
Have you made this or any other of our designs? Tag your pictures in social media with #dropsdesign so we can see them! Do you need help with this pattern?You'll find tutorial videos, a Comments/Questions area and more by visiting the pattern on garnstudio.com. © 1982-2024 DROPS Design A/S. We reserve all rights. This document, including all its sub-sections, has copyrights. Read more about what you can do with our patterns at the bottom of each pattern on our site. |
With over 40 years in knitting and crochet design, DROPS Design offers one of the most extensive collections of free patterns on the internet - translated to 17 languages. As of today we count 304 catalogs and 11422 patterns - 11417 of which are translated into English (US/in).
We work hard to bring you the best knitting and crochet have to offer, inspiration and advice as well as great quality yarns at incredible prices! Would you like to use our patterns for other than personal use? You can read what you are allowed to do in the Copyright text at the bottom of all our patterns. Happy crafting!
Comments / Questions (103)
Aliza wrote:
Bonjour J’en suis au manches. Je ne comprends pas les augmentations: Augmenter ainsi 12 fois ( taille M) au total 3 1/2 cm. Si j’augmente 12 fois de suite cela crée un espèce de ballonnement sous la manche. C’est pas joli. Dois-je augmenter chaque 3 1/2 cm? Merci de m’aider à comprendre. 🧶
28.02.2024 - 21:50DROPS Design answered:
Bonjour Aliza, il manquait "tous les" dans cette phrase, autrement dit, vous augmentez 12 fois tous les 3,5 cm, merci pour votre retour, la partie manquante a été ajoutée. Bonne continuation!
29.02.2024 - 08:15Lise wrote:
Hei! Skal denne genseren kun strikkes med en tråd? Skjønner ikke helt heller hvordan rillene skal strikkes.
21.02.2024 - 21:26DROPS Design answered:
Hei Lise, Ja, hvis du bruker Drops Air, eller et annet garn fra garngruppe C, bruker du 1 tråd. Rillestrikk (kantmaskene), når man strikker fram og tilbake, er strikket rett på alle pinner. God fornøyelse!
22.02.2024 - 06:43Celyne Ross wrote:
Bonjour! Une chance que vous êtes là! Voici ma question: je tricote le devant, j’ai fait les rangs de côtes, j’ai fait les diminutions indiquées et je tricote donc le dos comme tel. J’en suis à 25 cm de hauteur totale. Je mesure la largeur et j’ai 57 cm. Je suis de taille moyenne et la largeur indiquée est de 50 cm. J’ai utilisé les aiguilles 5,5 (et 4,5 pour les côtes ). Ça serait trop large de 7cm. Que faire?
31.01.2024 - 19:33DROPS Design answered:
Bonjour Mme Ross, avez-vous bien le bon échantillon/la bonne tension? Car les 82 mailles en taille M après les diminutions doivent vous donner 50 cm (soit 82 mailles - 2 mailles lisières sur la base de 16 mailles =10 cm). Pensez à bien vérifier votre échantillon - ajustez la taille des aiguilles si besoin, et à conserver la même tension pendant la réalisation. Bon tricot!
01.02.2024 - 08:23Célyne Ross wrote:
Bonjour, je viens de commencer le pull. J'ai commencé le dos jusqu'aux diminutions. J'ai l'impression que ce début de dos devrait être en côtes mais ce n'est pas le cas. Est-ce normal?
25.01.2024 - 17:49DROPS Design answered:
Bonjour Mme Ross, on doit avoir 8 cm de côtes 1/1 (avec 2 m de bordure au point mousse de chaque côté) en bas du dos et du devant, sur l'envers, tricotez bien les mailles comme elles se présentent, autrement dit, les côtes 1 m end, 1 m env, vu sur l'endroit vont se tricoter 1 m env, 1 m end, vu sur l'envers. Bon tricot!
26.01.2024 - 07:35Celyne Ross wrote:
J’aimerais savoir s’il y a eu des corrections de ce patron et si oui, où les trouver?
22.01.2024 - 18:42DROPS Design answered:
Bonjour Mme Ross, ce modèle n'a pas eu de correction. Bon tricot!
23.01.2024 - 07:25Renée Eklind wrote:
Fråga 1) Jag vill sticka det här mönstret i mosstickning (1 r, 1 a). Det måst väl gå åt lika mycket garn som om jag stickar slätstickning? Fråga 2) Jag vill sticka på rundsticka. Om jag plockar bort kantmaskan och lägger till den när jag delar arbetet, så måste väl det gå bra? Eller tänker jag fel? Vänligen Renée Eklind
20.01.2024 - 17:10DROPS Design answered:
Hei Renée. Det går litt mer garn ved vrangmasker enn rettmasker, men hvor mye det utgjør på en genser, kan jeg ikke svare på. Du tenker riktig ang kantmaske og legg den til senere. Om du skal strikke den i mosstickning, så pass på at du har riktig antall masker slik at mosstickning går opp og at det blir likt i begge sider når du skal strikke den frem og tilbake ved ermhullene. mvh DROPS Design
29.01.2024 - 11:16Zuzana Andrejkovic wrote:
Dobrý deň . Chcem sa opýtať na spotrebu priadze na tento sveter vo veľkosť xlxxl ak by bola použitá odporúčaná drops air vo farbe papoušek Modra. Ďakujem Zuzana
08.12.2023 - 12:44DROPS Design answered:
Dobrý den, Zuzano, množství potřebné příze je uvedeno v záhlaví návodu (u hlavní fotky) a je řazeno ve stejném pořadí, jako seznam velikostí: VELIKOST: S - M - L - XL - XXL - XXXL, MATERIÁL: DROPS AIR firmy Garnstudio (spadá do skupiny přízí C) 300-350-350-400-450-500 g, barva č. 03, perlově šedá. Pro velikost XL tedy potřebujete 400 g, resp. pro vel. XXL 450 g příze DROPS Air jakékoli barvy. Pokud si nejste velikostí jistá, volte raději množství pro vel. XXL - je lepší mít rezervu. Když příze zbyde, přidáte čepici nebo čelenku :-) Hodně zdaru! Hana
30.12.2023 - 09:09Ann-Marie Johansson wrote:
På detta mönster stickas resåren och sedan minskar man ett antal maskor innan man fortsätter. Tidigare när jag stickat så ökar man efter resåren. Varför är det så?
27.11.2023 - 21:54DROPS Design answered:
Hej Ann-Marie, i och med u stickar resåren med en mindre sticka och inte vill att den drar ihop arbetet, så minskar du antal maskor innan du fortsätter på en större sticka :)
28.11.2023 - 10:52Ingrid wrote:
Ik heb deze trui gemaakt in maat Small. Moest één bol bijbestellen omdat ik niets meer over had voor de halsboord. Ik heb 50 jaar brei ervaring, hier zit echt een fout in de opgave! Voor maat Small heb je dus 7 bollen á 50 gram Drops air nodig!
28.04.2023 - 11:01Ani wrote:
Hallo, bitte zur Halsblende. strickt man diese in Runden? Falls so, warum nicht mit einem Nadelspiel? Strickt man die Halsblende auf der inneren (ich meine, Pullover umdrehen) oder äußeren/"schönen" Seite? - Danke
27.04.2023 - 14:33DROPS Design answered:
Liebe Anni, die Halsblende wird in der Runde gestrickt, gerne können Sie auch mit einem Nadelspiel stricken. Die Blende wird dann später innen doppelt gefaltet und genäht. Viel Spaß beim stricken!
27.04.2023 - 17:13