
Popular categories
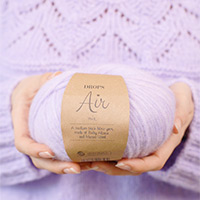
Looking for a yarn?


|
|
Trish |
|
|
|
|
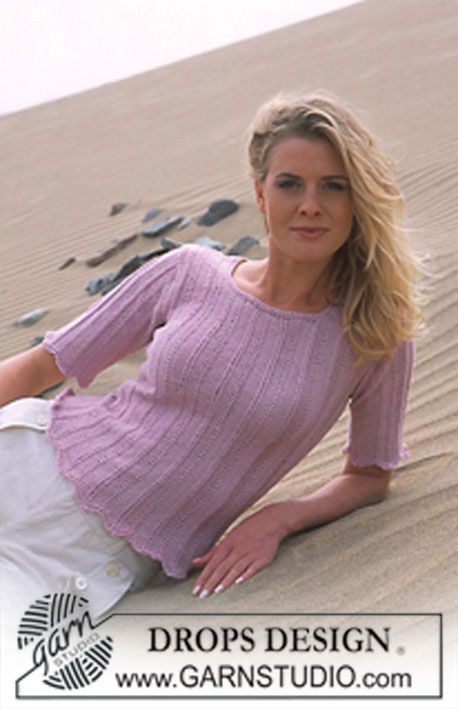
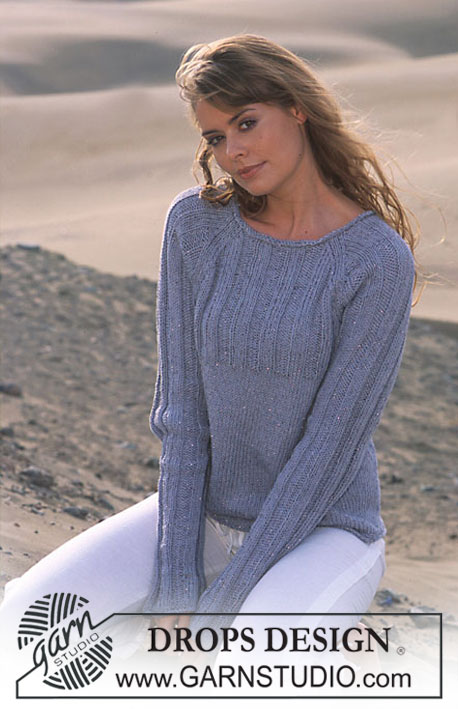
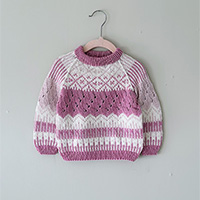
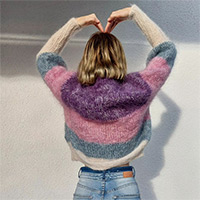
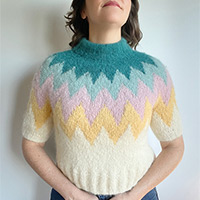
DROPS Pullover in Alpaca and Cotton Viscose
DROPS 89-17 |
|
|
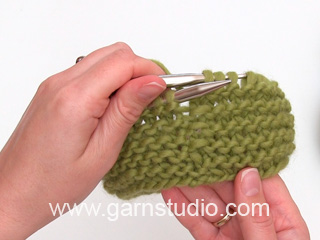
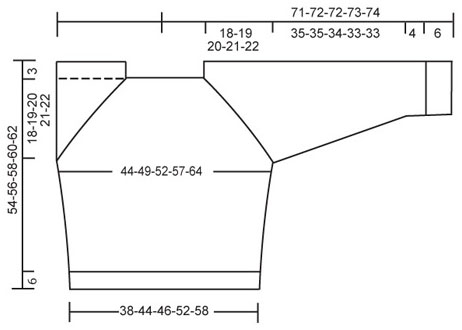
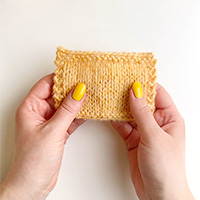
Gauge: 11 sts x 15 rows with 4 strands of yarn in stockinette st = 10 x 10 cm. Rib-1: * K 3, P 3 *, repeat * - *. Rib-2: * K 3, P 4 *, repeat * - *. Knitting tips (for raglan): Dec inside 1 st in stockinette st before or after the marker. After 1 st: slip 1 st as if to knit, K 1, psso. Before 1 st: K 2 tog Body: Loosely cast on 84-96-105-112-126 sts on smaller circular needles with 1 strand of each color (= 4 strands); join and place a marker at the join. Knit 2 rows stockinette st, and then: Sizes S + M: Rib-1 Sizes L + XL + XXL: Rib-2. When the rib measures 6 cm change to larger circular needles and continue in stockinette st adjusting (inc/dec as needed) to 84-96-100-114-128 sts on the 1st row. Put a marker at each side as follows: Size S: Put 1 marker in 1st st, knit 41 sts, put 1 marker in the next st, knit 41 sts. Size M: Put 1 marker in 1st st, knit 47 sts, put 1 marker in the next st, knit 47 sts. Size L: Put 1 marker (between first and last sts on row), knit 50 sts, put 1 marker, knit 50 sts. Size XL: Put 1 marker (between first and last sts on row), knit 57 sts, put 1 marker, knit 57 sts. Size XXL: Put 1 marker (between first and last sts on row), knit 64 sts, put 1 marker, knit 64 sts. When the piece measures 10 cm inc 1 st at each side of both markers every 8 cm a total of 3 times = 96-108-112-126-140 sts. When the piece measures 31-32-33-34-35 cm knit the next row as follows: Sizes S + M: P 2 (the marker sits in the first st), * K 3, P 3 *, repeat * - * and finish with K 3 and P 1 (the marker at the other side sits in the center of a P 3). Sizes L + XL + XXL: P 2 (the marker is in front of these sts), * K 3, P 4 *, repeat * - * and finish with K 3 and P 2 (the marker at the other side sits between 2 P sts). Continue in rib as established. When the piece measures 33-34-35-36-37 cm bind off 7-7-8-8-8 sts at each side for armhole (for sizes S + M: bind off st with marker + 3 sts at each side of that st and for sizes L + XL + XXL: bind off 4 sts at each side of each marker) = 41-47-48-55-62 sts remain on Body. Lay piece aside and knit the sleeve. Sleeve: Loosely cast on 24-24-28-35-35 sts on smaller double-pointed needles with 1 strand of each color (= 4 strands); join and place a marker at the join. Knit 2 rows stockinette st, then: Sizes S + M: Rib-1 Sizes L + XL + XXL: Rib-2. When the rib measures 6 cm change to larger double-pointed needles and stockinette st, adjusting (inc/dec as needed) to 24-26-29-34-36 sts on the 1st rows. When the piece measures 9-12-10-10-13 cm inc 1 st each side of marker every 3-3-3.5-3-3 cm a total of 12-11-10-11-10 times = 48-48-49-56-56 sts. When the piece measures 43-43-42-41-41 cm knit rib as follows: Sizes S + M: P 2 (put the marker in the first of these sts), * K 3, P 3 *, repeat * - * and finish with K 3 and P 1. Sizes L + XL + XXL: P 2, * K 3, P 4 *, repeat * - * and finish with K 3 and P 2. When sleeve measures 45-45-44-43-43 cm bind off 7-7-8-8-8 sts (for Sizes S + M: the st with the marker and 3 sts each side of it; for the other sizes: 4 sts each side of marker) = 41-41-41-48-48 sts remain on needles. Lay piece aside and knit 2nd sleeve. Yoke: Put the sleeves in on the same circular needles as front and back where you bound off for armholes = 164-176-178-206-220 sts. Put a marker in each transition between front, back and the sleeve = 4 markers. Continue in rib as before over back, front and sleeve, and shape raglan – see instructions below. Keep the K 2 at each side of marker as K 4 at all times during raglan shaping, even when no decs are made. Raglan shaping: Dec 1 st each side of each marker – see knitting tips above. Dec at each side on front and back every 4 rows 3-0-0-0-0 times, every other row 9-15-15-14-13 times and then every row 0-0-0-4-8 times. Dec at each side on the sleeve every other row 11-12-14-12-14 times and then every row 6-5-3-8-6 times. After last dec 48-48-50-54-56 sts remain on needles. Knit 3 rows stockinette st, then bind off loosely. Assembly: Sew opening under the sleeve. |
|
|
|
|
Have you made this or any other of our designs? Tag your pictures in social media with #dropsdesign so we can see them! Do you need help with this pattern?You'll find tutorial videos, a Comments/Questions area and more by visiting the pattern on garnstudio.com. © 1982-2024 DROPS Design A/S. We reserve all rights. This document, including all its sub-sections, has copyrights. Read more about what you can do with our patterns at the bottom of each pattern on our site. |

With over 40 years in knitting and crochet design, DROPS Design offers one of the most extensive collections of free patterns on the internet - translated to 17 languages. As of today we count 304 catalogs and 11422 patterns - 11417 of which are translated into English (US/in).
We work hard to bring you the best knitting and crochet have to offer, inspiration and advice as well as great quality yarns at incredible prices! Would you like to use our patterns for other than personal use? You can read what you are allowed to do in the Copyright text at the bottom of all our patterns. Happy crafting!
Comments / Questions (25)
Hej! Nytt försök med modell. Har en fundering om längdens ärm. Stämmer det att ärmen skall stickas kortare ju större storlek? Mvh K
20.11.2023 - 09:38DROPS Design answered:
Hei Kerstin. Ja, det stemmer. Det er kortere mål i de større størrelsene pga bredere skuldervidde. mvh DROPS design
20.11.2023 - 13:30Hej Skulle vilja sticka denna fina tröja men hittar inte färgerna Alpaca 7120 o 7300 i ert sortiment tyckte att det såg så fint ut. Mvh Pia
27.07.2023 - 11:08DROPS Design answered:
Hei Pia De 2 fargene er dessverre utgått fra vårt sortiment. Men ta en titt på farge nr. 9028 sitronpai, istedenfor 7300. Den er mer gul, men flott. Se også på farge nr. 9030, pistasis, den kan fint erstatte 7120. mvh DROPS Design
27.07.2023 - 14:57Ik heb een vraag m.b.t. de panden. Ik brei maat XL, ik heb 126 steken op de pen staan voor de panden en nu moet ik minderen voor de mouwen. 4 keer 8 steken en 4 keer 4 steken minderen dat is samen 48 steken. 126 steken min 48 steken is 78 steken echter staat er dat ik 55 steken moeten resteren. Ik snap niet wat ik verkeerd bereken. Misschien kunt u mij helpen. Met vriendelijke groet, Petra van Veghel
23.06.2023 - 11:13DROPS Design answered:
Dag Petra,
Je kant onder elke arm (dus onder de oksel zeg maar) 8 steken af. Je kant 4 steken aan de ene kant van de merkdraad af en 4 steken aan de andere kant van de merkdraad. En dit doe je dus voor beide armsgaten. In totaal heb je dan 16 steken minder.
25.06.2023 - 18:09Bei der Anleitung für die Ärmel steht: "die Maschenanzahl aufM. angleichen". Was soll das bedeuten? Danke für Ihre Rückmeldung.
11.01.2022 - 17:17DROPS Design answered:
Liebe Christiane, die Maschenanzahl muss man bei der 1. Runde auf 24-26-29-34-36 Maschen anpassen - Die deutsche Anleitung wird korrigiert, danke für den Hinweis. Viel Spaß beim stricken!
12.01.2022 - 06:46Vad kan jag använda för garn i stället för Cotton Viscose Lavendel 21 med samma färg?
25.12.2021 - 19:19DROPS Design answered:
Hej Anneli, du kan bruge DROPS Safran fv 05 lavendel :)
03.01.2022 - 15:27Good day, please tell me if it is possible to send a translation of the model of the TRISH pullover, I really liked it and really want to tie it, I will be very grateful to you!!!
21.12.2021 - 10:45DROPS Design answered:
Dear Natalia, all of the available translations can be accessed by selecting the language in the menu below the photo of the garment. Happy knitting!
24.12.2021 - 18:41I can see the size of the circular needle to be used but as they come in different lengths which length do I need to use for the second size of this pattern?
14.03.2021 - 10:35DROPS Design answered:
Dear Barbara, you will need both sizes in 60 or 80 cm and in 40 cm /or replace the 40 cm with double pointed needles. Happy knitting!
15.03.2021 - 09:30What length of circular needle do I need for the second size?
14.03.2021 - 10:29DROPS Design answered:
Hi Barbara, 80 cm. Happy knitting!
14.03.2021 - 18:57Merci pour vos explications. Pouvez-vous me dire si j’ai bien compris le positionnement du raglan : 1 dim 2 m avant ou après le marqueur ?
11.11.2020 - 09:59DROPS Design answered:
Bonjour Mme Balbo, vous tricotez jusqu'à ce qu'il reste 2 m avant le marqueur, vous diminuez 1 m, tricotez 4 m (= 2 m avant le marqueur + 2 m après le marqueur) et diminuez 1 m.(quand vous diminuez 8 m par tour, sinon, c'est 1 diminution, 2 m, marqueur ou bien marqueur, 2 m, 1 diminution). Bon tricot!
11.11.2020 - 13:50Je suis arrivée à l’empiècement, j’ai incorporé les manches et mis 4 marqueurs. J’ai compris les explications du raglan et comme on laisse 4 m end au milieu, les dim se font à la 3ème m avant ou après le marqueur, est-ce que c’est ça ? Par ailleurs, je tricote la taille M et pour le raglan du dos et devant vous indiquez 0 fois tous les 4 rgs, 15 fois tous les 2 rgs et 0 fois tous les rgs : en clair, combien de dim tous les ? rgs ? Merci pour votre réponse
11.11.2020 - 01:25DROPS Design answered:
Bonjour Mme Balbo, comme vous ne diminuez ni tous les 4 rangs ni tous les rangs en taille M, vous diminuez simplement et seulement 15 fois tous les 2 rangs sur le dos et le devant - en même temps, vous diminuerez pour les manches 12 x tous les 2 rangs et 5 x tous les rangs, autrement dit, vous diminuerez d'abord 8 m par tour (= dos/devant et manches) puis alternativement 4 m (= manches tous les tours) et 8 m (de nouveau dos/devant et manches = tous les 2 tours). Bon tricot!
11.11.2020 - 09:01