
Popular categories
Looking for a yarn?


|
||||||||||||||||||||||
Ulrika |
||||||||||||||||||||||
 |
 |
|||||||||||||||||||||
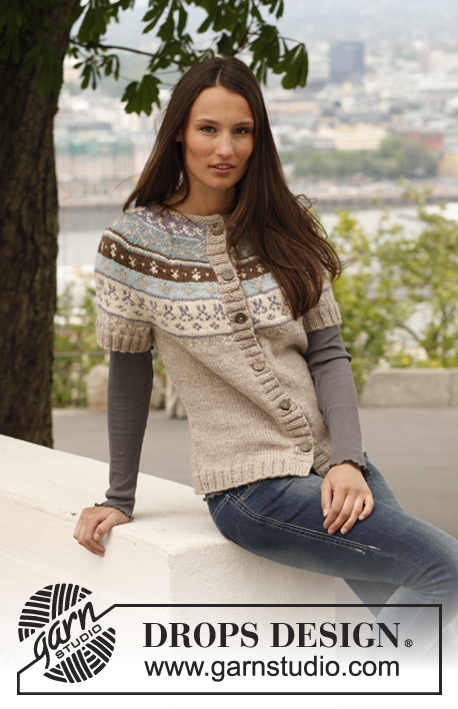
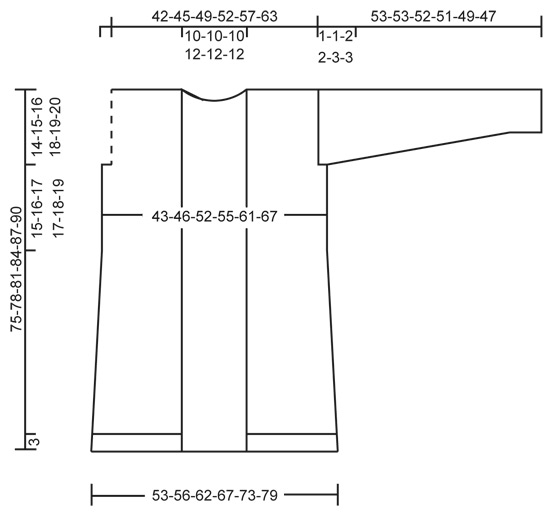
Knitted DROPS jacket with pattern borders and pockets in "Karisma". Size: S - XXXL.
DROPS 142-9 |
||||||||||||||||||||||
|
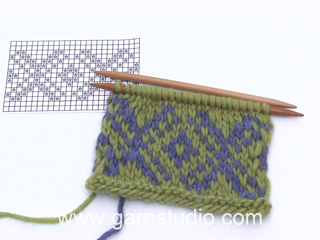
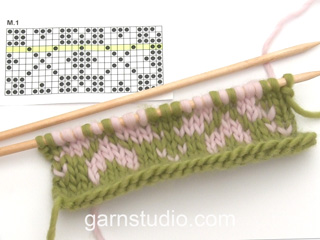
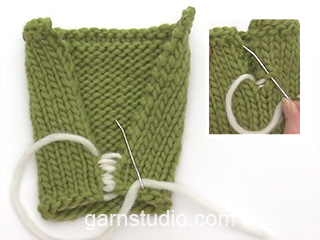
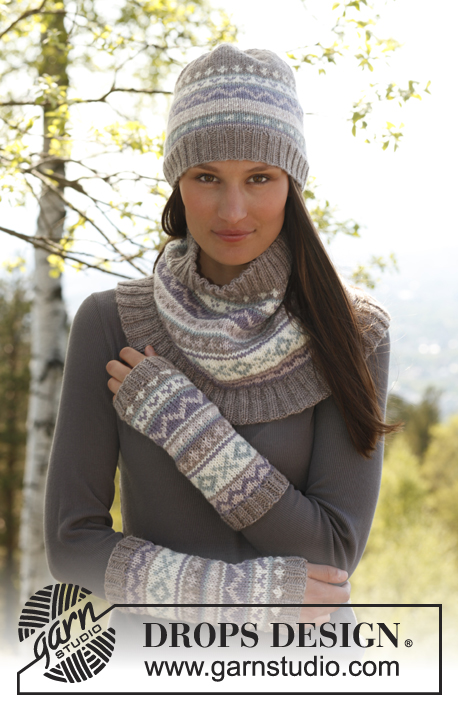
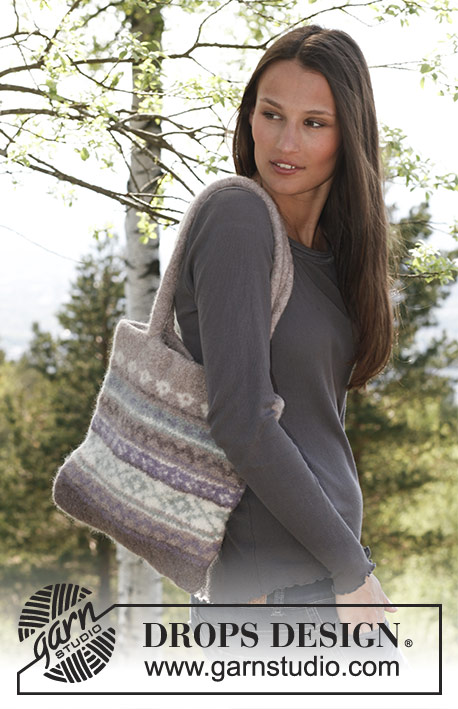
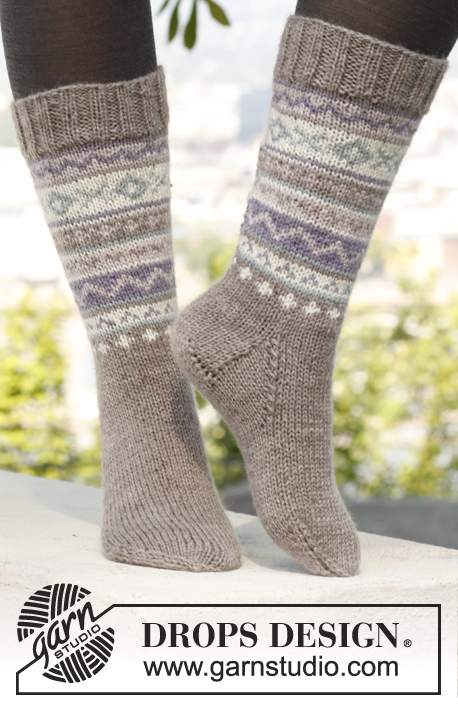
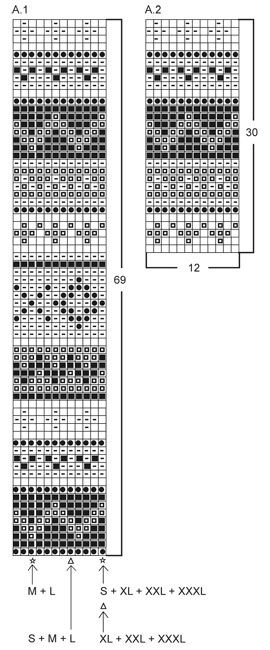
PATTERN: See diagrams A.1 and A.2. Work entire pattern in stockinette st. Beg with st marked with arrow in diagram for correct size - NOTE: The pattern beg differently on front and back piece so that the pattern fits in the side when sewn tog. GARTER ST (back and forth on needle): K all rows. 1 ridge = 2 K rows. ---------------------------------------------------------- BACK PIECE: Cast on 107-113-125-135-147-159 sts (includes 1 edge st in each side) on needle size 3.5 mm / US 4 with light beige brown. Work in GARTER ST - see explanation above. When piece measures 3 cm / 1⅛", switch to needle size 4.5 mm / US 7. Then work in stockinette st with 1 edge st in garter st in each side. REMEMBER THE GAUGE! AT THE SAME TIME when piece measures 4-4-4-5-5-5 cm / 1½"-1½"-1½"-2"-2"-2", dec 1 st in each side. Repeat dec every 3½-3½-3½-3-3-3 cm / 1¼"-1¼"-1¼"-1⅛"-1⅛"-1⅛", 9-9-9-11-11-11 more times = 87-93-105-111-123-135 sts. When piece measures 46-47-48-49-50-51 cm / 18"-18½"-19"-19¼"-19¾"-20", work next row from RS as follows: 1 edge st in garter st, work PATTERN following diagram A.1- see explanation above, until 1 st remains and finish with 1 edge st in garter st (pattern beg and ends the same way in each side inside edge st). When piece measures 61-63-65-66-68-70 cm / 24"-24¾"-25½"-26"-26¾"-27½", bind off 2-2-4-4-5-5 sts at beg of the next 2 rows for armholes = 83-89-97-103-113-125 sts. Continue pattern (make sure that the pattern still fits over each other in repetitions) with 1 edge st in garter st in each side until piece measures approx. 73-76-79-82-85-88 cm / 28¾"-30"-31"-32¼"-33½"-34½" – stop after one full border in pattern. Now finish pattern and work with light beige brown until finished measurements. AT THE SAME TIME on 1st row from RS after pattern, bind off the middle 17-17-17-21-21-21 sts for neck and finish each shoulder separately. Continue to bind off 1 st on next row from neck = 32-35-39-40-45-51 sts remain on the shoulder. Bind off when piece measures 75-78-81-84-87-90 cm / 29½"-30¾"-32"-33"-34¼"-35½". RIGHT FRONT PIECE: Cast on 44-47-53-56-62-68 sts (incl 1 edge st in each side) on needle size 3.5 mm / US 4 with light beige brown. Work in garter st. When piece measures 3 cm / 1⅛", switch to needle size 4.5 mm / US 7. Then work in stockinette st with 1 edge st in garter st in each side. When piece measures 4-4-4-5-5-5 cm / 1½"-1½"-1½"-2"-2"-2", beg dec in the side. Dec in the side as on back piece = 34-37-43-44-50-56 sts. When piece measures 46-47-48-49-50-51 cm / 18"-18½"-19"-19¼"-19¾"-20", work next row from RS as follows: 1 edge st in garter st, work PATTERN following diagram A.1 - see explanation above, until 1 st remains and finish with 1 edge st in garter st. When piece measures 61-63-65-66-68-70 cm / 24"-24¾"-25½"-26"-26¾"-27½", bind off for armhole at beg of row from the side as on back piece = 32-35-39-40-45-51 sts. Continue pattern with 1 edge st in each side until piece measures approx. 73-76-79-82-85-88 cm / 28¾"-30"-31"-32¼"-33½"-34½" - adjust according to back piece. Then work with light beige brown until piece measures 75-78-81-84-87-90 cm / 29½"-30¾"-32"-33"-34¼"-35½", bind off. LEFT FRONT PIECE: Work as right front piece but reversed. SLEEVE: Cast on 44-46-48-50-52-54 sts (includes 1 edge st in each side) on needle size 3.5 mm / US 4 with light beige brown. Work 6 ridges (i.e K12 rows), switch to needle size 4.5 mm / US 7 and continue in stockinette st with 1 edge st in garter st in each side. When piece measures 6-6-6-7-7-8 cm / 2⅜"-2⅜"-2⅜"-2¾"-2¾"-3⅛", inc 1 st in each side. Repeat inc every 7-6-5-3½-3-2½ cm / 2¾"-2⅜"-2"-1¼"-1⅛"-¾" 6-7-8-11-12-13 more times = 58-62-66-74-78-82 sts. When piece measures 52-52-50-49-46-44 cm / 20½"-20½"-19¾"-19¼"-18"-17¼" (shorter measurements in the larger sizes because of longer sleeve cap and wider shoulders), insert 1 marker in each side. Bind off for sleeve cap at beg of every row in each side as follows: 5 sts 1-1-2-2-1-1 times and 4 sts 0-0-0-0-2-2 times. Bind off the remaining sts, piece measures approx. 53-53-52-51-49-47 cm / 21"-21"-20½"-20"-19¼"-18½". ASSEMBLY: Sew the shoulder seams. Sew the side seams inside 1 edge st. Sew sleeve seams inside 1 edge st and sew in sleeves - section worked after markers at the top of sleeve should fit the bind off for armholes. POCKETS: Cast on 39 sts on needle size 4.5 mm / US 7 with light beige brown. Work in stockinette st with 1 edge st in each side. When piece measures 4-4-4-6-6-6 cm / 1½"-1½"-1½"-2⅜"-2⅜"-2⅜", work pattern according to diagram A.2 with 1 edge st in garter st in each side (pattern beg and ends the same way inside edge st). After A.2 switch to needle size 3.5 mm / US 4 and light beige brown. Work in garter st until piece measures 18-18-18-20-20-20 cm / 7"-7"-7"-8"-8"-8" (approx. 2 cm / ¾") and then bind off. Knit another pocket. Sew a pocket on to each front piece with duplicate sts, approx. 3-3-4-4-5-5 cm / 1⅛"-1⅛"-1½"-1½"-2"-2" from edge at the front and approx. 10-10-12-14-14-16 cm / 4"-4"-4¾"-5½"-5½"-6¼" from bottom edge (try the jacket on for where the pockets should be placed). BANDS: Cast on 34-34-34-38-38-38 sts on needle size 3.5 mm / US 4 with light beige brown and work in garter st back and forth until band measures approx. 82-85-88-92-95-98 cm / 32¼"-33½"-34½"-36¼"-37½"-38½" – hold the piece up when measuring otherwise the band will be too long. Bind off. Knit another band the same way. Sew one band on to right front piece from bottom edge and to mid back of neck – sew with 1 stitch in front loop of sts in garter st on band and 1 stitch inside 1 edge st on front piece. Sew the other band on to left front piece. Sew band tog mid back in front loop of outermost st to make the seam invisible. ---------------------------------------------------------- Wrist warmers, Hat and Neck warmer – see design: 142-10 ---------------------------------------------------------- Bag – see design: 142-11 ---------------------------------------------------------- Socks – see design: 142-12 ---------------------------------------------------------- |
||||||||||||||||||||||
Diagram explanations |
||||||||||||||||||||||
|
||||||||||||||||||||||
|
||||||||||||||||||||||
|
||||||||||||||||||||||
|
Have you made this or any other of our designs? Tag your pictures in social media with #dropsdesign so we can see them! Do you need help with this pattern?You'll find tutorial videos, a Comments/Questions area and more by visiting the pattern on garnstudio.com. © 1982-2024 DROPS Design A/S. We reserve all rights. This document, including all its sub-sections, has copyrights. Read more about what you can do with our patterns at the bottom of each pattern on our site. |
||||||||||||||||||||||


With over 40 years in knitting and crochet design, DROPS Design offers one of the most extensive collections of free patterns on the internet - translated to 17 languages. As of today we count 304 catalogs and 11422 patterns - 11417 of which are translated into English (US/in).
We work hard to bring you the best knitting and crochet have to offer, inspiration and advice as well as great quality yarns at incredible prices! Would you like to use our patterns for other than personal use? You can read what you are allowed to do in the Copyright text at the bottom of all our patterns. Happy crafting!
Comments / Questions (55)
Ik heb het vest afgebreid, maar bij patroon A1 heb ik nu allemaal draadeinden aan de zijkanten. Hoe kan ik dit het mooiste afwerken?
13.01.2014 - 16:22DROPS Design answered:
Hoi Betty. Er zijn meerdere manieren om af te werken en draden netjes weg te werken. Ik heb helaas hier geen video's voor je om te laten zien, maar maak gebruik van de manier dat jij zelf het mooiste vindt.
14.01.2014 - 14:59Ik ben dit vest in xl aan het breien. Ik ben nu met het achterpand bezig en bij het patroon A1 aangekomen bij het vierkantje op zn kant en de X in naturel en lichtgrijsgroen (naast het patroon staat 69). In de tekst staat "het patroon begint en einidgt op dezelfde manier aan elke kant naast de kant st" maar dat klopt bij mij dan niet. Ik heb het juiste aantal steken. Wat doe ik verkeerd?
05.12.2013 - 15:03DROPS Design answered:
Hoi M. De Vos. Het patroon klopt. Als u begint met A.1 heeft u 111 st op de nld. U breit dus A.1 over 109 (excl. de twee kantsteken). Er zijn 12 st per herhaling van A.1 = 9 keer herhalen in de breedte en brei de laatste st (109ste st) als de eerste st van A.1. Dan wordt het motief gelijk aan beide kanten.
17.12.2013 - 11:10Ik ga nu juist beginnen aan het telpatroon, is hier enkel de goede kant weergegeven? Of is het voor- en achterkant? Indien enkel de goede kant hoe brei ik dan de terug gaande naalden ?
31.01.2013 - 14:52DROPS Design answered:
Beide naalden zijn weergegeven. Eerste rij, goede kant. Tweede rij, verkeerde kant, en zo voort
31.01.2013 - 16:09Het afkanten was mij wel duidelijk, maar hebben jullie ook naar het patroonverloop gekeken? Ben nu aan het breien, en een doorlopend patroon krijg ik echt alleen als ik op het linkerpand begin op de aangegeven plaats.
06.12.2012 - 12:56DROPS Design answered:
Hoi. Wij kunnen niet een fout vinden, maar als je zou willen opgeven welke maat je breit, dan kunnen wij de bepaalde maat bekijken en narekenen. Alvast bedankt.
12.12.2012 - 11:17Op het telpatroon wordt aangegeven waar te beginnen op het achter en voorpand. Na een eerste poging en wat telwerk ben ik tot de conclusie gekomen dat de start voor het voorpand voor het linkerpand is (dus aan de linkermouw kant). Klopt dit? Dat zou verwarrend zijn omdat de uitleg eerst het rechterpand betreft.
04.12.2012 - 20:14DROPS Design answered:
Ik zie dat er wel een foutje in de vertaling stond. U moet alleen patroon A.1 breien op het achterpand en de voorpanden. Je moet afkanten aan het begin van de nld aan de zijkant, dus voor het rechter voorpand wordt dat aan het begin van een nld op de verkeerde kant en linker voorpand aan het begin van de nld op de goede kant.
05.12.2012 - 12:46I am so sorry this beautiful cardigan did not make it to the final release. There are a number of things I am sorrowful over not making it.
21.07.2012 - 19:49Snygg tröja, när kan man komma åt mönstret
05.07.2012 - 14:32I love this sweater. This will be one of the first I knit when it's available. Socks and mittens too!
04.07.2012 - 07:11Przepiękny, choć wydaje mi się baaardzo pracochłonny!
29.06.2012 - 15:34Super mooi vest leuk patroon heb zin om hem te breien kan niet wachten totdat het patroon online is
28.06.2012 - 15:07