
Popular categories
Looking for a yarn?


|
||||||||||||||||||||||
Ulrika |
||||||||||||||||||||||
 |
 |
|||||||||||||||||||||
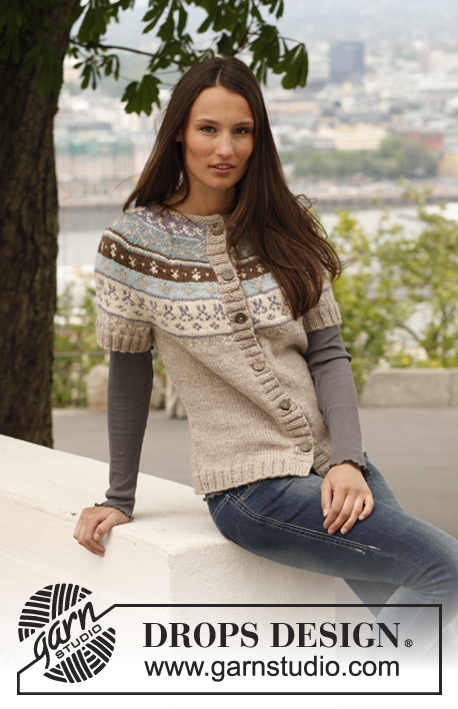
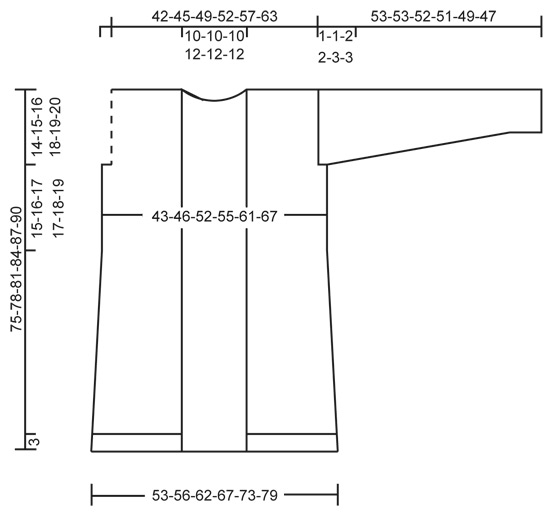
Knitted DROPS jacket with pattern borders and pockets in "Karisma". Size: S - XXXL.
DROPS 142-9 |
||||||||||||||||||||||
|
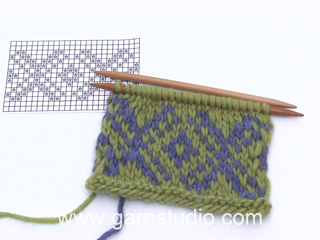
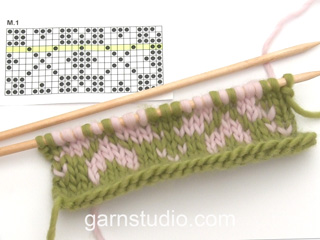
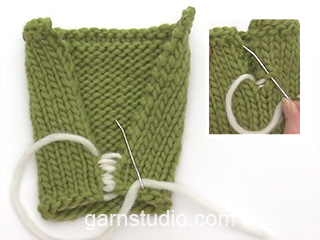
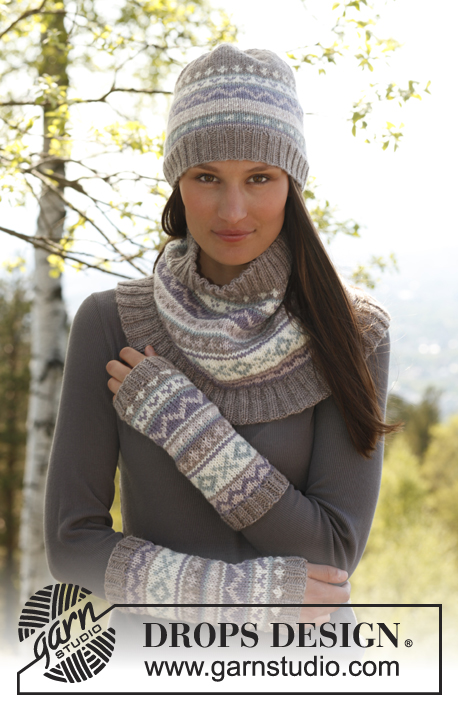
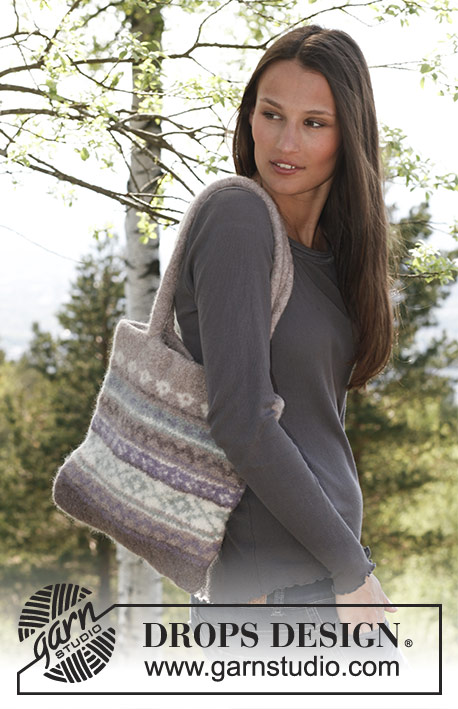
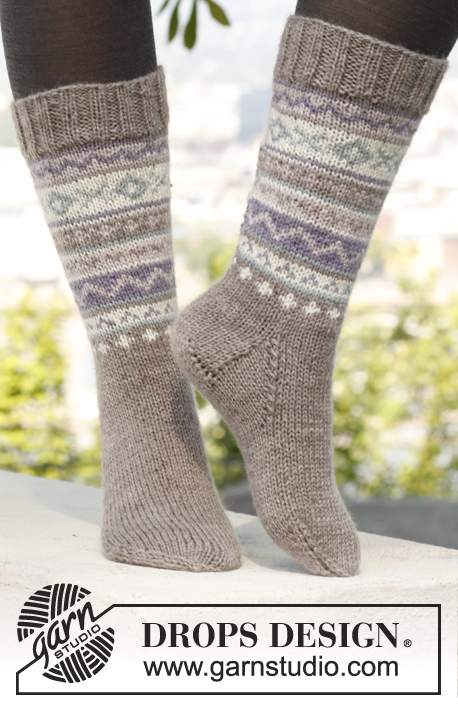
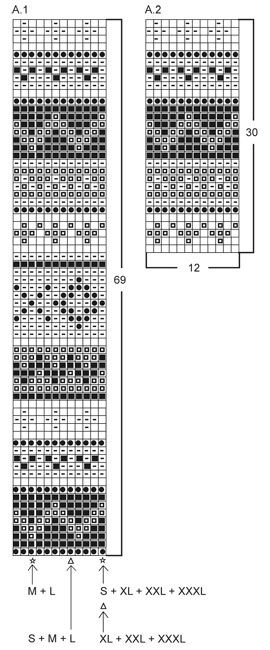
PATTERN: See diagrams A.1 and A.2. Work entire pattern in stockinette st. Beg with st marked with arrow in diagram for correct size - NOTE: The pattern beg differently on front and back piece so that the pattern fits in the side when sewn tog. GARTER ST (back and forth on needle): K all rows. 1 ridge = 2 K rows. ---------------------------------------------------------- BACK PIECE: Cast on 107-113-125-135-147-159 sts (includes 1 edge st in each side) on needle size 3.5 mm / US 4 with light beige brown. Work in GARTER ST - see explanation above. When piece measures 3 cm / 1⅛", switch to needle size 4.5 mm / US 7. Then work in stockinette st with 1 edge st in garter st in each side. REMEMBER THE GAUGE! AT THE SAME TIME when piece measures 4-4-4-5-5-5 cm / 1½"-1½"-1½"-2"-2"-2", dec 1 st in each side. Repeat dec every 3½-3½-3½-3-3-3 cm / 1¼"-1¼"-1¼"-1⅛"-1⅛"-1⅛", 9-9-9-11-11-11 more times = 87-93-105-111-123-135 sts. When piece measures 46-47-48-49-50-51 cm / 18"-18½"-19"-19¼"-19¾"-20", work next row from RS as follows: 1 edge st in garter st, work PATTERN following diagram A.1- see explanation above, until 1 st remains and finish with 1 edge st in garter st (pattern beg and ends the same way in each side inside edge st). When piece measures 61-63-65-66-68-70 cm / 24"-24¾"-25½"-26"-26¾"-27½", bind off 2-2-4-4-5-5 sts at beg of the next 2 rows for armholes = 83-89-97-103-113-125 sts. Continue pattern (make sure that the pattern still fits over each other in repetitions) with 1 edge st in garter st in each side until piece measures approx. 73-76-79-82-85-88 cm / 28¾"-30"-31"-32¼"-33½"-34½" – stop after one full border in pattern. Now finish pattern and work with light beige brown until finished measurements. AT THE SAME TIME on 1st row from RS after pattern, bind off the middle 17-17-17-21-21-21 sts for neck and finish each shoulder separately. Continue to bind off 1 st on next row from neck = 32-35-39-40-45-51 sts remain on the shoulder. Bind off when piece measures 75-78-81-84-87-90 cm / 29½"-30¾"-32"-33"-34¼"-35½". RIGHT FRONT PIECE: Cast on 44-47-53-56-62-68 sts (incl 1 edge st in each side) on needle size 3.5 mm / US 4 with light beige brown. Work in garter st. When piece measures 3 cm / 1⅛", switch to needle size 4.5 mm / US 7. Then work in stockinette st with 1 edge st in garter st in each side. When piece measures 4-4-4-5-5-5 cm / 1½"-1½"-1½"-2"-2"-2", beg dec in the side. Dec in the side as on back piece = 34-37-43-44-50-56 sts. When piece measures 46-47-48-49-50-51 cm / 18"-18½"-19"-19¼"-19¾"-20", work next row from RS as follows: 1 edge st in garter st, work PATTERN following diagram A.1 - see explanation above, until 1 st remains and finish with 1 edge st in garter st. When piece measures 61-63-65-66-68-70 cm / 24"-24¾"-25½"-26"-26¾"-27½", bind off for armhole at beg of row from the side as on back piece = 32-35-39-40-45-51 sts. Continue pattern with 1 edge st in each side until piece measures approx. 73-76-79-82-85-88 cm / 28¾"-30"-31"-32¼"-33½"-34½" - adjust according to back piece. Then work with light beige brown until piece measures 75-78-81-84-87-90 cm / 29½"-30¾"-32"-33"-34¼"-35½", bind off. LEFT FRONT PIECE: Work as right front piece but reversed. SLEEVE: Cast on 44-46-48-50-52-54 sts (includes 1 edge st in each side) on needle size 3.5 mm / US 4 with light beige brown. Work 6 ridges (i.e K12 rows), switch to needle size 4.5 mm / US 7 and continue in stockinette st with 1 edge st in garter st in each side. When piece measures 6-6-6-7-7-8 cm / 2⅜"-2⅜"-2⅜"-2¾"-2¾"-3⅛", inc 1 st in each side. Repeat inc every 7-6-5-3½-3-2½ cm / 2¾"-2⅜"-2"-1¼"-1⅛"-¾" 6-7-8-11-12-13 more times = 58-62-66-74-78-82 sts. When piece measures 52-52-50-49-46-44 cm / 20½"-20½"-19¾"-19¼"-18"-17¼" (shorter measurements in the larger sizes because of longer sleeve cap and wider shoulders), insert 1 marker in each side. Bind off for sleeve cap at beg of every row in each side as follows: 5 sts 1-1-2-2-1-1 times and 4 sts 0-0-0-0-2-2 times. Bind off the remaining sts, piece measures approx. 53-53-52-51-49-47 cm / 21"-21"-20½"-20"-19¼"-18½". ASSEMBLY: Sew the shoulder seams. Sew the side seams inside 1 edge st. Sew sleeve seams inside 1 edge st and sew in sleeves - section worked after markers at the top of sleeve should fit the bind off for armholes. POCKETS: Cast on 39 sts on needle size 4.5 mm / US 7 with light beige brown. Work in stockinette st with 1 edge st in each side. When piece measures 4-4-4-6-6-6 cm / 1½"-1½"-1½"-2⅜"-2⅜"-2⅜", work pattern according to diagram A.2 with 1 edge st in garter st in each side (pattern beg and ends the same way inside edge st). After A.2 switch to needle size 3.5 mm / US 4 and light beige brown. Work in garter st until piece measures 18-18-18-20-20-20 cm / 7"-7"-7"-8"-8"-8" (approx. 2 cm / ¾") and then bind off. Knit another pocket. Sew a pocket on to each front piece with duplicate sts, approx. 3-3-4-4-5-5 cm / 1⅛"-1⅛"-1½"-1½"-2"-2" from edge at the front and approx. 10-10-12-14-14-16 cm / 4"-4"-4¾"-5½"-5½"-6¼" from bottom edge (try the jacket on for where the pockets should be placed). BANDS: Cast on 34-34-34-38-38-38 sts on needle size 3.5 mm / US 4 with light beige brown and work in garter st back and forth until band measures approx. 82-85-88-92-95-98 cm / 32¼"-33½"-34½"-36¼"-37½"-38½" – hold the piece up when measuring otherwise the band will be too long. Bind off. Knit another band the same way. Sew one band on to right front piece from bottom edge and to mid back of neck – sew with 1 stitch in front loop of sts in garter st on band and 1 stitch inside 1 edge st on front piece. Sew the other band on to left front piece. Sew band tog mid back in front loop of outermost st to make the seam invisible. ---------------------------------------------------------- Wrist warmers, Hat and Neck warmer – see design: 142-10 ---------------------------------------------------------- Bag – see design: 142-11 ---------------------------------------------------------- Socks – see design: 142-12 ---------------------------------------------------------- |
||||||||||||||||||||||
Diagram explanations |
||||||||||||||||||||||
|
||||||||||||||||||||||
|
||||||||||||||||||||||
|
||||||||||||||||||||||
|
Have you made this or any other of our designs? Tag your pictures in social media with #dropsdesign so we can see them! Do you need help with this pattern?You'll find tutorial videos, a Comments/Questions area and more by visiting the pattern on garnstudio.com. © 1982-2024 DROPS Design A/S. We reserve all rights. This document, including all its sub-sections, has copyrights. Read more about what you can do with our patterns at the bottom of each pattern on our site. |
||||||||||||||||||||||


With over 40 years in knitting and crochet design, DROPS Design offers one of the most extensive collections of free patterns on the internet - translated to 17 languages. As of today we count 304 catalogs and 11422 patterns - 11417 of which are translated into English (US/in).
We work hard to bring you the best knitting and crochet have to offer, inspiration and advice as well as great quality yarns at incredible prices! Would you like to use our patterns for other than personal use? You can read what you are allowed to do in the Copyright text at the bottom of all our patterns. Happy crafting!
Comments / Questions (55)
Melnda wrote:
If this has been answered, I can't read it in the other languages. Sorry.
26.10.2017 - 19:44Melinda wrote:
How does the band lay naturally? The model is holding it in half? How do you recommend squaring up the sections I've completed? The edges curl under.
26.10.2017 - 19:42DROPS Design answered:
Dear Melinda, the frot band/collar is sewn along front edges, and fold along the collar (as a shawl collar) - blocking your pieces may help pieces to stay flat. Happy knitting!
27.10.2017 - 10:14I'm just to the design on the back of this sweater. Do I follow the pattern from the * going left or right?
16.09.2017 - 00:27DROPS Design answered:
Dear Melinda, the diagramms always show each row of the pattern from the right side, which means, when you knit back and forth (such as at the body of theis sweater you knit the RS rows from left to right and the WS rows from right to left. When you knit in the round (like at the leg of the sock), you always knit each row from right to left. I hope this helps. Happy Knitting!
18.09.2017 - 00:30La forme du gilet est super sympa. Si l'on ne souhaite pas faire le motif de jacquard, combien de pelotes de laines faut-il alors ? Merci par avance de votre réponse.
26.03.2017 - 23:09DROPS Design answered:
Bonjour Audrey, vous pouvez additionner les différentes couleurs, il vous en faudra probablement un peu moins, mais ce gilet ayant été tricoté en jacquard, il nous est difficile de donner la quantité exacte nécessaire en uni, vous pouvez vous baser sur un modèle similaire ou demander conseil à votre magasin DROPS. Bon tricot!
27.03.2017 - 10:00Sto già alla metà della schiena ma il bordo in punto legaccio rimane sempre piegato all'insù. Forse è troppo stretto con i ferri 3,5 ? vorrei capire cosa non va prima di andare ancora più avanti.
06.10.2016 - 17:12DROPS Design answered:
Buongiorno Kati. Una volta unito il dietro con il davanti e lavato il capo, il bordo generalmente non si piega più verso l'alto. Buon lavoro!
06.10.2016 - 17:28Ik ben met het achterpand aan het breien, en moet nu met het patroon A1 beginnen. Lees je het patroon , zowel voor de goede kant als de achterkant (averechtse kant) van rechts naar links?? M.vr.gr. Margreet
26.08.2016 - 21:43DROPS Design answered:
Hoi Margreet. Nee, je leest de naalden op de goede kant van rechts naar links en de naalden van de verkeerde kant van links naar rechts. Lees ook meer hier
29.08.2016 - 11:53Jeg strikker denne model i str M. I mønster A1 går det fint med at få det ens i begge sider inden for kantmasken indtil jeg når til p 30 - mønstergruppe 5 med spids firkant og kryds - kan I fortælle mig hvordan det skal komme til at starte og slutte ens i de to sider når jeg har det antal masker jeg skal have til str M (93 incl de to kantmasker)?
09.01.2016 - 20:02DROPS Design answered:
Hej Dorrit, du vil starte og slutte med hver sit halve mønster på hver side af rygstykket. God fornøjelse!
26.01.2016 - 14:05Hoe kan ik dit patroon en wol bestellen???van dit prachtige noors vest
04.11.2015 - 17:17DROPS Design answered:
Beste Ace. Het patroon is gratis. Je kan het gewoon printen door op AFDRUKKEN: PATROON. Je kan het garen bestellen door op "Bestel nu" te drukken of zoek een verkooppunt in Nederland hier
05.11.2015 - 10:03Dank je wel, ga ik proberen
07.11.2014 - 14:26Ik zou dit vest graag willen breien, maar dan zonder het patroon. Kan ik de biezen ook gelijk met het voorpand breien of wordt de bies dan te lang in ribbelsteek?
03.11.2014 - 17:48DROPS Design answered:
Hoi Truus. Je kan de bies tegelijkertijd breien, maar let op dat ribbelst altijd meer samentrekt dan tricotst. Een oplossing is om af en toe verkorte naalden te breien over de ribbelst (dwz, 2 nld extra alleen over de biesst breien), dan voorkom je dat de bies te kort wordt en omhoog trekt. Veel plezier mee.
05.11.2014 - 17:08