DROPS Fabel
DROPS Fabel
75% Wool, 25% Polyamide
from 2.10 $ /50g
DROPS Brushed Alpaca Silk
77% Alpaca, 23% Silk
from 3.95 $ /25g
Get the yarn to make this pattern from 38.15$.

The yarn cost is calculated from the pattern’s smallest size and the yarn’s cheapest product type. Looking for an even better price? You might find it on the DROPS Deals!

DROPS Super Sale

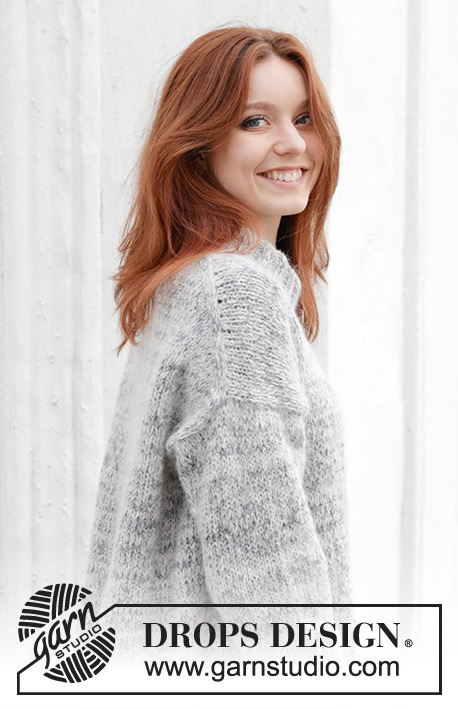
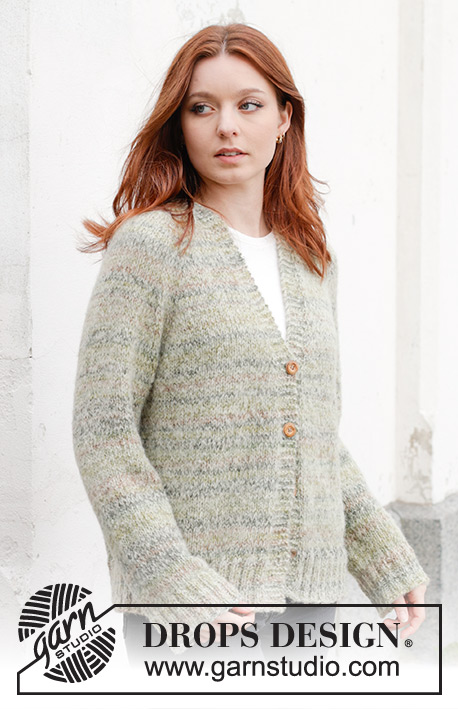
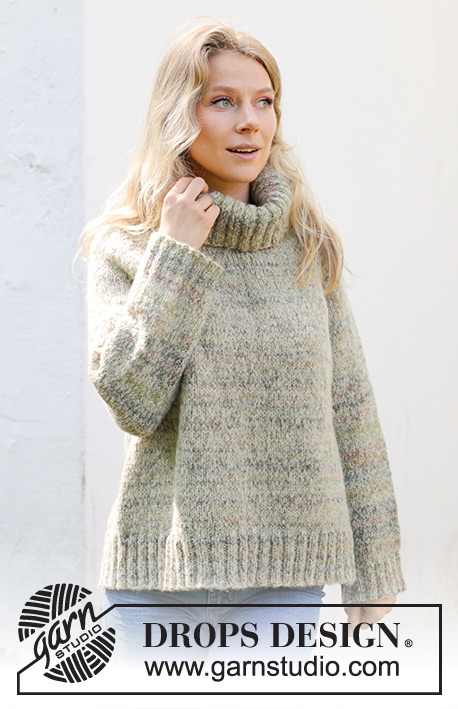
Hidden Forest Sweater

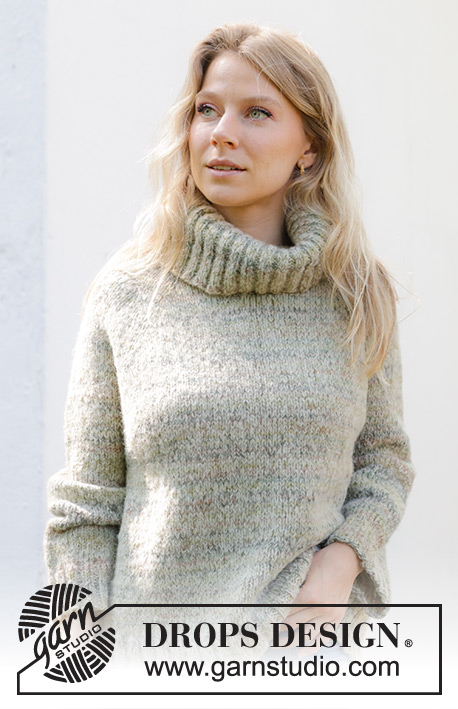
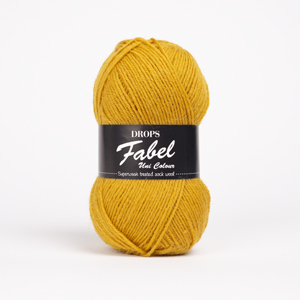
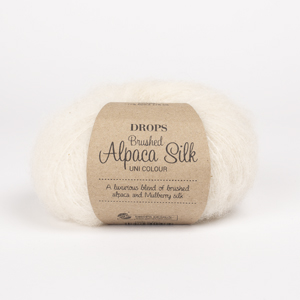
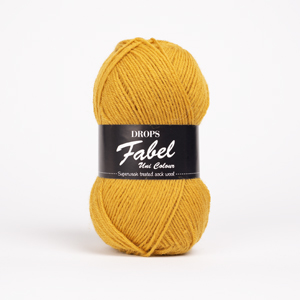
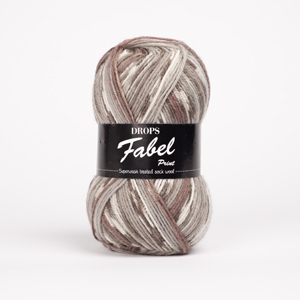
Knitted sweater in DROPS Fabel and DROPS Brushed Alpaca Silk. The piece is worked top down with raglan and high neck. Sizes S - XXXL.

DROPS 243-21
DROPS Design: Pattern fa-534
Yarn group A + C
-------------------------------------------------------

SIZES:
S - M - L - XL - XXL – XXXL

Finished measurements:
Chest measurements: 102-110-118-126-138-150 cm = 40"-43⅜"-46½"-49½"-54¼"-59"
Full length: 60-62-64-66-68-70 cm = 23⅝"-24⅜"-25¼"-26"-26¾"-27½"
All measurements in charts are in cm.

YARN:
DROPS FABEL from Garnstudio (belongs to yarn group A)
250-250-300-300-350-350 g color 650, forest
And use:
DROPS BRUSHED ALPACA SILK from Garnstudio (belongs to yarn group C)
175-175-200-225-225-250 g color 27, rainforest dew

NEEDLES:
DROPS CIRCULAR NEEDLES SIZE 5.5 MM = US 9: Length 40 cm = 16" and 80 cm = 32".
DROPS CIRCULAR NEEDLES SIZE 4.5 MM = US 7: Length 40 cm = 16" and 80 cm = 32".
DROPS DOUBLE POINTED NEEDLES SIZE 5.5 MM = US 9.
DROPS DOUBLE POINTED NEEDLES SIZE 4.5 MM = US 7.
The technique MAGIC LOOP can be used – you then only need 80 cm = 32" circular needle in each size.

KNITTING GAUGE:
15 stitches in width and 18 rows in height with stockinette stitch and 1 strand of each quality = 10 x 10 cm = 4" x 4".
NOTE: Needle size is only a guide. If you get too many stitches on 10 cm = 4", change to a larger needle size. If you get too few stitches on 10 cm = 4", change to a smaller needle size.

-------------------------------------------------------

Alternative Yarn – See how to change yarns here
Yarn Groups A to F – Use the same pattern and change the yarn here
Yarn usage using an alternative yarn – Use our yarn converter here

-------------------------------------------------------

DROPS Fabel
DROPS Fabel
75% Wool, 25% Polyamide
from 2.10 $ /50g
DROPS Brushed Alpaca Silk
77% Alpaca, 23% Silk
from 3.95 $ /25g
Get the yarn to make this pattern from 38.15$.

The yarn cost is calculated from the pattern’s smallest size and the yarn’s cheapest product type. Looking for an even better price? You might find it on the DROPS Deals!

Pattern instructions

NOTE: This pattern is written in American English. All measurements in charts are in cm. For conversion from inches to cm - click here. There are different terms for crocheting in American and British English. If this pattern includes crochet, click for "crochet terms" here. For this pattern in British English, please click here.
-------------------------------------------------------

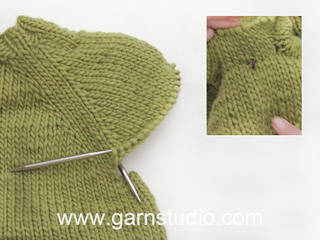
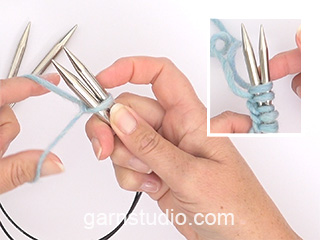
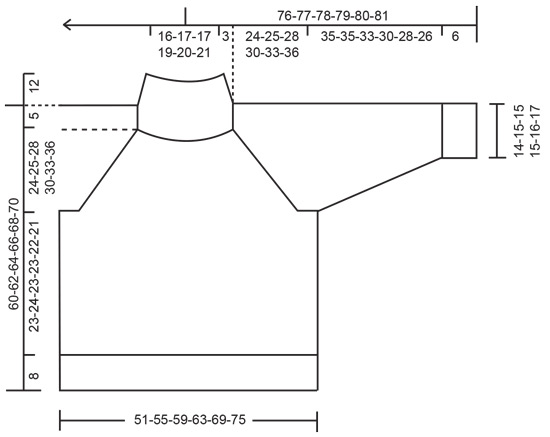
EXPLANATIONS FOR THE PATTERN:
-------------------------------------------------------

RAGLAN:
Increase 1 stitch on each side of 5 knitted stitches, in each transition between the body and sleeves; the middle stitch is the marker-stitch (8 increased stitches on the round). Increase by making 1 yarn over, which is knitted twisted on the next round to avoid a hole. Work the new stitches in stockinette stitch.

DECREASE TIP (for sleeves):
Start 3 stitches before the marker-thread, knit 2 together, knit 2 (marker-thread sits between these 2 stitches), slip 1 stitch knit-wise, knit 1 and pass the slipped stitch over the knitted stitch (2 stitches decreased).

-------------------------------------------------------

START THE PIECE HERE:

-------------------------------------------------------

SWEATER – SHORT OVERVIEW OF THE PIECE:
The neck and yoke are worked in the round with circular needle, from mid back and top down. The yoke is divided for body and sleeves and the body is continued in the round with circular needle. The sleeves are worked in the round with short circular needle/double pointed needles.

HIGH NECK:
Cast on 124-132-132-136-144-148 stitches with 1 strand DROPS Fabel and 1 strand DROPS Brushed Alpaca Silk, over short circular needles sizes 4.5 and 5.5 MM = US 9 held together.
Remove the needle size 5.5 MM = US 9 keeping stitches on needle 4.5 MM = US 7 (this gives you an elastic cast-on edge). Work rib in the round (knit 2, purl 2) for 24 cm = 9½". Knit 1 round and decrease 48-52-52-52-56-56 stitches evenly spaced = 76-80-80-84-88-92 stitches.

Insert 4 markers as described below, without working the stitches. Each marker is inserted in a knitted stitch (not between 2 stitches) and is used when increasing for raglan. Insert a marker-thread at the beginning of the round = approx. mid-back.
Count 11-12-12-13-14-15 stitches (half back piece), insert marker-1 in the next stitch, count 14 stitches (sleeve), insert marker-2 in the next stitch, count 22-24-24-26-28-30 stitches (front piece), insert marker-3 in the next stitch, count 14 stitches (sleeve), insert marker-4 in the next stitch, there are 11-12-12-13-14-15 stitches left on the round (half back piece)

NECKLINE:
Work short rows for the neckline. Change to needle size 5.5 MM = US 9. Start mid-back:
ROW 1 (right side): Knit and increase for RAGLAN – read description above, on each side of the first 2 markers (4 increased stitches), turn when you have worked 4 stitches past marker-2.
ROW 2 (wrong side): Purl. Turn when you have worked 4 stitches past last marker.
ROW 3 (right side): Knit and increase for raglan on each side of all markers, (8 increased stitches), turn when you have worked 2 stitches past the previous turn.
ROW 4 (wrong side): Purl and turn when you have worked 2 stitches past the previous turn.
ROW 5 (right side): Knit and increase for raglan on each side of the first 2 markers (4 increased stitches), knit to mid-back.
The short rows are finished and you have increased 2 times for raglan by each marker = 92-96-96-100-104-108 stitches. Knit 1 round.

YOKE:
Start at the marker-thread mid-back and work stockinette stitch in the round. AT THE SAME TIME continue to increase for raglan every 2nd round until you have increased a total of 7-8-9-12-11-9 times (including the increases on the short rows) = 132-144-152-180-176-164 stitches. Continue increasing for raglan, but every 2nd increase is now only on the body (4 stitches increased). I.e., increase on the body every 2nd round and on the sleeves every 4th round. Increase like this 14-14-16-14-18-22 times on the body (7-7-8-7-9-11 times on the sleeves). You have increased a total of 21-22-25-26-29-31 times on the body and 14-15-17-19-20-20 times on the sleeves.
After the last increase there are 216-228-248-264-284-296 stitches. Continue with stockinette stitch and without further increases until the yoke measures 24-25-28-30-33-36 cm = 9½"-9¾"-11"-11¾"-13"-14¼" from the neck, measured mid-back (after neck).

Now divide for the body and sleeves:
Knit 33-35-38-40-44-47 (half back piece), place the next 42-44-48-52-54-54 stitches on 1 thread for the sleeve, cast on 10-12-12-14-16-18 stitches (in side under sleeve), knit 66-70-76-80-88-94 (front piece), place the next 42-44-48-52-54-54 stitches on 1 thread for the sleeve, cast on 10-12-12-14-16-18 stitches (in side under sleeve), knit the last 33-35-38-40-44-47 stitches (half back piece). The body and sleeves are finished separately. The piece is now measured from here!

BODY:
= 152-164-176-188-208-224 stitches. Continue stockinette stitch in the round for a further 23-24-23-23-22-21 cm = 9"-9½"-9"-9"-8¾"-8¼". Knit 1 round and increase 36-40-44-48-52-56 stitches evenly spaced = 188-204-220-236-260-280 stitches.
Change to circular needle size 4.5 MM = US 7. Work rib (knit 2, purl 2) for 8 cm = 3⅛". Bind off. The sweater measures approx. 60-62-64-66-68-70 cm = 23⅝"-24⅜"-25¼"-26"-26¾"-27½" from the shoulder.

SLEEVES:
Place the 42-44-48-52-54-54 stitches from the thread on the one side of the piece on short circular needle/double pointed needles size 5.5 MM = US 9 and knit up 1 stitch in each of the new stitches cast on under the sleeve = 52-56-60-66-70-72 stitches. Insert a marker-thread in the middle of the new stitches under the sleeve and allow it to follow your work onwards; it is used when decreasing under the sleeve.
Start at the marker-thread and work stockinette stitch in the round.
When the sleeve measures 4 cm = 1½", decrease 2 stitches under the sleeve – read DECREASE TIP. Decrease like this every 6½-5-4-2½-2-1½ cm = 2½"-2"-1½"-1"-¾"-½" a total of 5-6-7-10-11-11 times = 42-44-46-46-48-50 stitches. Continue working until the sleeve measures 35-35-33-30-28-26 cm = 13¾"-13¾"-13"-11¾"-11"-10¼" from the division. Knit 1 round and increase 6-4-6-6-8-6 stitches evenly spaced = 48-48-52-52-56-56 stitches. Change to double pointed needles size 4.5 MM = US 7 and work rib (knit 2, purl 2) for 6 cm = 2⅜". Bind off. The sleeve measures approx. 41-41-39-36-34-32 cm = 16⅛"-16⅛"-15¼"-14¼"-13⅜"-12½" from the division.
Work the other sleeve in the same way.

This pattern has been corrected.

Updated online: 06.03.2024
Pattern is updated. Correction under neckline.

Diagram

All measurements in charts are in cm.

diagram measurements

Each of our patterns has specific tutorial videos to help you.

Do you have a question? See a list of frequently asked questions (FAQ)

Knitting tension is what determines the final measurements of your work, and is usually measured per 10 x 10 cm. It is provided like so: number of stitches in width x number of rows in height - eg: 19 stitches x 26 rows = 10 x 10 cm.

The knitting tension is very individual; some people knit/crochet loosely while others work tightly. You adjust the knitting tension with the needle size, which is why the suggested needle size only serve as a guide! You need to adjust this (up or down) to ensure that YOUR knitting tension matches the knitting tension provided in the pattern. If you work with a different knitting tension than provided you will have a different yarn consumption, and your work will have different measurements than what the pattern suggests.

The knitting tension also determines which yarns can replace each other. As long as you achieve the same knitting tension you can replace one yarn with another.

See DROPS lesson: How to measure your tension/gauge

See DROPS video: How to make a gauge tension swatch

The required amount of yarn is provided in grams, eg: 450 g. To calculate how many balls you’ll need you first need to know how many grams are in 1 ball (25g, 50g or 100g). This information is available if you click on the individual yarn quality on our pages. Divide the amount required with the amount of each ball. For example, if each ball is 50g (the most common amount), the calculation will be as follows: 450 / 50 = 9 balls.

The important thing when changing from one yarn to another is that the knitting/crochet tension remains the same. This is so that the measurements of the finished piece will be the same as on the sketch provided. It is easier to achieve the same knitting tension using yarns from the same yarn group. It is also possible to work with multiple strands of a thinner yarn to achieve the knitting tension of a thicker one. Please try our yarn converter. We recommend you to always work a test swatch.

Please NOTE: when changing yarn the garment might have a different look and feel to the garment in the photo, due to individual properties and qualities of each yarn.

See DROPS lesson: Can I use a different yarn than the one mentioned in the pattern?

All our yarns are categorised into yarn groups (from A to F) according to thickness and knitting tension – group A contains the thinnest yarns and group F the thickest. This makes it easier for you to find alternative yarns to our patterns, should you wish to switch yarn. All yarns within the same group have a similar knitting tension and can easily replace each other. However, different yarn qualities have different structures and properties which will give the finished work a unique look and feel.

Click here for an overview of the yarns in each yarn group

At the top of all our patterns you’ll find a link to our yarn converter, which is a helpful tool should you wish to use a different yarn than suggested. By filling in the yarn quality you wish to replace, the amount (in your size) and number of strands, the converter will present good alternative yarns with the same knitting tension. Additionally it will tell you how much you’ll require in the new qualities and whether you’ll need to work with multiple strands. Most skeins are 50g (some are 25g or 100g).

If the pattern is worked with multiple colours, every colour will have to be converted separately. Similarly, if the pattern is worked with several strands of different yarns (for example 1 strand Alpaca and 1 strand Kid-Silk) you will have to find alternatives for each, individually.

Click here to see our yarn converter

Since different yarns have different qualities and textures we have chosen to keep the original yarn in our patterns. However, you can easily find options among our available qualities by using our yarn converter, or simply pick a yarn from the same yarn group.

It is possible that some retailers still have discontinued yarns in stock, or that someone has a few skeins at home that they would like to find patterns for.

The yarn converter will provide both alternative yarn as well as required amount in the new quality.

If you think it's hard to decide what size to make, it can be a good idea to measure a garment you own already and like the size of. Then you can pick the size by comparing those measures with the ones available in the pattern's size chart.

You'll find the size chart at the bottom of the pattern.

See DROPS lesson: How to read size chart

The needle size provided in the pattern serves only as a guide, the important thing is to follow the knitting tension. And since knitting tension is very individual, you will have to adjust the needle size to ensure that YOUR tension is the same as in the pattern – maybe you’ll have to adjust 1, or even 2 needle sizes, up or down to achieve the correct tension. For this, we recommend that you work test swatches.

Should you work with a different knitting tension than the one provided, the measurements of the finished garment might deviate from the measurement sketch.

See DROPS lesson: How to measure your tension/gauge

See DROPS video: How to make a gauge tension swatch

Working a garment top-down provides more flexibility and room for personal adjustment. For example it is easier to try the garment on while working, as well as making adjustments to length of yoke and shoulder caps.

The instructions are carefully explaining every step, in the correct order. Diagrams are adjusted to the knitting direction and are worked as usual.

The diagram depicts all rows/rounds, and every stitch seen from the right side. It is read from bottom to top, from right to left. 1 square = 1 stitch.

When working back and forth, every other row is worked from the right side and every other row is worked from the wrong side. When working from the wrong side, the diagram will have to be worked reversed: from left to right, knit stitches are purled, purl stitches are knit etc.

When working in the round every round is worked from the right side and the diagram are worked from right to left on all rounds.

See DROPS lesson: How to read knitting diagrams

The diagram depicts all rows/rounds, and every stitch seen from the right side. It is worked from bottom to top, from right to left.

When working back and forth every other row is worked from the right side: from right to left and every other row is worked from the wrong side: from left to right.

When working in the round, every row in the diagram are worked from the right side, from right to left.

When working a circular diagram you start in the middle and work your way outwards, counter clockwise, row by row.

The rows usually start with a given number of chain stitches (equivalent to the height of the following stitch), this will either be depicted in the diagram or explained in the pattern.

See DROPS lesson: How to read crochet diagrams

Instructions for working several diagrams after each other on the same row/round, will often be written like so: “work A.1, A.2, A.3 a total of 0-0-2-3-4 times". This means you work A.1 once, then A.2 is worked once, and A.3 is repeated (in width) the number of times provided for your size – in this case like so: S = 0 times, M = 0 times, L=2 times, XL= 3 times and XXL = 4 times.

The diagrams are worked as usual: begin with the first row in A.1, then work the first row in A.2 etc.

See DROPS lesson: How to read knitting diagrams

See DROPS lesson: How to read crochet diagrams

The total width of the garment (from wrist-to-wrist) will be larger in the larger sizes, despite the actual sleeves being shorter. The larger sizes have longer sleeve caps and wider shoulders, so there will be a good fit in all sizes.

The measurement sketch/schematic drawing provides information regarding the full length of the garment. If it’s a jumper or a jacket the length is measured from the highest point on the shoulder (usually closest to the neckline), and straight down to the bottom of the garment. It is NOT measured from the tip of shoulder. Similarly, the length of yoke is measured from the highest point on the shoulder and down to where yoke is split into body and sleeves.

See DROPS lesson: How to read a schematic drawing

Diagrams are often repeated on the round or in height. 1 repeat is the diagram the way it appears in the pattern. If it says to work 5 repeats of A.1 in the round, then you work A.1 a total of 5 times after/next to each other in the round. If it says to work 2 repeats of A.1 vertically/in height you work the entire diagram once, then begin again at the start and work the entire diagram one more time.

Chain stitches are slightly narrower than other stitches and to avoid working the cast-on edge too tight, we simply chain more stitches to begin with. The stitch count will be adjusted on the following row to fit the pattern and measurement sketch.

The rib edge is more elastic and will contract slightly compared to, for example, stocking stitch. By increasing before the rib edge, you avoid a visible difference in width between the rib edge and the rest of the body.

It’s very easy to cast off too tightly, and by making yarn overs while casting off (and simultaneously casting these off) you avoid a too tight cast off edge.

See DROPS video: How to bind off with yarn overs (yo)

To achieve an even increase (or decrease) you can increase on, for example: every 3rd and 4th row alternately, like so: work 2 rows and increase on the 3rd row, work 3 rows and increase on the 4th. Repeat this until the increase is complete.

See DROPS lesson: Increase or decrease 1 st on every 3rd and 4th row alternately

Should you prefer to work in the round instead of back and forth, you may of course adjust the pattern. You’ll need to add steeks mid-front (usually 5 stitches), and follow the instructions. When you would normally turn and work from the wrong side, simply work across the steek and continue in the round. At the end you’ll cut the piece open, pick up stitches to work bands, and cover the cut edges.

See DROPS video: How to knit steeks and cut open

Should you prefer to work back and forth instead of in the round, you may of course adjust the pattern so you work the pieces separately and then assemble them at the end. Divide the stitches for the body in 2, add 1 edge stitch in each side (for sewing) and work the front and back pieces separately.

See DROPS lesson: Can I adapt a pattern for circular needles into straight needles?

Pattern repeats can vary slightly in the different sizes, in order to get the correct proportions. If you’re not working the exact same size as the garment in the photo, yours might deviate slightly. This has been carefully developed and adjusted so that the complete impression of the garment is the same in all sizes.

Make sure to follow instructions and diagrams for your size!

If you have found a pattern you like which is available in women’s size it’s not very difficult to convert it to men’s size. The biggest difference will be the length of sleeves and body. Start working on the women size that you think would fit across the chest. The additional length will be worked right before you cast off for the armhole/sleeve cap. If the pattern is worked top-down you can add the length right after the armhole or before the first decrease on sleeve.

Regarding additional yarn amount, this will depend on how much length you add, but it is better with a skein too many than too few.

All yarns will have excess fibres (from production) that might come off as lint or shedding. Brushed yarns (ie hairier yarns) have more of these loose, excess fibres, causing more shedding.

Shedding also depends on what is worn under or over the garment, and whether this pulls at the yarn fibres. It’s therefore not possible to guarantee that there will be no shedding

Below are some tips on how to get the best result when working with hairier yarns:

1. When the garment is finished (before you wash it) shake it vigorously so the looser hairs come off. NOTE: do NOT use a lint roller, brush or any method that pulls at the yarn.

2. Place the garment in a plastic bag and put it in your freezer - the temperature will cause the fibres to become less attached to each other, and excess fibres will come off easier.

3. Leave in the freezer for a few hours before taking it out and shaking it again.

4. Wash the garment according to the instructions on the yarn label.

Pilling is a natural process that happens to even the most exclusive of fibers. It's a natural sign of wear and tear that is hard to avoid, and that is most visible in high friction areas of your garment like a sweater's arms and cuffs.

You can make your garment look as new by removing the pilling, using a fabric comb or a pill/lint remover.

Still can't find the answer you need? Then scroll down and leave your question so one of our experts can try to help you. This will be done normally within 5 to 10 working days.
In the meantime, you can read the questions and answers that others have left to this pattern or join the DROPS Workshop on Facebook to get help from fellow knitters/crocheters!

You might also like...

Post a comment to pattern DROPS 243-21

We would love to hear what you have to say about this pattern!

If you want to leave a question, please make sure you select the correct category in the form below, to speed up the answering process. Required fields are marked *.

Comments / Questions (10)

country flag Susanne Olsen wrote:

"BÆRESTYKKE: Start omgangen ved mærketråden midt bagpå, og strik rundt over alle masker i glatstrik. SAMTIDIG fortsætter udtagningen til raglan på hver 2.omgang til der er taget ud totalt 7-8-9-!12-11-9! gange (inklusive udtagningerne i de forkortede pinde) = 132-144-152-!180-176-164! masker. Fortsæt i glatstrik og".. Er der nogle talrækker der er smuttet eller kan det passe at, der skal færre masker til en større størrelse?

17.03.2024 - 08:09

DROPS Design answered:

Hej Susanne, ja det stemmer, fortsæt ifølge opskrifterne, så får du flere masker jo større størrelser :)

19.03.2024 - 15:16

country flag Bettina Nordland wrote:

Ich verstehe die verkürzten Reihen bei dieser Anleitung nicht. Ich beginne in der hinteren Mitte und wende nach dem 2. Markieren. Dann stricke ich zurück über die Mitte und wende nach dem letzten Markierer. Aber welcher ist das? Der direkt vor der Mitte? Danke für die Hilfe. Bettina

05.03.2024 - 22:13

DROPS Design answered:

Liebe Bettina, bei der Rückreihe striken Sie bis 4 Maschen nach der 3. Markierung (Vorderteil ist zwischen 2. und 3. Markierung in die Strickrichtung, von der Vorderdseite gesehen). Viel Spaß beim Stricken!

06.03.2024 - 08:20

country flag Mia Johansen wrote:

Skal strikkeprøven laves med pind 4.4 eller pind 5.5, og hvad hvis antallet af masker passer, men jeg har for mange pinde på 10 cm? Mvh. Mia.

15.01.2024 - 09:10

country flag Birgitte wrote:

Hej. Hvilken størrelse har modellen på?

11.01.2024 - 18:59

DROPS Design answered:

Hej Birgitte, det ser ud til at det er en str M. Men se måleskitsen nederst i opskriften og vælg den størrelse som har de mål som passer dig. :)

12.01.2024 - 12:06

country flag Nicki wrote:

Guten Tag! :) Mit welcher Nadelstärke muss ich die Maschenprobe machen?

28.12.2023 - 22:12

DROPS Design answered:

Liebe Nicki, die Maschenprobe wird mit den grösseren Nadeln glatt rechts gestrickt. Viel Spaß beim stricken!

02.01.2024 - 09:47

country flag Nancy Daems wrote:

Ik heb de mouwen en de trui met 10cm moeten verlengen

22.12.2023 - 06:48

country flag Nancy Daems wrote:

Ik heb de mouwen en de trui met 10cm moeten verlengen

21.12.2023 - 09:18

country flag Sigrid wrote:

Hallo, wenn ich mit der Arbeit an der Passe beginne, habe ich in Größe L 96 Maschen auf der Nadel. Nun sollen 9x in jeder 2. Runde die Raglanzunahmen erfolgen. Das heißt, ich nehme in jeder Zunahmerunde 8 Maschen auf. So nehme ich aber insgesamt 72 Maschen zu und habe dann am Ende des Arbeitsschrittes 168 Maschen auf der Nadel und nicht wie angegeben 152 Maschen. An welcher Stelle habe ich zuviele Maschen aufgenommen?

25.11.2023 - 18:29

DROPS Design answered:

Liebe Sigrid, man soll insgesamt 9 Mal für den Raglanzunehmen, aber damit werden die Zunahmen von den verkürzten Reihen inbegriffen. Also nach den verkürzten Reihen wird man noch 7 Mal zunehmen: 96+(7x8)=152 Maschen. Viel Spaß beim stricken!

27.11.2023 - 08:41

country flag Suzanne Boudreau wrote:

Bonjour, je fais l'empiècement de ce modéle aux augmentations du dos et devant après les raccourcis est-ce que je commence après le quatrième marqueur qui fais le demi-dos et que je fais la deuxi;me augmentation après l'autre demi-dos et que je fais pour le devant entre le 3 et le quatrième marqueur merci de me déprendre

09.11.2023 - 20:14

DROPS Design answered:

Bonjour Mme Boudreau, après les rangs raccourcis, coupez le fil et joignez-le au milieu dos pour que les tours commencent au milieu dos, ainsi, vous augmenterez, dans l'ordre: à la fin du dos, avant le 1er marqueur, après le 1er marqueur au début de la manche et avant le 2ème marqueur à la fin de la manche, après le 2ème marqueur au début du devant et avant le 3ème marqueur à la fin du devant, après le 3ème marqueur au début de la 2ème manche et avant le 4ème marqueur à la fin de la manche et enfin après le 4ème marqueur au début du dos. Bon tricot!

10.11.2023 - 09:24

country flag Jeannette wrote:

Kuschelig

03.08.2023 - 16:45