
Popular categories
Looking for a yarn?


Comments / Questions (34)
![]() Shelah Feiss wrote:
Shelah Feiss wrote:
Thanks so much for answering my last question. The videos were very helpful The video on Raglan decreasing shows a different method that what the instructions say, So I should not use the method in the video? Also, after decreasing at all 4 markers, what does every 2nd round mean? Do I knit two full rows so I am knitting past all 4 decreases and then decrease on the next row? Thanks for your help.
27.02.2025 - 04:23DROPS Design answered:
Dear Mrs Feiss, decrease as explained in the pattern, ie as also shown in this video; the stitch with the marker is the one you can see going "straight upwards" in the middle of our piece. Hpe this can help. Decreasing every other round means working (1 round with decreases, 1 round without decrease) repeat from (to) the total of times described for your size (you decrease 8 sts on every decrease round). Happy knitting!
27.02.2025 - 11:23
![]() Shelah Feiss wrote:
Shelah Feiss wrote:
I don't understand how to put the sleeves together with the body. the circular needle tips are on each end of one cast off on the body. How do I get the second sleeve on when the second cast off area is not open ? This is supposed to be an easy pattern, but really isn't for beginner knitters.
19.02.2025 - 21:10DROPS Design answered:
Dear Mrs Feiss, you should have cast off 6-6-6-8-8-10 stitches on each side of body for each armhole at the end of body, and the same number of stitches at the end of each sleeve, then slip all stitches on the same circular needle (cast off stitches over ach other, see video), then work yoke decreasing for raglan. See in this video how we worked a raglan bottom up (note that the decreases are worked a different way, please remember to follow the pattern). Happy knitting!
20.02.2025 - 14:32
![]() Gabi Schulz wrote:
Gabi Schulz wrote:
Hallo , voller Freude habe ich den Pullover sofort in Angriff genommen. Leider ist mir des öfteren der Faden gerissen....\r\nNun habe ich das Vorder- u. Rückenteil bis zu den Armausschnitten gestrickt, sowie die Ärmel. Leider reicht die Wolle nicht, habe nur noch 2 Knäuel und muss ja noch die Passe, sowie den Kragen stricken. Sehr, sehr ärgerlich. Hoffentlich bekomme ich noch Wolle nach, ich weis garnicht wieviel ich brauche..... bitte antworten sie mir schnellstens. Vlg G.Schulz
29.01.2025 - 14:36
![]() Chantal Lehericey wrote:
Chantal Lehericey wrote:
Bonjour, je vois que sur le croquis, la manche arrive plus haut dans le dos que sur le devant, or on ne tricote pas plus haut pour le dos, puisque c'est identique dos et devant. il n'y a pas de devant et de dos une fois le pull terminé. D'où viennent ces 4 cm en plus ? Merci pour votre réponse.
15.01.2025 - 11:30DROPS Design answered:
Bonjour Mme Lehericey, les 4 cm de hauteur indiqués à gauche dans la hauteur totale correspondent à la hauteur de l'épaule. Retrouvez ici comment lire le schéma des mesures. Bon tricot!
15.01.2025 - 15:54
![]() Amaia wrote:
Amaia wrote:
Hi, I am confused about the sleeve instructions: " Increase like this every 8-6-7-4-3-2 cm a total of 4-5-4-6-7-10 times = 40-42-44-48-54-60 stitches. When the sleeve measures 42-40-38-37-35-34 cm". Why would the sleeve for the smallest size measure 42 cm in total and the one for the biggest size only 34?
02.01.2025 - 14:17DROPS Design answered:
Dear Amaia, sleeves are shorter in larger sizes because yoke is longer - see also chart measurements. Happy knitting!
03.01.2025 - 07:37
![]() Jule wrote:
Jule wrote:
"In dieser Weise ca. alle 8-6-7-4-3-2 cm insgesamt 4-5-4-6-7-10 x in der Höhe zunehmen = 40-42-44-48-54-60 Maschen." Diesen Teil der Anleitung für die Ärmel verstehe ich nicht. Wie viele cm soll ich denn insgesamt stricken? Und wie oft muss ich Maschen zunehmen? Ich stricke Größe M. Soll ich dann alle 6 cm 5 neue Maschen aufeinmal aufnehmen?
28.11.2024 - 19:40DROPS Design answered:
Lieber Jule, man wird jeweils 2 Maschen zunehmen, die 1. Abnahme wird nach 12 cm gestrickt, die 2. nach 18 cm (= 6 cm danach), die 3. nach 24 cm (6 cm danach), die 4. nach 30 cm und die 5. nach 36 cm. Viel Spaß beim Stricken!
29.11.2024 - 08:23
![]() Shelah Feiss wrote:
Shelah Feiss wrote:
The pattern says to bind off when the piece measures 31cm. Is that measured from the bottom of the front/back piece or just the body portion
16.05.2024 - 02:01DROPS Design answered:
Dear Mrs Feiss, the 31 cm when casting off for armholes are measured from cast on edge. Happy knitting!
16.05.2024 - 08:10
![]() Roselyne LAI VAN TINH wrote:
Roselyne LAI VAN TINH wrote:
Bonjour, est-il possible de tricotter ce pull sans les aiguilles circulaires?
02.01.2024 - 13:09DROPS Design answered:
Bo jour Mme Lai Van Tinh, cette leçon vous donne quelques astuces pour adapter un modèle sur aiguilles droites et pourra ainsi vous aider - notez qu'il est parfois plus simple de tricoter en rond en suivant les explications, nombreuses sont celles qui ont fini par dompter les aiguilles circulaires, n'hésitez pas à consulter les vidéos si besoin. Bon tricot!
03.01.2024 - 07:55
![]() Ingrid Theelen wrote:
Ingrid Theelen wrote:
Hallo,\\r\\n\\r\\nIk wil starten met de Claer winter trui; 236-24 maar ik vraag me af of je echt zoveel rondbreinaalden moet kopen in 4 maten. Er staat 40 en 80 lengte bij 8 mm en dan nog 7 mm van twee lengtes, dan nog d gewone zonder knop.. Iran nie tinzien of dit echt nodig is. \\r\\nKunnen jullie helpen? \\r\\nGr. Ingrid
28.11.2023 - 22:00DROPS Design answered:
Dag Ingrid,
Je kunt ook gebruik maken van de zgn 'magic loop' techniek. Je hebt dan maar één lengte nodig, alleen een lange rondbreinaald. Bekijk deze video voor die techniek. Mocht de lange draad je toch in de weg zitten, dan zou je alsnog een naald in een kleinere lengte kunnen aanschaffen.
06.12.2023 - 20:06
![]() Gabriela wrote:
Gabriela wrote:
Dzień dobry, mam pytanie odnośnie reglanu. Przy zamykaniu oczek z jednej strony wyszło poprawnie, jednak po drugiej stronie oczka powinny kierować się do środka, a mnie wyszły na zewnątrz, czy złe zrozumiałam poradnik?
24.11.2023 - 03:21DROPS Design answered:
Witaj Gabrysiu, zobacz video TUTAJ. To jest dokładnie to zamykanie oczek co w tym swetrze. Pozdrawiamy!
24.11.2023 - 14:43
|
|
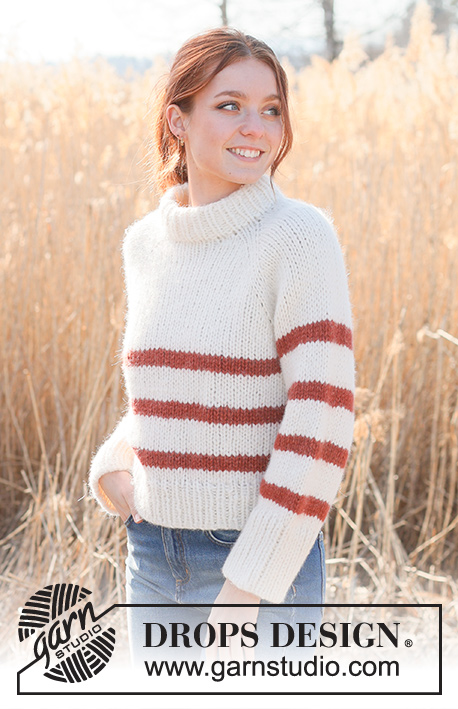
Clear Winter Sky |
|
 |
 |
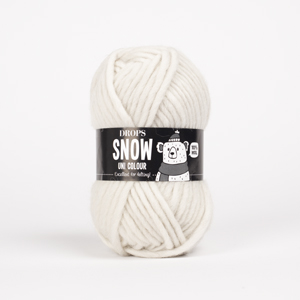
Knitted jumper in DROPS Snow. The piece is worked bottom up in stocking stitch with raglan. Sizes S - XXXL.
DROPS 236-24 |
|
|
------------------------------------------------------- EXPLANATIONS FOR THE PATTERN: ------------------------------------------------------- RIDGE/GARTER STITCH (worked back and forth): Knit all rows. 1 ridge = knit 2 rows. INCREASE TIP (for sleeves): Work until there are 2 stitches left before the marker, 1 yarn over, knit 4 (marker sits between these 4 stitches), 1 yarn over. On the next round knit the yarn overs twisted to avoid holes. Then work the new stitches in stocking stitch. RAGLAN: Decrease to raglan in each transition between body and sleeves as follows: Work until there is 1 stitch left before marker-stitch, slip 2 stitches as if to knit together, knit 1, pass the slipped stitches over the knitted stitch. Repeat at each marker (8 stitches decreased on the row). ------------------------------------------------------- START THE PIECE HERE: ------------------------------------------------------- JUMPER - SHORT OVERVIEW OF THE PIECE: The front and back pieces are worked separately, back and forth, bottom up until the split is finished. Both pieces are placed on the same circular needle and the piece is continued in the round as far as the armholes. The sleeves are worked in the round with double pointed needles/short circular needle, bottom up, then placed on the same circular needle as the body. The yoke is continued in the round. The neck is worked to finish. BACK PIECE: Cast on 62-70-74-78-86-94 stitches with circular needle size 7 mm and DROPS Snow. Purl 1 row from the wrong side. Then work rib as follows: 4 stitches in GARTER STITCH – read description above, * knit 2, purl 2 *, work from *-* until there are 6 stitches left, knit 2 and 4 stitches in garter stitch. Work this rib back and forth for 14 cm, finishing after a row from the wrong side. Lay the piece to one side. FRONT PIECE: Cast on and work in the same way as the back piece. BODY: Place the front and back pieces on the same circular needle size 8 mm and knit 1 round where you decrease 24-28-28-28-28-32 stitches evenly spaced = 100-112-120-128-144-156 stitches. Insert 1 marker at the beginning of the round and 1 marker after 50-56-60-64-72-78 stitches (sides). Work stocking stitch in the round. REMEMBER THE KNITTING TENSION! When the piece measures 31 cm, cast off 6-6-6-8-8-10 stitches for the armholes on each side (cast off 3-3-3-4-4-5 stitches on each side of each marker) = 44-50-54-56-64-68 stitches on the front and back pieces. Lay the piece to one side and work the sleeves. SLEEVES: Cast on 32-32-36-36-40-40 stitches with double pointed needles size 7 mm and DROPS Snow. Knit 1 round, then work rib (knit 2, purl 2) in the round for 10 cm. Change to double pointed needles size 8 mm. Insert 1 marker at the beginning of the round (mid-under sleeve). Allow the marker to follow your work onwards; it is used when increasing under the sleeve. Work stocking stitch. When the sleeve measures 12 cm from the cast-on edge, increase 1 stitch on each side of the marker – read INCREASE TIP. Increase like this every 8-6-7-4-3-2 cm a total of 4-5-4-6-7-10 times = 40-42-44-48-54-60 stitches. When the sleeve measures 42-40-38-37-35-34 cm, cast off 6-6-6-8-8-10 stitches under the sleeve (3-3-3-4-4-5 stitches on each side of the marker) = 34-36-38-40-46-50 stitches. Lay the piece to one side and work the other sleeve in the same way. YOKE: Place the sleeves onto the same circular needle as the body, where stitches were cast off for the armholes = 156-172-184-192-220-236 stitches. Insert a marker in the outermost stitch on each side of both the front and back pieces (4 markers). These are used when decreasing for raglan. Work stocking stitch in the round. When the yoke measures 4-4-5-6-4-3 cm, begin to decrease for RAGLAN – read description above. Decrease like this every 2nd round a total of 13-14-15-16-19-21 times = 52-60-64-64-68-68 stitches. When all the decreases are finished the yoke measures 21-23-25-27-29-31 cm. Knit 1 round and increase 12 stitches evenly spaced = 64-72-76-76-80-80 stitches. NECK: Change to short circular needle size 7 mm and work rib in the round (knit 2, purl 2) for 12 cm. Cast off with knit over knit and purl over purl. You can fold the neck double to the inside and fasten down with a stitch in each side. ASSEMBLY: Sew the openings under the sleeves. |
|

|
|
|
Have you made this or any other of our designs? Tag your pictures in social media with #dropsdesign so we can see them! Do you need help with this pattern?You'll find 29 tutorial videos, a Comments/Questions area and more by visiting the pattern on garnstudio.com. © 1982-2025 DROPS Design A/S. We reserve all rights. This document, including all its sub-sections, has copyrights. Read more about what you can do with our patterns at the bottom of each pattern on our site. Have you finished this pattern? |
|


With over 40 years in knitting and crochet design, DROPS Design offers one of the most extensive collections of free patterns on the internet - translated to 17 languages. As of today we count 314 catalogues and 11824 patterns translated into English (UK/cm). 11824
We work hard to bring you the best knitting and crochet have to offer, inspiration and advice as well as great quality yarns at incredible prices! Would you like to use our patterns for other than personal use? You can read what you are allowed to do in the Copyright text at the bottom of all our patterns. Happy crafting!
Post a comment to pattern DROPS 236-24
We would love to hear what you have to say about this pattern!
If you want to leave a question, please make sure you select the correct category in the form below, to speed up the answering process. Required fields are marked *.