
Popular categories
Looking for a yarn?


Comments / Questions (65)
![]() Mechthild wrote:
Mechthild wrote:
Guten Tag, wie könnte ich das Tuch etwas größer stricken?
02.01.2025 - 09:36DROPS Design answered:
Liebe Frau Mechthild, die Diagramme A.3/A.4/A.5 in der Höhe wiederholen bis dann die Arbeit länger als die 48 beschriebene cm stricken, dann wie beschrieben weiterstricken, es werden dann nur mehr Maschen in A.7 beidseitig von der Mittelmasche gestrickt. Oder wie beschrieben bis die 48 cm stricken, dann länger mit A.6, A.7 und A.8 stricken. Viel Spaß beim Stricken!
02.01.2025 - 16:20
![]() Denise wrote:
Denise wrote:
Bonjour. J'aime beaucoup ce châle mais je rencontre des difficultés. Je suis arrivée aux diagrammes A8 A7 A6. Sur le 2ème rang et les rangs suivants, quel est le détail de A7 : jeté, m endroit, jeté, 3 m endroit, surjet double, 3m endroit ? Et A6 : jeté, m endroit, jeté, 5 m endroit, 2m ensemble, 1m endroit, 1 jeté. Merci pour votre aide.
16.04.2024 - 11:21DROPS Design answered:
Bonjour Denise, le 1er jeté à la limite de A.8/A.7 appartient à A.8 (il compense la diminution faite au début du rang). A.7 se termine par 1 jeté (ainsi on diminue 2 mailles au milieu compensées par les 2 jetés). A.6 commence par 1 m end, 1 jeté etc... Bon tricot!
16.04.2024 - 13:18
![]() Keith wrote:
Keith wrote:
In pattern 143-43 when working pattern A3 A4 A5 then repeat A4 is there suposed to be two yarn overs side by side.
02.04.2024 - 17:53DROPS Design answered:
Hi Keith, A.3, A.4 and A.5 are workedon each side of the mid-stitch (1 stocking stitch), with 3 garter stitches at the beginning of the row and the end of the row (edge stitches), So you should not have 2 yarn overs side by side. Happy knitting!.
03.04.2024 - 06:42
![]() Susanne wrote:
Susanne wrote:
Buonasera non riesco a capire come lavorare i diagrammi A6 - A7 - A8 quando il lavoro si trova sul rovescio. Le righe vanno lavorate sempre nello stesso verso dopo aver superato la maglia centrale? Oppure bisogna lavorare a specchio?
02.01.2024 - 19:07DROPS Design answered:
Buonasera Susanne, per il rovescio del lavoro deve leggere i diagrammi da sinistra a destra e seguire la legenda. Buon lavoro!
02.01.2024 - 19:33
![]() Susanne wrote:
Susanne wrote:
Buonasera non riesco a capire come lavorare i diagrammi A6 - A7 - A8 quando il lavoro si trova sul rovescio. Le righe vanno lavorate sempre nello stesso verso dopo aver superato la maglia centrale? Oppure bisogna lavorare a specchio?
02.01.2024 - 19:06DROPS Design answered:
Buonasera Susanne, per il rovescio del lavoro deve leggere i diagrammi da sinistra a destra e seguire la legenda. Buon lavoro!
02.01.2024 - 19:33
![]() Marina wrote:
Marina wrote:
Bonjour après A1 on a 21 mailles et le prochain rang est l’endroit, comment je tricote A2 si celui-ci commence sur le Rang 1 envers? A2 montre les jetés sur l’envers je ne comprends pas. Merci
28.10.2021 - 12:36DROPS Design answered:
Bonjour Marina, le premier rang de A.1 est sur l'envers, le dernier sera sur l'envers aussi. Donc le premier rang de A.2 est sur l'endroit. Bon tricot!
01.11.2021 - 17:33
![]() Marie wrote:
Marie wrote:
Je suis rendue à la partie a8a7a6. Je fais 3 mailles endroit, a8 et a7. Est-ce que c'est uniquement a7 que je répète jusqu'å 9 mailles de la maille centrale. Merci
19.09.2021 - 00:31DROPS Design answered:
Bonjour Marie, tout à fait, c'est bien A.7 que l'on doit répéter jusqu'à ce qu'il reste 9 m avant la m centrale dans la 1ère moitié du châle et jusqu'à ce qu'il reste 12 m à la fin du rang. Bon tricot!
20.09.2021 - 10:57
![]() Maria wrote:
Maria wrote:
Siguiendo con patrón chal Andalosie 8143-43. Tampoco entiendo qué tengo que medir (ancho.?largo,?desde dónde?) "Tejer hasta que la pieza mida aprox 48 cm, medida a lo largo del pt central – ajustar después de una repetición completa de A.3/A.4/A.5 verticalmente, mas no tejer la última hilera en la última repetición." He enviado dos mensajes porque no puedo escribir todo en uno. Gracias
16.07.2020 - 16:48DROPS Design answered:
Ver la respuesta abajo.
20.07.2020 - 21:36
![]() Maria wrote:
Maria wrote:
Hola! Estoy tejiendo el chal Andalousie (143-43) y no entiendo parte de las instrucciones. Tejer la hilera sig, de la manera sig, por el LD: 3 pts en pt musgo, A.3 (= 4 pts) y A.4 (= 10 pts) y A.5 (= 3 pts), 1 pt en pt jersey (= pt central), A.3 (= 4 pts) y A.4 (= 10 pts) y A.5 (= 3 pts), terminar con 3 pts en pt musgo. Continuar el patrón de esta manera – ¿ NOTA: Cada vez que A.3-A.5 es tejido 1 vez verticalmente, hay 1 repetición más de A.4 en cada lado del pt central. ?????
16.07.2020 - 16:45DROPS Design answered:
Hola Maria. Los diagramas A.3 y A.5 incluyen los aumentos. En este caso, después de completar las 8 filas de los diagramas tenemos suficientes puntos para trabajar una repetición más de A.4 entre las repeticiones de A.3 y A.5. El chal se mide de arriba abajo a lo largo del fila que se forma con el punto central (desde el borde superior hacia abajo( hacia la punta). Cuando llegamos a 48 cm, no trabajar la fila 8 de las diagramas A.3-A.5 y trabajar la fila por el lado revés según las explicaciones del patrón.
20.07.2020 - 21:31
![]() Serena wrote:
Serena wrote:
Si può fare anche con i ferri non circolari?
11.03.2019 - 13:33DROPS Design answered:
Buongiorno Serena. Si lavora avanti e indietro sui ferri. Vengono però consigliati i ferri circolari perché più comodi per lavorare con un numero elevate di maglie. Buon lavoro!
11.03.2019 - 14:13
|
|||||||||||||||||||
Andalousie |
|||||||||||||||||||
|
|
|||||||||||||||||||
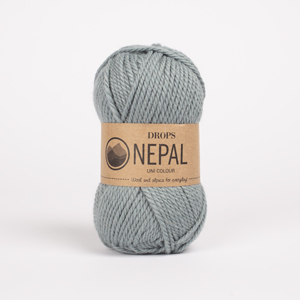
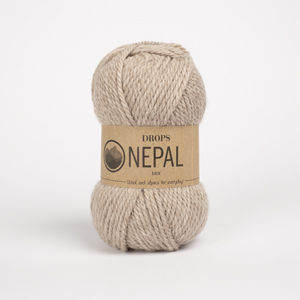
Knitted DROPS shawl with lace pattern and in garter st in ”Nepal”.
DROPS 143-43 |
|||||||||||||||||||
|
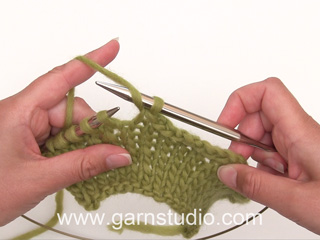
KNITTING TIP: Cast on 3 sts on circular needle size 5.5 mm with Nepal. K 6 rows. After 6th row do not turn piece but rotate 90 degrees clockwise, knit up 3 sts along the edge (i.e. 1 st in every ridge), rotate piece again, 90 degrees clockwise and knit up 3 sts along cast on edge (i.e. 1 st in every st) = 9 sts on needle. GARTER ST (back and forth on needle): K all rows. 1 ridge = 2 rows K. PATTERN: See diagrams A.1 to A.8. Diagrams show all rows in pattern seen from RS. ---------------------------------------------------------- SHAWL: Worked back and forth on circular needle from the neck and down with 3 sts in garter st in each side. Cast on 9 sts on circular needle size 5.5 mm with Nepal and K 1 row - if a thicker cast on edge is desired - SEE KNITTING TIP ABOVE. Now work pattern according to diagram A.1, 1st row = WS. After A.1 there are 21 sts on needle. Then work as follows from RS: 3 sts in garter st, A.2 (= 7 sts), 1 st in stocking (= mid st), A.2 (= 7 sts) and 3 sts in garter st. On every row from WS, P all sts and YOs but work the 3 sts in each side in garter st. When A.2 has been worked 1 time vertically (= 8 rows), there are 41 sts on needle. Work next row as follows from RS: 3 sts in garter, A.3 (= 4 sts) and A.4 (= 10 sts) and A.5 (= 3 sts), 1 st in stocking (= mid st), A.3 (= 4 sts) and A.4 (= 10 sts) and A.5 (= 3 sts), finish with 3 sts in garter st. Continue the pattern like this – NOTE: Every time A.3-A.5 is worked 1 time vertically there is 1 repetition more of A.4 on each side of mid st. REMEMBER THE KNITTING TENSION! Work until piece measures approx. 48 cm measured along mid st - adjust after one whole repetition of A.3/A.4/A.5 vertically but do not work last row on last repetition. Work next row from WS as follows: 3 sts in garter st, A.8 (= 8 sts) and then A.7 (= 10 sts) until 9 sts remain before mid st, work A.6 (= 9 sts), 1 st in stocking st, A.8 (= 8 sts) and repeat A.7 (= 10 sts) until 12 sts remain, work A.6 (= 9 sts) and finish with 3 sts in garter st. Then work as follows from RS: 3 sts in garter st, A.6 and then A.7 until 8 sts remain before mid st, work A.8, 1 st in stocking st, A.6 and repeat A.7 until 11 sts remain, work A.8 and finish with 3 sts in garter st. Continue pattern like this until piece measures approx. 66 cm measured along mid st – adjust so that last row is worked from WS. Now K 1 row from RS while AT THE SAME TIME inc with 1 YO inside the 3 sts in garter st and on each side of mid st (= 4 sts inc). K 1 row from WS. Loosely cast off from RS as follows: Cast off the first 3 sts, make 1 YO, cast off YO, cast off all sts until mid st, make 1 YO, cast off YO, cast off mid st, make 1 YO, cast off YO, cast off until 3 sts remain, make 1 YO, cast off YO, cast off the remaining sts. |
|||||||||||||||||||
Diagram explanations |
|||||||||||||||||||
|
|||||||||||||||||||

|
|||||||||||||||||||

|
|||||||||||||||||||
|
Have you made this or any other of our designs? Tag your pictures in social media with #dropsdesign so we can see them! Do you need help with this pattern?You'll find 8 tutorial videos, a Comments/Questions area and more by visiting the pattern on garnstudio.com. © 1982-2025 DROPS Design A/S. We reserve all rights. This document, including all its sub-sections, has copyrights. Read more about what you can do with our patterns at the bottom of each pattern on our site. Have you finished this pattern? |
|||||||||||||||||||


With over 40 years in knitting and crochet design, DROPS Design offers one of the most extensive collections of free patterns on the internet - translated to 17 languages. As of today we count 309 catalogues and 11683 patterns translated into English (UK/cm). 11683
We work hard to bring you the best knitting and crochet have to offer, inspiration and advice as well as great quality yarns at incredible prices! Would you like to use our patterns for other than personal use? You can read what you are allowed to do in the Copyright text at the bottom of all our patterns. Happy crafting!
Post a comment to pattern DROPS 143-43
We would love to hear what you have to say about this pattern!
If you want to leave a question, please make sure you select the correct category in the form below, to speed up the answering process. Required fields are marked *.