Comments / Questions (14)
![]() Anne wrote:
Anne wrote:
Comment faire les boutonnières?
06.03.2019 - 08:43DROPS Design answered:
Bonjour Anne, les boutonnières sont détaillées dans les explications, je cite: ... tricoter 4 rangs endroit sur toutes les mailles puis le rang suivant : 16 m end, *2 m ens à l'end, 1 jeté, 4 m end * répéter de * à * mais terminer par 2 m end.... Bon tricot!
06.03.2019 - 09:50
![]() Maria wrote:
Maria wrote:
Je viens de terminer cette étole pour ma petite-fille de 16 ans. 6 diagrammes tricotés en hauteur ont été suffisants. C’est très élégant et féminin. 👍
17.01.2018 - 16:32
![]() Monique wrote:
Monique wrote:
I love your patterns but this one is driving me crazy. Can you please put this in a written pattern? I have asked everyone that is a knitter and no one can understand this? I love the pink one and the gray , thank you so much, Oh in the future on patterns can you please add an arrow to point to the start? Thanks.
30.08.2016 - 01:39DROPS Design answered:
Dear Monique, read more here about diagrams, ie 1 square = 1 st x 1 row, work from the bottom corner on the right side towards the left from RS and from the left towards the right from WS. Work short rows when only a few squares are shown in the diagram. For any further personnal assistance you are welcome to ask the store where you bought your yarn. Happy knitting!
30.08.2016 - 08:28ALEXANDRA wrote:
Schema M1, il 1° ferro è a diritto, seguendo le spiegazioni (9 maglie diritto, 1 maglia diritto +1 accavallata =1, 3 diritto, 1 gettato, 1 diritto, 1 gettato, 3 diritto, 2 insieme =1, 8 diritto, 2 insieme=1, 1 gettato, 5 diritto, 1 gettato, 3 diritto) alla fine ci sono 39 maglie. Al 2° ferro si aumenta di 1 maglia = 40, se ne fanno 15 diritte sul rovescio, poi 19 rovescio su rovescio e le ultime 5 diritto su rovescio ma dopo le 19 me ne rimangono 6 prima di fare le 5. come mai? Grazie
21.01.2016 - 09:45DROPS Design answered:
Buongiorno ALEXANDRA, i diagrammi dei modelli DROPS si leggono dal basso verso l'alto, da destra verso sinistra, per cui il 1° ferro va lavorato così: 2 m dir, 1 gettato, 5 m dir, 1 gettato, 2 m insieme a dir, 8 m dir, 2 m insieme a dir, 3 m dir, 1 gettato, 1 m dir, 1 gettato, 3 m dir, 1 accavallata, 9 m dir. Il 2° ferro viene letto da sinistra verso destra, e così via. Provi a lavorare in questo modo e ci riscriva se qualcosa non le torna. Buon lavoro!
21.01.2016 - 11:22
![]() Claudia Carolina wrote:
Claudia Carolina wrote:
Spett.le Drops, non capisco come mai per tutte le taglie si chiede di avviare la stessa quantità di punti
04.09.2015 - 20:03DROPS Design answered:
Buonasera Claudia Carolina. Vengono avviate lo stesso numero di maglie per tutte le taglie, in quanto quello che cambia è la lunghezza del copri spalle (quello che diventa il giro intorno alle spalle), non la larghezza che è stata pensata uguale per tutte le taglie. Buon lavoro!
04.09.2015 - 21:56
![]() Carol Bjornson wrote:
Carol Bjornson wrote:
Sidestepper
14.08.2015 - 18:57
![]() Carol Bjornson wrote:
Carol Bjornson wrote:
Sidestepper
14.08.2015 - 18:57
![]() Katja Møller wrote:
Katja Møller wrote:
Jeg kan simpelthen ikke få diagrammet til at passe. Det går galt hver gang jeg når til første serie vendepinde. Altså efter de første 10 pinde i diagrammet. Når jeg skal strikke den 11. pind kommer det til at passe med at vendepindene strikkes i toppen, ved halskanten og det er jo forkert. I skriver at 1. pind er en retpind, måske er det der fejlen er? Jeg har strikket det 2 gange nu og ellers været meget omhyggelig med at tælle pinde og masker. Hjælp, hvad gør jeg galt?
10.03.2014 - 17:43DROPS Design answered:
Hvis du starter diagrammet i nederste højre hjørne, så vil vendepindene også blive strikket fra retsiden i højre side af diagrammet og altså nederst på skulderstykket.
30.05.2014 - 08:08
![]() Benedetta wrote:
Benedetta wrote:
Buongiorno, dopo le vs spiegazioni sono riuscita a finire il lavoro. Però il lavoro terminato deve avere 8 ripetizioni e deve misurare 106 cm.io sono arrivata alla 7ma ripetizione ed il lavoro misura gia'106 e devo ancora fare il bordo.Mi fermo o vado avanti?
27.05.2013 - 08:22DROPS Design answered:
Buongiorno. Se le è possibile, la cosa migliore sarebbe provare il capo sulla persona che dovrà indossarlo. Se già dopo 7 ripetizioni la misura le sembra essere corretta, può proseguire con il bordo ed intrecciare poi le m. Buon lavoro!
27.05.2013 - 13:45
![]() Benedetta wrote:
Benedetta wrote:
Grazie per le vostre immediate e semplici spiegazioni su questo modello!
23.05.2013 - 11:59
Faustine |
|||||||||||||||||||
|
|
|||||||||||||||||||
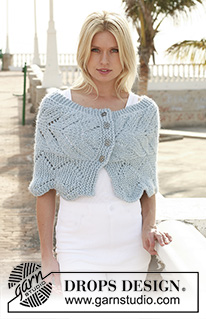
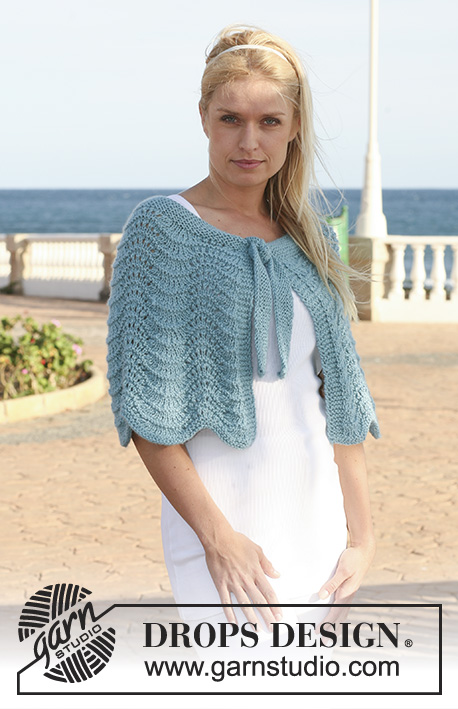
Knitted DROPS shoulder wrap with lace pattern in ”Snow”.
DROPS Extra 0-541 |
|||||||||||||||||||
|
KNITTING INFO: The broken rows in the diagram are shortened rows and are only worked on the sts shown in diagram. Work the sts on row, turn piece and work return row. This will make the piece wider along bottom edge. -------------------------------------------------------- SHOULDER WRAP: Cast on 38 sts on needle size 8 mm with Snow. K 10 rows on all sts. Continue in M.1 – SEE KNITTING INFO! (first row = RS). After 8-9-10 vertical repeats of M.1, K 4 rows on all sts and now work next row as follows from RS: K 16 sts, * K2 tog, 1 YO, K4 * repeat from *-* a total of 4 times, but the last time finish with K2. K 5 rows on all sts and cast off. Piece measures approx 106-120-133 cm in the middle. Sew on buttons mid front. |
|||||||||||||||||||
Diagram explanations |
|||||||||||||||||||
|
|||||||||||||||||||

|
|||||||||||||||||||
|
Have you made this or any other of our designs? Tag your pictures in social media with #dropsdesign so we can see them! Do you need help with this pattern?You'll find 16 tutorial videos, a Comments/Questions area and more by visiting the pattern on garnstudio.com. © 1982-2025 DROPS Design A/S. We reserve all rights. This document, including all its sub-sections, has copyrights. Read more about what you can do with our patterns at the bottom of each pattern on our site. Have you finished this pattern? |
|||||||||||||||||||


Post a comment to pattern DROPS Extra 0-541
We would love to hear what you have to say about this pattern!
If you want to leave a question, please make sure you select the correct category in the form below, to speed up the answering process. Required fields are marked *.