
Looking for a yarn?


Comments / Questions (3)
![]() Deborah wrote:
Deborah wrote:
What does “I cord” mean ?
22.12.2024 - 21:18DROPS Design answered:
Dear Deborah, it's a type of edge, you can see how it's worked in the pattern instructions in the BANDS WITH I-CORD section. You can also watch this video: https://www.garnstudio.com/video.php?id=1805&lang=en. Happy knitting!
22.12.2024 - 22:47
![]() Beata wrote:
Beata wrote:
Wydaje mi się, że coś nie zgadza się w objaśnieniach do schematów A2 i A3. Z opisu wychodzi mi ścieg fantazyjny dżersejem. Sweterek na modelce ma paski zrobione inaczej (ścieg francuski?). Jak mam zrobić paski takie jak w swetrze na zdjęciu?
07.11.2024 - 23:36DROPS Design answered:
Witaj Beato, paski są wykonane dżersejem, 2 kolorami, za to 2 rzędy przed wprowadzeniem koloru do żakardu, mamy sekwencję 1 oczko lewe, 3 oczka prawe i tak dalej przez całe okrążenie, taki mały wizualny akcent. Pozdrawiamy!
12.11.2024 - 09:49
![]() Carina H wrote:
Carina H wrote:
I stycket som handlar om raglanökningarna står slutligen står det ..det har ökats 32-32 -36- etc gånger på framstyckena etc och 18-20-24-etc gånger på ärmarna. Det vore tydligare om det istället för gånger stod maskor. Jag tolkade det först som att det ökats 32x8 maskor på framstyckena osv. Fick då inte maskantalet att stämma alls.
02.11.2024 - 11:32
|
||||||||||
Moon Phase Cardigan |
||||||||||
 |
 |
|||||||||
Knitted jacket in DROPS Karisma. The piece is worked top down with raglan, two-coloured stripe pattern, rolled edges and I-cord. Sizes S - XXXL.
DROPS 252-25 |
||||||||||
|
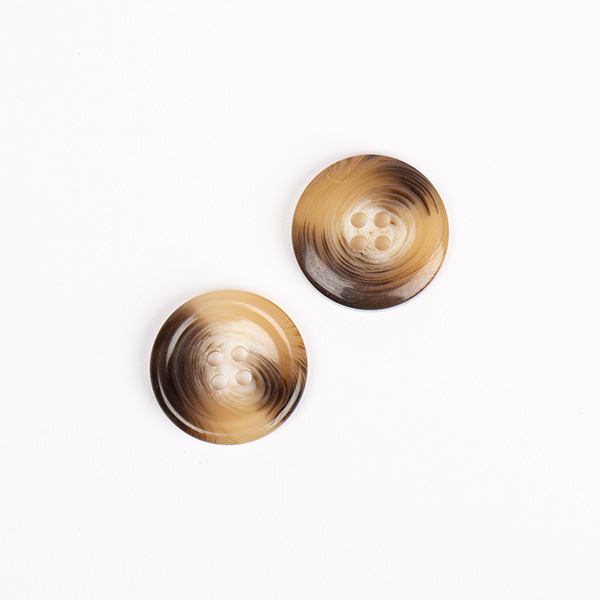
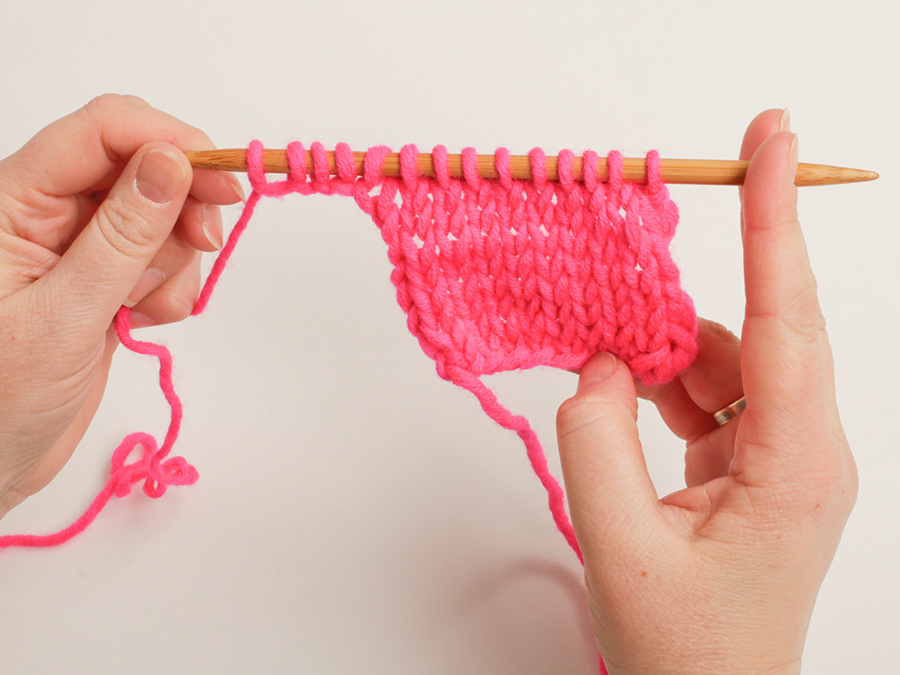
------------------------------------------------------- EXPLANATIONS FOR THE PATTERN: ------------------------------------------------------- PATTERN: See diagrams A.1 to A.3. Choose diagram for your size (applies to A.2). The diagrams show the pattern from the right side. STRIPES WITH PATTERN: * Work pattern according to diagrams A.2/A.3 (= 6 rows), then 14 rows stocking stitch with colour light grey *, work from *-* a total of 5 times, work pattern according to diagrams A.2/A.3 as before, then finish the piece with stocking stitch, bands and colour light grey. INCREASE TIP: Increase 1 stitch by picking up the stitch around the outermost stitch on the left needle, knit this stitch. RAGLAN: Increase 1 stitch by making 1 yarn over which is worked as follows on the next row: BEFORE MARKER: Knit through the back loop to avoid a hole. Then work the new stitches in stocking stitch. AFTER MARKER: Slip the yarn over off the left needle and replace it twisted (insert the left needle through the back when replacing it). Knit the front loop to avoid a hole. Then work the new stitches in stocking stitch. DECREASE TIP: Decrease 1 stitch on each side of the marker-stitch as follows: Work until there are 2 stitches left before the marker-stitch, knit 2 together, knit 1 (marker-stitch), slip 1 stitch knit-wise, knit 1 and pass the slipped stitch over the knitted stitch (2 stitches decreased). BANDS WITH I-CORD: BEGINNING OF ROW: Work the band as follows: Slip 1 stitch purl-wise, with yarn in front, knit 1, work A.1 (6 stitches). END OF ROW: Work the band as follows: Work until there are 8 stitches left on the row, work A.1 (6 stitches), slip 1 stitch purl-wise with yarn in front, knit 1. Work like this from both the right and wrong side. BUTTONHOLES: Work the buttonholes on the right band (when the piece is worn), working from the right side when there are 5 stitches left as follows: ROW 1 (right side): Make 1 yarn over, knit 2 together, work 1 stitch in A.1, slip 1 purl-wise with strand in front, knit 1. ROW 2 (wrong side): Work the band as before, knit the yarn over to leave a hole. The first buttonhole is worked on the first row from the right side after the neck is finished. Then work the other 5 buttonholes with 8½-8½-8½-9-9-9 cm between each one. ------------------------------------------------------- START THE PIECE HERE: ------------------------------------------------------- JACKET – SHORT OVERVIEW OF THE PIECE. The pattern uses both long and short needles; start with the length which fits the number of stitches and change when necessary. The neck and yoke are worked back and forth with circular needle, from mid front and top down. When the yoke is finished, it is divided for body and sleeves and the body continued back and forth with circular needle, while the sleeves wait. The sleeves are worked in the round, top down. If there is a «0» in your chosen size, skip the information and go straight to the next instruction. NECK: Cast on 127-131-135-143-147-155 stitches with circular needle size 4 mm and colour light grey DROPS Karisma. Change to needle size 3 mm (casting on with a larger needle size makes the cast-on edge elastic). Work as follows: ROW 1 (wrong side): Work 8 stitches according to BANDS WITH I-CORD – read description above, purl until there are 8 stitches left, work 8 stitches according to bands with I-cord – as described above. ROW 2 (right side): Work the band as before, knit until there are 8 stitches left, work the band as before. ROW 3 (wrong side): Work the band as before, purl until there are 8 stitches left, work the band as before. ROW 4 (right side): Work the band as before, work rib (knit 1, purl 1) until there are 9 stitches left, knit 1, work the band as before. ROW 5 (wrong side): Work the band as before, rib (purl 1, knit 1) until there are 9 stitches left, purl 1 and band as before. AFTER ROW 5: Continue with stocking stitch and bands until the neck measures 6-6-6-7-7-7 cm from the cast-on edge, AT THE SAME TIME increase 0-12-8-16-20-36 stitches evenly on the last row from the right side – read INCREASE TIP (do not increase across the bands) = 127-143-143-159-167-191 stitches – finishing after a row from the wrong side. Insert a marker after the first band (mid-front), the piece is now measured from here. YOKE: Change to circular needle size 4 mm. Insert 4 markers as follows, without working the stitches and each marker being inserted into a stitch (raglan-stitch) which is then always worked in stocking stitch with colour light grey. Count 24-28-28-30-32-38 stitches (= left front piece), insert 1 marker in the next stitch, count 21-21-21-25-25-25 stitches (= sleeve), insert 1 marker in the next stitch, count 33-41-41-45-49-61 stitches (= back piece), insert 1 marker in the next stitch, count 21-21-21-25-25-25 stitches (= sleeve), insert 1 marker in the next stitch. There are 24-28-28-30-32-38 stitches left on the row (= right front piece). You now increase for RAGLAN and work STRIPES WITH PATTERN – read descriptions above and both the next 2 sections before continuing; remember the BUTTONHOLES on the right band – read description above. RAGLAN: ROW 1 (right side): Work stocking stitch and bands, increasing for raglan by making 1 yarn over before and after each raglan- stitch (8 increased stitches). ROW 2 (wrong side): Work stocking stitch and bands, the new stitches are continued in stocking stitch (remember to twist the yarn overs as described under RAGLAN). Work ROWS 1 and 2 a total of 4-8-12-8-8-12 times (8-16-24-16-16-24 worked rows) = 159-207-239-223-231-287 stitches. Remember to maintain the knitting tension. Now continue with stocking stitch/pattern and bands, increasing for raglan as follows: ROW 1 (right side): Increase by making 1 yarn over before and after each raglan- stitch (8 increased stitches). ROW 2 (wrong side): Work as before with the new stitches in stocking stitch/worked into the pattern. ROW 3 (right side): Increase by making 1 yarn over before raglan-stitch-1, after raglan-stitch-2, before raglan-stitch-3 and after raglan-stitch-4, i.e., only increase on the front and back pieces, not on the sleeves (4 increased stitches). ROW 4 (wrong side): Work as before, with the new stitches in stocking stitch / worked into the pattern. Work ROWS 1 to 4 a total of 14-12-12-14-16-14 times (56-48-48-56-64-56 rows worked). All increases for raglan are now finished (a total of 32-32-36-36-40-40 times on the front and back pieces and 18-20-24-22-24-26 times on the sleeves) = 327-351-383-391-423-455 stitches. The yoke measures approx. 23-23-26-26-29-29 cm from the marker mid-front. Now divide for the body and sleeves. STRIPES WITH PATTERN: When you have worked 16 rows with colour light grey after the neck, and the next row is from the right side, work STRIPES WITH PATTERN as described above. Work as follows from the right side each time A.2/A.3 is worked: Work the band as before, A.2 as far as raglan-stitch-1, increase before/after the raglan-stitch (which is worked with colour light grey), work A.3 to raglan-stitch-2 (A.3 starts in the same way as A.2 finished before the raglan-stitch), increase before/after the raglan-stitch (which is worked with colour light grey), work A.3 as far as raglan-stitch-3 (A.3 starts in the same way as A.3 finished before the raglan-stitch), increase before/after the raglan-stitch (which is worked with colour light grey), work A.3 as far as raglan-stitch-4 (A.3 starts in the same way as A.3 finished before the raglan-stitch), increase before/after the raglan-stitch (which is worked with colour light grey), work A.3 as far as the band (A.3 finishes by the band in the same way as A.2 started after the first band), work the band as before. DIVIDE FOR BODY AND SLEEVES: Work 56-60-64-66-72-78 stitches as before (= front piece), place the next 59-63-71-71-75-79 stitches on a thread for the sleeve, cast on 7-7-7-15-15-15 stitches (in side mid-under sleeve), work 97-105-113-117-129-141 stitches as before (= back piece), place the next 59-63-71-71-75-79 stitches on a thread for the sleeve, cast on 7-7-7-15-15-15 stitches (in side mid-under sleeve), work the last 56-60-64-66-72-78 stitches as before (= front piece). The body and sleeves are finished separately. BODY: = 223-239-255-279-303-327 stitches. Continue with stocking stitch, stripes and bands until the piece measures 46-48-50-50-52-54 cm from the marker mid-front (after the last stripe with A.2/A.3, continue with stocking stitch, bands and colour light grey). On the next row from the right side begin the rib, AT THE SAME TIME increase 40-46-50-56-58-64 stitches evenly on this row (do not increase across the bands) = 263-285-305-335-361-391 stitches, as follows: Change to circular needle size 3 mm. Work the band as before, rib (knit 1, purl 1 – remember increases) until there are 9 stitches left, knit 1 and 8 band stitches as before. When the rib measures 5-5-5-6-6-6 cm, cast off. The jacket measures approx. 51-53-55-56-58-60 cm from the marker mid-front and 56-58-60-62-64-66 cm from the shoulder. SLEEVES: Place the 59-63-71-71-75-79 sleeve-stitches from 1 thread on circular needle size 4 mm. Knit up 1 stitch in each of the 7-7-7-15-15-15 cast-on stitches under the sleeve = 66-70-78-86-90-94 stitches. Insert 1 marker in the middle stitch under the sleeve. The marker is used when decreasing under the sleeve. Now decrease and work pattern – read the next 2 sections before continuing. DECREASE: When the sleeve measures 2 cm from the division, decrease 2 stitches under the sleeve – read DECREASE TIP. Decrease like this every 2-2-1½-1-1-1 cm a total of 5-6-9-12-12-13 times = 56-58-60-62-66-68 stitches. PATTERN: Remember to decrease. Start at the marker-stitch under the sleeve and continue the pattern from the yoke - A.3 will not fit under the sleeve. Work until the sleeve measures 43-43-41-42-40-40 cm from the division (after the last stripe, continue with stocking stitch and colour light grey). Change to double pointed needles size 3 mm. Work 2 rounds of rib (knit 1, purl 1), then 3 rounds of stocking stitch (= rolled-edge). Change to double pointed needles size 4 mm. Cast off with knit. The sleeve measures approx. 45-45-43-44-42-42 cm from the division. ASSEMBLY: Sew the buttons onto the left band. |
||||||||||
Diagram explanations |
||||||||||
|
||||||||||

|
||||||||||

|
||||||||||
|
Have you made this or any other of our designs? Tag your pictures in social media with #dropsdesign so we can see them! Do you need help with this pattern?You'll find 32 tutorial videos, a Comments/Questions area and more by visiting the pattern on garnstudio.com. © 1982-2025 DROPS Design A/S. We reserve all rights. This document, including all its sub-sections, has copyrights. Read more about what you can do with our patterns at the bottom of each pattern on our site. Have you finished this pattern? |
||||||||||


With over 40 years in knitting and crochet design, DROPS Design offers one of the most extensive collections of free patterns on the internet - translated to 17 languages. As of today we count 314 catalogues and 11806 patterns translated into English (UK/cm).
We work hard to bring you the best knitting and crochet have to offer, inspiration and advice as well as great quality yarns at incredible prices! Would you like to use our patterns for other than personal use? You can read what you are allowed to do in the Copyright text at the bottom of all our patterns. Happy crafting!
Post a comment to pattern DROPS 252-25
We would love to hear what you have to say about this pattern!
If you want to leave a question, please make sure you select the correct category in the form below, to speed up the answering process. Required fields are marked *.