
Popular categories
Looking for a yarn?


Comments / Questions (392)
![]() Yenith Bolaños wrote:
Yenith Bolaños wrote:
Realiza envios a colombia
15.12.2019 - 13:46DROPS Design answered:
Hola Yenith. Aquí tienes el línk para los envíos para todo el mundo: https://www.garnstudio.com/findastore.php?s=w&cid=23
15.12.2019 - 18:29
![]() Melissa Crismon wrote:
Melissa Crismon wrote:
Is there a pattern conversion to crochet?
26.11.2019 - 07:36DROPS Design answered:
We do not unfortunately, but we do have many other crochet patterns for baby here. Happy crocheting!
26.11.2019 - 08:45
![]() Letizia wrote:
Letizia wrote:
Salve, non ho ben capito quando inizia la lavorazione in tondo... prima degli aumenti o dopo i 6 cm? Grazie
29.10.2019 - 14:55DROPS Design answered:
Buongiorno Letizia. Deve iniziare a lavorare in tondo quando il lavoro misura 6 cm (per la taglia più piccola). Buon lavoro!
29.10.2019 - 16:28
![]() Lilia wrote:
Lilia wrote:
Hallo ich verusche gerade diesen süssen Poncho zu stricken. Und verstehe den Anfang überhaupt nicht. Ich Stricke Größe 4Jahre 47 Maschen. Nun bin ich bei dem Teil wo ich den Markierfaden setzen muss. Wie kann ich den diese 4 Markierer setzen mit den vorgegebenen Maschen wenn ich nur 40 (nach der Abnahme) habe.Das verstehe ich nicht ganz.
24.10.2019 - 22:50DROPS Design answered:
Liebe Lilia, die Maschen sind jeweils von Anfang der Reihe gezählt, dh es sind: 4 M, 1 Mark, 12 M, 1 Mark, 8 M, 1 Mark, 12 M, 1 Mark, 4 M = 4+12+8+12+4= 40 M. Viel Spaß beim stricken!
25.10.2019 - 09:47
![]() Jeanetta wrote:
Jeanetta wrote:
I’m attempting to make the booties, but I’m having a hard time following the pattern. Are there pictures of them before sewing together?
22.08.2019 - 22:06DROPS Design answered:
Dear Jeanetta, slippers are worked sideways from toe to heel. You first work stocking st, then increase in the middle of piece and finish both sides separately casting on new stitches worked in garter stitch (leg) - the remaining sts will be worked in stocking stitch (foot) as before. And work short rows as explained. Happy knitting!
23.08.2019 - 09:13
![]() Gauvert wrote:
Gauvert wrote:
Il faudrait revoir vos estimations de laine. Pour le modele 2-3 ans, je n'ai pas eu assez des 300 grammes pour finir !!!!! J'ai dû recommander une pelote qui m'a coûté moins cher que le port !!!!!!
11.08.2019 - 13:40DROPS Design answered:
Bonjour Mme Gauvert, votre tension est-elle restée la même que celle de l'échantillon tout du long? Ce modèle est très populaire et nous n'avons eu à ce jour aucun retour à propos des quantités, je suis désolée. Bon tricot!
12.08.2019 - 09:14
![]() Blanca wrote:
Blanca wrote:
Este parrafo no tiene ningun sntido: AL MISMO TIEMPO, cuando la pieza mida 6-7-8 (9-10) cm, continuar en redondo en pt jersey – tejer los 6 pts del centro del frente de revés, en la primera vta, y, después, tejerlos en pt jersey. Me lo pueden explicar?
17.07.2019 - 21:17DROPS Design answered:
Hola Blanca. La capucha y la primera parte del cuerpo se trabajan de ida y vuelta con 3 puntos en punto musgo (= cenefa) a cada lado. A partir de los 6-7-8 (9-10) cm (medidos desde el marcapuntos = desde el inicio del cuerpo) se trabaja en redondo y en la primera vuelta los 6 puntos de la cenefa ( = los 3 a cada lado) se trabajan de revés. Después toda la prenda se trabaja en punto jersey.
25.07.2019 - 19:49
![]() Lynn Beall wrote:
Lynn Beall wrote:
I do not understand the marker row. I have decreased from 41 st. to 38 st. on decrease row. The number of stitches between the increases on the marker row adds up to more than 38 stitches. What am I not understanding? Thanks for your help!
10.07.2019 - 06:00DROPS Design answered:
Dear Mrs Beall, count the stitches from the beg of row: first marker after 4 stitches, 2nd marker after a total of 15 sts (from beg of row), 3rd marker after a total of 23 sts (from beg of row) and the last marker after a total of 34 sts (from beg of row). Happy knintting!
10.07.2019 - 09:25
![]() Rina wrote:
Rina wrote:
Making this pattern for the second time. Love it! So cute!
08.07.2019 - 16:32
![]() Kandi wrote:
Kandi wrote:
I agree with Sherry, the instructions are not clear, got it through the hood and two knit rows, then the rest is very hard to understand! Is the cape part sewed up in back? Grrrrrr, so frustrated! Such a cute pattern,I give up!
05.07.2019 - 22:03DROPS Design answered:
Dear Kandi, when the hood has been worked, you will now work the "body" of the poncho, after the decreases insert markers (for increases) and work now first back and forth until the vent mid front is done and continue then in the round after the vent, increasing at the markers every other round/row. Happy knitting!
08.07.2019 - 11:25
|
|
Little Peach |
|
 |
 |
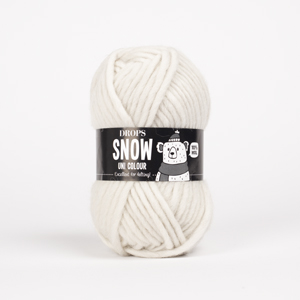
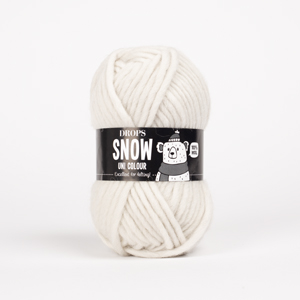
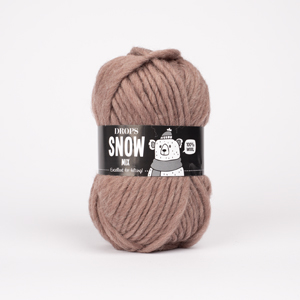
Set of knitted poncho with hood and booties for baby and children in DROPS Snow or DROPS Wish
DROPS Baby 16-1 |
|
|
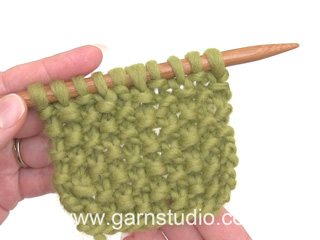
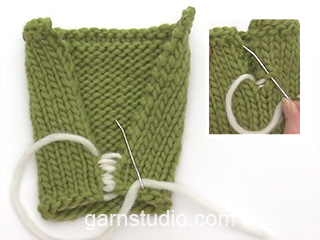
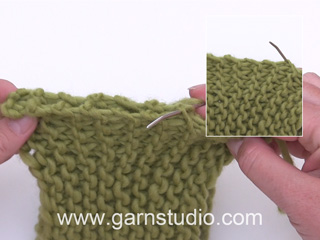
GARTER ST (back and forth on needle): K all rows. MOSS ST: Row 1: * K1, P1 *, repeat from *-*. Row 2: K over P and P over K. Repeat row 2. INCREASING TIP: Inc 1 st by making 1 YO. Work YO into back of loop on return row to avoid a hole. ---------------------------------------------------------- PONCHO: Worked from top down, beg with hood. Cast on 37-39-41 (45-47) sts on circular needle size 8 mm [US 11] with Snow or Wish. Work moss st – SEE ABOVE – back and forth on needle with 3 garter sts – SEE ABOVE – each side. REMEMBER THE KNITTING GAUGE! When piece measures 19-21-23 (25-27) cm [7½"-8 ¼"-9" (9 ¾"-10⅝")] K 1 row from RS, AT THE SAME TIME dec 3-3-3 (7-7) sts evenly (do not dec on the 3 garter sts each side) = 34-36-38 (38-40) sts. Insert 4 markers in piece as follows (as seen from RS): M-1 after 4 sts, M-2 after 13-14-15 (15-16) sts, M-3 after 21-22-23 (23-24) sts and M-4 after 30-32-34 (34-36) sts. Now piece are measured from here. K 1 row from WS. READ ALL OF THE FOLLOWING SECTION BEFORE CONTINUING! Continue in stockinette st back and forth on needle with 3 garter sts each side towards mid front, AT THE SAME TIME on first row from RS inc as follows – SEE INCREASING TIP: 1 st AFTER M-1, 1 st BEFORE M-2, 1 st AFTER M-3, 1 st BEFORE M-4 (= 4 inc). Repeat the inc on every other row another 15-17-18 (20-21) times = 98-108-114 (122-128) sts. AT THE SAME TIME when piece measures 6-7-8 (9-10) cm [2⅜"-2 ¾"-3⅛" (3½"-4")] continue in the round in stockinette st - P the 6 sts mid front on first round, and then work them in stockinette st. After all inc are complete work 1 round stockinette st on all sts and continue in moss st for 4-4-5 (5-6) cm [1½"-1½"-2" (2"-2⅜")]. Work 1 round stockinette st and bind off loosely. ASSEMBLY: Sew hood tog at the top, sew in outer loops of sts top avoid a chunky seam. TIE STRINGS: Crochet a string of ch measuring approx 1 meter [1.1 yds] with 2 threads Snow or Wish. Thread string through row after the garter st on neckline. Tie a knot either end. ---------------------------------------------------------- BOOTIES: Worked back and forth on needle from toe towards the heel. Cast on 16-16-18 (18-20) sts on needle size 7 mm [US 10 ½] with Snow or Wish. Work stockinette st with 1 garter st each side until piece measures approx 4-4½-5 (6-6½) cm [1½"-1 ¾"-2" (2⅜"-2½")] – adjust so that next row is from RS. REMEMBER THE KNITTING GAUGE! Now work 2 sts in each of the middle 2 sts (to make bootie wider at top of foot) = 18-18-20 (20-22) sts, P return row. Now slip the first 9-9-10 (10-11) sts on a stitch holder. FIRST SIDE: Work remaining 9-9-10 (10-11) sts on row. Work return row and cast on 5-6-6 (7-7) new sts at the end of row – work new sts in garter st and work remaining sts as before = 14-15-16 (17-18) sts. Continue as follows: * 1 row on the first 5-6-6 (7-7) sts, turn piece and work return row, 1 row on all sts, turn piece and work return row *, repeat from *-* until piece measures 10-11-12 (14-16) cm [4"-4⅜"-4 ¾" (5½"-6 ¼")] where longest, bind off. THE OTHER SIDE: Slip sts on stitch holder back on needle, K 1 row from RS and now cast on 5-6-6 (7-7) new sts at the end of row = 14-15-16 (17-18) sts. Continue as described for first side until piece measures 10-11-12 (14-16) cm [4"-4⅜"-4 ¾" (5½"-6 ¼")], bind off. ASSEMBLY: Fold bootie double and sew tog mid back and under foot – sew in outer loops of sts to avoid a chunky seam. Run a thread round the toe, tighten and fasten. |
|

|
|
|
Have you made this or any other of our designs? Tag your pictures in social media with #dropsdesign so we can see them! Do you need help with this pattern?You'll find 16 tutorial videos, a Comments/Questions area and more by visiting the pattern on garnstudio.com. © 1982-2025 DROPS Design A/S. We reserve all rights. This document, including all its sub-sections, has copyrights. Read more about what you can do with our patterns at the bottom of each pattern on our site. Have you finished this pattern? |
|


With over 40 years in knitting and crochet design, DROPS Design offers one of the most extensive collections of free patterns on the internet - translated to 17 languages. As of today we count 313 catalogs and 11748 patterns - 11739 of which are translated into English (US/in).
We work hard to bring you the best knitting and crochet have to offer, inspiration and advice as well as great quality yarns at incredible prices! Would you like to use our patterns for other than personal use? You can read what you are allowed to do in the Copyright text at the bottom of all our patterns. Happy crafting!
Post a comment to pattern DROPS Baby 16-1
We would love to hear what you have to say about this pattern!
If you want to leave a question, please make sure you select the correct category in the form below, to speed up the answering process. Required fields are marked *.