
Popular categories
Looking for a yarn?


|
||||||||||||||||||||||
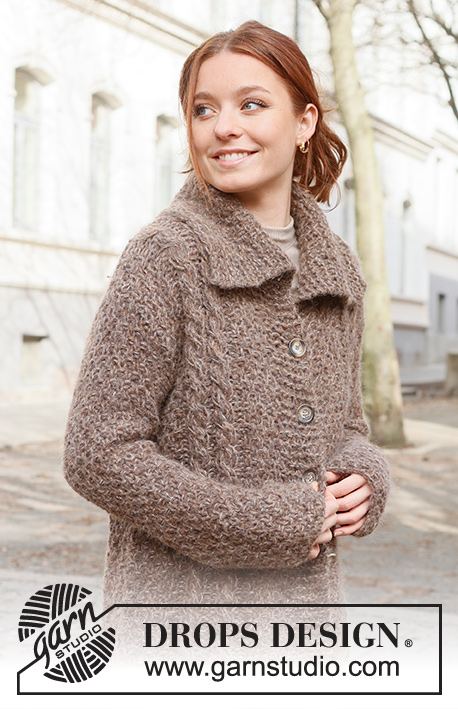
Chestnut Street Cardigan |
||||||||||||||||||||||
 |
 |
|||||||||||||||||||||
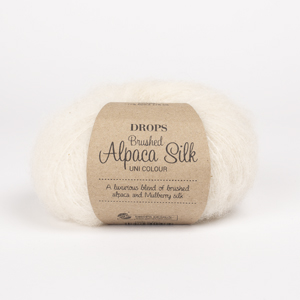
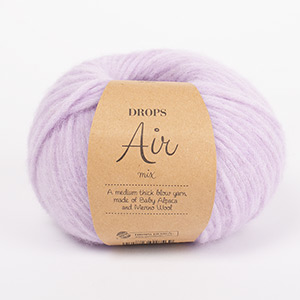
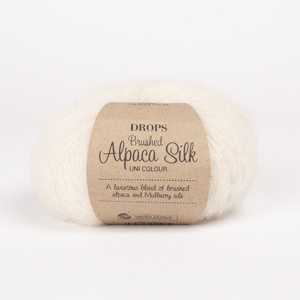
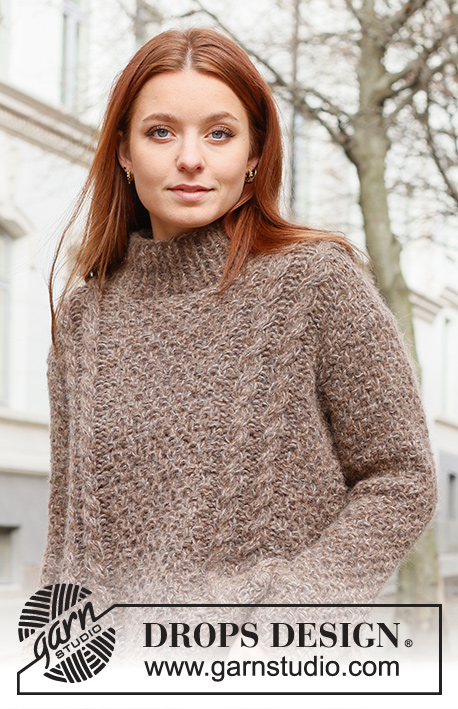
Knitted jacket in DROPS Air and DROPS Brushed Alpaca Silk. The piece is worked bottom up with cables, double moss stitch and collar. Sizes XS - XXL.
DROPS 235-25 |
||||||||||||||||||||||
|
------------------------------------------------------- EXPLANATIONS FOR THE PATTERN: ------------------------------------------------------- RIDGE/GARTER STITCH (worked back and forth): Knit all rows. 1 ridge = knit 2 rows. PATTERN: See diagrams A.1 to A.3. Choose diagram for your size (applies to A.2 and A.3). The diagrams show all rows in the pattern from the right side. INCREASE TIP (for sleeves): Increase by making 1 yarn over inside the edge stitch on both sides. On the next row work the yarn overs twisted to avoid holes. Then work the new stitches into A.1. BUTTONHOLES: Work the buttonholes from the right side as follows: Knit 3, knit 2 together, make 1 yarn over. On the next row (wrong side) knit the yarn over to leave a hole Work the buttonholes when the piece measures: XS: 17, 26, 35, 44 and 53 cm = 6¾", 10¼", 13¾", 17¼" and 21". S: 19, 28, 37, 46 and 55 cm = 7½", 11", 14½", 18" and 21⅝". M: 20, 29, 38, 47 and 56 cm = 8", 11⅜", 15", 18½" and 22". L: 22, 31, 40, 49 and 58 cm = 8¾", 12¼", 15¾", 19¼" and 22¾". XL: 19, 27, 35, 43, 51 and 59 cm = 7½", 10⅝", 13¾", 17", 20" and 23¼". XXL: 21, 29, 37, 45, 53 and 61 cm = 8¼", 11⅜", 14½", 17¾", 21" and 24". ------------------------------------------------------- START THE PIECE HERE: ------------------------------------------------------- JACKET – SHORT OVERVIEW OF THE PIECE: The front, back and sleeves are worked separately, back and forth and bottom up, then sewn together. The collar is worked to finish. BACK PIECE: Cast on 57-61-65-69-77-83 stitches with circular needle size 7 MM = US 10.75 and 1 strand of each quality (2 strands). Purl 1 row from the wrong side, then work 2 rows of rib (knit 1, purl 1) with 1 stitch in GARTER STITCH on each side – read description above. Change to circular needle size 9 MM = US 13. Work the next row from the right side as follows: 1 stitch in garter stitch, A.1 over the next 6-8-9-11-10-13 stitches, A.2, A.1 over the next 15-15-17-17-19-19 stitches, A.3, A.1 over the next 6-8-9-11-10-13 stitches, 1 stitch in garter stitch. Continue this pattern. REMEMBER THE KNITTING GAUGE! When the piece measures 43-44-45-46-47-48 cm = 17"-17¼"-17¾"-18"-18½"-19", bind off 3-3-4-4-5-5 stitches at the beginning of the next 2 rows for the armholes = 51-55-57-61-67-73 stitches. Continue as follows: 1 stitch in garter stitch, A.1 over the next 3-5-5-7-5-8 stitches, A.2, A.1 over the next 15-15-17-17-19-19 stitches, A.3, A.1 over the next 3-5-5-7-5-8 stitches, 1 stitch in garter stitch. When the piece measures 59-61-63-65-67-69 cm = 23¼"-24"-24¾"-25½"-26⅜"-27⅛", bind off the middle 11-11-11-13-13-13 stitches for the neck and finish each shoulder separately. Continue as before and bind off 1 stitch on the next row from the neck = 19-21-22-23-26-29 stitches on the shoulder. When the piece measures 61-63-65-67-69-71 cm = 24"-24¾"-25½"-26⅜"-27⅛"-28", and the next row is from the right side, decrease 4-4-4-4-6-6 stitches on the shoulder by knitting together the stitches in each cable, 2 and 2 = 15-17-18-19-20-23 stitches. Bind off. Work the other shoulder in the same way. The back piece measures approx. 62-64-66-68-70-72 cm = 24⅜"-25¼"-26"-26¾"-27½"-28⅜". RIGHT FRONT PIECE: Cast on 34-36-38-40-44-48 stitches with circular needle size 7 MM = US 10.75 and 1 strand of each quality (2 strands). Purl 1 row from the wrong side Work the next row from the right side as follows: 7 band stitches in garter stitch, * knit 1, purl 1 *, work from *-* until there is 1 stitch left, 1 stitch in garter stitch. Work 1 row back, with garter stitch over garter stitch, knit over knit and purl over purl. Change to circular needle size 9 MM = US 13. Work the next row from the right side as follows: 7 band stitches in garter stitch, A.1 over the next 6-6-7-7-8-9 stitches, A.3, A.1 over the next 6-8-9-11-10-13 stitches, 1 stitch in garter stitch. Continue this pattern – remember the BUTTONHOLES on the right band – read description above. When the piece measures 43-44-45-46-47-48 cm = 17"-17¼"-17¾"-18"-18½"-19", bind off 3-3-4-4-5-5 stitches for the armhole at the beginning of the row from the side = 31-33-34-36-39-43 stitches. When the piece measures 54-56-57-59-60-62 cm = 21¼"-22"-22½"-23¼"-23⅝"-24⅜" (1 cm = ⅜" after the last buttonhole), place the outermost 8-8-8-9-9-10 stitches mid-front on a thread for the collar, working them first to avoid having to cut the strand. Bind off stitches at the beginning of each row from the neck as follows: 2 stitches 1 time and 1 stitch 2 times = 19-21-22-23-26-29 stitches on the shoulder. When the piece measures 61-63-65-67-69-71 cm = 24"-24¾"-25½"-26⅜"-27⅛"-28" and the next row is from the right side, decrease 4-4-4-4-6-6 stitches on the shoulder in the same way as on the back = 15-17-18-19-20-23 stitches. Bind off. The front piece measures approx. 62-64-66-68-70-72 cm = 24⅜"-25¼"-26"-26¾"-27½"-28⅜". LEFT FRONT PIECE: Cast on 34-36-38-40-44-48 stitches with circular needle size 7 MM = US 10.75 and 1 strand of each quality (2 strands). Purl 1 row from the wrong side Work the next row from the right side as follows: 1 stitch in garter stitch, * purl 1, knit 1 *, work from *-* until there are 7 stitches left, 7 band stitches in garter stitch. Work 1 row back with garter stitch over garter stitch, knit over knit and purl over purl. Change to circular needle size 9 MM = US 13. Work the next row from the right side as follows: 1 stitch in garter stitch, A.1 over the next 6-8-9-11-10-13 stitches, A.2, A.1 over the next 6-6-7-7-8-9 stitches, 7 band stitches in garter stitch. Continue this pattern. When the piece measures 43-44-45-46-47-48 cm = 17"-17¼"-17¾"-18"-18½"-19", bind off 3-3-4-4-5-5 stitches for the armhole at the beginning of the row from the side = 31-33-34-36-39-43 stitches. When the piece measures 54-56-57-59-60-62 cm = 21¼"-22"-22½"-23¼"-23⅝"-24⅜", place the outermost 8-8-8-9-9-10 stitches mid-front on a thread for the collar, working them first to avoid having to cut the strand. Bind off stitches at the beginning of each row from the neck as follows: 2 stitches 1 time and 1 stitch 2 times = 19-21-22-23-26-29 stitches on the shoulder. When the piece measures 61-63-65-67-69-71 cm = 24"-24¾"-25½"-26⅜"-27⅛"-28" and the next row is from the right side, decrease 4-4-4-4-6-6 stitches on the shoulder in the same way as on the right front piece = 15-17-18-19-20-23 stitches. Bind off. SLEEVES: Cast on 30-32-34-36-38-40 stitches with circular needle size 7 MM = US 10.75 and 1 strand of each quality (2 strands). Purl 1 row from the wrong side, then work 2 rows of rib (knit 1, purl 1) with 1 stitch in garter stitch on each side. Change to circular needle size 9 MM = US 13. Work A.1 with 1 stitch in garter stitch on each side. When the sleeve measures 10 cm = 4", increase 1 stitch on each side – read INCREASE TIP. Increase like this every 9-9-8½-8½-8-7½ cm = 3½"-3½"-3¼"-3¼"-3⅛"-2⅞" a total of 5 times on each side = 40-42-44-46-48-50 stitches. When the sleeve measures 48-48-47-46-45-43 cm = 19"-19"-18½"-18"-17¾"-17", insert 1 marker in each side – they mark the bottom of the armhole. Continue working until the sleeve measures 50-50-50-49-49-47 cm = 19¾"-19¾"-19¾"-19¼"-19¼"-18½" from the cast-on edge. Bind off a little loosely. Work the other sleeve in the same way. ASSEMBLY: Sew the shoulder seams. Sew in the sleeves and sew the bottom of the armholes together – the markers on the sleeves should match the sides of the body – see sketch. Sew the sleeve and side seams in one go, inside the 1 edge stitch. Sew the buttons onto the left band. COLLAR: Knit up from the right side 45-45-47-47-51-51 stitches around the neck with circular needle size 7 MM = US 10.75 and 1 strand of each quality (2 strands). Knit 1 row from the right side and increase 6-6-6-8-6-6 stitches evenly spaced = 51-51-53-55-57-57 stitches. Insert 1 marker on each side of the middle 11-11-11-13-13-13 stitches on the row. Work as follows from the right side: 7 band stitches in garter stitch, A.1 over the next 13-13-14-14-15-15 stitches, 11-11-11-13-13-13 stitches in garter stitch, A.1 over the next 13-13-14-14-15-15 stitches, 7 band stitches in garter stitch. Continue this pattern. AT THE SAME TIME on the next row from the right side, increase 1 stitch on each side of the middle garter-stitches by making 1 yarn over; on the next row work the yarn overs twisted to avoid holes then work the new stitches into A.1. Increase like this every 4th row a total of 5 times (the number of middle garter-stitches remains the same – A.1 increases) = 61-61-63-65-67-67 stitches. When the collar measures 16-16-17-17-18-18 cm = 6¼"-6¼"-6¾"-6¾"-7"-7", work 2 rows of rib (knit 1, purl 1) with 7 band stitches in garter stitch on each side. Bind off a little loosely from the right side with knit over knit and purl over purl. The collar measures approx. 18-18-19-19-20-20 cm = 7"-7"-7½"-7½"-8"-8". |
||||||||||||||||||||||
Diagram explanations |
||||||||||||||||||||||
|
||||||||||||||||||||||

|
||||||||||||||||||||||

|
||||||||||||||||||||||

|
||||||||||||||||||||||
|
Have you made this or any other of our designs? Tag your pictures in social media with #dropsdesign so we can see them! Do you need help with this pattern?You'll find tutorial videos, a Comments/Questions area and more by visiting the pattern on garnstudio.com. © 1982-2024 DROPS Design A/S. We reserve all rights. This document, including all its sub-sections, has copyrights. Read more about what you can do with our patterns at the bottom of each pattern on our site. |
||||||||||||||||||||||


With over 40 years in knitting and crochet design, DROPS Design offers one of the most extensive collections of free patterns on the internet - translated to 17 languages. As of today we count 304 catalogs and 11422 patterns - 11417 of which are translated into English (US/in).
We work hard to bring you the best knitting and crochet have to offer, inspiration and advice as well as great quality yarns at incredible prices! Would you like to use our patterns for other than personal use? You can read what you are allowed to do in the Copyright text at the bottom of all our patterns. Happy crafting!
Comments / Questions (3)
Mit Originalwolle in genau dieser Farbe gestrickt. Die Jacke ist traumhaft schön geworden und das erste Strickstück, dass mir tatsächlich exakt passt. Vielen Dank für die tollen Anleitungen und die schöne Wolle! Freue mich schon auf das nächste Strickprojekt!
17.12.2023 - 15:32Ik wil dit vest graag breien met een enkele draad in garengroep C. Moet ik dan het dubbele aantal steken opzetten? Ik brei nog niet zo lang dus ik wil het graag eerst even navragen voordat ik begin en alles weer uit kan halen.
19.06.2023 - 15:35DROPS Design answered:
Dag Ina,
Je zou het patroon dan om moeten rekenen op basis van de stekenverhouding, dus het aantal steken over 10 cm van je proeflapje, maar je moet ook rekening houden met de positie van de kabels, de meerderingen en minderingen, etc. Helaas is het voor ons niet mogelijk om een patroon aan te passen naar persoonlijke wensen. Het is het handigst als de stekenverhouding overeen komt met die in het patroon, zodat je het patroon gewoon kan volgen.
21.06.2023 - 20:59Modelos bonitos e gostsoso de tricotar
25.02.2023 - 16:39