
Popular categories
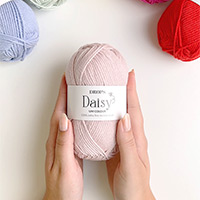
Looking for a yarn?


|
|
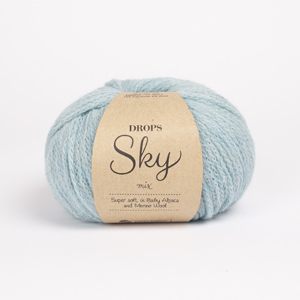
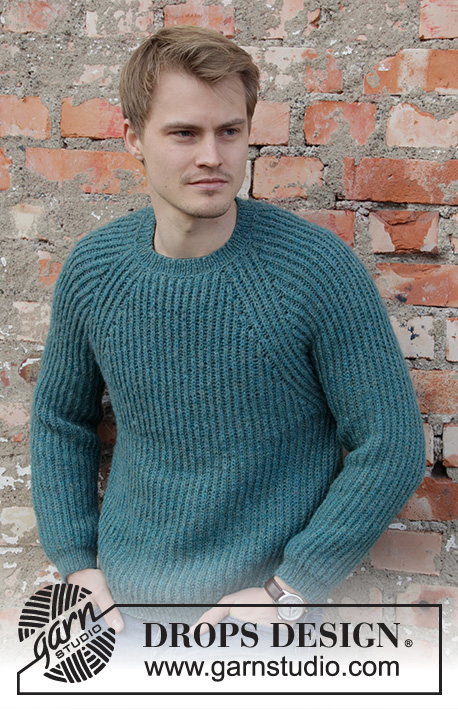
Lagoon |
|
 |
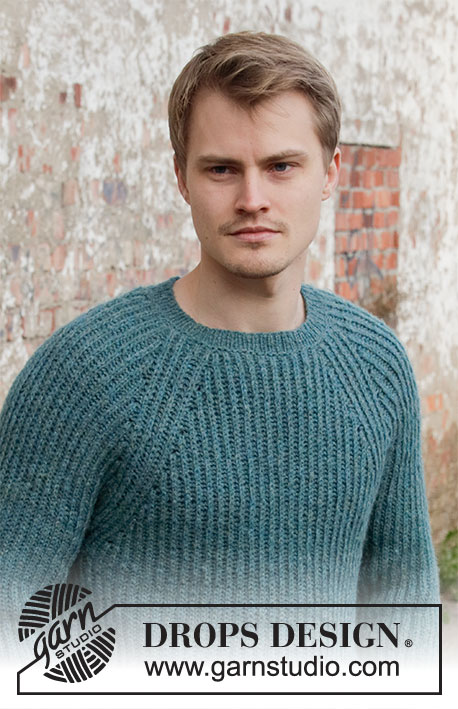 |
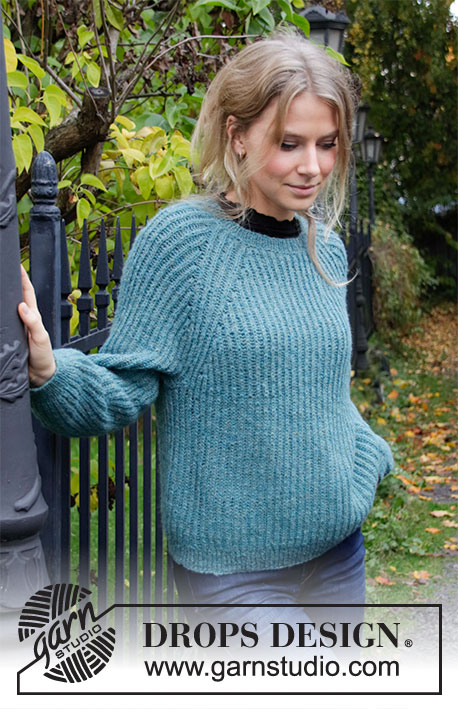
Knitted jumper with raglan for men in DROPS Sky. Piece is knitted top down with English rib. Size: S - XXXL
DROPS 208-9 |
|
|
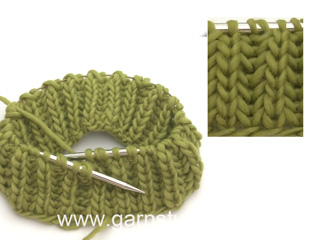
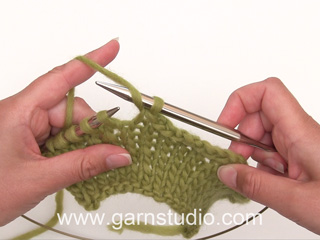
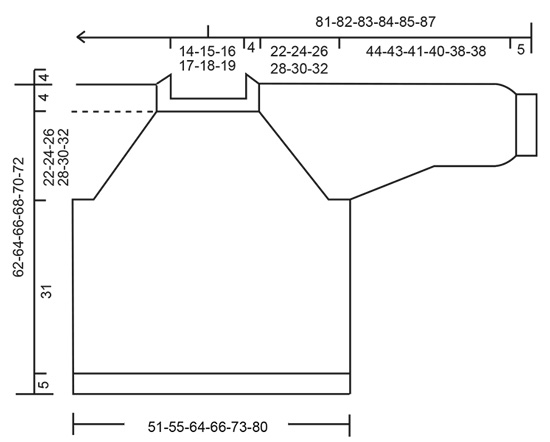
---------------------------------------------------------- EXPLANATION FOR THE PATTERN: ---------------------------------------------------------- ENGLISH RIB: ROUND 1: * Knit 1, 1 yarn over, slip 1 stitch as if to purl *, work from *-*. ROUND 2: * 1 yarn over, slip 1 stitch purlwise, purl together yarn over and slipped stitch *, work from *-*. 3.ROUND: * Knit together yarn over and slipped stitch, 1 yarn over, slip 1 stitch as if to purl *, repeat from *-*. Repeat rounds 2 to 3. RAGLAN: All increases are done on 2 round in English rib pattern! NOTE! If the knitting tension is not correct vertically the raglan increase will be too short/long vertically. Raglan increase is written in both number of round and cm. If the knitting tension is incorrect vertically, work raglan increase in cm. Increase as follows: Work until 4 stitches remain before stitch with marker. Increase 2 stitches in next stitch (one purl stitch + yarn over) as follows: Knit yarn over and stitch together but wait to slip stitch and yarn over off the needle, make 1 yarn over on right needle, knit stitch and yarn over together 1 more time = 3 stitches (= 2 stitches increased). Work the next 7 stitches in English rib as before. Increase 2 stitches in next stitch (one purl stitch + yarn over) as follows: Knit yarn over and stitch together but wait to slip stitch and yarn over off the needle, make 1 yarn over on right needle, knit stitch and yarn over together 1 more time = 3 stitches (= 2 stitches increased). Repeat at each of the remaining markers (= 16 stitches increased in total on round). On next round work the increased stitches in English rib pattern - there are no English rib yarn overs in increase, so on next round in English rib pattern work stitch to be worked together yarn over, without yarn over. DECREASE TIP-1 (evenly): To calculate how to decrease evenly, use the total number of stitches on row (e.g. 96 stitches) and divide stitches by number of decreases to be done (e.g. 16) = 6. In this example decrease by knitting every 5th and 6th stitch together. DECREASE TIP-2 (applies to sleeves): All decreases are done on 2 round in English rib pattern. Decrease as follows: Work like this until 2 stitches remain before stitch with marker slip the next 3 stitches (+ yarn overs that belongs to stitches) loosely over on to right needle as if to knit together, knit the next 2 stitches (+ yarn over that belongs to stitch) together, pass the 3 slipped stitches over stitches knitted together (= 4 stitches decreased). NOTE! On next round do not work any English rib stitch together with middle stitch under sleeve, then on next round in English rib pattern, work stitch together with yarn over, without yarn over. INCREASE TIP (evenly): To calculate how to increase evenly, use the total number of stitches on row (e.g. 164 stitches) and divide stitches by number of increases to be done (e.g. 70) = 2.3. In this example increase by making 1 yarn over after approx. every other stitch. On next round work yarn overs twisted to avoid holes. CAST-OFF TIP: To avoid a tight cast-off edge you may use a needle ½ size larger or cast off with knit over knit and purl over purl and make 1 yarn over after every 4th stitch (cast off yarn overs as regular stitches). ---------------------------------------------------------- START THE PIECE HERE: ---------------------------------------------------------- JUMPER - SHORT OVERVIEW OF THE PIECE: Worked in the round on circular needle, top down. Work sleeves in the round on a short circular needle/double pointed needles. NECK EDGE: Cast on 96-102-106-110-114-118 stitches on a short circular needle size 3 mm with Sky. Knit 1 round, then work rib = knit 1/purl 1 for 4 cm. Knit 1 round while decreasing 16-18-18-22-22-26 stitches evenly - read DECREASE TIP-1 (evenly) = 80-84-88-88-92-92 stitches. Purl 1 round. Insert a marker here (= beginning of round approx. mid back). NOW MEASURE PIECE FROM HERE! YOKE: Switch to circular needle size 4.5 mm. Then work ENGLISH RIB - read explanation above. When 1 round has been worked with English rib, insert 4 markers in piece without working (insert all markers in a purl stitch): Skip the first 13-13-15-15-15-15 stitches, insert a marker in next stitch (= in transition between half back piece and right sleeve), skip the next 13 stitches, insert a marker in next stitch (= in transition between right sleeve and front piece), skip the next 25-27-29-29-31-31 stitches, insert a marker in next stitch (= in transition between front piece and left sleeve), skip the next 13 stitches, insert a marker in next stitch (= in transition between left sleeve and half back piece), there are now 12-14-14-14-16-16 stitches between last marker and beginning of round. REMEMBER THE KNITTING TENSION! There is now one marker in every transition between body and sleeves. Move the markers upwards when working. Continue in the round with English rib, AT THE SAME TIME on next round (= 2nd round in English rib) begin increase for RAGLAN - read explanation above. Increase like this every 6th round (approx. every 1½ cm), 1-2-4-5-6-8 times in total and every 8th round (approx. every 2 cm) 10 times in all sizes = 256-276-312-328-348-380 stitches. When all increases are done, continue with English rib until piece measures 22-24-26-28-30-32 cm from marker, finish after 2nd round in English rib. Work next round as follows: Work the first 37-39-47-49-53-59 stitches (= approx. half back piece), slip the next 55-59-63-67-67-71 stitches on a stitch holder for sleeve and cast on 9 new stitches on needle (= in the side under sleeve), work the next 73-79-93-97-107-119 stitches (= front piece), insert the next 55-59-63-67-67-71 stitches on a stitch holder for sleeve and cast on 9 new stitches on needle (= in the side under sleeve), work the last 36-40-46-48-54-60 stitches on round (= approx. half back piece). Finish body and sleeves separately. NOW MEASURE PIECE FROM HERE! BODY: There are now 164-176-204-212-232-256 stitches on round. Continue in the round with English rib until piece measures 31 cm from division - adjust to finish after 2nd round in English rib. Switch to circular needle size 3 mm. Work next round as follows: * Knit yarn over and slipped stitch together, purl 1 *, work from *-* the entire round, AT THE SAME TIME increase 60-66-70-72-84-82 stitches - read INCREASE TIP = 224-242-274-284-316-338 stitches. Work rib (knit 1/purl 1) in the round for 5 cm. Cast off - read CAST-OFF TIP. Jumper measures approx. 54-56-58-60-62-64 cm from shoulder and down. SLEEVE: Slip the 55-59-63-67-67-71 stitches from stitch holder in one side of piece back on a short circular needle/double pointed needles size 4.5 mm and pick in addition up 1 stitch in each of the 9 new stitches cast on in the side under sleeve = 64-68-72-76-76-80 stitches. Continue in the round with English rib. When sleeve measures 4 cm – adjust so that next round is 2nd round in English rib, insert a marker in the middle stitch under sleeve (= one knit stitch). On next round, decrease 4 stitches under sleeve - read DECREASE TIP-2. Decrease like this every 10-10-5-5-5-4 cm 4-4-5-6-6-6 times in total = 48-52-52-52-52-56 stitches. When sleeve measures 44-43-41-40-38-38 cm – adjust so that next round is 3rd round in English rib pattern, switch to double pointed needles size 3 mm. In S - M – L work next round as follows: * Knit yarn over and slipped stitch together, knit 1, knit yarn over and slipped stitch together, knit 1, knit yarn over as 1 knit stitch, knit slipped stitch as 1 knit stitch, knit 1 *, work from *-*, 8 stitches have been increased on round = 56-60-60 stitches. In XL - XXL work next round as follows: Knit yarn over as 1 knit stitch, knit slipped stitch as 1 knit stitch, * knit yarn over as 1 knit stitch, knit slipped stitch as 1 knit stitch, knit yarn over and slipped stitch together, knit 1 *, work from *-*, 14 stitches have been increased on round = 66-66 stitches. In XXXL work next round as follows: * Knit yarn over and slipped stitch together, knit 1, knit yarn over as 1 knit stitch, knit slipped stitch as 1 knit stitch, knit 1 *, work from *-*, 14 stitches have been increased on round = 70 stitches. Now work rib (= knit 1/purl 1) for 5 cm. Cast off - read CAST-OFF TIP. Sleeve measures 49-48-46-45-43-43 cm from division. Work the other sleeve the same way. |
|
|
|
|
Have you made this or any other of our designs? Tag your pictures in social media with #dropsdesign so we can see them! Do you need help with this pattern?You'll find tutorial videos, a Comments/Questions area and more by visiting the pattern on garnstudio.com. © 1982-2024 DROPS Design A/S. We reserve all rights. This document, including all its sub-sections, has copyrights. Read more about what you can do with our patterns at the bottom of each pattern on our site. |
|


With over 40 years in knitting and crochet design, DROPS Design offers one of the most extensive collections of free patterns on the internet - translated to 17 languages. As of today we count 304 catalogues and 11422 patterns - 11422 of which are translated into English (UK/cm).
We work hard to bring you the best knitting and crochet have to offer, inspiration and advice as well as great quality yarns at incredible prices! Would you like to use our patterns for other than personal use? You can read what you are allowed to do in the Copyright text at the bottom of all our patterns. Happy crafting!
Comments / Questions (80)
Hallo, Ich verstehe die Beschreibung der Raglanzunahme nicht". 2 Maschen in der nächsten M( Linksmasche und Umschlag) wie folgt zunehmen: den Umschlag und die M.rechts zusammenstricken, jedoch beides noch nicht von der linken Nadel gleiten lassen, 1 Unschlag, die Linksmasche und den Umschlag nochmals rechts zusamnenstricken=3 M.= 2 zugenommen.. Wo kommen Maschen dazu? Kann man das leichter erklären? Viele Grüße; Thekla
01.07.2022 - 19:54DROPS Design answered:
Liebe Frau Rockstein, um 2 Maschen zuzunehmen werden Sie die selbe Masche 2 Mal stricken und dazwischen 1 Umschlag machen - dieses Video zeigt mit "WIE FOLGT IN DEN MASCHEN MIT DEN LILAFARBENEN MARKIERERN ZUNEHMEN: " wie es hier zugenommen wird (siehe z.B. 0:44) - Sie werden aber hier immer beidseitig von den 7 PatentMaschen zunehmen. Viel Spaß beim stricken!
04.07.2022 - 07:45How many ball of wool do you need for the man jumper Lagoon please
28.06.2022 - 14:07DROPS Design answered:
Dear Marie, you will find the total required weight of yarn in the header, for example in size S you need 450 g DROPS Sky / 50 g a ball = you require 9 balls DROPS Sky in S. Happy knitting!
29.06.2022 - 08:55Efter 1. omg. patent på bærestykket får jeg 3 master for hver gang man strikker gentagelsen, altså ender man med 126 masker (en ret, en slået om og en taget løst af). Dette antal passer ikke når man skal til at strikke raglan udtagninger, her passer antallet med at man starter med 84 masker, altså det antal man har før 1. omgang i helpatent. Har jeg gjort noget forkert, eller er maskeantallet uden de masker der er slået om, så jeg har 84 masker (126 inkl. slået om)
14.06.2022 - 23:49Hello, apologies if this question has been asked before in another language. I have a question about the raglan increases. When it says increase on every 6th and 8th row - does that mean every 6th row for 4 times, and then AFTER that every 8th row for 10 times? Or is it meant to be at the same time? Thanks very much.
19.03.2022 - 15:00DROPS Design answered:
Dear Kelsey, you first increase every 6th row 4 times and then every 8th row 10 times. Happy knitting!
20.03.2022 - 19:41Hallo, ich verstehe nicht, wie ich die Raglanaufnahmen in der 3. Vollpatent Reihe stricken soll. Vielen Dank für Ihre Hilfe ! LG
26.02.2022 - 22:40DROPS Design answered:
Liebe Karolin, die Zunahmen entstehen in der 2. Runde nicht in der 3. Runde - Sie sollen beidseitig von den 7 Maschen im Patentmuster zunehmen, dh jeweils anstatt die vorrige + die nächste M (Umschlag + abgehobene links zs stricken) stricken Sie diese Masche 3 Mal: (den Umschlag + die abgehoben M links stricken + Umschlag + den Umschlag + die abgehobene M noch einam links stricken, jetzt können Sie diese M von linken Nadeln wegfallen; = es sind jetzt 3 M auf der rechten nadel = 2 Maschen wurden zugenommen. Viel Spaß beim stricken!
28.02.2022 - 09:58Hallo, ich möchte dieses Modell gern im 2-farbigen Patent Stricken. Das kenne ich normalerweise nur mit Hin-und Rückreihen (Fb 1 hin, Fb. 2 hin, Fb 1 rück, Fb2 rück). Kann ich dieses Modell auch in Runden 2-farbig stricken?
22.12.2021 - 21:39DROPS Design answered:
Liebe Frau Glitzi, wahrscheinlich können Sie dieses Modell aus 2-farbig stricken. Dieses Video zeigt, wie man Vollpatent in runden strickt. Viel Spaß beim stricken!
03.01.2022 - 08:18Danke, ich meinte nicht das Halsstück: hier beziehen Sie sich doch auf das Rumpfteil, oder nicht? "Es sind nun 164-176-204-212-232-256 Maschen in der Runde. Weiter in Runden im Vollpatent stricken, bis die Arbeit eine Länge von 31 cm ab der Teilung – daran angepasst, dass nach der 2. Runde des Vollpatents geendet wird. Zu Rundnadel Nr. 3 wechseln..." Danke nochmals
03.12.2021 - 12:26DROPS Design answered:
Liebe Frau Schoene, Sie sind ja recht, ich meinte Halsblende, Sie sind ja recht, am besten mit einer 80 cm Rundnadel stricken . Viel Spaß beim stricken!
03.12.2021 - 13:42Hallo, in der Anleitung steht, daß das Rumpfteil mit der Nadel 3 (3 mm) zu ende gestrickt wird. Dabei sollen bei Nadelwechsel (von 4,5 auf 3) auch noch Maschen zugenommen werden. Als Nadel mit der Stärke 3 wird zu Beginn jedoch angegeben, daß nur eine 40 cm lange Rundnadel nötig ist. Diese erscheint mir für das Stricken des Abschlusses des Rumpfteiles zu kurz. Sollte man also auch hier eine 80 cm lange Rundnadel (3 mm) nehmen? Danke!
03.12.2021 - 08:18DROPS Design answered:
Liebe Frau Schoene, normaleweise sollten Sie genügend Platz mit der 40 Rundnadel Nr 3 für die Halsblende, aber wenn Sie so möchten, können Sie lieber entweder mit Nadelpsiel Nr3 oder mit einem 80 cm Rundnadel Nr 3 und Magic loops Technik stricken. Viel Spaß beim stricken!
03.12.2021 - 08:37Hallo! Ich habe eine Frage zu diesem Teil der Anleitung: "In dieser Weise in jeder 6. Runde (ca. alle 1½ cm) insgesamt 1-2-4-5-6-8 x zunehmen und dann in jeder 8. Runde (ca. alle 2 cm) 10 x für alle Größen zunehmen" Nimmt man nicht in jeder Runde der Raglanzunahmen 16 Maschen hinzu? Und was bedeutet es in jeder 8. Runde 10 hinzuzunehmende? Vielen Dank!
09.11.2021 - 21:59DROPS Design answered:
Lieber Nik, es wird jeweils 16 Maschen zugenommen, aber nicht in jeder Runde noch in jeder 2. Runde, sondern zuerst in jeder 6. Runde je nach der Größe 1 bis 8 x (= 1 Runde mit Zunahmen stricken, 5 Reihen ohne Zunahmen Stricken)dann in jeder 8. Runde (= 1 Runde mit Zunahmen, 7 Runden ohne Zunahmen) 10 Mal in allen Größen. Kann das Ihnen helfen?
10.11.2021 - 07:38Hallo! Ich habe eine Frage zum Übergang vom Kragen zur Passe. In der Anleitung steht "Zu Rundnadel Nr. 4,5 wechseln. Nun im VOLLPATENT stricken – siehe oben. Wenn 1 Runde im Vollpatent gestrickt wurde, 4 Markier...." Heißt das, dass die 1. Runde des Vollpatents gestrickt wird oder einmal Runde 1-3 ? Vielen Dank!
04.11.2021 - 22:37DROPS Design answered:
Lieber Nik, die Markierer werden nach der 1. Runde im Vollpatent eingesetzt, dann stricken Sie die 2. Runde im Vollpatent und gleichzeitig beginnen die Zunahmen. Viel Spaß beim stricken!
05.11.2021 - 07:07