
Popular categories
Looking for a yarn?


|
||||||||||||||||||||||||||||||||||||||||||||||||||||
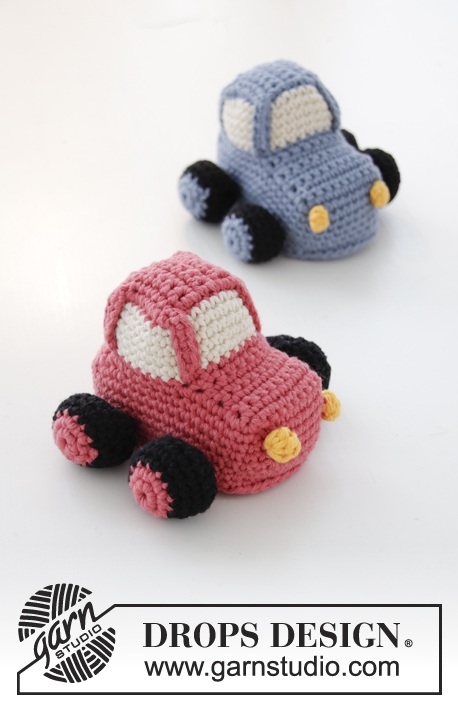
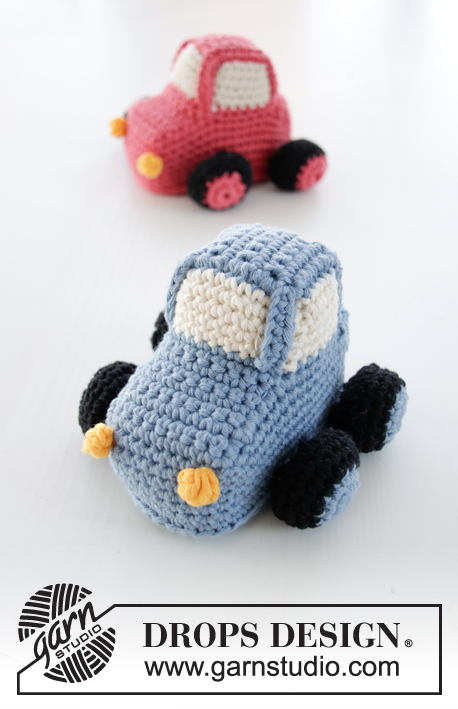
My First Car |
||||||||||||||||||||||||||||||||||||||||||||||||||||
 |
 |
|||||||||||||||||||||||||||||||||||||||||||||||||||
Crocheted car for baby. Piece is crocheted in DROPS Paris.
DROPS Baby 31-26 |
||||||||||||||||||||||||||||||||||||||||||||||||||||
|
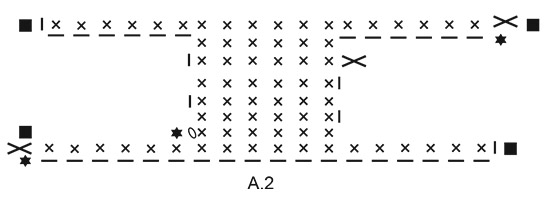
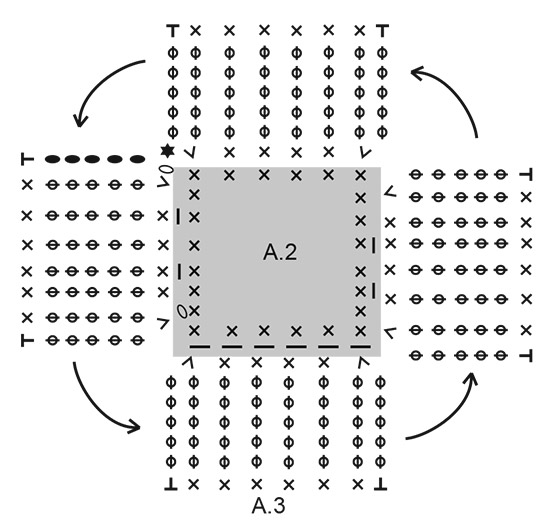
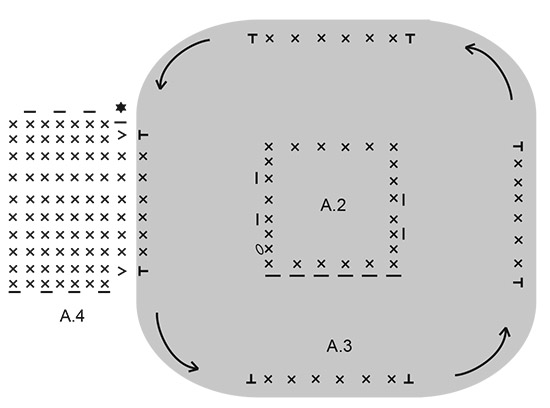
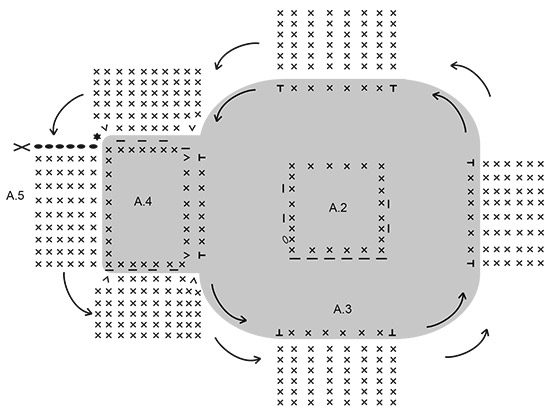
INFORMATION FOR PATTERN: PATTERN: See diagrams A.1 to A.7. Diagrams A.2 to A.5 are the car, A.1 is the wheels, A.6 is lights and A.7 is bottom of car. Section marked with gray has already been worked, it only shows how next round should be worked in stitches/rows. ---------------------------------------------------------- CAR: Car worked in several parts. First work 4 wheels, then the car. Finally work light and work the piece together. WHEELS: Work 4 chain stitches on hook size 4 mm / G/6 with the color of the car and form a ring with 1 slip stitch in first chain stitch. Work A.1 in the round = 1 wheel. REMEMBER THE CROCHET GAUGE! When A.1 has been worked, there are 9 single crochets on last round. Fasten off, fill the wheel with poly stuffing and put aside. Work 4 wheels in total. They are worked together with car in diagram A.5. CAR: Work A.2 back and forth (= car roof and flaps down over the windows) with the color of the car. When A.2 has been worked, work A.3 in the round over stitches/rows in A.2 (= the windows). Section marked with gray = A.2, section has already been worked, it only shows how next round should be worked in stitches. Work first round in A.3 with the color of the car, then work with off white until 1 round remains. On last round place flaps down over windows and work together with corners in A.3 with the color of the car (see the squares in A.2). When A.3 has been worked, there are 32 single crochets on last round. Fasten off the off white strand. Work the rest of car in the color of the car. Work A.4 back and forth over the first 8 stitches (= front of car). Increase 1 single crochet in each side on first round = 10 single crochets. When A.4 has been worked, work A.5 in the round over all stitches/rounds in A.4 and the remaining stitches in A.3 (= the sides, mid front and mid back on car). On 4th round in A.5 work the wheels on car as follows: Fold last round on wheel double and work 1 single crochet through both layers of wheels and 4th row in A.5, work 2 single crochets in total through all 3 layers (= the wheel is now fastened with 2 single crochets to the car), work all 4 wheel to the car the same way. When A.5 has been worked, there are 54 single crochets on last round. Fasten off. LIGHTS: Work A.6 with strong yellow. Cut the thread and tie ends together. Work 2 lights in total. Sew light to the front of car. Fill the car with some poly stuffing. Then work the bottom loosely in the round before working it together with the car. BOTTOM: Work 9 chain stitches on hook size 4 mm / G/6 with the color of the car and work A.7, work on both sides of chain stitch row. When A.7 has been worked, there are 54 single crochets on last round. Work the bottom to car with 1 single crochet through both layers in the round, over all stitch. Fasten off. |
||||||||||||||||||||||||||||||||||||||||||||||||||||
Diagram explanations |
||||||||||||||||||||||||||||||||||||||||||||||||||||
|
||||||||||||||||||||||||||||||||||||||||||||||||||||
|
||||||||||||||||||||||||||||||||||||||||||||||||||||
|
||||||||||||||||||||||||||||||||||||||||||||||||||||
|
||||||||||||||||||||||||||||||||||||||||||||||||||||
|
||||||||||||||||||||||||||||||||||||||||||||||||||||

|
||||||||||||||||||||||||||||||||||||||||||||||||||||
|
Have you made this or any other of our designs? Tag your pictures in social media with #dropsdesign so we can see them! Do you need help with this pattern?You'll find tutorial videos, a Comments/Questions area and more by visiting the pattern on garnstudio.com. © 1982-2024 DROPS Design A/S. We reserve all rights. This document, including all its sub-sections, has copyrights. Read more about what you can do with our patterns at the bottom of each pattern on our site. |
||||||||||||||||||||||||||||||||||||||||||||||||||||


With over 40 years in knitting and crochet design, DROPS Design offers one of the most extensive collections of free patterns on the internet - translated to 17 languages. As of today we count 304 catalogs and 11422 patterns - 11417 of which are translated into English (US/in).
We work hard to bring you the best knitting and crochet have to offer, inspiration and advice as well as great quality yarns at incredible prices! Would you like to use our patterns for other than personal use? You can read what you are allowed to do in the Copyright text at the bottom of all our patterns. Happy crafting!
Comments / Questions (14)
Kan ikke finne diagram A.1?
02.11.2018 - 11:44DROPS Design answered:
Hei Sinikka. Diagram A.1 ligger helt nederst, under A.7 og ved siden av A.6. God fornøyelse.
02.11.2018 - 14:46Hallo, ich wollte mich jetzt auch mal an dieser schönen Anleitung versuchen und habe folgendes Problem: Was bedeuten die geschlossenen Dreiecke nach dem Ring bei A.1?
26.08.2018 - 09:30Wat een leuk patroontje, bedankt daarvoor. Met vriendelijke groet, Kirsten
26.05.2018 - 16:29Hallo, die Anleitung war am Anfang erschreckend, es ging dann aber. Nur das Anhäkeln der Räder hatte ich nicht verstanden, ich habe sie dann angenäht. Aber das Auto sieht süß aus. Dankeschön
16.04.2018 - 18:25