
Popular categories
Looking for a yarn?


|
|||||||||||||||||||
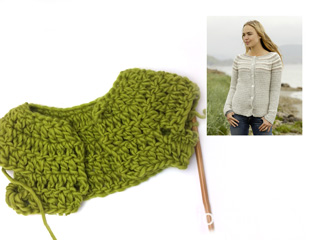
Yesterday Cardigan |
|||||||||||||||||||
 |
 |
||||||||||||||||||
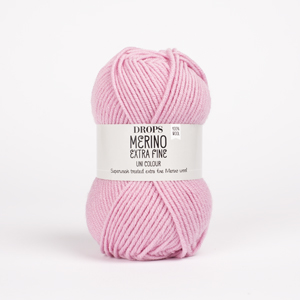
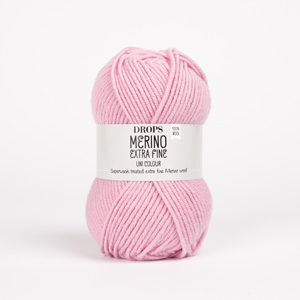
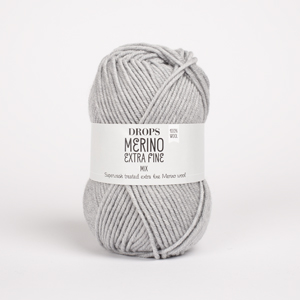
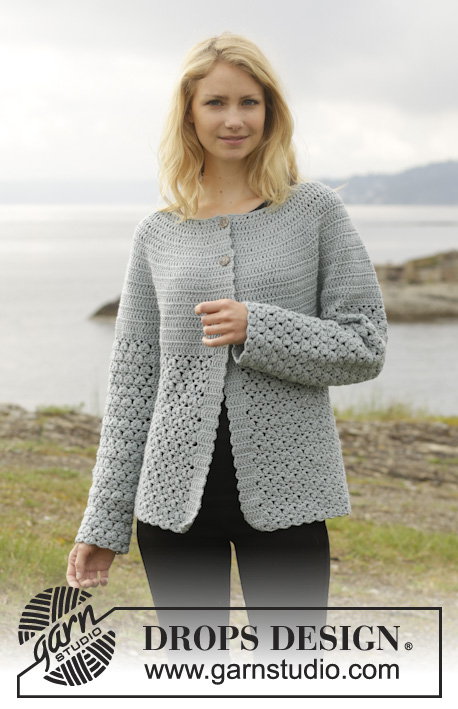
Crochet DROPS jacket with round yoke and lace pattern, worked top down in ”Merino Extra Fine”. Size: S - XXXL.
DROPS 156-17 |
|||||||||||||||||||
|
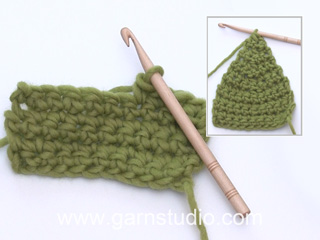
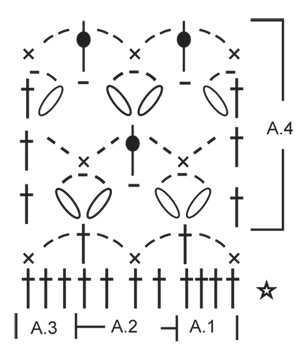
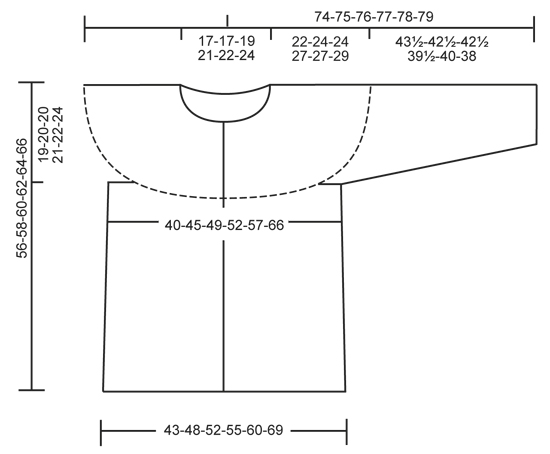
PATTERN: See diagrams A.1-A.4. The diagrams show all rows in pattern seen from RS. CROCHET INFO: Replace first tr on every round/row with 3 ch. Replace first dc on every round/row with 1 ch. Finish every tr round with 1 sl st in 3rd ch from beg of round. Finish every dc round with 1 sl st in 1st ch on round. INCREASE TIP: Inc 1 st by working 2 tr in 1 tr, first on one side of all markers on row, next time on the other side of all markers on row, continue inc like this. DECREASE TIP: Work 1 tr but wait with last pull through (= 2 sts on hook), then work next tr but on last pull through, pull yarn through all sts on hook = 1 st dec. ---------------------------------------------------------- BODY: The piece is worked top down. Worked back and forth from mid front. Work 111-116-121-131-136-146 ch (incl 3 ch to turn with) on hook size 4.5 mm with Merino Extra Fine. Work next row as follows: 1 tr in 4th ch (= 2 tr), 1 tr in each of the next 2 ch, * skip 1 ch, 1 tr in each of the next 4 ch *, repeat from *-* = 88-92-96-104-108-116 tr - READ CROCHET INFO. Insert 19-20-21-23-24-26 markers in the piece as follows: Insert 1st marker after 8th tr, then insert 18-19-20-22-23-25 markers 4 tr apart, after last marker there are 8 tr. Work back and forth with tr AT THE SAME TIME inc 1 tr at all markers as follows: Inc every other row 5-6-6-5-5-6 times, and every 4th row 2-2-2-3-3-3 times - READ INCREASE TIP = 221-252-264-288-300-350 tr. Work a row and inc 14-7-7-7-19-5 tr evenly (do not inc over the first and last 6 tr = band) = 235-259-271-295-319-355 tr. REMEMBER THE CROCHET TENSION! On next round work as follows: 36-40-43-47-51-58 tr (front piece), 8 ch (under sleeve), skip 52-56-56-60-64-68 tr from previous row (to be used for sleeve later), 59-67-73-81-89-103 tr (back piece), 8 ch (under sleeve), skip 52-56-56-60-64-68 tr from previous row (to be used for sleeve later) and 36-40-43-47-51-58 tr (front piece). Insert a marker, now measure piece from here! Work 1 tr in every tr/ch AT THE SAME TIME dec 8-8-8-12-12-12 sts evenly – READ DECREASE TIP = 139-155-167-179-195-223 tr. Continue to work as follows: Work 1 tr in each of the first 6 tr (= band), A.1, A.2 30-34-37-40-44-51 repetitions in total in width, finish with A.3 and 1 tr in each of the last 6 tr. Continue pattern like this. When A.1-A.3 have been worked 1 time vertically, repeat A.4 vertically until finished measurements. When piece measures 14-14-14-15-15-15 cm from marker, adjust so that next row is last row in A.4, inc 1 repetition of A.2 in 8th-9th-9th-10th-11th-13th repetition in ch-space as follows: Work 2 ch, 1 dc in ch-space, 2 ch, 1 tr in same ch-space, 2 ch, 1 dc in same ch-space. Work 14-16-19-20-22-25 repetitions of A.2, in next repetition of A.2 inc the same way. Then continue as before = 32-36-39-42-46-53 repetitions of A.2 in width. Fasten off when piece measures 34-34-36-35-37-37 cm from marker, adjust to finish with next to last row in A.4, piece measures 56-58-60-62-64-66 cm in total. SLEEVE: Sleeve is worked in the round, top down. Insert a marker, now measure piece from here! Beg by working mid under sleeve as follows: Work 1 dc in 5th ch of the 8 ch work in armhole on body, 3 ch (= 1 tr), work 1 tr in each of the next 3 ch, 1 tr in every tr over sleeve, then work 1 tr in each of the remaining 4 ch under sleeve = 60-64-64-68-72-76 tr. Insert 1 marker mid under sleeve. Continue to work as follows: 1 tr in each of the first 11-11-11-13-13-15 tr AT THE SAME TIME dec 1 tr (= 10-10-10-12-12-14 tr), A.1, A.2 8-9-9-9-10-10 times in width, A.3, work 1 tr in each of the last 10-10-10-12-12-14 tr. Continue with 1 tr in each of the 20-20-20-24-24-28 tr mid under sleeve and A.1-A.3 over sleeve. When A.1-A.3 have been worked 1 time vertically, repeat A.4 vertically until finished measurements. Continue this pattern AT THE SAME TIME when piece measures 4 cm, dec 1 tr on each side of marker - Remember DECREASE TIP. Repeat dec every 3½-3½-3½-2½-2½-2 cm 9-9-9-11-11-13 more times. Now work only A.1-A.3 over sleeve. Fasten off when sleeve measures 43½-42½-42½-39½-40-38 cm, adjust to finish with next to last round in A.4 – NOTE – shorter measurements in the larger sizes because of wider neck and shoulders. Work the other the same way. NECK EDGE: Work neck edge in ch-row. Work on hook size 4.5 mm with Merino Extra Fine as follows: 1 dc in 1st st, * 2 ch, skip 2 sts, 1 dc in next st *, repeat from *-* around the entire neck. Fasten off. ASSEMBLY: Fasten the buttons on left front piece, the top button approx. 1 cm from neck edge, the bottom button in transition between tr and pattern. Button between 2 tr on right front piece. |
|||||||||||||||||||
Diagram explanations |
|||||||||||||||||||
|
|||||||||||||||||||
|
|||||||||||||||||||
|
|||||||||||||||||||
|
Have you made this or any other of our designs? Tag your pictures in social media with #dropsdesign so we can see them! Do you need help with this pattern?You'll find tutorial videos, a Comments/Questions area and more by visiting the pattern on garnstudio.com. © 1982-2024 DROPS Design A/S. We reserve all rights. This document, including all its sub-sections, has copyrights. Read more about what you can do with our patterns at the bottom of each pattern on our site. |
|||||||||||||||||||


With over 40 years in knitting and crochet design, DROPS Design offers one of the most extensive collections of free patterns on the internet - translated to 17 languages. As of today we count 304 catalogues and 11422 patterns - 11422 of which are translated into English (UK/cm).
We work hard to bring you the best knitting and crochet have to offer, inspiration and advice as well as great quality yarns at incredible prices! Would you like to use our patterns for other than personal use? You can read what you are allowed to do in the Copyright text at the bottom of all our patterns. Happy crafting!
Comments / Questions (35)
Bonjour, sur le modèle Yesterday Cardigan, apres avoir fait les augmentations et commencé la séparation pour les manches (36 brides pour les 2 parties du devant et 59 pour le dos = 131 brides), il est noté après de diminuer de 8 ml pour avoir 139 brides. Pourriez vous m'expliquer ce passage car je ne comprends pas et je suis bloquée. Merci encore pour tous ces beaux modèles, j ai beaucoup de plaisir à les crocheter. J'attends impatiemment votre réponse.🙂
06.05.2022 - 20:12DROPS Design answered:
Bonjour Mme Cattaneo, lorsque vous divisez l'empiècement vous avez: 36 brides (devant), 8 ml, 59 brides (dos), 8 ml et 36 brides (devant ) soit: 36+8+59+8+36=147 mailles au total; vous crochetez 1 bride dans chaque maille en diminuant 8 mailles à intervalles réguliers soit 147-8=139 mailles. Bon crochet!
09.05.2022 - 08:05Fortsätt mönstret så. När A.1-A.3 har virkats 1 gång på höjden repeteras A.4 på höjden till färdigt mått. Jag….När arb mäter 14-14-14-15-15-15 cm från markören, avpassa så att nästa v är sista v i A.4,det 1 rapport av A.2 i…. Jag förstår inte” a1-A3 på höjden,” vad är det? Ska jag vara göra ett varv och sedan bara A4 hela vägen eller är det a1-a3 på ett varv och sedan A4 som ska repeteras om och om igen som ett paket? Men vaddå höjden?
27.03.2022 - 21:41DROPS Design answered:
Hej Camila. Du virkar 1 st i var och en av de 6 första st (= framkant), A.1, A.2 totalt 30-34-37-40-44-51 rapporter på bredden, avsluta med A.3 och 1 st i var och en av de sista 6 st. När du virkat hela diagrammet så fortsätter du att virka endast de varv där det står A.4 (men med samma ordning som tidigare av delarna i A.4). Du virkar A.4 tills arbetet mäter 14-14-14-15-15-15 cm från markören och fortsätter då enligt beskrivningen. Mvh DROPS Design
30.03.2022 - 09:04Kan man få opskriften på Dansk
28.01.2022 - 16:51DROPS Design answered:
Hei Marianne. Om du bruker nedtrekksmenyen under bildet og klikker på Endre språk, kan du velge dansk. mvh DROPS Design
31.01.2022 - 13:40Ik snap niet precies wat er bedoeld wordt met de zin:meerder tegelijkertijd 1 stokje bij alle markeerders als volgt:meerderom de toer 5 keer en elke 4de toer 3 keer. Kunt u dat misschien in andere woorden zeggen? Ik denk bij 24 markeerders 24 stokjes meerderen, terug niet meerderen, maar dan...
16.07.2021 - 15:21DROPS Design answered:
Dag Maria,
Bij elk van de 24 markeerders meerder je 1 stokje en dat doe je eerst om de toer (dus de ene toer wel en de andere toer niet) 5 keer in totaal, dus dan heb je 10 toeren gehaakt. Daarna doe je dit elke 4e toer, dus 3 toeren niet en de 4e toer wel en dit doe je 3 keer. Dus dat zijn 12 toeren. In totaal heb je dan 22 toeren gehaakt.
19.07.2021 - 07:29In jeder 2. R 5-6-6-5-5-6 x und in jeder 4. R 2-2-2-3-3-3 x – ZUNAHMETIPP lesen (= 221-252-264-288-300-350 Stb). Dann 1 R häkeln und dabei 14-7-7-7-19-5 Stb gleichmäßig verteilt zunehmen (jedoch nicht verstehe ich leider nicht
21.06.2021 - 13:34DROPS Design answered:
Liebe Mary, dieses Video zeigt, wie man rechts und links - wie bei dem ZUNAHMETIPP zunimmt. Kann das Ihnen helfen?
21.06.2021 - 16:54I would like to ask if the row with single crochets and loops in A4 starts with 6 double dc for the band or is it 6 sc ? Thank you very much in advance for your reply.
30.01.2021 - 21:18DROPS Design answered:
Dear Marcella, you still work double crochets as before over each front band, start pattern with 1 dc, 2 chains before the first dc and end with 2 ch and 1 dc after the last sc (as shown in diagram). Happy crocheting!
01.02.2021 - 09:15Virkar denna i största storleken. Nu har jag precis gjort ökningen i sidan efter ca 15 cm. Men hur fortsätter jag? Enligt beskrivningen ska jag ta av tråden efter37 cm men förstår inte hur jag ska göra men ökningen. Det står "sedan virkas det vbidare som förut= 53 rapporter..." Ska jag inte använda ökningarna i sidorna?
23.07.2020 - 23:18DROPS Design answered:
Hej Annika, ikke sikker på at jeg forstår dit spørgsmål... men jo hver ökning er en ny maske og skal hækles med på næste varv.
04.08.2020 - 11:04Als ik met het lijfje ben met haken moet ik op een hoogtr 14 cm meerderen, dat snap uk nog,maar daarna staat er.haak 19 patroon her halingen van a2, moet dat niet a4 zijn.verderop hebben ze het ook steeds over a2.
29.05.2019 - 16:03DROPS Design answered:
Dag Els,
Je breit 19 herhalingen van A.2 in de breedte. Als er over A.4 gesproken wordt, zijn dat herhalingen in de hoogte.
31.05.2019 - 15:46I loved making this sweater - so easy and no seams!
12.01.2019 - 00:05Hej \r\nJeg har kastet mig over denne lækre Cardigan men mangler en forklaring på diagrammet specielt a1, a2 og a3 fårstår ikke om der skal være mellemrum eller hva der skal ske. \r\nHåber i kan hjælpe mig \r\nMvh anna
16.10.2018 - 17:55