
Catégories populaires
Vous cherchez un fil?


Poster un commentaire sur le modèle DROPS Baby 25-30
Nous aimerions connaître votre avis sur ce modèle !
Si vous souhaitez poser une question, merci de bien vouloir vérifier que vous avez choisi la bonne catégorie dans le formulaire ci-dessous afin d'accélérer la réponse. Les champs obligatoires sont indiqués par une *.
|
||||||||||
Simply Sweet |
||||||||||
|
|
||||||||||
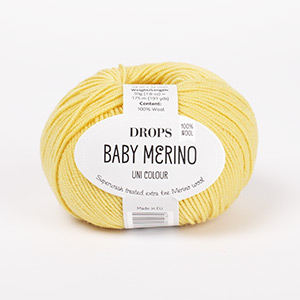
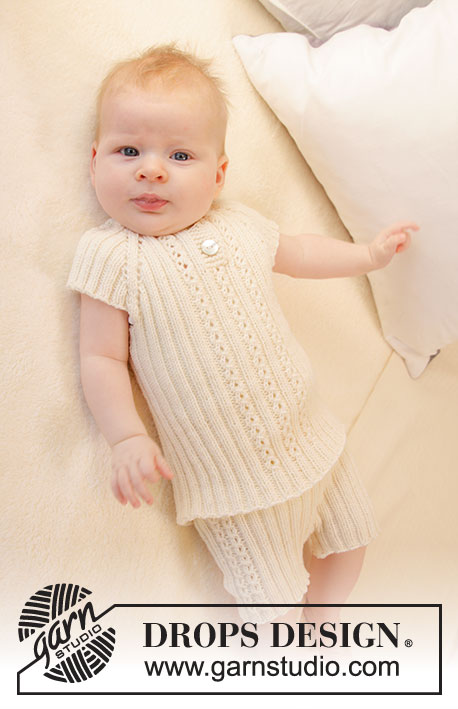
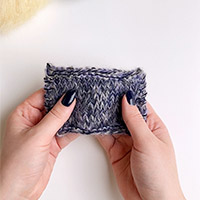
Body au tricot pour bébé, en côtes, tricoté de haut en bas, en DROPS BabyMerino. Taille préma à 4 ans.
DROPS Baby 25-30 |
||||||||||
|
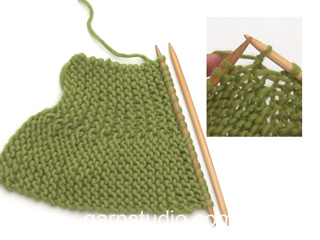
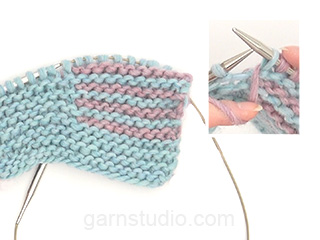
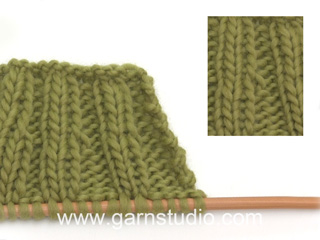
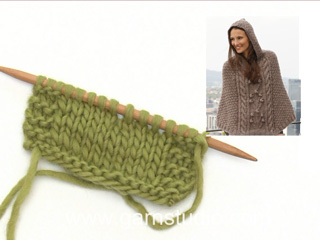
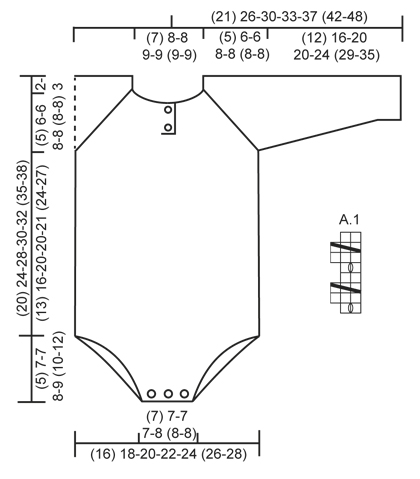
POINT MOUSSE (en en allers et retours) : Tricoter tous les rangs à l'endroit. 1 côte mousse = 2 rangs end. POINT FANTAISIE : Voir diagramme A.1. Les diagrammes montrent tous les rangs du point fantaisie, vus sur l'endroit. RAGLAN : Toutes les augmentations se font sur l'endroit. Pour augmenter 1 m de chaque côté des 4 raglans, faire 1 jeté de chaque côté des 2 m end de chaque raglan (vu sur l'endroit). Tricoter les jetés en côtes, c'est-à-dire tricoter à l'env sur l'envers les 2 premières augmentations, tricoter à l'end sur l'envers les 2 augmentations suivantes, etc.. – NOTE: ne pas tricoter les jetés torse (c'est-à-dire que l'on doit avoir des jours (trous) de chaque côté des 2 m end à chaque raglan). BOUTONNIÈRES : Ouvrir les boutonnières sur la bordure devant droit. 1 boutonnière = tricoter ens à l'end la 3ème et la 4ème m à partir du bord et faire 1 jeté (ouvrir les boutonnières sur l'envers). Emplacement des boutonnières (en cm de hauteur totale): TAILLE (prématuré): 1 et 3 cm. TAILLE 0/1 mois + 1/3 mois : 1 et 4 cm. TAILLE 6/9 mois + 1218 mois : 1 et 4½ cm. TAILLE (2 ans + 3/4 ans): 1 et 5 cm. DIMINUTIONS 1 (ouverture pour les jambes) : Diminuer à 3 m au point mousse du bord. SUR L'ENDROIT : Diminuer ainsi après 3 m au point mousse : 2 m ens torse à l'env. Diminuer ainsi avant 3 m au point mousse (commencer quand il reste 5 m): 2 m ens à l'env. SUR L'ENVERS : Diminuer après 3 m au point mousse ainsi : 2 m ens torse à l'end. Diminuer ainsi avant 3 m au point mousse (commencer quand il reste 5 m): 2 m ens à l'end. DIMINUTIONS 2 (manches): Tricoter jusqu'à ce qu'il reste 3 m avant le marqueur, tricoter 2 m ens (en côtes), tricoter 2 m (le marqueur se trouve entre ces 2 m) et puis tricoter 2 m ens torse (en côtes). ---------------------------------------------------------- DOS & DEVANT: Se tricote de haut en bas, en allers et retours sur l'aiguille circulaire jusqu'après la fente d'encolure, puis en rond sur aiguilles doubles pointes/aiguille circulaire avant de diviser l'ouvrage pour les jambes. Les manches se tricotent en rond sur aiguilles doubles pointes. EMPIÈCEMENT : Monter (54) 60-60-64-74 (74-74) m (y compris 6 m de bordure devant de chaque côté) avec l'aiguille circulaire 3.5 en Baby Merino naturel. Tricoter 2 CÔTES MOUSSE - voir ci-dessus (1er rang = sur l'endroit). Tricoter ensuite une ré-hausse pour l'encolure dos ainsi (1er rang = sur l'endroit): Tricoter à l'end jusqu'à ce qu'il reste (6) 8-8-8-10 (10-10) m, tourner, serrer le fil et tricoter le rang retour jusqu'à ce qu'il reste (6) 8-8-8-10 (10-10) m de l'autre côté. Tourner l'ouvrage, serrer le fil et continuer jusqu'à ce qu'il reste (12) 16-16-16-20 (20-20) m, tourner l'ouvrage, serrer le fil et tricoter le rang retour jusqu'à ce qu'il reste (12) 16-16-16-20 (20-20) m de l'autre côté. Tourner l'ouvrage, serrer le fil et continuer jusqu'à ce qu'il reste (18) 24-24-24-30 (30-30) m, tourner, serrer le fil et continuer jusqu'à ce qu'il reste (18) 24-24-24-30 (30-30) m de l'autre côté. Tourner l'ouvrage, serrer le fil et tricoter les mailles restantes du rang. Tricoter ensuite le rang suivant ainsi sur l'envers : 6 m end (= bordure devant), tricoter à l'envers les (42) 48-48-52-62 (62-62) m suiv, EN MÊME TEMPS, répartir (32) 26-42-38-44 (60-60) m augmentations au-dessus de ces mailles et terminer par 6 m end (= bordure devant) (ne pas oublier les BOUTONNIÈRES sur la bordure devant – voir ci-dessus) = on a (86) 86-102-102-118 (134-134) m. TRICOTER LE RANG SUIVANT AINSI SUR L'ENDROIT: TAILLE(prématuré) + 0/1 mois : 6 m de bordure devant au POINT MOUSSE – voir ci-dessus, 2 m end, 2 m env, A.1 (= 2 m), 2 m env, 2 m end (placer 1 marqueur entre ces 2 m = raglan), *2 m env, 2 m end*, répéter de *-* 3 fois au total, 2 m env, 2 m end (placer 1 marqueur entre ces 2 m = raglan), *2 m env, 2 m end*, répéter de *-* 5 fois au total, 2 m env, 2 m end (placer 1 marqueur entre ces 2 m = raglan), *2 m env, 2 m end*, répéter de *-* 3 fois au total, 2 m env, 2 m end (placer 1 marqueur entre ces 2 m = raglan), 2 m env, A.1 (= 2 m), 2 m env, 2 m end et 6 m de bordure devant au POINT MOUSSE. TAILLE 1/3 mois + 6/9 mois + 12/18 mois: 6 m de bordure devant au POINT MOUSSE – voir ci-dessus, 2 m end, 2 m env, A.1 (= 2 m), 2 m env, 2 m end, 2 m env, 2 m end (placer 1 marqueur entre ces 2 m = raglan), *2 m env, 2 m end*, répéter de *-* 3-3-5 fois au total, 2 m env, 2 m end (placer 1 marqueur entre ces 2 m = raglan), *2 m env, 2 m end*, répéter de *-* 7 fois au total, 2 m env, 2 m end (placer 1 marqueur entre ces 2 m = raglan), *2 m env, 2 m end*, répéter de *-* 3-3-5 fois au total, 2 m env, 2 m end (placer 1 marqueur entre ces 2 m = raglan), 2 m env, 2 m end, 2 m env, A.1 (= 2 m), 2 m env, 2 m end et 6 m de bordure devant au POINT MOUSSE. TAILLE(2 ans + 3/4 ans): 6 m de bordure devant au POINT MOUSSE – voir ci-dessus, **2 m end, 2 m env, A.1 (= 2 m), 2 m env**, répéter de **-** 2 fois au total, 2 m end (placer 1 marqueur entre ces 2 m = raglan), *2 m env, 2 m end*, répéter de *-* 5 fois au total, 2 m env, 2 m end (placer 1 marqueur entre ces 2 m = raglan), *2 m env, 2 m end*, répéter de *-* 9 fois au total, 2 m env, 2 m end (placer 1 marqueur entre ces 2 m = raglan), *2 m env, 2 m end*, répéter de *-* 5 fois au total, 2 m env, 2 m end (placer 1 marqueur entre ces 2 m = raglan), ** 2 m env, A.1 (= 2 m), 2 m env, 2 m end **, répéter de **-** 2 fois au total et terminer par 6 m de bordure devant au POINT MOUSSE. TOUTES LES TAILLES: Continuer ainsi, en allers et retours. EN MÊME TEMPS, au rang suivant sur l'endroit, augmenter pour le RAGLAN – voir ci-dessus (= 8 augmentations). Répéter ces augmentations encore (7) 7-7-11-11 (11-11) fois tous les 2 rangs/tours (c'est-à-dire tous les rangs sur l'endroit) = (8) 8-8-12-12 (12-12) augmentations au total de chaque côté de chaque raglan). EN MÊME TEMPS, à (4) 5-5-6-6 (7-7) cm de hauteur totale, les bordures sont terminées et on continue en rond ainsi (ajuster pour que le rang suivant soit tricoté sur l'endroit): Placer l'ouvrage en mettant les mailles de la bordure devant droit au-dessus (ainsi les bordures des devants sont l'une au-dessus de l'autre et les boutonnières sont au bord). Tricoter 1 tour en rond EN MÊME TEMPS, tricoter ens 2 par 2 à l'end les 6 m de la bordure devant droit avec celle de la bordure devant gauche, tricoter les mailles restantes du tour, couper le fil et commencer le tour suivant au milieu dos. Continuer en côtes et point fantaisie, en rond, EN MÊME TEMPS, continuer à augmenter pour le raglan comme avant mais tricoter les 6 m du milieu devant ainsi: 2 m env, A.1 (= 2 m) et 2 m env. Après la dernière augmentation pour le raglan, on a (144) 144-160-192-208 (224-224) m. Tricoter encore (0) 2-2-2-2 (2-2) tours comme avant, l'ouvrage mesure environ (7) 8-8-10-11 (11-11) cm à partir de l'épaule. Au tour suivant, glisser en attente les (32) 32-32-40-48 (48-48) m entre chaque marqueur au-dessus des manches sur des arrêts de mailles (tricoter les mailles avant de les glisser sur l'arrêt de mailles) = il reste (40) 40-48-56-56 (64-64) m pour le devant et le dos. DOS & DEVANT : = (80) 80-96-112-112 (128-128) m. Au tour suivant, monter SOUPLEMENT (8) 16-12-12-16 (16-20) m au-dessus des mailles en attente (emmanchures) = on a (96) 112-120-136-144 (160-168) m– MESURER DÉSORMAIS À PARTIR D'ICI ! Placer un marqueur de chaque côté (repères côtés). Continuer en côtes, en rond, comme avant (= 2 m end/2 m env) avec A.1 au milieu devant comme avant. À (13) 16-20-20-21 (24-27) cm après les emmanchures, diviser l'ouvrage aux marqueurs de chaque côté et terminer le devant et le dos séparément. DOS : = (48) 56-60-68-72 (80-84) m. Tricoter en côtes, en allers et retours comme avant, mais tricoter les 3 m de chaque côté au point mousse. EN MÊME TEMPS, diminuer 1 m à 3 m des bords de chaque côté – VOIR DIMINUTIONS 1 (= 2 diminutions). Répéter ces diminutions encore (6) 10-12-16-14 (18-14) fois tous les rangs (c'est-à-dire sur l'endroit et sur l'envers) (= (7) 11-13-17-15 (19-15) fois au total) et (5) 5-5-5-7 (7-11) fois tous les 2 rangs (c'est-à-dire tous les rangs sur l'endroit) = il reste (24) 24-24-24-28 (28-32) m. Tricoter 1 rang end sur l'endroit, EN MÊME TEMPS, répartir (8) 8-8-8-10 (10-12) diminutions = il reste (16) 16-16-16-18 (18-20) m. Tricoter 10 rangs end (= 5 côtes mousse) et rabattre souplement à l'end sur l'envers. DEVANT : = (48) 56-60-68-72 (80-84) m. Tricoter en côtes en allers et retours comme avant mais tricoter les 3 m de chaque côté au point mousse. EN MÊME TEMPS, diminuer 1 m à 3 m des bords de chaque côté – VOIR DIMINUTIONS 1 (= 2 diminutions). Répéter ces diminutions encore (11) 13-17-21-19 (23-17) fois tous les rangs (c'est-à-dire sur l'endroit et sur l'envers) = ((12) 14-18-22-20 (24-18) fois au total) et (0) 2-0-0-2 (2-8) fois tous les 2 rangs (c'est-à-dire tous les rangs sur l'endroit) = il reste (24) 24-24-24-28 (28-32) m. Tricoter 1 rang end sur l'endroit, EN MÊME TEMPS, répartir (8) 8-8-8-10 (10-12) diminutions = il reste (16) 16-16-16-18 (18-20) m. Tricoter 1 rang end sur l'envers. Au rang suivant (= sur l'endroit), ouvrir 3 boutonnières ainsi: tricoter (3) 3-3-3-3 (3-4) m end, *1 jeté, 2 m ens à l'end, (2) 2-2-2-3 (3-3) m end*, répéter de *-* encore 1 fois, 2 m ens à l'end, 1 jeté et (3) 3-3-3-3 (3-4) m end. Tricoter 4 rangs end (= 2 côtes mousse) et rabattre souplement à l'end sur l'envers. MANCHES : = (32) 32-32-40-48 (48-48) m. Monter SOUPLEMENT (8) 16-12-12-16 (16-20) m sous la manche = on a (40) 48-44-52-64 (64-68) m (tricoter en rond sur aiguilles doubles pointes). Placer 1 marqueur au début du tour (= milieu sous la manche) - MESURER DÉSORMAIS À PARTIR D'ICI. Continuer les côtes, en rond, comme avant (= 2 m end/2 m env). EN MÊME TEMPS, quand la manche mesure 1 cm, diminuer 1 m de chaque côté du marqueur - VOIR DIMINUTIONS 2. Répéter ces diminutions encore (3) 7-3-7-7 (7-7) fois tous les (4) 4-6-6-6 (8-8) rangs(= (4) 8-4-8-8 (8-8) fois au total) = il reste (32) 32-36-36-48 (48-52) m. Quand la manche mesure (12) 16-20-20-24 (29-35) cm, rabattre souplement les mailles comme elles se présentent. Tricoter l'autre manche de la même façon. ASSEMBLAGE : Fermer l'ouverture sous les manches par une couture. Coudre 2 boutons sur la bordure gauche de l'encolure et 3 boutons en bas du body. |
||||||||||
Légende diagramme(s) |
||||||||||
|
||||||||||
|
||||||||||
|
Vous avez réalisé ce modèle ou un autre de nos collections? Taguez vos photos dans les réseaux sociaux avec #dropsdesign pour que nous puissions les voir! Vous avez besoin d'aide pour ce modèle ?Vous trouverez tutoriels vidéo, une rubrique commentaires/questions et plus encore en vous rendant sur la page du modèle sur garnstudio.com © 1982-2024 DROPS Design A/S. Tous droits réservés. Ce document, y compris ces sous-sections, est protégé par les droits d'auteur (copyright). Apprenez-en davantage sur ce que vous pouvez faire avec nos modèles en bas de chacune des pages de notre site. |
||||||||||


Avec plus de 40 ans dans la conception de modèles tricot et crochet, DROPS Design offre l'une des plus vastes collections de modèles gratuits sur internet - traduits dans 17 langues. À ce jour, on compte 304 catalogues et 11422 modèles en français.
Nous nous efforçons de vous apporter le meilleur de ce que le tricot et le crochet peuvent vous offrir, inspiration et conseils mais également des fils de haute qualité à des prix incroyables! Vous souhaiteriez utiliser nos modèles autrement que pour un usage personnel? Vous pouvez lire ce que vous êtes autorisés à faire dans le Copyright en bas de page de chacun de nos modèles. Bon tricot!
Commentaires / Questions (50)
Thank you for your video it cleared my confusion If you have any tutorial video for the dec where it says twisted purl and knit dec I'll be grateful
20.01.2016 - 00:06DROPS Design answered:
Dear Mrs Syed, please have a look on the tab "Videos" at the right of the one "Materials" to find relevant videos to that pattern - and check all our videos here. Happy knitting!
20.01.2016 - 11:52And also when you said inc 16 st do you mean all at one time or what and then you said go round ribbing the body but how will you do that when in the middle we have st on the holder And also you said put marker on both the side but there is already holder there
16.01.2016 - 23:08If anybody has worked on simply sweet onesie please need some help
16.01.2016 - 18:42Under the sleeves what does that mean I have 32 st for the sleeve on the holder now what does under the sleeve means and then you are talking about 80 st and then inc of 16 st under the sleeves are these front and back 40 st do you have any tutorial video for this If you can explain it I would appreciate I know I am asking too many questions sorry about that I do so much knitting but this is the most complicated one and then you are inc 16 st again under the sleeves when you would do sleeves
16.01.2016 - 18:03DROPS Design answered:
Dear Nasreen, the video below is a standard tutoriel for top down jumper - you will figure out how to place sts for sleeve on a thread/st holder and how to cast on new sts for armhole (under sleeve). Happy knitting!
18.01.2016 - 13:58Hi I am so confuse here first I want to know how are we joining the work with button band on top of each other Secondly when you come to the point where you slip the 32 stitches between the markers on the st holder then what do you do with it Then the first inc of 16 st under the sleeves what does that mean and there is another 2 times 16 st increase under the sleeves it's too confusing Can you please walk me through it I'll appreciate it please Thanks
16.01.2016 - 08:57DROPS Design answered:
Dear Nasreen, work tog the sts from right band with the sts from left band; K the 1st st from right band tog with the 1st st from left band, then work 2nd st from right band tog with the 2nd st from left band, etc. 2)these 32 sts are for sleeves and will be worked afterwards (see "Sleeve" in pattern) - on next round after the 32 st are on a st holder, cast on 16 sts under each sleeve for armhole. Happy knitting!
16.01.2016 - 11:21In your explanation for A1 In round 2 it p3 (k3) means I need to do both the st like p3 and k3 and the dec p2 k2 how is the devil happening
16.11.2015 - 17:07DROPS Design answered:
Dear Nasreen, when working rib in the round, as well as back and forth you will always work K over K and P over P. Remember you will get all individual assistance from your DROPS store. Happy knitting!
16.11.2015 - 17:56And also about the raglan I am doing the inc like Yo before the Kst then yo before the Kst like after the marker but the inc st are all Kst so how do I pattern them or just leave them as it is like Kst Please explain I am really appreciating your help thanks
16.11.2015 - 17:00DROPS Design answered:
Dear Nasreen, you will work the inc sts in rib : the first 2 yos will be worked P then next 2 will be worked K and so on - see "raglan" at the beg of the pattern. Happy knitting!
16.11.2015 - 18:03Thank you so much for your explanation Now I am working the pattern on the circular needle so how do I join the work and as you say in the pattern the 2 bands will come on top of each other so how that will happen and dec the band stitches how is that happening Thanks please explain it I'll appreciate sorry to bother you this much but the pattern is so precious that I really want to do it
16.11.2015 - 16:56DROPS Design answered:
Dear Nasreen, when you start to work in the round after the split for neck, work together the 6 sts from right and left band 2 by 2 (= 1 st from right front band with 1 st from left front band) until all 6 sts are worked together and continue in pattern as stated Happy knitting!
16.11.2015 - 17:54Sorry still can't understand the diagram A1 if u can specifically tell me how it is worked I'll appreciate meaning what do you mean by 2 stitches 8 rows are they being knitted or they are purl stitches it's not clearly indicated
14.11.2015 - 01:29DROPS Design answered:
Dear Nasreen, A.1 is worked either back and forth or in the round - following the pattern- as follows : Row1(from RS= = Round1): K1, YO, K1 Row 2 = from WS (Round 2): P3 (K3) Row 3 = from RS = Round3 = dec 1 st as in diagram text Row 4 from WS (Rond 4): P2 (K2) Repeat these 4 rows (from RS + WS when working back and forth) or these 4 rounds (= from RS when working in the round). Happy knitting!
16.11.2015 - 09:04It's me again Nasreen about the simply sweet pattern. Where it says A1 in the bracket it =2 what does that mean what r we doing to this 2 And the markers where r we putting them between the knit 2 and purl 2 I will really appreciate the answers I am stuck and my first grand child is about to be born Thanks
13.11.2015 - 10:04DROPS Design answered:
Dear Nasreen, diagram A.1 - see at the very bottom of the pattern - is worked over 2 sts and 8 rows. Start reading diagram at the bottom corner on the right side from the left every row from RS/every round - and from the left towards the right from WS. Happy knitting!
13.11.2015 - 14:35