
Popular categories
Looking for a yarn?


|
|
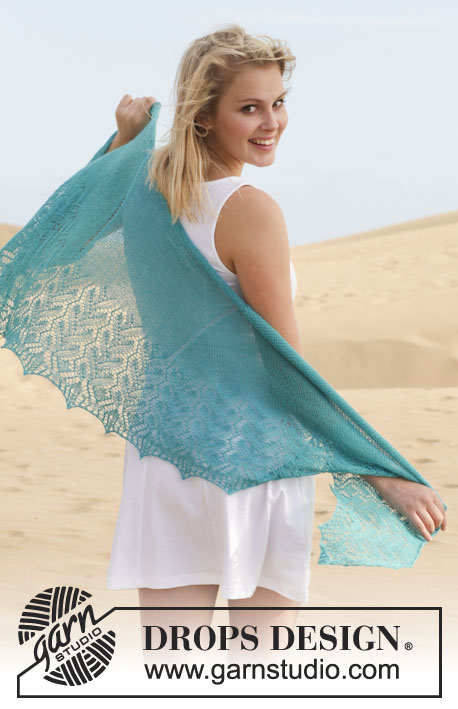
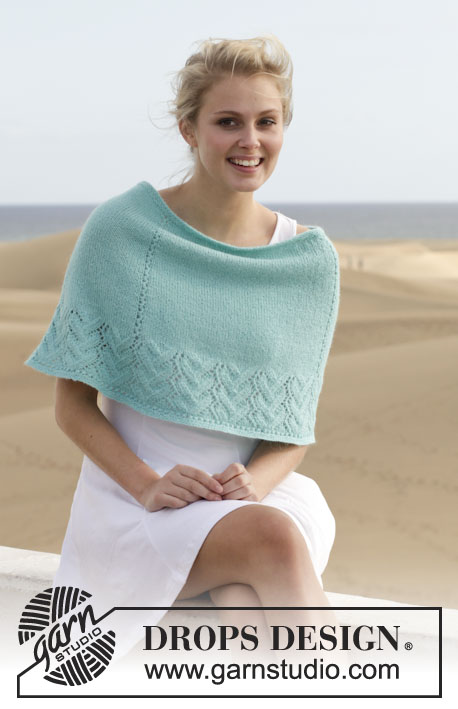
Soir d'Été |
|
 |
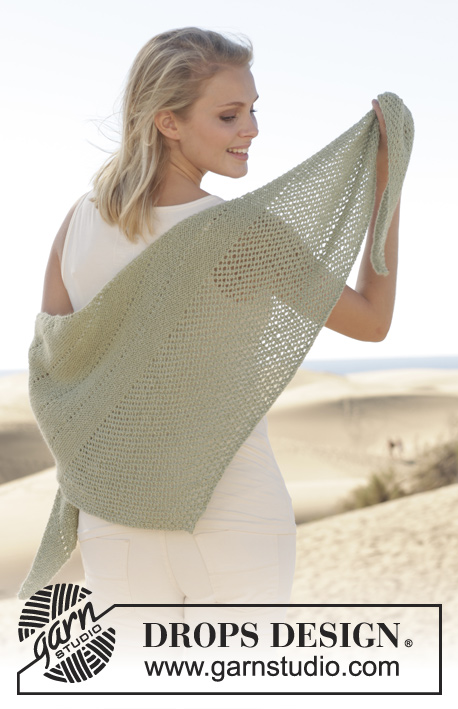 |
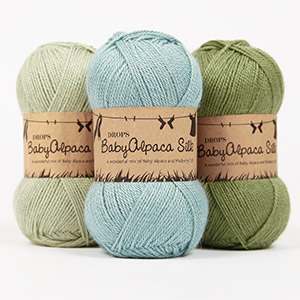
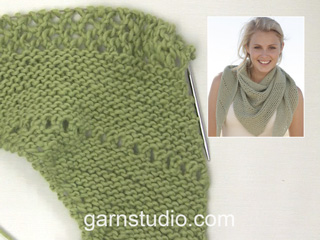
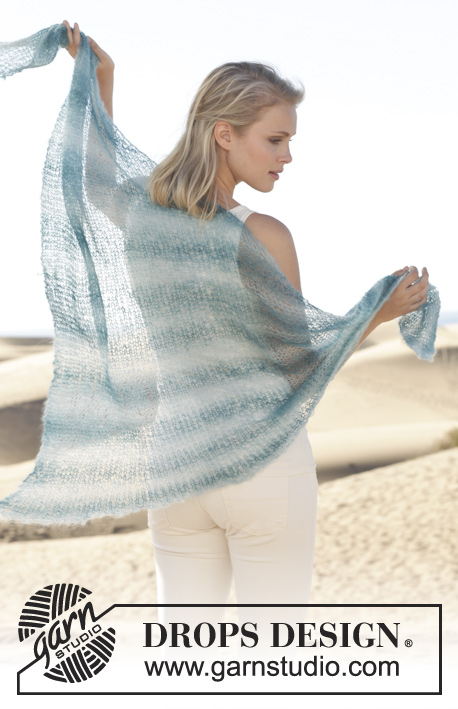
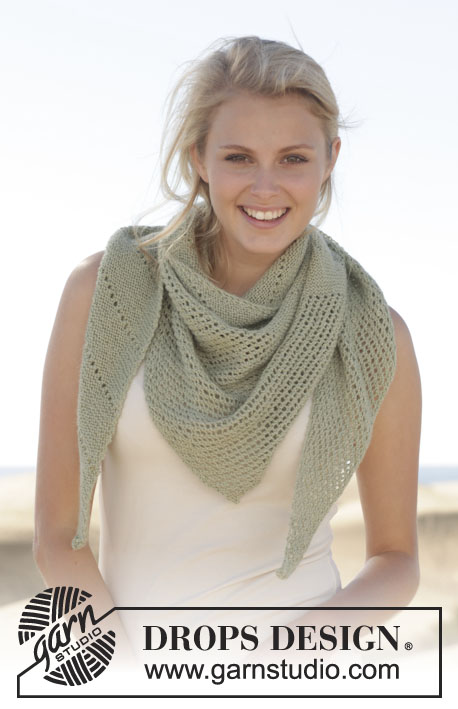
Knitted DROPS shawl in garter st with lace pattern in ”BabyAlpaca Silk”.
DROPS 152-16 |
|
|
GARTER ST (back and forth on needle): K all rows. 1 ridge = K2 rows. EYELET ROW: Work an eyelet row every 11th ridge, first eyelet row when there are 17 sts on needle. Eyelet row is always worked on 3rd row, i.e. row that beg with K 2 tog. Work eyelet row as follows: K 2 tog, * 1 YO, K 2 tog *, repeat from *-* until 1 st remains, 1 YO and K 1. LACE PATTERN: Row 1: K 2 tog, * 1 YO, K 2 tog *, repeat from *-* until 1 st remains, 1 YO and K 1. Row 2: K all sts and YO. Row 3: K 1, * K 2 tog, 1 YO *, repeat from *-* until 4 sts remain, K2, 1 YO, K 1, 1 YO and K 1. Row 4: K all sts and YO. Repeat row 1 to 4. ---------------------------------------------------------- SHAWL: Worked back and forth on circular needle. Cast on 3 sts on circular needle size 3.5 mm / US 4 with BabyAlpaca Silk and K 1 row. Then work in GARTER ST - see explanation above, as follows: ROW 1: K 1, 1 YO, K 1, 1 YO and K 1 = 5 sts. ROW 2: K all sts. ROW 3: K 2 tog (loosely), K until 1 st remains, 1 YO and K 1. This row is replaced with eyelet row every 11th ridge. ROW 4: K all sts. ROW 5: Work until 2 sts remain, 1 YO, K 1, 1 YO and K 1. Then repeat rows 2 to 5 until there are 17 sts on needle. ** Continue as before, but replace 3rd row with EYELET ROW - see explanation above. Then work as before in garter st and with inc/dec as before without eyelet row until 12 new sts have been inc ** = 29 sts on needle. Repeat from **-** until 11 eyelet rows have been worked (12 new sts inc). Work eyelet row when there are: 17, 29, 41, 53, 65, 77, 89, 101, 113, 125 and 137 sts on needle. Continue in garter st with inc/dec as before until there are 149 sts on needle, then work LACE PATTERN - see explanation above. Repeat rows 1 to 4 of lace pattern until piece measures approx. 106 cm / 41¾" measured along needle/short side. Finish after 2nd or 4th row in lace pattern and loosely bind off with K sts. Cut and fasten the yarn. |
|
|
Have you made this or any other of our designs? Tag your pictures in social media with #dropsdesign so we can see them! Do you need help with this pattern?You'll find tutorial videos, a Comments/Questions area and more by visiting the pattern on garnstudio.com. © 1982-2024 DROPS Design A/S. We reserve all rights. This document, including all its sub-sections, has copyrights. Read more about what you can do with our patterns at the bottom of each pattern on our site. |
|


With over 40 years in knitting and crochet design, DROPS Design offers one of the most extensive collections of free patterns on the internet - translated to 17 languages. As of today we count 304 catalogs and 11422 patterns - 11417 of which are translated into English (US/in).
We work hard to bring you the best knitting and crochet have to offer, inspiration and advice as well as great quality yarns at incredible prices! Would you like to use our patterns for other than personal use? You can read what you are allowed to do in the Copyright text at the bottom of all our patterns. Happy crafting!
Comments / Questions (77)
Tar tilbake min tidligere kommentar ang. garn mengde.. Jeg som brukte annet garn og ikke tenkte på om de hadde samme antall meter.
29.04.2021 - 22:22Dobry den, v popisu je chyba v prekladu. Dirkovy vzor, 3.rada: "opakujeme po poslední 4 oka, 2 oka spleteme hladce, 1x nahodíme, 1 oko upleteme hladce, 1x nahodíme, 1 oko upleteme hladce." 2 oka se nemaji "splest hladce", ale uplest hladce, kazde samostatne. tj, preklad by mohl byt:" opakujeme po poslední 4 oka, 2 oka hladce, 1x nahodíme, 1 oko upleteme hladce, 1x nahodíme, 1 oko upleteme hladce."
07.03.2021 - 23:14DROPS Design answered:
Dobrý den, Beo, díky za upozornění - opraveno! Hana
08.03.2021 - 06:41Holder på med denne nå, og kjøpte inn 200gr som oppskriften sier. Kommer bare ca halvveis ut i hullmønster.. Vil anbefale at dere endrer oppskrift til 250gr, da jeg tror det kan være mer passende. Med mindre det er jeg som har gjort noe feil da, strikket for stramt eller noe. Ellers et veldig fint sjal! Skal helt klart lage et til!
23.02.2021 - 23:30Når jeg har 149 m på pinnen og skal begynne med hullmønster, kan jeg fortsette resten av sjalet med hullrad i stedet?
14.08.2020 - 07:35DROPS Design answered:
Hej Wenche, Ja det kan du gøre som du vil :)
20.08.2020 - 08:143. řada dírkového vzoru je chybně přeložena. * 2 splést hladce, 1 nahodíme* po poslední 2 oka, 1 nahodit, 1 hladce, 1 nahodit, 1 hladce... pak by bylo nahození 2 x za sebou. Správně i podle videa a anglického návodu je: * 2 splést hladce, 1 nahodíme* po poslední 4 oka, pak 2 hladce, 1 nahodit, 1 hladce, 1 nahodit, 1 hladce.
15.06.2020 - 16:57DROPS Design answered:
Dobrý den, Moniko, díky za upozornění - opraveno! Hana
16.06.2020 - 22:13I have a question about Row 2 and Row 4 on the lace pattern on the Soir d'Ete pattern. Does 'K all sts and YO' mean the knit all stitches in the row and then do a yarn over at the very end? Or does it mean to knit then yarn over, knit then yarn over, until the end of the row.
08.05.2020 - 05:01DROPS Design answered:
Hi Donna, This means that on rows 2 and 4 you knit all stitches including the yarn overs. The straight knitting of the yarn overs leaves you with the holes in the lace pattern. Happy crafting!
08.05.2020 - 07:54J’aimerais savoir lorsque nous devrions avoir la longueur totale demandée. Combien devrions-nous avoir de mailles totale Merci!
28.03.2020 - 11:47DROPS Design answered:
Bonjour Suzanne, tout dépendra de votre tension en hauteur, le nombre de mailles n'est ici pas important, ce qui compte c'est de bien augmenter comme indiqué et d'arrêter à la hauteur indiquée (ou celle que vous souhaitez). Bon tricot!
30.03.2020 - 09:34Buonasera ,sono arrivata a 149 maglie,ho iniziato il motivo traforato e ha parte il primo ferro n.1 che ho finito come descritto cioè: " finché non rimane 1m,1m gettata e 1m dir." ora continuando ogni volta che arrivo al ferro 1,dopo aver lavorato le m 2,3,4 alla fine del ferro mi rimangono 2 m: ho rifatto più volte tutto il passaggio ma rimane sempre cosi. Dove baglio????? grazie
30.07.2019 - 17:28DROPS Design answered:
Buonasera Miriam, è sicura di lavorare correttamente il ferro 3? Su questo ferro vengono aumentate 2 maglie, che formeranno una ripetizione in più di * 1 m gettata, 2 m insieme a dir * del 1° ferro. Buon lavoro!
30.07.2019 - 19:12I now have 149 stitches and need to start lace but it seems that I should knit one row prior to starting row 1 of the lace or eyelet edge will be on the opposite side. Is this correct?
09.06.2019 - 02:28DROPS Design answered:
Dear Mrs Alden, the row 1 from the lace pattern has to be worked from RS, so that if you get 149 sts at the end of last RS row, work the WS row so that the lace pattern starts from RS with 149 sts. Happy knitting!
11.06.2019 - 10:46Na 291 toeren zit ik op 149 steken. In de laatste toer heb ik dan dus 2 steken gemeerderd (=de meerderen van naald 5: brei tot 2 st over zijn, 1 omslagdoek, 1 st r, 1 omslagdoek en 1 st r). Normaal gesproken wordt deze toer gevolgd door toer 2: brei alle st recht. Moet ik dat nu ook doen? En pas daarna aan het kantpatroon beginnen? In afwachting van uw reactie, Hartelijke groet, Petra Nobel
08.05.2019 - 18:07DROPS Design answered:
Dag Petra,
Ja, je breit inderdaad eerst weer een naald recht (terug) voordat je aan het kantpatroon begint.
09.05.2019 - 20:03