
Popular categories
Looking for a yarn?


|
||||||||||||||||||||||
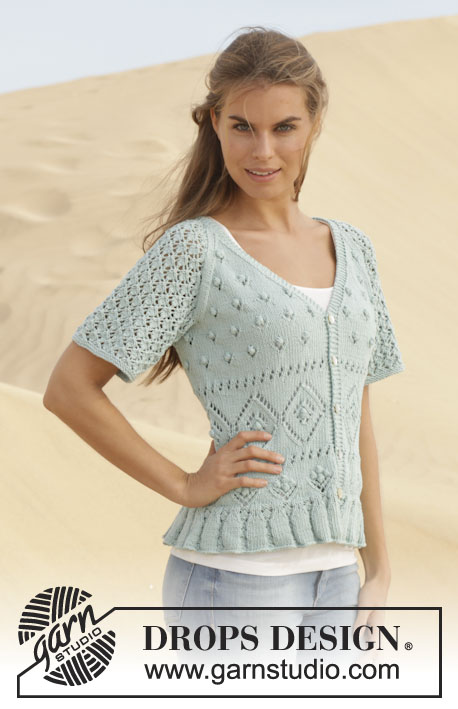
Lemon Shrug |
||||||||||||||||||||||
 |
 |
|||||||||||||||||||||
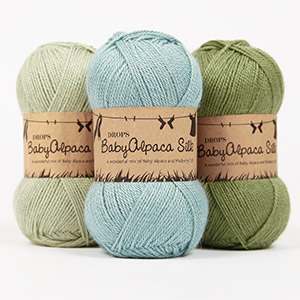
Knitted DROPS bolero with lace pattern in ”BabyAlpaca Silk”. Size: S - XXXL.
DROPS 152-14 |
||||||||||||||||||||||
|
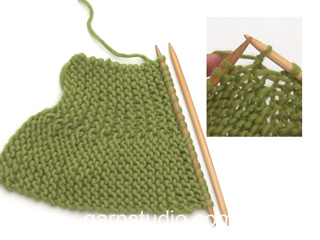
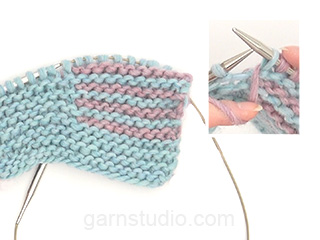
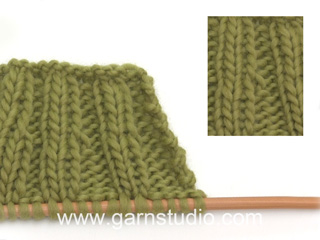
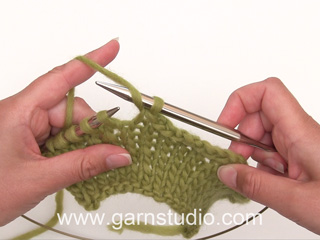
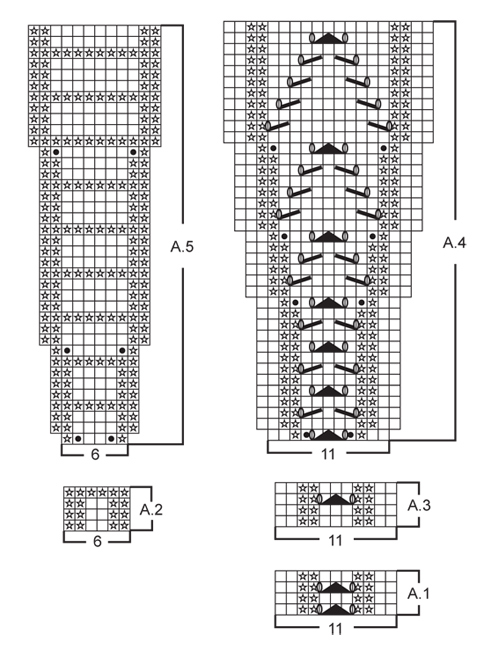
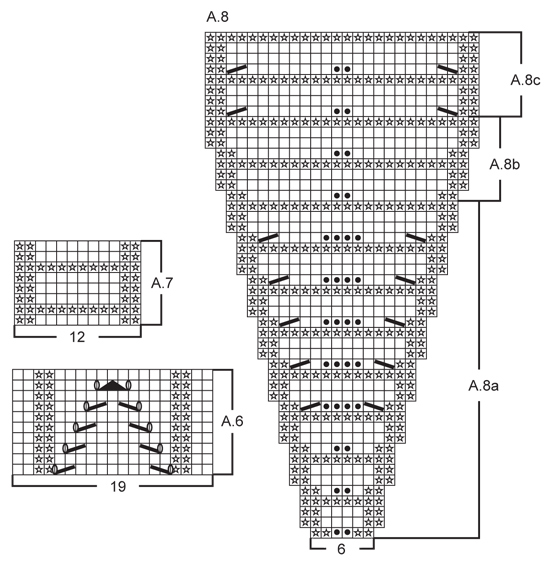
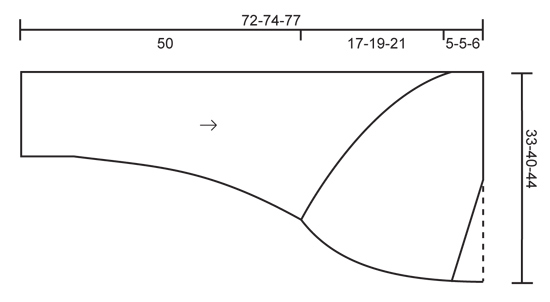
GARTER ST (back and forth on circular needle): K all rows. 1 ridge = K2 rows. PATTERN: See diagrams A.1 to A.8. The diagrams show all rows in pattern seen from RS. ---------------------------------------------------------- BOLERO: Worked in 2 parts from edge of sleeve to mid back. Then the 2 parts are sewn tog mid back Pick up an edge in rib around the opening of bolero. RIGHT SIDE: Worked back and forth on circular needle from bottom of sleeve. Cast on 98-115-132 sts (includes 1 edge st in each side) on circular needle size 2.5 mm / US 1.5 with BabyAlpaca Silk. P 1 row from WS. Work next row as follows from RS: 1 edge st in GARTER ST – see explanation above, * K 2, P 2, K 3, P 2, K 2, P 2, K 2, P 2 *, repeat from *-* 5-6-7 times in total, then * K 2, P 2, K 3, P 2, K 2 *, repeat from *-* 1 time in total and finish with 1 edge st in garter st. Continue rib like this. When piece measures 10 cm / 4", switch to circular needle size 3 mm / US 2.5. Work next row as follows from RS: 1 edge st in garter st, * A.1 (= 11 sts), A.2 (= 6 sts) *, repeat from *-* 5-6-7 times in total, then A.1 (= 11 sts) 1 time in total, finish with 1 edge st in garter st. Continue like this until A.1 has been worked for 5 cm / 2" (piece measures approx. 15 cm / 6"). Now work A.3 instead of A.1 (continue A.2 as before). When piece measures 50 cm / 19¾", insert 1 marker in piece. Work next row as follows from RS: 1 edge st in garter st, * A.4 (= 11 sts), A.8 (= 6 sts) *, repeat from *-* 2-3-3 times in total, ** A.4 (= 11 sts), A.5 (= 6 sts) **, repeat from **-** 3-3-4 times in total and finish with A.4 1 time and 1 edge st in garter st. Continue pattern like this. When A.4/ A.5 has been worked 1 time vertically, there are 196-237-268 sts on needle and piece measures approx. 12 cm / 4¾" from marker. Then work A.6 instead of A.4 and A.7 instead of A.5 (continue diagram A.8 as follows: Work A.8b 1 time and continue with A.8c). When A.8b has been worked 1 time vertically, there are 204-249-280 sts on needle. When piece measures 17-19-21 cm / 6¾"-7½"-8¼" from marker, slip the first 110-136-155 sts on needle from RS on 1 stitch holder (work sts before slipping them on holder) = right front piece. There are now 94-113-125 sts on needle for back. Insert another marker (side seam is seamed up to this marker) and continue pattern back and forth over back sts. When piece measures 2-2-3 cm / ¾"-¾"-1⅛" from marker, slip 10 sts on 1 stitch holder 5 times in total from bottom of back and up towards neck every other row (i.e. at beg of every row from WS - work sts before slipping them on holder to avoid cutting the yarn) = 44-63-75 sts remain on needle. Switch to circular needle size 2.5 mm / US 1.5 and slip all sts from stitch holder back on needle AT THE SAME TIME work the rest of row from RS = 94-113-125 sts. P 1 row from WS while AT THE SAME TIME inc 10 sts evenly = 104-123-135 sts. Work 1 ridge in garter st over all sts. Slip the first 48-59-63 sts at the top of neck on 1 stitch holder (work sts before slipping them on holder). Then continue in garter st back and forth over the 56-64-72 sts AT THE SAME TIME work short rows as follows: ROW 1 (= RS): K 56-64-72 (from middle of back to bottom edge), turn piece. ROW 2 (= WS): K from bottom edge until 2 sts remain on needle (i.e. towards middle of back), turn piece. ROW 3 (= RS): K 54-62-70 sts, turn piece. ROW 4 (= WS): K from bottom edge until 4 sts remain on needle, turn piece. ROW 5 (= RS): K 52-60-68 sts, turn piece. ROW 6 (= WS): K from bottom edge until 6 sts remain on needle, turn piece. Continue like this until 1 ridge has been worked only over the outermost 2 sts at the bottom of back piece = 28-32-36 ridges. Then work 1 ridge over all 104-123-135 sts (also sts on stitch holder), loosely bind off. Bolero has now been worked until mid of back, i.e. half way. LEFT SIDE: Cast on and work as right side but reversed. I.e. when sts on front piece are slipped on a stitch holder, this is done from WS (not RS) and when sts from back are slipped on stitch holder, this is done at beg of every row from RS (not WS). ASSEMBLY: Sew sleeve seams edge to edge in outer loops of edge sts up to marker at 50 cm / 19¾", then sew side seams, i.e. continue sleeve seam so that the side on front piece is sewn towards the side on back piece up to marker. Sew back seam. RIB: Pick up sts along the opening of bolero - i.e. up along right front piece, back of neck, down along left front piece and then along back piece as follows: Pick up from RS approx. 340 to 380 sts (includes sts on stitch holders) on circular needle size 2.5 mm / US 1.5 and work in the round on needle as follows: P 1 round, then K 1 round while AT THE SAME TIME inc evenly to 390-416-468 sts. Continue to work rib as follows: * Work A.3 (= 11 sts), P 2 *, repeat from *-* the entire round. When rib measures 3 cm / 1", inc every 3rd P-section to 3 P sts = 420-448-504 sts. Repeat inc when edge measures 7 cm / 2¾", but displace inc so that there now are 2 sections with 3 P sts between every section with 2 P = 450-480-540 sts. When edge measures 8 cm / 3⅛", loosely bind off with K over K and P over P - NOTE: To avoid a tight bind-off edge, 1 YO after approx. every 6th or 12th st can be made and bind off as a regular st. |
||||||||||||||||||||||
Diagram explanations |
||||||||||||||||||||||
|
||||||||||||||||||||||
|
||||||||||||||||||||||
|
||||||||||||||||||||||
|
||||||||||||||||||||||
|
Have you made this or any other of our designs? Tag your pictures in social media with #dropsdesign so we can see them! Do you need help with this pattern?You'll find tutorial videos, a Comments/Questions area and more by visiting the pattern on garnstudio.com. © 1982-2024 DROPS Design A/S. We reserve all rights. This document, including all its sub-sections, has copyrights. Read more about what you can do with our patterns at the bottom of each pattern on our site. |
||||||||||||||||||||||


With over 40 years in knitting and crochet design, DROPS Design offers one of the most extensive collections of free patterns on the internet - translated to 17 languages. As of today we count 304 catalogs and 11422 patterns - 11417 of which are translated into English (US/in).
We work hard to bring you the best knitting and crochet have to offer, inspiration and advice as well as great quality yarns at incredible prices! Would you like to use our patterns for other than personal use? You can read what you are allowed to do in the Copyright text at the bottom of all our patterns. Happy crafting!
Comments / Questions (30)
Hallo, verstehe ich die Muster richtig: die Reiehen sind mal eine Hin-Reihe dann eine Rück-Reihe? zB.beim Muster A.1 stricke ich die Hin-Reihe mit den Umschlägen+Abheben, die 2. Zeile des Musters ist dann die Rückreihe,und die 3. Reihe ist dann schon wieder mit Umschlägen? Herzlichen Dank im Voraus
13.03.2014 - 15:46DROPS Design answered:
Liebe Tomm, ja das ist richtig. In unseren Diagrammen wird jede Reihe dargestellt.
17.03.2014 - 12:17Tak for svar. Måske i også skulle kikke på en bedre forklaring på slutribben rundt om hele stykket. Det er ikke til at forstå hvad I mener mht til udtagningen af vrang masker. Når jeg nærstudere billedet ser det ud som om udtagningerne er foretaget på hver sin side af mønsteret, men det ikke det der står i teksten. Bedste hilsner Jette Bjærge
05.03.2014 - 21:11DROPS Design answered:
Hej Jette. Det er ikke tydeligt at se paa billedet, men der er taget ud i hver tredje vrang-rapport. Ved 7 cm skal du tage ud igen, denne gang forskyder du - altsaa du tager den vrang-rapport med 2 m ved siden af den med 3, saa du naar er faerdig har 2 vrang-rapporter med 3 vr ved siden af hinanden med 1 vrang-rapport med 2 vr imellem.
07.03.2014 - 11:10Jeg er igang med denne opskrift. Jeg er i tvivl om jeg skal fortsætte A 8 med 22 masker i glat med 1 vrang på retsiden hver 4. pind til jeg har gjort A4 og A5 færdig og derefter fortsætte med B8 når A4 erstattes af A6 og A5 af A7 MVH Jette Bjærge
16.02.2014 - 22:58DROPS Design answered:
Hej Jette. Du skal fortsaette med A.8b naar du har strikket A.8a, strik b 1 gang og fortsaet da med c. Kan godt forstaa din forvirring, saa vi skal nok lige skrive det lidt om.
21.02.2014 - 10:50Ich habe 135 Maschen für den Arm aufgenommen. Ich finde das Bündchen ziemlich weit. Bei anderen Strickmustern mit langen Armen werden nur so um die 40-60 Maschen aufgenommen. Bevor ich jetzt weiter stricke würde ich gerne wissen, ob es wirklich 132 Maschen sind. Vielen Dank :-)
27.01.2014 - 19:49DROPS Design answered:
Liewbe Nicole, die Maschenzahl ist auch beim Originalmodell so - durch das Muster zieht sich das Strickstück stark zusammen.
28.01.2014 - 07:57Sarah Guthrie wrote:
Love the shape of this and the interesting combination of stitches,would look great over a dress on a chilly English evening.
08.01.2014 - 20:13è favoloso
28.12.2013 - 12:29Jyotsna wrote:
I LOVE THIS PATTERN .CAN YOU GIVE ME THIS PATTERN FOR ME?
16.12.2013 - 19:46Very pretty! I wish the underarms would fit better.
12.12.2013 - 21:08This one better make it in, its kinda like the one in the winter patterns that didnt make it,its beautiful.
12.12.2013 - 17:54Très joli boléro qui pourrait convenir à toutes les saisons.
11.12.2013 - 14:20