
Popular categories
Looking for a yarn?


|
|
Miss Spring |
|
 |
 |
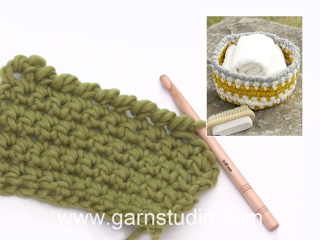
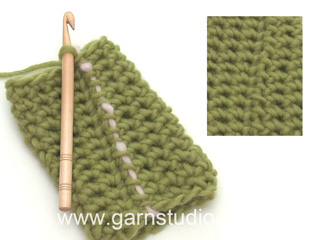
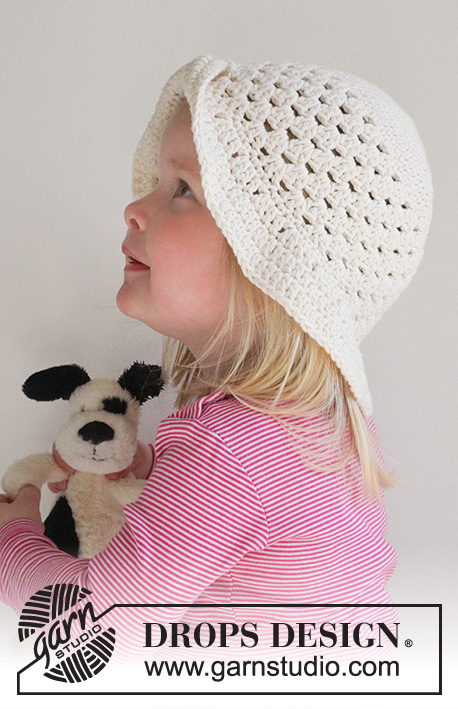
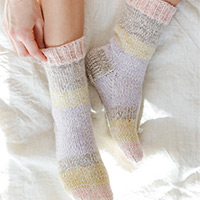
Crochet cap for children in DROPS Nepal.
DROPS Children 24-16 |
|
|
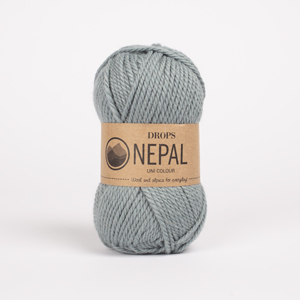
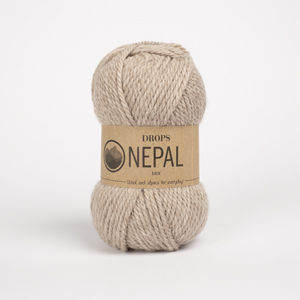
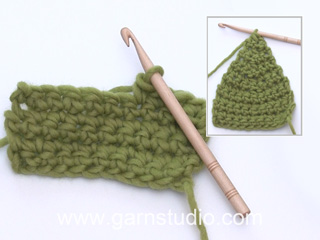
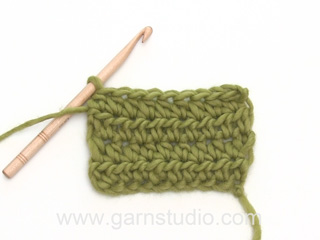
US/UK: This pattern is in US English. There are different crochet terms in British and US English. Conversion - see page 4. CROCHET INFO: Replace first sc on every round with 1 ch. Finish every round with 1 sl st in ch from beg of round. DECREASE TIP: * Insert hook in next st, get yarn *, repeat from *-* one more time, make a YO and pull yarn through all 3 sts on hook. REVERS CROCHET: Work as sc but backwards. I.e. crochet around from left to right ---------------------------------------------------------- CAP: Read US/UK above! Ch 4 on hook size 6 mm / J/10 with Nepal and form a ring with 1 sl st in 1st ch. ROUND 1: Work 6 sc in ch-ring. READ CROCHET INFO! ROUND 2: 2 sc in every sc = 12 sc. REMEMBER THE CROCHET TENSION/GAUGE! ROUND 3: * 1 sc in first sc, 2 sc in next sc *, repeat from *-* = 18 sc. ROUND 4: * 1 sc in each of the first 2 sc, 2 sc in next sc *, repeat from *-* = 24 sc. ROUND 5: * 1 sc in each of the first 3 sc, 2 sc in next sc *, repeat from *-* = 30 sc. ROUND 6: * 1 sc in each of the first 4 sc, 2 sc in next sc *, repeat from *-* = 36 sc. ROUND 7: * 1 sc in each of the first 5 sc, 2 sc in next sc *, repeat from *-* = 42 sc. ROUND 8: * 1 sc in each of the first 6 sc, 2 sc in next sc *, repeat from *-* = 48 sc. ROUND 9: * 1 sc in each of the first 7 sc, 2 sc in next sc *, repeat from *-* = 54 sc. ROUND 10: * 1 sc in each of the first 8 sc, 2 sc in next sc *, repeat from *-* = 60 sc. ROUND 11: * 1 sc in each of the first 9 sc, 2 sc in next sc *, repeat from *-* = 66 sc. ROUND 12: Work 1 sc in every sc while at the same time inc 0-2-6 sc evenly = 66-68-72 sc. ROUND 13-17: 1 sc in every sc. ROUND 18: Work 1 sc in every sc while at the same time dec 5-4-5 sc evenly = 61-64-67 sc - READ DECREASE TIP. Continue with 1 sc in every sc until hat measures 16-17-18 cm / 6 1/4"-6 3/4"-7". BRIM: Then work brim over the middle 14-16-16 sts at the front (i.e. in opposite side of beg of round) at follows: ROW 1: Work 1 sc in every sc. Turn piece. ROW 2: Work ch 1, 2 sc in first sc, 1 sc in each of the next 12-14-14 sc and 2 sc in last sc = 16-18-18 sc. Turn piece. ROW 3: Work ch 1, 3 sc in first sc, 1 sc in every sc until last sc, 3 sc in last sc, 1 sl st in the next free sc from hat edge to fasten the brim for hat = 20-22-22 sc. Turn piece. ROW 4: Work ch 1, 3 sc in first sc, 1 sc in every sc until last sc, 3 sc in last sc, 1 sl st in the next free sc from hat edge as on row 3 = 24-26-26 sc. Turn piece. ROUND 5: Work ch 1, 1 sc in every sc over the entire brim and continue around the entire hat. ROUND 6: Work REVERSE CROCHET – see explanation above, around the entire hat and the brim. Fasten off. CROCHET FLOWER: Ch 6 on hook size 6 mm / J/10 with cerise and form a ring with 1 sl st in first ch. ROUND 1: ch 2 (= first hdc), 2 hdc in ch-ring, * ch 5, 1 sc in last hdc made, 3 hdc in ch-ring *, repeat from *-* a total of 5 times and finish with 5 ch and 1 sl st in 2nd ch from beg of round = 6 ch-spaces with 3 hdc between each. Fasten off. ROUND 2: Switch to red. Work 1 sc in the middle of the first 3 hdc on round, * 10 dc in ch-space, skip 1 hdc, 1 sc in next hdc, skip 1 hdc *, repeat from *-* the entire round and finish with 1 sl st in first sc from beg of round. Fasten off. Sew the flower to the side of the cap. |
|
|
Have you made this or any other of our designs? Tag your pictures in social media with #dropsdesign so we can see them! Do you need help with this pattern?You'll find tutorial videos, a Comments/Questions area and more by visiting the pattern on garnstudio.com. © 1982-2024 DROPS Design A/S. We reserve all rights. This document, including all its sub-sections, has copyrights. Read more about what you can do with our patterns at the bottom of each pattern on our site. |
|


With over 40 years in knitting and crochet design, DROPS Design offers one of the most extensive collections of free patterns on the internet - translated to 17 languages. As of today we count 304 catalogues and 11422 patterns - 11422 of which are translated into English (UK/cm).
We work hard to bring you the best knitting and crochet have to offer, inspiration and advice as well as great quality yarns at incredible prices! Would you like to use our patterns for other than personal use? You can read what you are allowed to do in the Copyright text at the bottom of all our patterns. Happy crafting!
Comments / Questions (35)
Bonjour j ai un souci au niveau de l explication du rang 12 augmenter0-2-6 ms à intervalle regulier 66-68-72 J ai pourtant l'habitude de crocheter mais la je bloque... Quelqu'un pourrait-il m aider?? Merci à vous.
28.08.2015 - 21:09DROPS Design answered:
Bonjour Gigi, au rang 12, on va répartir 2 augmentations dans la 2ème taille (=6/9 ans), 6 augmentations dans la 3ème taille (= 10/12 ans), il n'y a pas d'augmentations dans la 1ère taille (= 3/5 ans). Bon crochet!
31.08.2015 - 11:32Hallo, habe die Mütze nach gestrickt. Sie ist schön geworden. Aber....... der Schirm ist viel kürzer als auf dem Foto, was mir nicht so gut gefällt. Was kann ich tun? L.G.
17.06.2015 - 10:39DROPS Design answered:
Sie könnten den Schirm einfach noch um eine oder mehrere R ergänzen, indem Sie nach der 4. R die 4. R noch 1 x oder mehrfach wdh, also mit Zunahmen am Anfang und am Ende der R.
24.06.2015 - 12:16Isabel Speleers wrote:
Ik haak nog maar net. In deze handleiding heb ik tot toer 11 alles goed kunnen volgen. Alleen begrijp ik toer 12 niet goed: Hier staat dat ik in elke v 1 moet haken, maar dan tgelijk meerderen 0-2-6 gelijkmatig. Wat bedoelt men met dat laatste stuk . ( idem met toer 18). Alvast dank bij voorbaat.
26.01.2015 - 08:38DROPS Design answered:
Hoi Isabel. Dat betekent dat je tegelijkertijd met het haken van 1 v in elke v 0, 2 of 6 st moet meerderen met een gelijkmatige afstand (afhankelijk van welke maat je maakt, in bijvoorbeeld de kleinste maat hoef je dus niet te meerderen)
28.01.2015 - 16:30Il y a une erreur dans les explications de la visière . Pour commencer la visière il faut plus de mail l'eau premier rang et après il ne faut pas augmenter mais diminuer afin d'obtenir l'arrondi de la visière merci de me confirmer que j'ai raison et de bien vouloir rectifier. Il m'a fallut recommencer plusieurs fois pour voir l'erreur. Cordialement Paule
28.12.2014 - 05:20DROPS Design answered:
Bonjour Mme Lopez, les explications de la visière sont justes, on commence sur 14-16 m (cf taille) et on augmente progressivement pour former l'arrondi (et on attache la visière avec 1 mc dans le bord de la casquette) et terminer sur 24-26 m. Bon crochet!
30.12.2014 - 14:42Vielen dank, man muss anscheinend sehr sehr locker häkeln, dann gehts. lg
16.12.2014 - 12:30Hallo, ich würde diese Haube sehr gerne häkeln. Ich habe die Wolle Nepal und eine 6er Nadel verwendet, so wie in der Anleitung steht. Nun passt das aber meiner Meinung nach nicht zusammen (auf der Wolle Nepal ist auch für Nadel Nr. 5 angegeben), d.h. ich kann schwer mit der 6er Nadel einstechen usw. Auch erscheint mir das Maschenbild am Foto viel dicker als die Nepal-wolle. Wird viellecht mit doppeltem Faden gehäkelt? Bitte um Hilfe! Danke.
14.12.2014 - 17:41DROPS Design answered:
Sie können Wolle immer mit verschiedenen Nadelstärken stricken, die Angabe bei der Wolle ist lediglich ein Richtwert. Letztendlich sind die Angaben in der Anleitung entscheidend und vor allem Ihre Maschenprobe - Sie müssen immer die Nadelstärke verwenden, die Sie benötigen, um die Maschenprobe zu erhalten. Testen Sie also, welche Nadel Sie für 13 fM auf 10 cm benötigen. Die Mütze wird nicht mit doppeltem Faden, sondern mit einfachem gehäkelt.
15.12.2014 - 14:40Ik heb de muts gehaakt. En zoals ik al meer lees op deze site is het jammer van de klep dat hier niet de juiste beschrijving wordt gegeven. Ik heb ook geprobeerd om ipv vaste steken halve stokjes te haken maar dan krijg ik nog steeds de klep niet zo groot als op de foto. Ik hoop dat jullie het patroon hiervan aan kunnen passen
27.11.2014 - 22:30DROPS Design answered:
Hoi Joke. De beschrijving voor de muts is volgens ons correct. Als wij een fout vinden, dan passen wij dat natuurlijk altijd aan.
01.12.2014 - 14:58Nå har jeg strikket flere luer med forskjellig garn og må innrømme at fritidsgarn til toving holder bedre fassongen enn garn med bomull. Skyggen står stivere og kantene ruller ikke opp. Oppskrift til blomst var misforståelig. Det må ikke hekles "om" ringen men" gjennom" ringen. Det hjalp med video ;-)
04.11.2014 - 08:29Hei igjen, har sovet over det og fikk det plutselig til! Tips for andre nybegynnere: jeg hoppet ikke nok over den første fm, derfor hadde jeg for mange masker! Forbedringstips for oppskriften : sett merke i luftmasken, da finner du den bedre til slutt. Hver omg slutter med økningen før lm:-) Kjempegøy!
30.10.2014 - 13:43Hei, den fantastiske luen, og jeg bommer allerede i de første 11 omg. Har for mange masker i hver omg. Jeg har lest hekleinfo og beg med lm og hopper over første fm. Avslutter med kjm i lm Føler jeg skjønner alt riktig. Har prøvd om og om igjen. Hva gjør jeg feil? Mvh Karin
30.10.2014 - 00:24