
Popular categories
Looking for a yarn?


|
||||||||||
Country Rose |
||||||||||
 |
 |
|||||||||
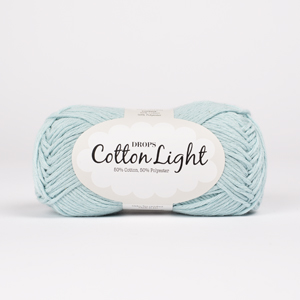
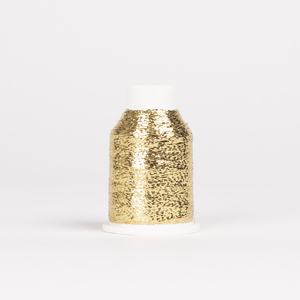
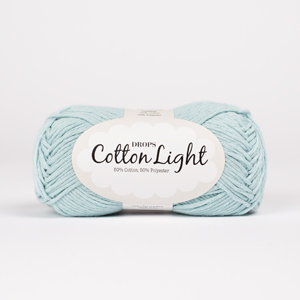
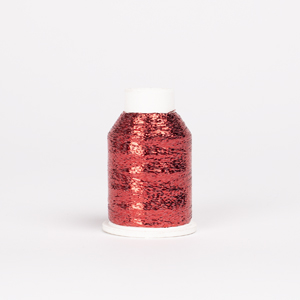
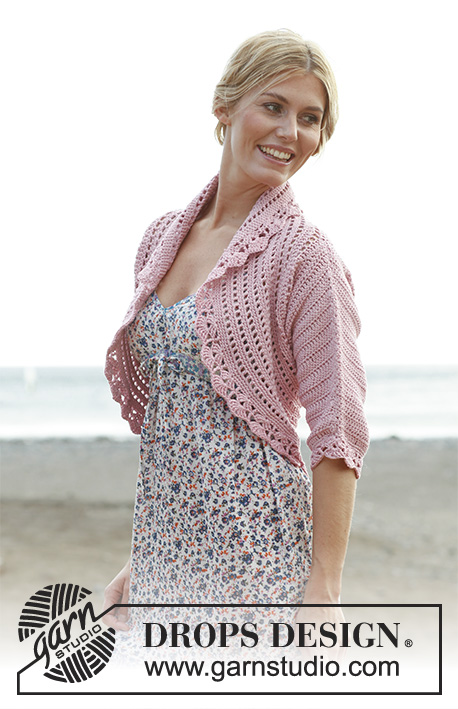
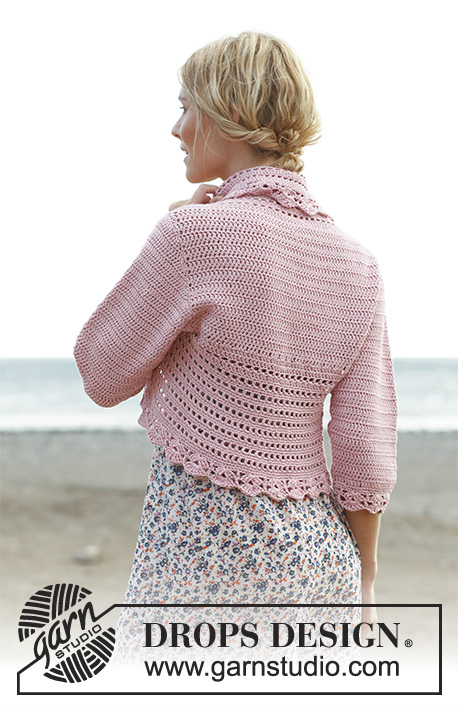
Crochet DROPS jacket in "Cotton Light" and "Glitter". Size S-XXXL.
DROPS 138-6 |
||||||||||
|
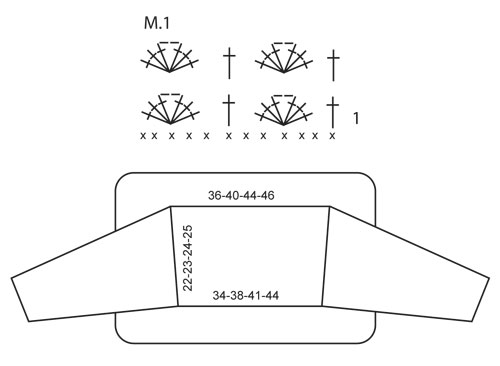
CROCHET INFO: Replace first tr on every row with 3 ch. Replace first dc on every round with 1 ch. Finish every dc round with 1 sl st in 1st ch from beg of round. Replace first tr on every round with 3 ch. Finish every tr round with 1 sl st in 3rd ch from beg of round. INCREASE TIP: Inc by working 2 tr in first and last tr on row. DECREASE TIP: Dec at beg of row as follows: Work sl st over no of tr to be dec. Dec at end of row as follows: When no of tr to be dec remains, turn piece. -------------------------------------------------------- BACK PIECE: Work 78-86-94-99 loose ch on hook size 4 mm with 1 thread Cotton Light and 1 thread Glitter (= 2 threads). Work 1 tr in 4th ch from hook, * 1 tr in each of the next 3 ch, skip 1 ch *, repeat from *-*, and finish with 1 tr in each of the last 2-2-2-3 ch = 58-64-70-74 tr. Then work 1 tr in every tr - READ CROCHET INFO. When piece measures 7 cm, inc 1 tr in each side – READ INCREASE TIP, repeat inc when piece measures 15 cm = 62-68-74-78 tr. Work until piece measures 22-23-24-25 cm. EDGE PIECE: Work 1 tr in every tr on the upper side of back piece, work 56-58-60-64 ch, 1 tr in every tr from bottom side of back piece, work 56-58-60-64 ch and finish with 1 sl st in 1st tr on upper side of back piece. Work 1 tr in every tr from back piece, in ch-loops work 42-44-46-48 tr = 204-220-236-248 tr. Continue to work in the round as follows: ROUND 1: 1 tr in first tr, * 1 ch, skip 1 tr, 1 tr in next tr *, repeat from *-* and finish with 1 ch, skip 1 tr and work 1 sl st on beg of round. ROUND 2: 1 dc in every tr and 1 dc in every ch. ROUND 3: 1 dc in every dc. Repeat these 3 rounds, AT THE SAME TIME when edge measures 5, 10 and 15 cm (adjust so that this is a round with dc), inc 30-30-30-32 dc evenly on round – READ INCREASE TIP = 294-310-326-344 dc. When edge measures 17-18-19-20 cm (adjust so that next round is a round with dc), work 1 dc row while AT THE SAME TIME inc 0-2-4-4 dc evenly = 294-312-330-348 dc. Then work diagram M.1. NOTE! Start to work on the row marked with 1 in the diagram. Work diagram M.1 1 time vertically, cut and fasten the thread. SLEEVE: Work 67-72-72-77 loose ch on hook size 4 mm with 1 thread Cotton Light and 1 thread Glitter (= 2 threads). Work 1 tr in 4th ch from hook (= 2 tr), * skip 1 ch, 1 tr in each of the next 4 ch *, repeat from *-* and finish by skipping 1 ch and work 1 tr in each of the last 2 ch = 52-56-56-60 tr. Work 1 tr in every tr back and forth, AT THE SAME TIME inc 1 tr in each side on every row a total of 13-14-16-17 times, read INCREASE TIP = 78-84-88-94 tr. When piece measures 24-24-22-20 cm (shorter measurements in the larger sizes because of broader shoulder width), dec for sleeve cap in each side on every row - READ DECREASE TIP: 4 tr 1 time, then 3-3-2-2 tr in each side until piece measures 31-33-33-34 cm, now dec 4 tr 1 time in each side. Cut and fasten the thread. Sew under arm seam with neat little stitches. Work around the bottom of sleeve as follows: Work 1 round with 1 dc in every tr, while at the same time inc 2-4-4-0 dc evenly = 54-60-60-60 dc. Then work diagram M.1 1 time vertically. Cut and fasten the thread. ASSEMBLY: Sew in sleeves. |
||||||||||
Diagram explanations |
||||||||||
|
||||||||||
|
||||||||||
|
Have you made this or any other of our designs? Tag your pictures in social media with #dropsdesign so we can see them! Do you need help with this pattern?You'll find tutorial videos, a Comments/Questions area and more by visiting the pattern on garnstudio.com. © 1982-2024 DROPS Design A/S. We reserve all rights. This document, including all its sub-sections, has copyrights. Read more about what you can do with our patterns at the bottom of each pattern on our site. |
||||||||||


With over 40 years in knitting and crochet design, DROPS Design offers one of the most extensive collections of free patterns on the internet - translated to 17 languages. As of today we count 304 catalogues and 11422 patterns - 11422 of which are translated into English (UK/cm).
We work hard to bring you the best knitting and crochet have to offer, inspiration and advice as well as great quality yarns at incredible prices! Would you like to use our patterns for other than personal use? You can read what you are allowed to do in the Copyright text at the bottom of all our patterns. Happy crafting!
Comments / Questions (186)
I'm very new to crochet, and don't understand what I'm doing on the chain going into the tr crochet on the second row. Your notes say chain 3 for first tr and then tr into 4th ch stitch which I've done, then tr 3 more mis chain and carry on till 2 sts remain, I have 3 tr at this end and one chain space remaining, my count of tr stitches is 59 if i include the first chain 3, I've taken it out 3 times, and am carfully counting as i go, I don't understand where it is going wrong.
19.04.2020 - 18:28DROPS Design answered:
Dear Caroline, in first size you have 78 chains, then crochet 1 tr in 4th ch from hook (= 2 trebles, 6 chains), then repeat (1 tr in each of the next 3 ch, skip 1 ch) a total of 18 times ((= 3 tr, 4 chains)x 18 = 54 tr, 72 chains), finish with 1 tr in each of the last 2 ch (2 tr, 2 ch) you have now: 2+54+2 tr over 6+72+2 chains. Hope this helps, happy crocheting!
20.04.2020 - 10:41Hello, i'd like to try making this, is there a possibility if i work the sleeve in round? Thank you
18.03.2020 - 06:41DROPS Design answered:
Dear Mrs Fitri, you could start to work the sleeve in the round but to get the same texture for sleeve cap remember to work alternately from RS and from WS - when working sleeve cap you will have then to work in rows decreasing on each side. Happy crocheting!
18.03.2020 - 08:49I a m so confused. The edge piece says you should have 56+56+44+44=196 but then directions says 204. Am I missing something?
06.03.2020 - 21:26DROPS Design answered:
Dear Linda, you work 1 st in each st in the top of back piece = 62 sts + 42 sts in the 56 chains + 1 st in each st in the bottom of back piece = 58 sts + 42 sts in the 56 chains = 62+42+58+42=204 sts. Happy crocheting!
09.03.2020 - 09:40The pattern is very nice n have completed making the body and edging . In sleeve part , what will be the count of stitch in the last line? Is it possible to send pics of just the sleeve to see the shape that v achieve afterall the decreases.
01.02.2020 - 22:12DROPS Design answered:
Dear Mrs Namrata, the number of stitches at the end of the sleeve (sleeve cap) will depends on your tension in height. Just make sure that you decrease the same number of stitches on each side and that the measurements are right. Happy crocheting!
03.02.2020 - 09:54I was confused with the edge piece, if i ch 58 and in each ch loop ill do 44 tr, how will get the total of 220 tr?
01.11.2019 - 17:44DROPS Design answered:
Dear Zhell, you crochet 44 tr in the 58 ch (skipping chains evenly) = 44 tr; then 1 tr in each of the 64 tr from the bottom of piece, then 44 tr in the 58 ch = 44 tr and 1 tr in each of the 68 tr on top of back piece = 44+64+44+68= 220 tr. Happy crocheting!
04.11.2019 - 15:28If I used DK yarn and did not add the metallic thread, might this affect the size or could I possibly correct it by using a thicker thread to begin with?
23.08.2019 - 00:07DROPS Design answered:
Dear Mrs Smart, read more about alternatives here and use our yarn converter - DROPS Glitter just give a glitter effect and doesn't affect tension. Happy crocheting!
23.08.2019 - 09:22Bonjour, Une fois que le dos est terminé, d'où est-ce qu'il faut commencer pour faire la bordure? Merci!
07.08.2019 - 14:51DROPS Design answered:
Bonjour Mme Richard, vous continuez à crocheter dans les mailles du dernier rang du dos: 1 B dans chaque B, puis crochetez les mailles en l'air, 1 B dans chaque B le long du bas du dos, crochetez les mailles en l'air et fermez en rond avec 1 mc dans la 3ème ml du début du tour, crochetez ensuite 1 rang de brides = 204-248 B. Bon crochet!
08.08.2019 - 09:12Bonjour, Comment fait-on pour assembler les manches au dos? Merci!
01.08.2019 - 17:47DROPS Design answered:
Bonjour Mme Richard, placez les manches avec la couture sous la manche en bas du dos, la maille centrale de la manche doit être en haut de l'emmanchure - cf schéma. Assemblez ensuite les mailles de l'arrondi de la manche le long des emmanchures, vous pouvez épingler avant de faire la couture pour bien placer toutes les mailles/rangs les uns contre les autres et que la couture soit plus nette. Bonnes finitions!
07.08.2019 - 09:22Hallo, kan ik de mouwen van deze bolero ook langer maken tot lange mouw, zo ja, hoe?? Mvg Gerrieneke
13.07.2019 - 11:11DROPS Design answered:
Dag Gerrieneke,
Je zou dan op kunnen zetten en eerst een aantal toeren zonder meerderingen kunnen haken, dus dat je de meerderingen vanaf de elleboog haakt.
24.07.2019 - 08:30Det står att man ska ha 204 maskor runt kanten och sen öka 30 jämnt fördelat över varvet = 294 maskor. ska man öka 30st till 234st eller 90 till 294st mvh Lotta
20.06.2019 - 19:31DROPS Design answered:
Hei Lotta. Du skal øke 30 fastmasker, og dette skal du gjøre 3 ganger: første gang når arbeidet måler 5 cm, neste gang når det måler 10 cm, og siste gang når det måler 15 cm - altså hver 5 cm. Hver gang du øker skal du øke 30 fastmasker jevnt fordel. Når du har økt 3 ganger har du derfor økt tilsammen 90 fastmasker. God fornøyelse
21.06.2019 - 13:36