
Popular categories
Looking for a yarn?


|
|||||||||||||
Enjoy |
|||||||||||||
|
|
|||||||||||||
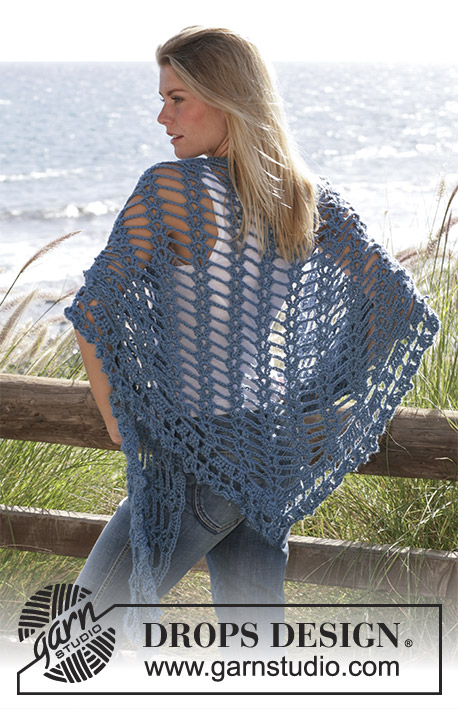
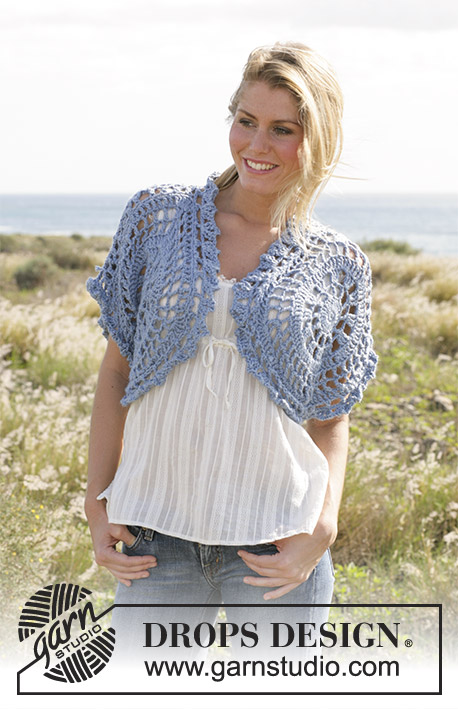
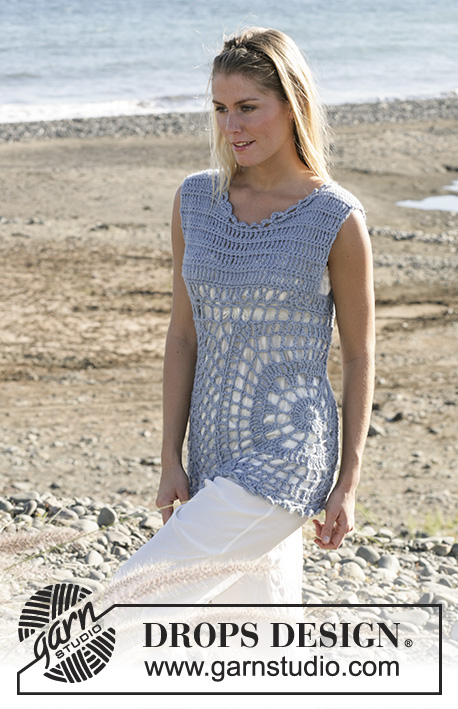
DROPS long sleeves less cardigan with wide shoulders crochet in “Muskat”. Sizes XS - XXL
DROPS 99-2 |
|||||||||||||
|
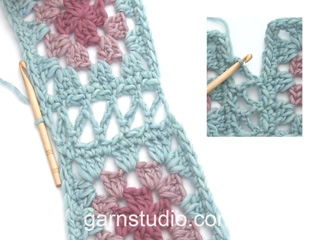
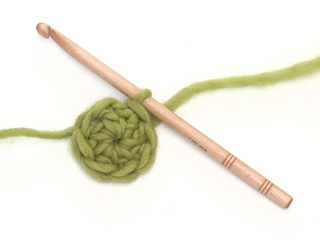
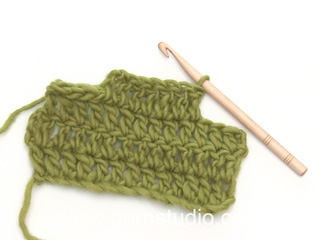
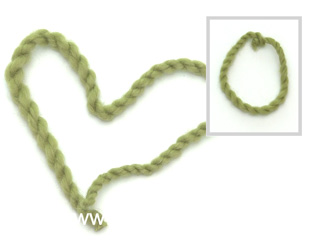
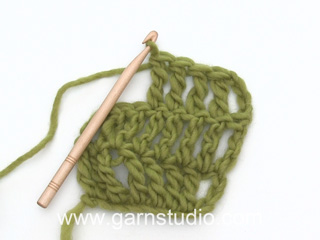
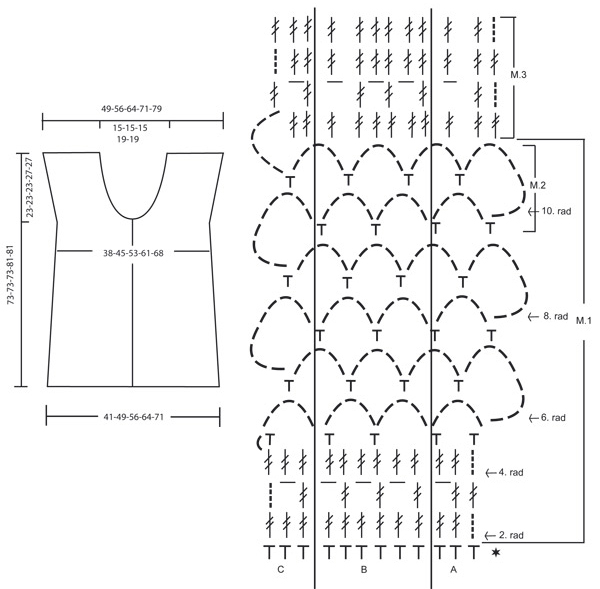
Crochet tension: 16 tr x 10 rows using hook size 4 mm and Muskat =10 x 10 cm. Crochet info: At the beg. of row substitute the tr with 3 ch. Pattern info: See diagram M.1, M.2 and M.3. M.2 is crochet only in size XL and XXL - one time after M.1 Size XS/S–M-L: 1 repeat = M.1 Size XL-XXL: 1 repeat = M.1 + M.2 The diagrams are seen from the RS. English Translations for the wording in the diagrams are given at the bottom of this pattern, and they are given in the vertical order in which they appear in the diagram. Increasing tips: For inc. crochet 1 extra ch-loop at the end of a row with ch-loops. Crochet until finish, then crochet 8 ch, 1 dc in the last dc. Turn and crochet the first dc in the new ch-loop. Cast off tips: For rows with dtr: Cast off as follows at beg. of row: Substitute 3 dtr with 3 sl sts. Cast off as follows at the end of row: Turn when there are 3 dtr left to cast off. For rows with ch-loops: Cast off as follows from beg. of row: Crochet sl sts over the the last ch-loop from previous row. Cast off as follows at the end of row: Turn when 1 ch-loop is left. Crochet squares: 1 crochet square measures approx. 13 x 13 cm. Crochet squares: Crochet 5 ch and make a ring with a sl st. Read crochet info! 1st round: crochet 16 tr in the ring. 2nd round: 1 dc in the first tr, *3 ch, skip 1 tr, 1 dc in the next tr*, repeat from *-* and finish with 3 ch and a sl st in the first dc = 8 ch-loops. 3rd round: *1 tr in each dc, 3 tr in each ch-loop*, repeat from *-* and finish with a sl st in the first tr = 32 tr 4th round: 1 dc in the first tr, *3 ch, skip 1 tr, 1 dc in the next tr*, repeat from *-* and finish with 3 ch and a sl st in the first dc = 16 ch-loops 5th round: *1 tr in each dc and 2 tr in each ch-loop*, repeat from *-* until finish round and finish with a sl st in the first tr = 48 tr 6th round: *1 dc in the first tr, 5 ch, skip 2 tr, 1 dc in the next tr*, repeat from *-* and finish with 5 ch and a sl st in the first dc = 16 ch-loops 7th round: Crochet sl sts until the middle of the first ch-loop *(7 ch, 1 dc in the next ch-loop), repeat from (-)a total of 3 times, 10 ch (=corner), 1 dc in the next ch-loop*, repeat from *-* until finish round. Cut and sew the thread. Crochet a total of 6-7-8-9-10 squares. Put the squares on top of each other 2 by 2 and crochet as follows: 1 dc in the outer most ch-loop of both squares, * 5 ch, 1 dc in the next ch-loop of both squares*, repeat from *-* until the squares are crochet tog. as a long string. Continue to crochet the sleeves less cardigan from the squares and down in one piece, and then the top part. Bottom piece: Crochet the first row from the WS. Crochet 120-144-168-192-216 dc in the bottom edge of the string of crochet squares (crochet approx. 20-20-21-21-22 dc in each square) Turn and crochet according to M.1A over the first 3 dc, repeat M.1B over the next 114-138-162-186-210 dc and finish with M.1C. Work M.1 (M.1 + M.2 for size XL and XXL) – read pattern info, 2 times in total. AT THE SAME TIME when M.1 is worked for the 2nd time, on 1st row inc 6 dtr evenly distributed = 126-150-174-198-222 dtr. Them work according to M.3, AT THE SAME TIME on 1st row inc 6 dtr evenly distributed = 132-156-180-204-228 dtr. Cut and sew the thread tight. The piece measures approx. 30-30-30-34-34 cm. Top piece: Crochet the first row from the WS. Crochet 120-144-168-192-216 dc in the top edge of the string of squares. Split the work and finish front and back pieces separately. All measures are done from the top edge of the string of squares. Right front: 1st row = RS. Crochet M.1 (M.1 + M.2 for size XL and XXL) – read pattern info over 30-36-42-48-54 dc at the right side of the piece. (crochet M.1A over the first 3 dc then repeat M.1B over the next 24-30-36-42-48 dc and finish with M.1C). At the same time at the end of the 6th, 8th and 10th row of M.1 inc. for wide shoulder – read increasing tips above. At the same time cast off 3 dtr/ 1 ch-loop for the neck shaping on every 2.5 cm a total of 4-4-4-5-5 times – read casting off tips. After a total of 2 vertical repeats of M.1 (M.1 + M.2 for size XL and XXL) are completed crochet M.3. After all dec. and inc. are completed there are 27-33-39-42-48 dtr left for each shoulder. Cut and sew the thread tight when the piece measures approx. 30-30-30-34-34 cm. The total length of the cardigan is approx. 73-73-73-81-81 cm Left from piece: Crochet as right front but reverse. NB: To get the cast off edges look the same each side, beg. the left front piece at the mid front. 1st row is the WS. Back piece: 1st row =RS. Crochet M.1 (M.1 + M.2 for size XL and XXL) – read pattern info over the mid 60-72-84-96-108 dc. (Crochet M.1A over the first 3 dc, repeat M.1B over the next 54-66-78-90-102 dc and finish with M.1C). At the same time at the end of the 6th to 11th row inc. for wide shoulder as done for the front pieces. Crochet a total of 2 repeats of M.1 (M.1 + M.2 for size XL and XXL) then crochet M.3 (after all inc. for the wide shoulder there are 78-90-102-114-126 dtr) At the same time on the 3rd row of M.3 crochet 1 row but only over the outer most 27-33-39-42-48 dtr/ch each side (do not crochet over the mid 24-24-24-30-30 dtr/ch= neck line). Crochet the last row of M.3, cut and sew the thread, the piece measures approx. 330-30-30-34-34 cm. Assembly: Sew the shoulder seams with small neat stitches. Sew approx. 4 cm tog. under neath the armhole, i.e. up to where the inc. for the shoulder beg. Crochet edge: Crochet and edge around the armholes and up along the opening of the sleeve less cardigan as follows: Crochet up along one side of the front piece around the neck opening and down along the other front piece: 1st row: Crochet 1 dc, *3 ch, skip over approx. 1-1.5 cm, 1 dc*, repeat from *-* until finish. 2nd row: 1 dc in each dc and 2 dc in each ch-loop (in the transitions between the neck and front pieces crochet 4 dc in each ch-loop). 3rd row: 1 tr in each dc. Twisted string: Cut 4 threads Muskat of approx 3 meters. Twist them tog until they resist, double thread and let it twist tog. Tie knot approx 5 cm from each end of the string. Pull thread up and down through the 2nd round of dtr above the crochet squares. Make a tassel for each end: cut 25 threads Muskat of approx. 25 cm each. Split the string above the knot and pull the threads through the split. Knot the threads tog. and twist 1 of them around the top of the tassel to keep it tog. Cut and sew the thread. |
|||||||||||||
Diagram explanations |
|||||||||||||
|
|||||||||||||
|
|||||||||||||
|
Have you made this or any other of our designs? Tag your pictures in social media with #dropsdesign so we can see them! Do you need help with this pattern?You'll find tutorial videos, a Comments/Questions area and more by visiting the pattern on garnstudio.com. © 1982-2024 DROPS Design A/S. We reserve all rights. This document, including all its sub-sections, has copyrights. Read more about what you can do with our patterns at the bottom of each pattern on our site. |
|||||||||||||


With over 40 years in knitting and crochet design, DROPS Design offers one of the most extensive collections of free patterns on the internet - translated to 17 languages. As of today we count 304 catalogues and 11422 patterns - 11422 of which are translated into English (UK/cm).
We work hard to bring you the best knitting and crochet have to offer, inspiration and advice as well as great quality yarns at incredible prices! Would you like to use our patterns for other than personal use? You can read what you are allowed to do in the Copyright text at the bottom of all our patterns. Happy crafting!
Comments / Questions (65)
Buenas, En la parte donde hay que aumentar 6 puntos altos en la parte inferior, en el M1, en el patrón en español indica que hay que aumentar dos veces estos 6 puntos la 2a vez y 3a vez que se repite el M1. Como antes indicaba que solo se repite dos veces, leí el patrón en inglés y alemán y ahí indican cosas distintas. En estos últimos hay que aumentar 6 puntos altos en la 2a fila de M1 la segunda vez que se repite. Los otros 6 se aumentan en el M3. Seguramente se trate de un error.
21.11.2019 - 19:43DROPS Design answered:
Hola Alicia. Se trata de una corrección después de publicar el patrón. Ya está añadida. Gracias por avisar.
24.11.2019 - 22:47On the chart for this pattern would please let me know what rad means beside the row number.
27.10.2019 - 11:19DROPS Design answered:
Dear Rina. this is an old pattern, in which the chart is in Norsk. Rad means row. Happy knitting!
27.10.2019 - 22:28Goedenavond, is er ook een tekening van het vierkant?
17.08.2018 - 22:10DROPS Design answered:
Dag Tineke, Nee, helaas is er geen tekening; alleen een beschrijving. Kom je er uit met de beschrijving?
20.08.2018 - 08:28Ik ben begonnen aan het rechtervoorpand. De eerste dubbele stokjes op de goede kant, als ik dan in toer 6 ga meerderen, komt de meerdering aan het voorgedeelte en de mindering daar waar straks het rugpand aan moet (volgens mij dus precies verkeerd om) en als ik meerder/ minder in M1 dan meerder/ minder ik al ergens op mijn buik (ik haak xl), is dat de bedoeling?
20.07.2018 - 10:28DROPS Design answered:
Dag Janneke, Je meerdert aan de kant van de mouw en je mindert voor de hals aan de kant van midden voor. Met het rechter deel wordt bedoelt, het rechter deel, wanneer je het kledingstuk draagt. En je haakt dus op dat moment vanaf de taille naar boven toe.
07.08.2018 - 09:51Er staat in de 6e, 8e en 10e toer meerderen. Maar toer 10 zit in M2. Moet ik nu wel of niet meerderen in die toer? Ik haak de L
11.05.2018 - 18:00DROPS Design answered:
Hallo Thea, Ja hoor, als je bij M2 bent kun je ook gewoon meerderen. Zie bij tip voor het meerderen hoe je dit doet (een extra lossenboogje haken aan het eind van de toer)
12.05.2018 - 15:19How many skeins or how many grams of yarn does this require? Having trouble locating.
09.05.2018 - 14:37DROPS Design answered:
Dear Emily, you will find the required amount of yarn for each size under header, ie 400-450-500-550-600 g color no. 01, light blue lilac in DROPS Muskat. Muskat = 50 g a skein so that in 1st size you will need: 400/50= 8 balls DROPS Muskat in size XS/S. Happy crocheting!
09.05.2018 - 14:58Het meerderen van een lossenboogje lukt me niet. Ik zou daar graag een filmpje van zien. Kan dat?
20.04.2018 - 23:11DROPS Design answered:
Hallo Yvonne, Er is helaas geen filmpje van het meerderen van dit lossenboogje. Wat je doet is aan het eind van de toer, dus nadat je 1 vaste hebt gemaakt in het lossenboogje van de vorige toer, dan haak je nog 8 lossen en maak je deze met een vaste vast in de eerste vaste.
21.04.2018 - 12:40Je fais le dos et je ne comprends pas vous dites faire les augmentations à partir du rang 6 à11 je ne compte que 12 augmentations au total alors qu'il en faut 18 pour arriver à 90 mailles en haut du dos ? merci
10.04.2018 - 04:05DROPS Design answered:
Bonjour Mme Coutarel, vous augmentez un total de 6 arceaux (3 de chaque côté), vous aurez donc 30 arceaux au total. Au 1er rang de M.3, vous crochetez 3 DB par arceaux soit 90 DB au total. Bon crochet!
10.04.2018 - 08:40Pourriez vous m'expliquer l'augmentation pour l'épaule je suis sur le 6 ème (rang d'arceaux) si c'est possible avec une vidéo
05.04.2018 - 16:45DROPS Design answered:
Bonjour Mme Coutarel, à la fin du 6ème, 8ème et 10ème rang, après 1 ms dans le dernier arceau (cf diagramme), crochetez 8 ml et 1 ms dans la dernière ms du rang= vous augmentez 1 arceau à gauche. Continuez ensuite le rang suivant comme avant (= 1 ms dans chaque arceau). Bon crochet!
06.04.2018 - 08:27Le 1 er rang sur l'envers 144 ms soit 20 ms par carrés et 4 ms le 2 ème rang sur l'endroit quant on a fait M1a sur les 3 premiers carrés sur les 60 ms au total, il ne reste pas 138 ms? puisqu'on a 144 ms au total il ya une erreur?
26.03.2018 - 18:02DROPS Design answered:
Bonjour Mme Coutarel, on doit en fait crocheter M.1A sur les 3 premières mailles (pas sur les 3 premiers carrés), la correction a été faite, merci. Bon crochet!
28.03.2018 - 14:46