
Popular categories
Looking for a yarn?


|
||||||||||
Catch of the Day |
||||||||||
 |
 |
|||||||||
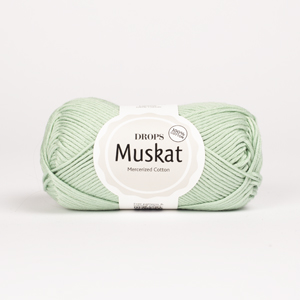
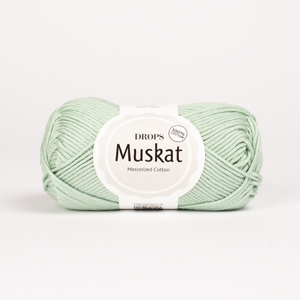
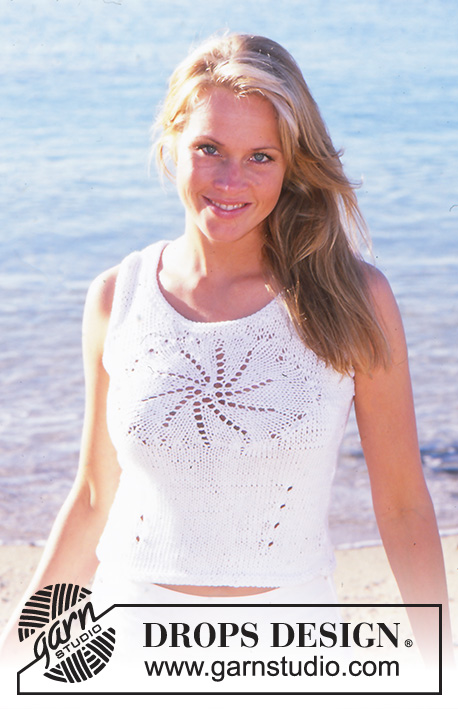
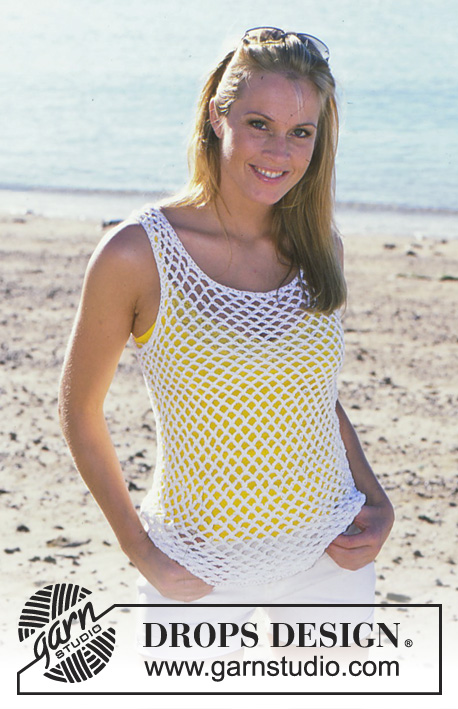
Crochet DROPS top and jacket in ”Muskat”.
DROPS 82-6 |
||||||||||
|
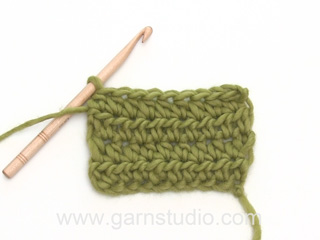
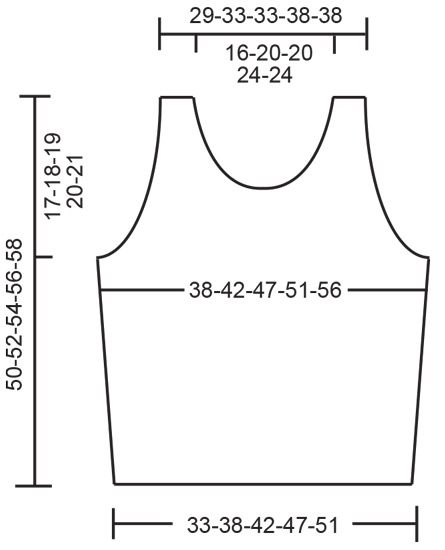
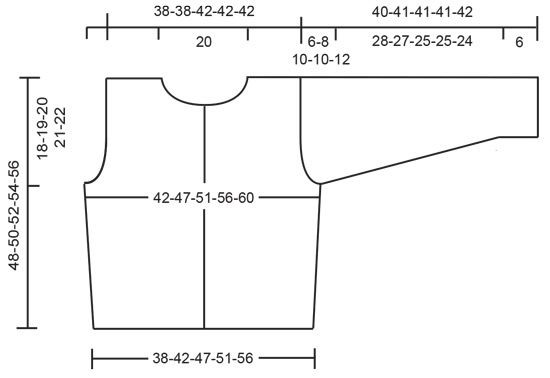
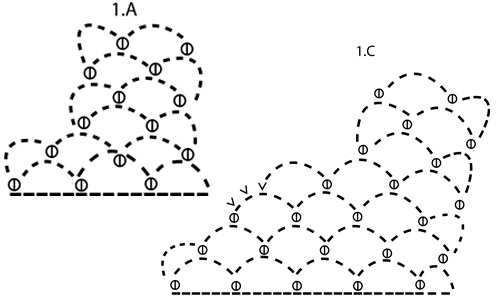
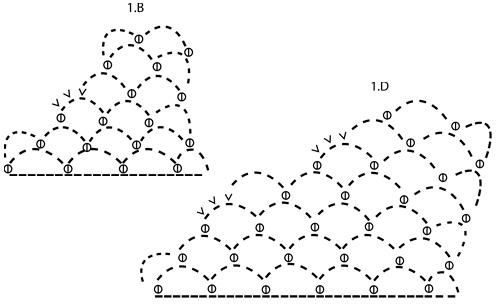
Crochet tension: Remember hook size is only a guide. 4.5 ch-spaces in width and 10 rows vertically on hook size 4.5 mm = 10 x 10 cm. Front piece: Work 91-103-115-127-139 ch (incl 6 ch to turn with) on hook size 4.5 mm with off Muskat. Work first row as follows: 1 dc in 7th ch from hook, * 5 ch, skip 5 ch, 1 dc in next ch *, repeat from *-* = 15-17-19-21-23 ch-spaces, turn piece. Continue to work as follows: 6 ch (incl 1 ch to turn with), 1 dc around first ch-space, * 5 ch, 1 dc around next ch-space *, repeat from *-* the entire row and turn piece. Continue like this. Remember the crochet tension! When piece measures 15 cm, inc 1 space in each side by working 1 extra ch-space in next to last space in each side = 17-19-21-23-25 ch-spaces. Armholes: When piece measures 33-34-35-36-37 cm, cast off for armholes as follows: Size S + M: Work as before until 1 ch-space remains, turn piece, work sl sts until middle of first ch-space, continue with ch-spaces and repeat dec in the other side - or see diagram 1B. Size L + XL: Follow dec for Size S + M: 1 time, turn piece and work back until 1 ch-space remain, turn piece and continue with ch-spaces and repeat dec in the other side - or see diagram 1C. Size XXL: Follow dec for Size S + M: 2 times - or see diagram 1D. 2-2-3-3-4 ch-spaces have been dec in each side = 13-15-15-17-17 ch-spaces on row. Continue working as before. When piece measures 36-38-40-42-44 cm, dec for neck as follows: Work 4 ch-space, turn piece, work sl sts until middle of first ch-space and continue with ch-spaces = 3 ch-spaces remain on shoulder. Work as before until piece measures 50-52-54-56-58 cm. Repeat in the other side of neck. Back piece: Cast on and work as front piece. Dec for armholes as on front piece and continue until piece measures 48-50-52-54-56 cm. Now dec for neck by working 2 rows over only 3 ch-space on each shoulder (i.e. do not work over the middle 7-9-9-11-11 ch-spaces). Piece measures approx. 50-52-54-56-58 cm, cut the yarn. Assembly: Work piece tog on the shoulder as follows: 1 sl st in first ch-space on back piece, 3 ch, 1 dc around first ch-space on front piece, 3 ch, 1 dc around next ch-space on back piece etc. Work the sides tog the same way. Neck edge and armhole: Work 1 round htr around the neck and both armholes as follows: * 1 htr in dc, 2 htr around ch-space *, repeat from *-* and finish with 1 sl st in first htr on round. ________________________________________ Jacket: Size: S - M - L - XL - XXL Materials: DROPS MUSKAT from Garnstudio 300-350-350-400-450 g colour no 18, white DROPS Crochet hook size 4.5 mm. DROPS Angular silver buttons no 534: 5 pieces Crochet tension: Remember hook size is only a guide. 4.5 ch-spaces in width and 10 rows vertically on hook size 4.5 mm = 10 x 10 cm. Back piece: Work 103-115-127-139-151 ch (incl 6 ch to turn with) on hook size 4.5 mm with off Muskat. Work first row as follows: 1 dc in 7th ch from hook, * 5 ch, skip 5 ch, 1 dc in next ch *, repeat from *-* = 17-19-21-23-25 ch-spaces, turn piece. Continue to work as follows: 6 ch (incl 1 ch to turn with), 1 dc around first ch-space, * 5 ch, 1 dc around next ch-space *, repeat from *-* the entire row and turn piece. Continue like this. Remember the crochet tension! When piece measures 15 cm, inc 1 space in each side by working 1 extra ch-space in next to last space in each side = 19-21-23-25-27 ch-spaces. Armholes: When piece measures 30-31-32-33-34 cm, dec for armholes as follows: SIZE S: Work as before until 1 ch-space remain, turn piece and continue with ch-spaces and repeat dec in the other side - or see diagram 1A. SIZE M + L: Work as before until 1 ch-space remains, turn piece, work sl sts until middle of first ch-space, continue with ch-space and repeat dec in the other side - or see diagram 1.B. SIZE XL: Follow dec for Size M + L: 1 time and then dec for size S: 1 time - or see diagram 1C. Size XXL: Follow dec for Size M + L: 2 times - or see diagram 1D. 1-2-2-3-4 ch-spaces have been dec in each side = 17-17-19-19-19 ch-spaces on row. Continue working as before. When piece measures 46-48-50-52-54 cm, dec for neck by working 2 rows over only 4-4-5-5-5 ch-spaces on each shoulder (i.e. do not work over the middle 9 ch-spaces). Piece measures approx. 48-50-52-54-56 cm, cut the yarn. Right front piece: Work 55-61-67-73-79 ch (incl 6 ch to turn with) on hook size 4.5 mm with off Muskat. Then work as on back piece = 9-10-11-12-13 ch-spaces. When piece measures 15 cm, inc 1 ch-space in the side as on back piece = 10-11-12-13-14 ch-spaces. When piece measures 30-31-32-33-34 cm, dec for armhole in one side as on back piece = 9-9-10-10-10 ch-spaces. When piece measures 34-36-38-40-42 cm, dec for neck as follows: Follow armhole dec for diagram 1D: 1 time and diagram 1A: 1 time, 5 spaces have been dec and 4-4-5-5-5 spaces remain on shoulder. Continue to work until piece measures 48-50-52-54-56 cm, fasten off. Left front piece: Work as right but reversed. Sleeve: Work 67-73-73-79-85 ch (incl 6 ch to turn with) on hook size 4.5 mm with off Muskat. Then work as on body = 11-12-12-13-14 ch-spaces. When piece measures 6 cm, inc by working 1 extra ch-space in next to last space in one side, work 5 rows and inc the same way in the other side. Repeat inc in each side 1 more time with 5 rows between each inc = 15-16-16-17-18 ch-spaces on row. Continue to work until piece measures 34-33-31-31-30 cm. Now dec for sleeve cap by working 6-8-10-10-12 row with 1 ch-space less at the end of every row, fasten off. Piece measures approx. 40-41-41-41-42 cm. Assembly: Crochet the jacket tog on the shoulder as follows: 1 sl st in first ch-space on back piece, 3 ch, 1 dc in first ch-space on front piece, 3 ch, 1 dc around first ch-space on back piece etc. Work the sleeves and side seams tog the same way. Then work the sleeves in the same way. Neck: Work 2 rows with dc around the neck - work approx. 3 dc in every ch-space - adjust to avoid a loose or tight edge. Left band: Work 4 rows with dc up along left front piece (also over neck edge) - there should be approx. 3 dc in every ch-space = approx. 102 to 126 dc, turn every row with 1 ch. Right band: Work as left but after 2nd row work 5 buttonholes evenly on band. Bottom buttonhole should be approx. 10 cm from bottom edge, and top hole 2 sts from the top. 1 buttonhole = 2 ch, skip 2 dc, 1 dc in next st. On next row work 2 dc around ch. Sew on buttons. |
||||||||||
Diagram explanations |
||||||||||
|
||||||||||
|
||||||||||
|
||||||||||
|
||||||||||
|
||||||||||
|
Have you made this or any other of our designs? Tag your pictures in social media with #dropsdesign so we can see them! Do you need help with this pattern?You'll find tutorial videos, a Comments/Questions area and more by visiting the pattern on garnstudio.com. © 1982-2024 DROPS Design A/S. We reserve all rights. This document, including all its sub-sections, has copyrights. Read more about what you can do with our patterns at the bottom of each pattern on our site. |
||||||||||


With over 40 years in knitting and crochet design, DROPS Design offers one of the most extensive collections of free patterns on the internet - translated to 17 languages. As of today we count 304 catalogues and 11422 patterns - 11422 of which are translated into English (UK/cm).
We work hard to bring you the best knitting and crochet have to offer, inspiration and advice as well as great quality yarns at incredible prices! Would you like to use our patterns for other than personal use? You can read what you are allowed to do in the Copyright text at the bottom of all our patterns. Happy crafting!
Comments / Questions (93)
Cuantos ovillos necesito para el top de drops muskat?
16.04.2021 - 17:30DROPS Design answered:
Hola Raquel, 4-6 ovillos, eso depende de tu talla. Buen trabajo!
21.04.2021 - 14:47Há tempos sou admiradora dos trabalhos e dos fios que utilizam.Hoje nao contive,preciso sabe como faço para adquir se estou no Brasil. Tenho dúvidas com relação à moeda.
20.03.2020 - 16:10DROPS Design answered:
Para adquirir nossos fios, pode encomendar em qualquer uma das lojas DROPS em todo o mundo. Quanto à moeda, dependendo das lojas, será sempre a moeda local mas se pagar com Paypal,será em reais. Aqui tem uma lista de lojas DROPS que falam português: https://www.garnstudio.com/findastore.php?id=28&cid=28 Bom Tricô!
24.03.2020 - 12:22What do the v’s mean in the diagram? I don’t understand the diagrams and I’ve read all the previous questions and I still don’t know how to bind off for the armholes. Please and thank you.
24.02.2020 - 23:20DROPS Design answered:
Dear Dawné. the little v's represent slip stitches, the stitch where you insert the crochet hook into the first chain stitch that was made. Then grab the working yarn(long tail) and pull it straight through the stich. Then, continue by pulling the yarn through the stitch that is on the needle. I hope this helps. Happy Crafting!
25.02.2020 - 07:07Molto bello e spiegazioni facili da seguire
03.09.2019 - 17:24I do not understand the diagram for the neck bind off st all. Please help
19.08.2019 - 03:45DROPS Design answered:
Dear Deborah, you will work diagram 1.D one time in height and then 1.A one time in height on the stitches towards neck - on right front piece, work the last 6 chain spaces on shoulder as shown in 1.D starting reading diagram with first row from WS (= left towards the right) and on left front piece you will work 1.D with first row from RS (= right towards front). Happy crocheting!
19.08.2019 - 11:30Oh yes it helped me a lot to have those stitch markers in the front half of the tank top I’d just lay backside on that and know where to increase or decrease without having to measure not knowing how much I stretched out the front I recommend doing stitch markers
05.08.2019 - 00:51I think I’ve figured it out when I’m binding off the neck I read the cardigan instructions they helped I think I would cut yarn after getting the desired length then cut yarn and attach to the opposite soo and do the same it might not be what you did but I think it’ll work
04.08.2019 - 21:31I don’t know if this will be helpful or not I’m working this top now I’m placing stitch markers on the front you work first at the places you increase and decrease just in case I stretch the project differently for the back piece I can just lay it against the front and see where it’s been increased easily and that the pieces are stretched the same just what I’m doing maybe it’ll help me and maybe others I’ll let you know when I get to the back piece increase
04.08.2019 - 20:51I don’t understand thrust the tank top shoulder I know I’m going down to 3 chain 5 spaces am I to do one side and then cut yarn to do the other shoulder since the back piece begins I’d be cutting my yarn for it or am I slip stitching across in those stitches until I get to the last four on the other side?
04.08.2019 - 20:38DROPS Design answered:
Dear Deanna, each shoulder is worked separately after neck, ie when 3 chain-spaces are left for shoulder, continue over these chain spaces as before until finished length, then cut the yarn and work over the 3 chain-spaces on the other side for the 2nd shoulder. Happy crocheting!
07.08.2019 - 10:17Could locate this yarn in your store., can you please advise what ply it is and is crochet cotton compatible?
12.06.2019 - 16:40DROPS Design answered:
Dear Karen, you will find here all stores in or shipping to Canada - and more informations about the yarn there. Happy crocheting!
13.06.2019 - 08:53