
Popular categories
Looking for a yarn?


|
|||||||||||||
Blue Pebbles |
|||||||||||||
 |
 |
||||||||||||
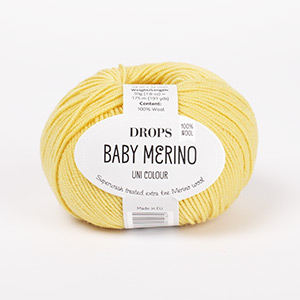
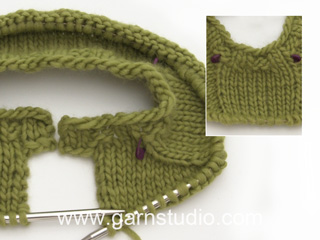
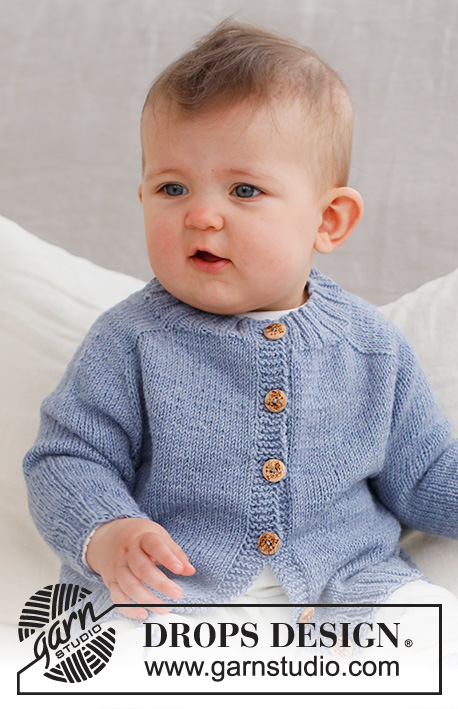
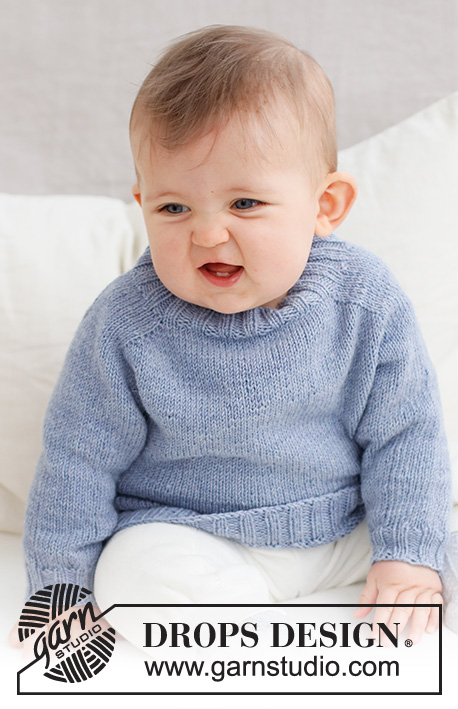
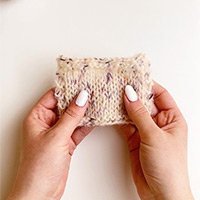
Knitted sweater for baby in DROPS BabyMerino. The piece is worked top down with saddle-shoulders. Sizes: Premature to 2 years.
DROPS Baby 43-4 |
|||||||||||||
|
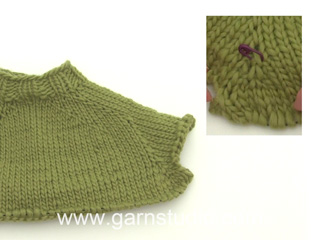
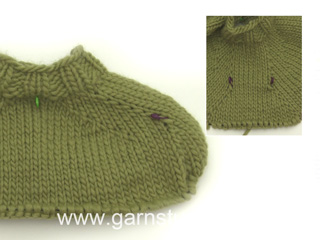
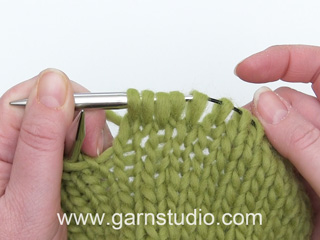
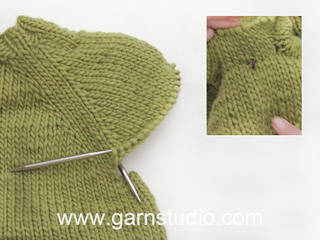
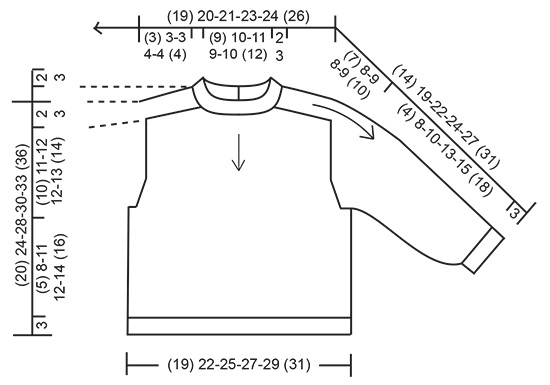
------------------------------------------------------- EXPLANATIONS FOR THE PATTERN: ------------------------------------------------------- RIDGE/GARTER STITCH (worked back and forth): Knit all rows. 1 ridge = knit 2 rows. INCREASE TIP-1 (saddle-shoulders, sleeves and yoke from the right side): BEFORE MARKER: The new stitch twists to the right. Use left needle to pick up thread between 2 stitches from row below, pick up thread from behind and knit stitch in front loop. AFTER MARKER: The new stitch twists to the left. Use left needle to pick up thread between 2 stitches from row below, pick up thread from front and knit stitch in back loop. INCREASE TIP-2 (for saddle-shoulders from the wrong side): BEFORE MARKER: The new stitch twists to the right (seen from the right side). Use left needle to pick up thread between 2 stitches from row below, pick up thread from front and purl stitch in back loop. AFTER MARKER: The new stitch twists to the left (seen from the right side). Use left needle to pick up thread between 2 stitches from row below, pick up thread from behind and purl stitch in front loop. DECREASE TIP (for sleeves): Start 3 stitches left before the marker, knit 2 together, knit 2 (marker sits between these 2 stitches), slip 1 stitch as if to knit, knit 1 and pass the slipped stitch over the knitted stitch (= 2 stitches decreased). BUTTONHOLES (for band mid-back): Work the buttonholes at the beginning of the row from the right side as follows: Knit 2, make 1 yarn over and knit 2 together On the next row (wrong side) knit the yarn over to leave a hole. The first buttonhole is worked when the neck measures 1½ cm = ½", the other 2 buttonholes are worked with (2) 2-2½-2½-3 (3) cm = (3/4") ¾"-1"-1"-1⅛" (1⅛") between each one. ------------------------------------------------------- START THE PIECE HERE: ------------------------------------------------------- SWEATER – SHORT OVERVIEW OF THE PIECE: The neck and yoke are worked back and forth with circular needle, from mid back and top down, until the split is finished. The piece is then joined and continued in the round. At the same time, stitches are increased for the shoulders, sleeves and yoke. The yoke is divided for body and sleeves and the body is continued in the round with circular needle. The sleeves are worked in the round with double pointed needles. SWEATER: Cast on (70) 74-78-82-86 (94) stitches with circular needle size 2.5 MM = US 1.5 and DROPS Baby Merino. Purl 1 row from the wrong side. The next row is worked as follows from the right side: 4 stitches in GARTER STITCH – read description above, * knit 2, purl 2 *, work from *-* until there are 6 stitches left, knit 2 and 4 stitches in garter stitch. Continue this rib for (2) 2-2-3-3 (3) cm = (3/4") ¾"-¾"-1⅛"-1⅛" (1⅛") – remember the BUTTONHOLE at the beginning of the row from the right side – read description above. When the rib is done, knit 1 row from the right side where you increase (6) 10-10-14-14 (14) stitches evenly spaced (do not increase over the bands on each side) = (76) 84-88-96-100 (108) stitches. Purl 1 row from the wrong side (bands knitted). YOKE: Change to circular needle size 3 MM = US 2.5. Insert 1 marker after the band mid-back; the yoke is measured from this marker! In addition, insert 4 other markers without working the stitches and insert each marker between 2 stitches; these markers are used when increasing for the shoulders and should have a different color to the marker on the neck. Marker 1: Start mid-back and count (15) 17-18-18-19-21 stitches (½ back piece), insert the marker before the next stitch. Marker 2: Count (10) 10-10-14-14 (14) stitches from marker 1 (shoulder), insert the marker before the next stitch. Marker 3: Count (26) 30-32-32-34 (38) stitches from marker 2 (front piece), insert the marker before the next stitch. Marker 4: Count (10) 10-10-14-14 (14) stitches from marker 3 (shoulder), insert the marker before the next stitch. There are (15) 17-18-18-19 (21) stitches left after marker 4 (½ back piece). Allow these markers to follow your work onwards. INCREASES FOR SADDLE-SHOULDERS: Read the next section before continuing – on the first row from the right side, increase 4 stitches for the saddle-shoulders as follows: Work stockinette stitch and 4 band stitches in garter stitch on each side. Increase BEFORE markers 1 and 3 and AFTER markers 2 and 4 – read INCREASE TIP-1. You are only increasing on the front and back pieces. The number of shoulder stitches remains the same. On the next row from wrong side, increase 4 stitches as follows: Increase BEFORE markers 4 and 2 and AFTER markers 3 and 1 – read INCREASE TIP-2. You are increasing on EACH row but differently from the right and wrong side so the stitches lie neatly. Continue like this, increasing a total of (10) 10-10-12-12 (12) times on every row (both from right side and wrong side) = (116) 124-128-144-148 (156) stitches. REMEMBER THE KNITTING GAUGE! After the last increase, the piece measures approx. (3) 3-3-4-4 (4) cm = (1⅛") 1⅛"-1⅛"-1½"-1½" (1½") from the marker on the neck. Now increase for the sleeves as follows – at the same time, the piece is joined mid-back as described below. Read INCREASES TO SLEEVES and SPLIT MID-BACK before continuing! INCREASES TO SLEEVES: Continue with stockinette stitch and 4 band stitches in garter stitch on each side. AT THE SAME TIME, on the next row from the right side increase 4 stitches for the sleeves as follows: Increase AFTER markers 1 and 3 and BEFORE markers 2 and 4 – remember INCREASE TIP-1. You are only increasing on the sleeves and the number of stitches on the front and back pieces remains the same. Increase like this every 2nd row (each row from the right side) a total of (10) 12-11-9-9 (10) times. The piece measures approx. (9) 11-10-9-9 (10) cm = (3½") 4⅜"-4"-3½"-3½" (4") from the marker on the neck. Now increase for the yoke as follows. After these increases are finished and the piece has been joined mid-back (as described below), there are (152) 168-168-176-180 (192) stitches. Then continue with increases to yoke. SPLIT MID-BACK: AT THE SAME TIME when the piece measures (6) 6-7-7-8 (8) cm = (2⅜") 2⅜"-2¾"-2¾"-3⅛" (3⅛") from the cast-on edge, the split is finished. Work from the right side as far as the 4 band-stitches at the end of the row. Lay the 4 band stitches at the beginning of the row on top of these last 4 stitches, with the buttonholes on top. Knit the stitches from both bands together 2 and 2 (4 stitches decreased). Continue working in the round (after the join the sleeve increases continue every 2nd round instead of each row from the right side). On the first round after the join, purl the 4 stitches from the bands. Then continue with stockinette stitch over all stitches. NOTE: The beginning of the round is moved to the middle of these 4 stitches. INCREASES TO YOKE: SIZE (<0): = (152) stitches. Continue with stockinette stitch but without increasing until the piece measures 10 cm = 4" from the marker on the neck. Go to ‘Divide for the body and sleeves’ below. SIZES 0/1 - 1/3 - 6/9 - 12/18 months (2 years): Move the 4 markers so each marker sits in the outermost stitch on each side of the back and front pieces, with 34-32-32-32 (34) stitches between the marker-stitches on the sleeves. On the next round increase 8 stitches by increasing both before and after each marker-stitch – remember INCREASE TIP-1. You are now increasing on the front and back pieces as well as the sleeves. Increase like this every 2nd round a total of 1-3-4-5 (5) times = 176-192-208-220 (232) stitches. After the last increase, the piece measures approx. 11-12-12-13 (13) cm = 4⅜"-4¾"-4¾"-5⅛" (5⅛") from the marker on the neck. Continue working until the piece measures 11-12-12-13 (14) cm = 4⅜"-4¾"-4¾"-5⅛" (5½") from the marker. DIVIDE FOR THE BODY AND SLEEVES: Work the first (21) 24-27-29-31 (33) stitches (½ back piece), place the next (34) 40-42-46-48 (50) stitches on a thread for the sleeve, cast on (4) 4-6-6-8 (8) stitches (in side under sleeve), work (42) 48-54-58-62 (66) stitches (front piece), place the next (34) 40-42-46-48 (50) stitches on a thread for the sleeve, cast on (4) 4-6-6-8 (8) stitches (in side under sleeve), work the last (21) 24-27-29-31 (33) stitches (½ back piece). The body and sleeves are finished separately. THE PIECE IS NOW MEASURED FROM HERE. BODY: = (92) 104-120-128-140 (148) stitches. Insert 1 marker in the middle of the cast-on stitches under 1 sleeve. Work stockinette stitch as far as the marker – the round now starts here. Continue with stockinette stitch until the piece measures (5) 8-11-12-14 (16) cm = (2") 3⅛"-4⅜"-4¾"-5½" (6¼") from the division. Knit 1 round where you increase (12) 16-16-20-20 (20) stitches evenly spaced = (104) 120-136-148-160 (168) stitches. Change to circular needle size 2.5 MM = US 1.5 and work rib (knit 2, purl 2) for 3 cm = 1⅛". Bind off a little loosely. The sweater measures approx. (20) 24-28-30-33 (36) cm = (8") 9½"-11"-11¾"-13" (14¼") from the shoulder down. SLEEVES: Place the (34) 40-42-46-48 (50) stitches from the thread on the one side of the piece on double pointed needles size 3 MM = US 2.5 and knit up 1 stitch in each of the (4) 4-6-6-8 (8) stitches cast on under the sleeve = (38) 44-48-52-56 (58) stitches. Insert a marker in the middle of the (4) 4-6-6-8 (8) stitches under the sleeve. Start at the marker and work stockinette stitch in the round for 1 cm = ⅜". Now decrease 2 stitches under the sleeve (does not apply to sizes <0 and 0/1 month) – read DECREASE TIP. Decrease like this every 3rd round a total of (0) 2-2-3-4 (4) times = (38) 40-44-46-48 (50) stitches. Continue working until the sleeve measures (4) 8-10-13-15 (18) cm = (1½") 3⅛"-4"-5⅛"-6" (7") from the division. There is approx. 3 cm = 1⅛" to finished length; try the sweater on and work to desired length. Knit 1 round where you decrease (2) 0-0-2-0 (2) stitches evenly spaced = (36) 40-44-44-48 (48) stitches. Change to double pointed needles size 2.5 MM = US 1.5 and work rib (knit 2, purl 2) for 3 cm = 1⅛". Bind off a little loosely The sleeve measures approx. (7) 11-13-16-18 (21) cm = (2¾") 4⅜"-5⅛"-6¼"-7" (8¼") from the division. Work the other sleeve in the same way. ASSEMBLY: Sew the buttons onto the band mid-back. |
|||||||||||||
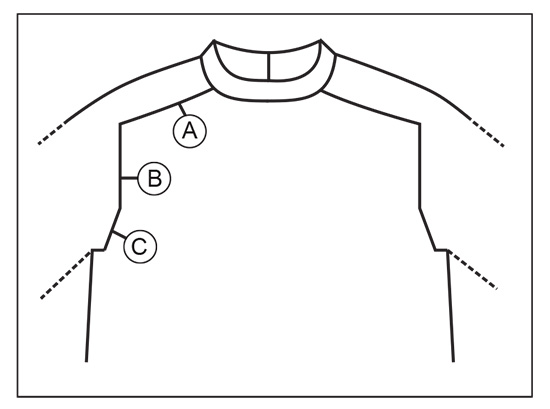
Diagram explanations |
|||||||||||||
|
|||||||||||||
|
|||||||||||||
|
|||||||||||||
|
Have you made this or any other of our designs? Tag your pictures in social media with #dropsdesign so we can see them! Do you need help with this pattern?You'll find tutorial videos, a Comments/Questions area and more by visiting the pattern on garnstudio.com. © 1982-2024 DROPS Design A/S. We reserve all rights. This document, including all its sub-sections, has copyrights. Read more about what you can do with our patterns at the bottom of each pattern on our site. |
|||||||||||||

With over 40 years in knitting and crochet design, DROPS Design offers one of the most extensive collections of free patterns on the internet - translated to 17 languages. As of today we count 304 catalogs and 11422 patterns - 11417 of which are translated into English (US/in).
We work hard to bring you the best knitting and crochet have to offer, inspiration and advice as well as great quality yarns at incredible prices! Would you like to use our patterns for other than personal use? You can read what you are allowed to do in the Copyright text at the bottom of all our patterns. Happy crafting!
Comments / Questions (14)
Comment joindre l'ouvrage au milieu dos ? Je n'ai rien trouvé dans les vidéos. Merci !
14.09.2022 - 02:06DROPS Design answered:
Bonjour Line, regardez la video ICI. Bon tricot!
14.09.2022 - 07:19I opskriften skriver I "husk UDTAGNINGSTIPS-2" (brugt på vrangen), når man skal tage ud til ærmerne (på retsiden). Men i toppen, under UDTAGNINGSTIPS-1, står der, at denne skal bruges til ærmerne. Den er også egnet til retsiden. Er det korrekt, at jeg skal bruge UDTAGNINGSTIPS-2 til at lave ret udtagning ved ærmet, eller...??
13.06.2022 - 23:25DROPS Design answered:
Hei Christine. UDTAGNINGSTIPS-1 (gælder udtagning til sadelskulder, ærmer og bærestykke fra retsiden), altså ikke bare til erme. UDTAGNINGSTIPS-2 (gælder udtagning til sadelskulder fra vrangen), altså bare sadelskulder. mvh DROPS Design
20.06.2022 - 11:41In the instructions for the JUMPER, it first says 'continue this rib for 3 cm', then it has a comment about remembering to do the buttonhole, then it says 'when the rib measures 4 cm, knit 1 row from the right side'. So should the ribbing be 3cm or 4 cm? Thank you!
08.05.2022 - 05:18DROPS Design answered:
Dear Anna, you need to work the rib 3 cm. The 4 cm sentence seems to be a typo; we will correct it as soon as possible. Thank you. Happy knitting!
08.05.2022 - 19:14In the instructions for the JUMPER, it first says 'continue this rib for 3 cm', then it has a comment about remembering to do the buttonhole, then it says 'when the rib measures 4 cm, knit 1 row from the right side'
08.05.2022 - 05:17DROPS Design answered:
Dear Anna, please see answer above.
08.05.2022 - 19:14