
Popular categories
Looking for a yarn?


|
|||||||||||||||||||||||||
Fisher’s Moon |
|||||||||||||||||||||||||
 |
 |
||||||||||||||||||||||||
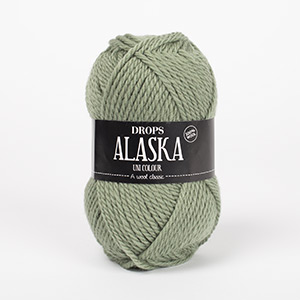
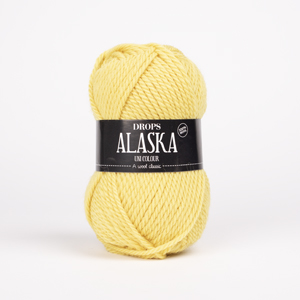
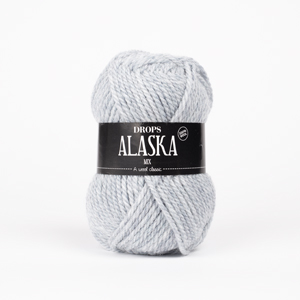
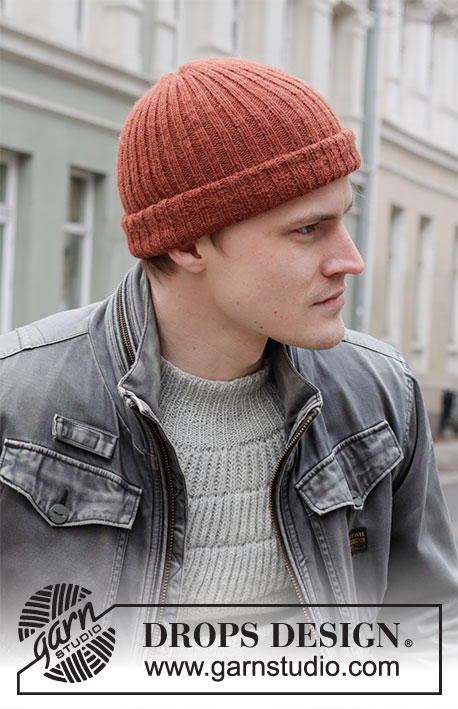
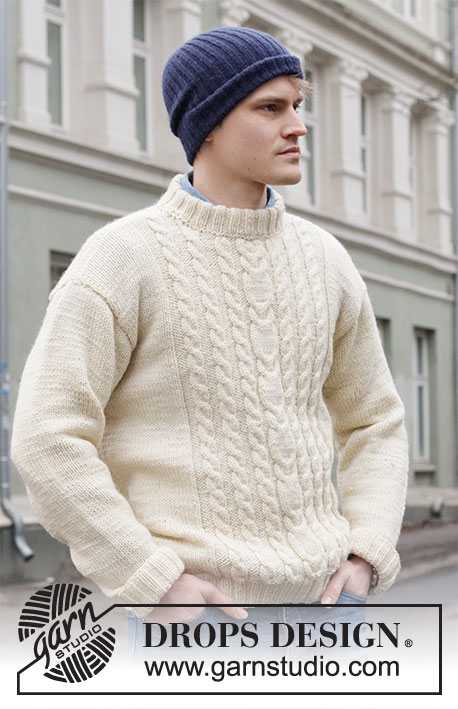
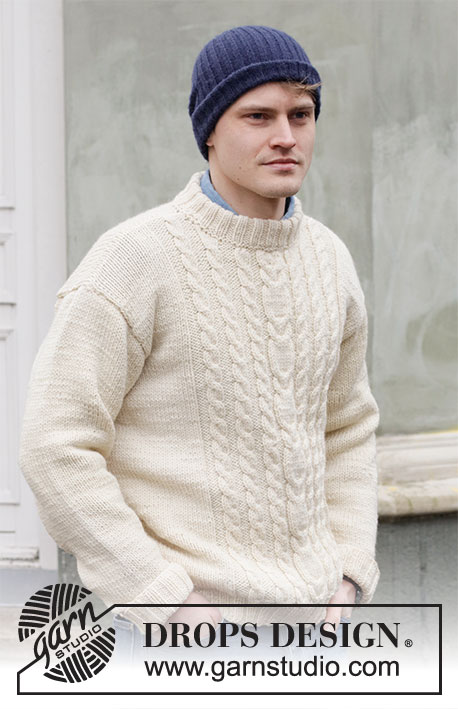
Knitted sweater for men with cables in DROPS Alaska. Size: S - XXXL
DROPS 219-9 |
|||||||||||||||||||||||||
|
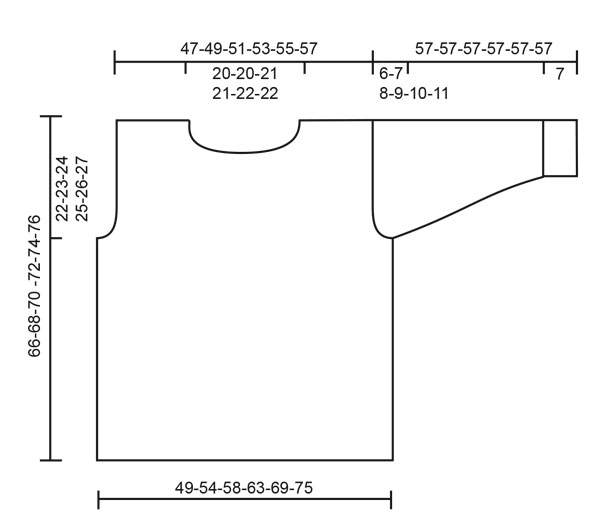
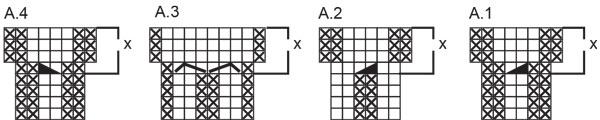
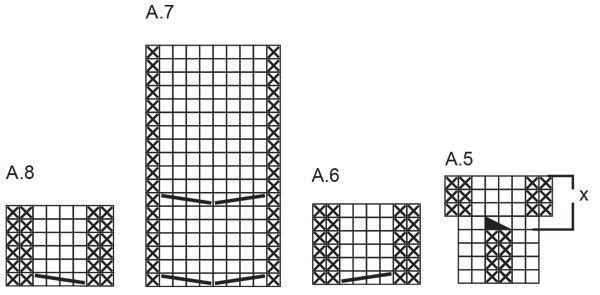
---------------------------------------------------------- EXPLANATION FOR THE PATTERN: ---------------------------------------------------------- GARTER STITCH (back and forth): Knit all rows. 1 ridge vertically = knit 2 rows. PATTERN: See diagrams A.1 to A.8. INCREASE TIP (applies to sleeve): Make 1 yarn over in each side inside 1 edge stitch in garter stitch. On next row work yarn overs twisted to avoid holes. Then work the new stitches in stockinette stitch. ----------------------------------------------------- START THE PIECE HERE: ---------------------------------------------------------- SWEATER - SHORT OVERVIEW OF THE GARMENT: Worked back and forth on circular needle in parts and sewn together when finished. Work back piece in stockinette stitch and front piece with cables and stockinette stitch. Work sleeves back and forth on needle. Work neck edge in the round. BACK PIECE: Cast on 84-88-96-104-112-124 stitches on circular needle size 5 mm = US 8 with Alaska. Work back and forth as follows – first row is from right side: 1 edge stitch in GARTER STITCH - read explanation above, * purl 2 and knit 2 *, work from *-* until 3 stitches remain, purl 2 and 1 edge stitch in garter stitch. Work rib like this until piece measures 5 cm = 2". Switch to circular needle size 5.5 mm = US 9. Work in stockinette stitch with 1 stitch in garter stitch in each side. On first row adjust number of stitches to 82-88-94-102-110-122. REMEMBER THE KNITTING GAUGE! When piece measures 44-45-46-47-48-49 cm = 17¼"-17¾"-18"-18½"-19"-19¼", bind off for armholes in each side. Bind off stitches at beginning of every row in each side: Bind off 4 stitches 0-1-1-1-1-1 time, 3 stitches 1-0-0-0-0-0 times, 2 stitches 0-0- 0-1-2-3 times and 1 stitch 0-1-2-3-3-5 times = 76-78-82-84-88-92 stitches. Continue in stockinette stitch. When piece measures 64-66-68-70-72-74 cm = 25 1/4"-26"-26¾"-27½"-28⅜"-29 1/8", bind off the middle 30-30-32-32-34-34 stitches for neck. Then bind off 1 stitch on next row from neck = 22-23-24-25-26-28 stitches for shoulder. Continue until piece measures 66-68-70-72-74-76 cm = 26"-26 3/4"-27½"-28⅜"-29 1/8"-30" and bind off. Work the other shoulder the same way. FRONT PIECE: Cast on 82-90-98-106-114-122 stitches on circular needle size 5 mm = US 8 with Alaska. Work back and forth as follows – first row is from right side: 1 edge stitch in garter stitch, * knit 2, purl 2 *, work from *-* over the next 16-20-24-28-32-36 stitches, knit 2, A.1 (= 6 stitches), A.2 (= 6 stitches), A.1, A.3 (= 8 stitches), A.4 (= 6 stitches), A.5 (= 6 stitches), A.4, * knit 2, purl 2 *, work from *-* over the next 16-20-24-28-32- 36 stitches, finish with knit 2 and 1 edge stitch in garter stitch. Continue rib like this (repeat the first 4 rows in A.1 to A.5) until piece measures 5 cm = 2". Switch to circular needle size 5.5 mm = US 9. Then work as follows from right side: 1 edge stitch in garter stitch, stockinette stitch over the first 16-20-24-28-32-36 stitches, AT THE SAME TIME decrease 0-1-2-2-2-0 stitches evenly, purl 2, A.1x, A.2x. A.1x, A.3x, A.4x, A.5x, A.4x, purl 2, stockinette stitch over the next 16-20-24-28-32-36 stitches, AT THE SAME TIME decrease 0-1-2-2-2-0 stitches evenly, 1 edge stitch in garter stitch. There are now 96-102-108-116-124-136 stitches on needle. When A.1x to A.5x have been worked 1 time vertically, continue as follows: 1 edge stitch in garter stitch, 16-19-22-26-30-36 stitches in stockinette stitch, purl 2, A.6, A.6, A.6, A.7, A.8, A.8, A.8, purl 2, 16-19-22-26-30-36 stitches in stockinette stitch, 1 edge stitch in garter stitch. Continue this pattern. When piece measures 44-45-46-47-48-49 cm = 17¼"-17¾"-18"-18½"-19"-19¼", bind off for armhole in each side as on back piece = 90-92-96-98-102-106 stitches. When piece measures 60-62-64-66-68-70 cm = 23⅝"-24⅜"-25¼"-26"-26¾"- 27½", work next row as follows: Work the first 30-31-33-34-36-38 stitches as before, work the next 30 stitches - at the same time decrease 2 stitch evenly over each cable (= decrease 2 stitches over cable in A.6, 4 stitches over cables in A.7, and 2 stitches over cable in A.8, 8 stitches decreased in total), then slip these stitches on a stitch holder for neck (= 22 stitches on stitch holder), work the remaining 30-31-33-34-36-38 stitches as before. Now work each shoulder separately. Continue to bind off for neck at beginning of every row from neck as follows: Bind off 2 stitches 1-1-1-1-2-2 times and 1 stitch 2-2-3-3-2-2 times - NOTE: When working over cables in A.6/A.8, decrease at the same time 2 stitches over every cable = 24- 25-26-27-28-30 stitches. Continue until piece measures 65-67-69-71-73-75 cm = 25 1/2"-26⅜"-27⅛"-28"-28¾"-29½" – decrease 2 stitches over cable in last repetition of A.6/A.8 = 22-23-24-25-26-28 stitches on shoulder. Bind off when piece measures 66-68-70-72-74-76 cm = 26"-26¾"-27½"-28⅜"-29 1/8"-30". Work the other shoulder the same way. SLEEVE: Cast on 42-46-46-50-50-50 stitches (including 1 edge stitch in each side) on circular needle size 5 mm = US 8 with Alaska. Work back and forth as follows – first row is from right side: 1 edge stitch in garter stitch, * knit 2 and purl 2 *, work from *-* until 1 stitch remains, work 1 edge stitch in garter stitch. Work rib like this until piece measures 7 cm = 2¾". Switch to circular needle size 5.5 mm = US 9. Purl 1 row from wrong side while decreasing 0-2-0-4-2-0 stitches evenly = 42-44-46-46-48-50 stitches. Then work in stockinette stitch with 1 edge stitch in garter stitch in each side. When piece measures 8-8-8-8-8-10 cm = 3⅛"-3⅛"-3⅛"-3⅛"-3⅛"-4", increase 1 stitch inside 1 edge stitch in each side - read INCREASE TIP. Increase like this every 3½-3½-3-2½-2½-2 cm = 1¼"-1¼"-1⅛"-⅞"-⅞"-¾" 12-12-13- 15-15-16 times in total = 66-68-72-76-78-82 stitches. When piece measures 51-50- 49-48-47-46 cm = 20"-19¾"-19¼"-19"-18½"-18", bind off 4 stitches in each side. Bind off for sleeve cap at beginning of every row in each side as follows: 2 stitches 2- 2-3-3-4-4 times, 1 stitch 0-1-0-1-0-1 time. Then bind off 2 stitches in each side until piece measures 56 cm = 22" in all sizes, bind off 3 stitches in each side, then bind off the remaining stitches. Sleeve measures 57 cm = 22½" in all sizes. Work another sleeve the same way. ASSEMBLY: Sew shoulder seams with grafting/kitchener stitches inside bind-off edge. Sew in sleeve cap. Sew underarm and side seams in one inside 1 edge stitch in garter stitch. NECK EDGE: Work neck edge in the round. Use circular needle size 5 mm = US 8 and begin from right side at one shoulder seam. Pick up 72 to 84 stitches (including stitches on stitch holder at the front and divisible by 4). Purl 1 round and knit 1 round. Work rib with knit 2 and purl 2 for 9 cm = 3½". Bind off stitches with knit over knit and purl over purl. Fold rib at the top of neck down on the inside of garment. Fasten rib to form a folding edge. To avoid a tight neck edge and avoiding the edge to tip outwards, it is important to make the seam elastic. |
|||||||||||||||||||||||||
Diagram explanations |
|||||||||||||||||||||||||
|
|||||||||||||||||||||||||
|
|||||||||||||||||||||||||
|
|||||||||||||||||||||||||
|
|||||||||||||||||||||||||
|
Have you made this or any other of our designs? Tag your pictures in social media with #dropsdesign so we can see them! Do you need help with this pattern?You'll find tutorial videos, a Comments/Questions area and more by visiting the pattern on garnstudio.com. © 1982-2024 DROPS Design A/S. We reserve all rights. This document, including all its sub-sections, has copyrights. Read more about what you can do with our patterns at the bottom of each pattern on our site. |
|||||||||||||||||||||||||


With over 40 years in knitting and crochet design, DROPS Design offers one of the most extensive collections of free patterns on the internet - translated to 17 languages. As of today we count 304 catalogs and 11422 patterns - 11417 of which are translated into English (US/in).
We work hard to bring you the best knitting and crochet have to offer, inspiration and advice as well as great quality yarns at incredible prices! Would you like to use our patterns for other than personal use? You can read what you are allowed to do in the Copyright text at the bottom of all our patterns. Happy crafting!
Comments / Questions (42)
Is there a reason this sweater is not knit in the round, rather than knitting the front and back separately and then sewing the pieces together? Different gauge with the cables?
06.08.2021 - 17:24DROPS Design answered:
Dear Alice, please see answer above.
07.08.2021 - 10:55Kan det være rigtig at man begynder med diagrammet allerede i ribkanten foran?
21.05.2021 - 10:42Hej Jeg vil gerne hvis det er muligt bruge Drops Alpaca, 100 % Alpaca, til trøjen. Da jeg ikke er så øvet en strikker har jeg brug for hjælp til hvordan jeg griber det an, hvor meget garn jeg skal bruge, og hvilken str. pinde. \r\n\r\nHåber i kan hjælpe. På forhånd tak\r\nVenlig hilsen \r\nIrene Møller
05.05.2021 - 14:08DROPS Design answered:
Hej Irene, Ja, se måleskitsen nederst i opskriften, vælg størrelse som passer dig. Klik på "brug vores garn-omregner her" - vælg DROPS Alaska. Vælg antal gram i den størrelse du skal strikke. Vælg 1 tråd, så får du et alternativ op til 2 tråde Alpaca. God fornøjelse!
05.05.2021 - 15:32Onko etukappaleen ohjeessa jokin virhe kun ensin pyydetään luomaan (XXL koko) 114 silmukkaa sitten joustinneuleen jälkeen vähennetään silmukoita ja yhtäkkiä ilmoitetaan että silmukoita pitäisi olla 126? Samoin tarkistan: onko todella tarkoitus että palmikot aloitetaan jo joustinneuleen alussa? Kiitos jo etukäteen vastauksista Yst.terv. Ira S.
27.02.2021 - 23:35DROPS Design answered:
Hei, joustinneule neulotaan piirrosten mukaisesti siten, että kerroksia 1.-4. toistetaan, eli joustinneuleessa ei tehdä palmikonkiertoja. Joustinneuleen jälkeen tehdään kavennuksia mutta myös lisäyksiä (piirrosten mukaisesti), jolloin silmukoita tulee 124.
16.03.2021 - 18:39Bij breipatroon: ne - 328 op bl.3 van 8 bij Tip voor het meerderen: Als ik iedere andere nld. voor de raglan 2 st. meerder krijg ik te veel steken ! Betekent iedere andere nld. OM DE ANDERE NLD ? Dat klopt ook beter bij de meerderingen in het patroon in het voorpand !Daar is de meerdering niet in iedere nld, maar om de andere nld. Ik hoop een verduidelijking te krijgen .
13.02.2021 - 12:49DROPS Design answered:
Dag Anne,
Ja dat klopt; met iedere andere naald wordt om de naald bedoeld, dus de ene naald wel en de andere naald niet.
15.02.2021 - 10:56Lille fejl i opskrift: I skriver på ærme, at man skal slå masker op i Nepal....resten af sweater er i Alaska;-)
27.01.2021 - 13:45Hallo, kann es sein, dass in den Diagrammen A6, A7 und A8 jeweils 2 Reihen glatt rechts vor einer neuen Zopfkreuzung nicht gezeichnet, also vergessen wurden? Auf dem Foto mit der Nahaufnahme sieht es so aus, man kann auch nachzählen, und auch bei meinem Vorderteil habe ich wesentlich mehr Rapporte in der Höhe als auf dem Foto mit dem ganzen Pullover, obwohl die Maschenprobe stimmt. Die Zöpfe sehen tatsächlich gedrungener/kürzer aus. Danke.
19.01.2021 - 22:59Buonasera. quanti grammi di filato indicativamente servirebbero per fare questo maglione taglia L?
09.01.2021 - 19:04DROPS Design answered:
Buongiorno Matteo, per una taglia L servono 950 g di Alaska. Buon lavoro!
10.01.2021 - 12:58What does the triangle mean in row 5 of A1, A2, A4, A5 ?
08.01.2021 - 16:47DROPS Design answered:
Dear Mrs Hastings-Clough, on this row you will work a small cable increasing 2 stitches - see 3rd and 6th symbol under diagram key. Happy knitting!
11.01.2021 - 06:50Qu'est-ce que ça signifie trcoter au dessus des 16 mailles suivantes?
08.01.2021 - 10:30DROPS Design answered:
Bonjour Mme Lomuzin-Lamothe, cela veut dire qu'il faut ticoter les 16 mailles du rand/tour precenent selon les explications. Regardez le video Comment lire des diagrammes tricot. Bon tricot!
08.01.2021 - 10:43