
Popular categories
Looking for a yarn?


|
|||||||
Sjøbris |
|||||||
 |
 |
||||||
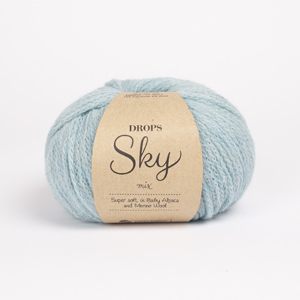
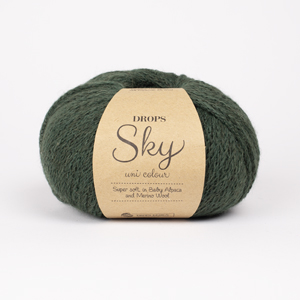
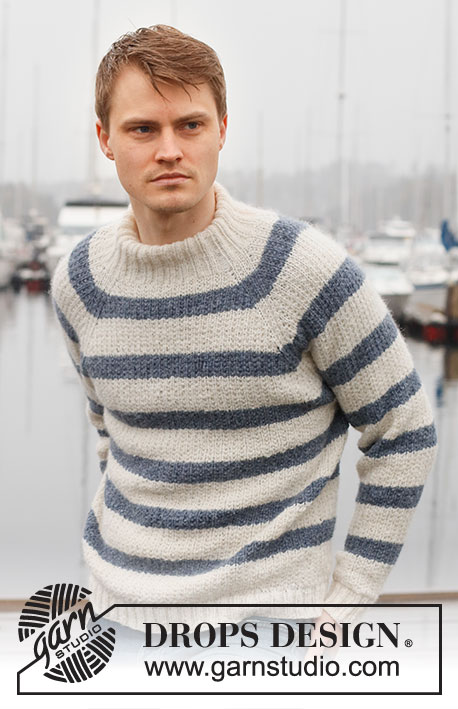
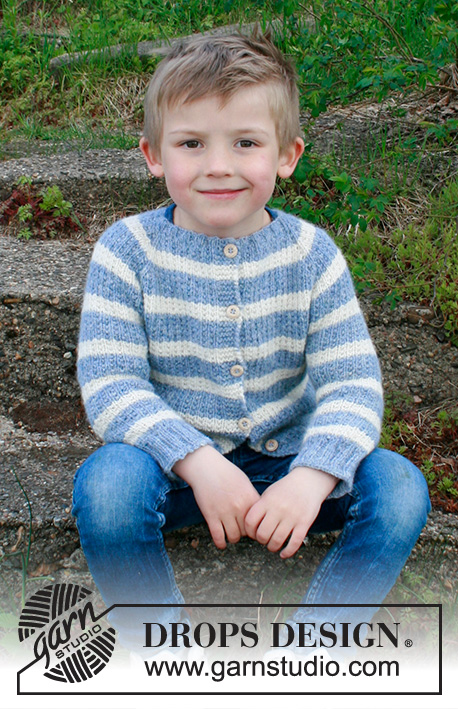
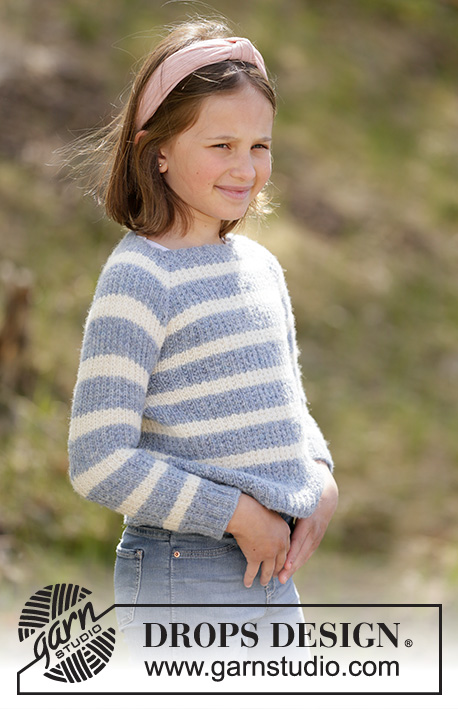
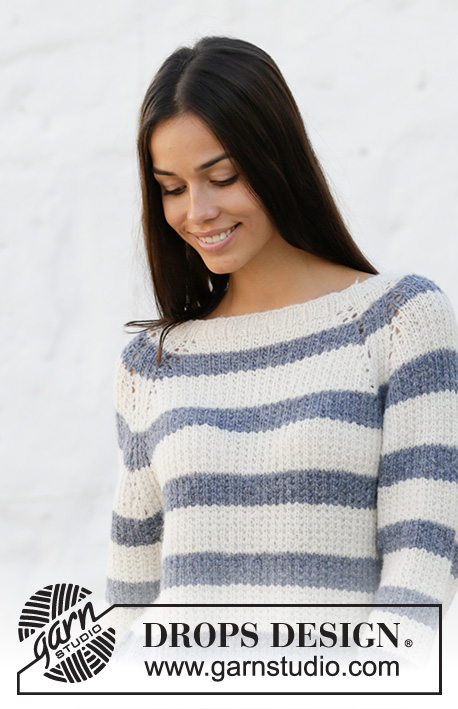
Knitted jumper with raglan and stripes in DROPS Sky. The piece is worked top down. Sizes S - XXXL.
DROPS 199-1 |
|||||||
|
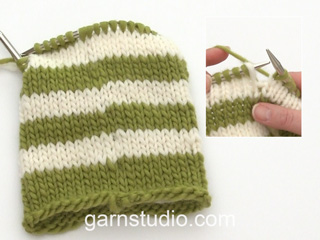
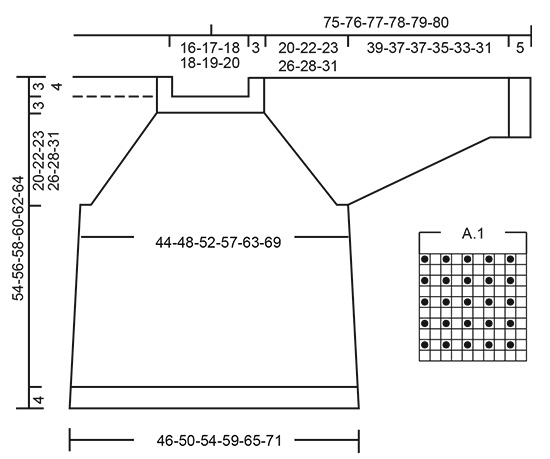
------------------------------------------------------- EXPLANATIONS FOR THE PATTERN: ------------------------------------------------------- DECREASE/INCREASE TIP (evenly spaced): To work out how to decrease/increase evenly, count the total number of stitches to be decreased/increased over (e.g. 96 stitches), and divide by the number of decreases/increases to be made (e.g. 8) = 12. In this example, decrease by knitting each 11th and 12th stitch together. When increasing make 1 yarn over after each 12th stitch. On the next round, knit the yarn overs twisted to avoid holes. RAGLAN: Increase 4 stitches in each transition between body and sleeves as follows: Work until there are 4 stitches left before the marker thread, 1 yarn over, knit 1, 1 yarn over, work 6 stitches in pattern (the marker thread sits in the middle of these 6 stitches), 1 yarn over, knit 1, 1 yarn over. On the next round knit the yarn overs to leave holes. Then work the new stitches in stripes and pattern. INCREASE TIP (for sides of body): Work until there are 2 stitches left before the marker thread, 1 yarn over, knit 4 (marker thread sits in the middle of these 4 stitches), 1 yarn over. On the next round knit the yarn overs twisted to avoid holes. Then work the new stitches in stripes and pattern. DECREASE TIP (for sleeves): Decrease 1 stitch on each side of the marker thread as follows: Work until there are 3 stitches left before the marker thread, knit 2 together, knit 2 (marker thread sits between these 2 stitches), slip 1 stitch as if to knit, knit 1 and pass the slipped stitch over the knitted stitch. STRIPES AND PATTERN: * Work 5 cm in white (including neck) and then 3 cm jeans blue * – repeat these stripes at the same time as the whole piece is worked in pattern – see diagram A.1; when increasing to raglan work the new stitches into the pattern as you go. ------------------------------------------------------- START THE PIECE HERE: ------------------------------------------------------- JUMPER - SHORT OVERVIEW OF THE PIECE: The piece is worked in the round with circular needle, top down. After the yoke the body is continued in the round with circular needle. The sleeves are worked in the round with short circular needle/double pointed needles. NECK: Cast on 96-100-104-112-120-124 stitches with circular needle size 3.5 mm and white. Knit 1 round. Then work rib (= knit 2 / purl 2) for 3 cm. Knit 1 round where you decrease 8-8-8-12-12-12 stitches evenly spaced – read DECREASE/INCREASE TIP = 88-92-96-100-108-112 stitches. Change to circular needle size 4.5 mm. Now continue with STRIPES AND PATTERN - see description above. YOKE: Insert 1 marker - THE PIECE IS NOW MEASURED FROM HERE! Insert 4 marker threads in the piece at the same time as you work stripes and pattern in the round as follows: Knit 3 stitches (= 3 stitches on back piece), insert 1 marker thread, work the next 12-12-14-14-16-16 stitches (= sleeve), insert 1 marker thread, work the next 32-34-34-36-38-40 stitches (= front piece), insert 1 marker thread, work 12-12-14-14-16-16 stitches (= sleeve), insert 1 marker thread, work the last 29-31-31-33-35-37 stitches (= back piece) after the last marker thread (there are 3 stitches left to the first marker thread). The next round is worked as follows: 6 stitches in pattern (marker thread sits in the middle of these 6 stitches), make 1 yarn over, knit 1, make 1 yarn over, 4-4-6-6-8-8 stitches in pattern (= sleeve), 1 yarn over, knit 1, make 1 yarn over, 6 stitches in pattern (marker thread sits in the middle of these 6 stitches), 1 yarn over, knit 1, make 1 yarn over, 24-26-26-28-30-32 stitches in pattern (= front piece), 1 yarn over, knit 1, make 1 yarn over, 6 stitches in pattern (marker thread sits in the middle of these 6 stitches), 1 yarn over, knit 1, make 1 yarn over, 4-4-6-6-8-8 stitches in pattern (= sleeve), 1 yarn over, knit 1, make 1 yarn over, 6 stitches pattern (marker thread sits in the middle of these 6 stitches), 1 yarn over, knit 1, make 1 yarn over, work 24-26-26-28-30-32 stitches in pattern (= back piece), 1 yarn over, knit 1, make 1 yarn over. The first increase to RAGLAN – read description above, is now finished (= 16 stitches increased on the round). Continue to increase to raglan every 4th round a total of 11-13-14-16-17-19 times (including the first increase described above) = 264-300-320-356-380-416 stitches on needle Size XL and XXL: The increase for raglan is complete. Size S, M, L and XXXL: The next round is worked as follows: 6 stitches in pattern (marker thread sits in the middle of these 6 stitches), make 1 yarn over, work pattern until 3 sts remain before the next marker thread (= sleeve), 1 yarn over, 6 stitches in pattern (marker thread sits in the middle of these 6 stitches), 1 yarn over, work pattern until 3 sts remain before the next marker thread (= front piece), 1 yarn over, 6 stitches in pattern (marker thread sits in the middle of these 6 stitches), 1 yarn over, work pattern until 3 sts remain before the next marker thread (= sleeve), 1 yarn over, 6 stitches in pattern (marker thread sits in the middle of these 6 stitches), 1 yarn over, work pattern until 3 sts remain before the next marker thread (= back piece), 1 yarn over = 8 stitches increased. All sizes: After the last increase to raglan there are 272-308-328-356-380-424 stitches on the needle. Continue with stripes and pattern without increasing until the piece measures 20-22-23-26-28-31 cm from the marker at the beginning of the yoke. The next round is worked as follows: Work 4-3-4-5-7-7 stitches (= on back piece), place the next 56-66-70-74-76-86 stitches on 1 thread for sleeve, cast on 8-8-10-10-12-12 new stitches on needle (= in side under sleeve), work the next 80-88-94-104-114-126 stitches (= front piece), place the next 56-66-70-74-76-86 stitches on 1 thread for sleeve, cast on 8-8-10-10-12-12 new stitches on needle (= in side under sleeve) and work the last 76-85-90-99-107-119 stitches (= back piece). Body and sleeves are finished separately. THE PIECE IS NOW MEASURED FROM HERE! BODY: = 176-192-208-228-252-276 stitches. Insert 1 marker thread in the middle of the 8-8-10-10-12-12 new stitches cast on under each sleeve. Start the round by one of these marker threads and allow the marker threads to follow your work onwards; continue with stripes and pattern. When the piece measures 8 cm from the division, increase 1 stitch on each side of both marker threads – read INCREASE TIP (= 4 stitches increased). Repeat this increase when the piece measures 17 cm from the division = 184-200-216-236-260-284 stitches. When the piece measures 27-27-28-26-26-25 cm from the division (approx. 50-52-54-56-58-60 cm from shoulder) knit 1 round where you increase 36-40-44-48-52-56 stitches evenly spaced = 220-240-260-284-312-340 stitches. Change to circular needle size 3.5 mm and work rib (= knit 2 / purl 2) for 4 cm. Loosely cast off with knit over knit and purl over purl - to avoid the cast-off edge being tight you can cast off with needle size 4.5 mm. The jumper measures approx. 54-56-58-60-62-64 cm from the shoulder. SLEEVE: Place the 56-66-70-74-76-86 stitches from the thread on the one side of the piece on short circular needle/double pointed needles size 4.5.mm and knit up 1 stitch in each of the 8-8-10-10-12-12 stitches cast on under the sleeve = 64-74-80-84-88-98 stitches. Insert 1 marker thread in the middle of the 8-8-10-10-12-12 stitches. Work stripes and pattern in the round. When the piece measures 2 cm from the division decrease 2 stitches mid under sleeve – read DECREASE TIP. Decrease like this every 7th-5th-4th-4th-3rd-3rd round a total of 13-17-19-20-21-25 times = 38-40-42-44-46-48 stitches. Continue working until the sleeve measures 39-37-37-35-33-31 cm from the division (shorter measurements in larger sizes due to longer yoke). Knit 1 round where you increase 6-4-6-8-6-8 stitches evenly spaced = 44-44-48-52-52-56 stitches. Change to double pointed needles size 3.5 mm and work rib (= knit 2 / purl 2) for 5 cm. The sleeve measures approx. 44-42-42-40-38-36 cm from the division. Loosely cast off with knit over knit and purl over purl - to avoid the cast-off edge being tight you can cast off with needle size 4.5 mm. Work the other sleeve in the same way. |
|||||||
Diagram explanations |
|||||||
|
|||||||
|
|||||||
|
Have you made this or any other of our designs? Tag your pictures in social media with #dropsdesign so we can see them! Do you need help with this pattern?You'll find tutorial videos, a Comments/Questions area and more by visiting the pattern on garnstudio.com. © 1982-2024 DROPS Design A/S. We reserve all rights. This document, including all its sub-sections, has copyrights. Read more about what you can do with our patterns at the bottom of each pattern on our site. |
|||||||


With over 40 years in knitting and crochet design, DROPS Design offers one of the most extensive collections of free patterns on the internet - translated to 17 languages. As of today we count 304 catalogues and 11422 patterns - 11422 of which are translated into English (UK/cm).
We work hard to bring you the best knitting and crochet have to offer, inspiration and advice as well as great quality yarns at incredible prices! Would you like to use our patterns for other than personal use? You can read what you are allowed to do in the Copyright text at the bottom of all our patterns. Happy crafting!
Comments / Questions (123)
After the increases with YO at the markers, it says work the YO into the patten (knit or purl) but I sometimes end up with either two Knits or two Purls next to each other. Is that normal? Or should the whole pattern keep shifting all the time, meaning stitches that was previously worked Knit must now become Purl? Or was I suppose to follow the pattern in the very first increase round and not Knit each time (as pattern states) but Purl as well?
06.05.2024 - 10:58DROPS Design answered:
Dear Karlé, it might happen that there will be 2 stitches next to each other that should be worked the same way, most important is that the new stitches are worked into the pattern for sleeves/body to enlarge this pattern in width and keep the raglan sttiches worked as before (the 6 stitches worked in pattern should follow all the way). Happy knitting!
06.05.2024 - 13:40Hallo liebes Drops-Team, diese Anleitung gab es auch mal als Jacke. Ich habe sie vor ca. 2 Jahren gestrickt und würde sie gerne mit einer anderen Farbe nochmals stricken. Damals war sie unter 199-1 zu finden. Darunter finde ich jetzt leider nur noch den Pullover. Gibt es die Anleitung für die Jacke noch? Liebe Grüße Ute
14.01.2024 - 16:44DROPS Design answered:
Liebe Frau Schmitt, dieses Modell ist nur als Pullover - aber hier finden Sie eine ähnliche Jacke, vielleicht kann das Ihnen helfen. Viel Spaß beim stricken!
15.01.2024 - 09:41Suite de mon message. Autrement dit, après les 6 m du raglan, il y aura (avec le nouveau jeté) forcément 2 mailles end ou 2 m envers qui se suivent Quand j'ai tricoté ma 14 ème aug, faut-il faire 3 autres rgs avant de commencer à augmenter les 8 mailles ? J'espère que vous comprenez mes explications pas forcément très claires ! Merci beaucoup de m'aider....
04.09.2023 - 14:16DROPS Design answered:
Bonjour Mme Francesconi, le point fantaisie du devant /du dos et des manches va s'élargir, autrement dit, tricotez les nouvelles mailles en point fantaisie en lisant le diagramme de gauche à droite au début du dos/devant/manches (= comme les mailles précédentes) et celles de la fin du devant/dos/manches comme les mailles suivantes - vous devez toujours avoir les 6 mailles (3 m avant + 3 m après le marqueur) tricotées telles quelles sans augmentations et les mailles du devant/du dos et des manches qui s'élargissent en incorporant les nouvelles mailles dans le point fantaisie. J'espère être claire car je ne vois pas la difficulté. Bon tricot!
04.09.2023 - 15:28Oui mais : La je viens de faire mon dernier rg d'aug. On est bien d'accord qu'il s'agit d'un rg en point fantaisie + aug. de 16 m. en tout sur ce dernier rang.A partir d'ici, il faudrait que je fasse un rang en point endroit comme indiqué sur A1.Or, il est indiqué de faire 8 aug. et faire ce rg avec des points fantaisie.il y a 2 rgs en point fantaisie qui se suivent et si je rajoute une augm (1 jeté) avant et après les 3 mailles de chaque marqueur, ca decale les points end. et env.
04.09.2023 - 11:00Bonjour, EMPIECEMENT : Taille M, donc j'ai réalisé les 14 augmentations raglan. Je termine donc sur le rang avec le point fantaisie. La suite me parait bizarre. on refait le point fantaisie et on augmente en tout 8 mailles. Mais cela décale le point fantaisie. (avec 16 mailles d'augmentations on retombe sur le point fantaisie d'une façon juste mais pas avec 8) Me comprenez-vous ? Comment faire ? Merci d'avance pour votre réponse Bonne journée...
03.09.2023 - 09:17DROPS Design answered:
Bonjour Mme Francesconi, le point fantaisie ne doit pas être décalé, les 6 mailles point fantaisie sont les mailles des raglans (vous augmentez de part et d'autre de ces 6 mailles) et elle doivent toujours être tricotées de la même façon, les mailles du devant, du dos et des manches augmentent au début et à la fin de chaque partie, et ces nouvelles mailles vont être progressivement intégrées dans le point fantaisie, mais vous devez toujours tricotez les mailles endroit à l'endroit (1ère m de A.1) et les mailles point mousse (2ème m de A.1) alternativement à l'endroit et à l'envers. Bon tricot!
04.09.2023 - 08:28Pour faire le raglan, faut-il faire les 6 mailles (avec le marqueur au milieu) a l'endroit ou en point fantaisie ? Il y a contradictions avec les explications indiquées dans "RAGLAN" et "EMPIECEMENT" Merci d'avance pour votre réponse. Bien cordialement
29.08.2023 - 21:43DROPS Design answered:
Bonjour Mme Francesconi, effectivement, les 6 mailles du raglan doivent être tricotées en point fantaisie et non à l'endroit, ainsi vous augmenterez ainsi: 1 jeté, 1 m end, 1 jeté, 6 m point fantaisie (le fil marqueur est au milieu), 1 jeté, 1 m end, 1 jeté - répétez ces augmentations à chaque marqueur. La correction a été faite, merci pour votre retour. Bon tricot!
30.08.2023 - 08:37Hallo liebes Drops-Team! Ehe man am Rumpfteil das Bündchen strickt, nimmt man ja noch mal ordentlich Maschen zu. Passiert das, damit der Rand schön locker bleibt und sich nicht zusammenzieht? Kann es sein, dass der Pullover auf den Fotos mit einem völlig anderen Garn gestrickt ist? Ich stricke ihn mit Sky, aber er sieht komplett anders aus. Liebe Grüße, Jane
28.05.2023 - 11:15DROPS Design answered:
Liebe Jane, ja genauso wird man vor Bündchen am Rumpfteil zugenommen; der photographierte Pullover wurde mit Sky gestrickt. Viel Spaß beim stricken!
30.05.2023 - 10:43Buona sera. Non capisco la correzione. È per caso già stata inserita nel testo ?
10.03.2023 - 19:33DROPS Design answered:
Buonasera Maria Raffaella, le correzioni vengono integrate direttamente nelle spiegazioni. La descrizione delle correzioni viene aggiunta per chi ha stampato il modello prima delle correzioni. Buon lavoro!
10.03.2023 - 21:47Ho difficoltà nel capire come lavorare le maglie degli aumenti del raglan perché secondo le indicazioni andrebbero lavorate con le strisce motivo, ma così facendo si sfalsa la sequenza del motivo stesso e non si ha più l'incolonnamento delle maglie rovesce. Mi potreste gentilmente spiegare come fare. Grazie per l'aiuto
26.02.2023 - 23:38DROPS Design answered:
BuonaseraVirginia, deve mantenere la lavorazione del motivo in essere e aggiungere le maglie aumentate. Buon lavoro!
08.03.2023 - 17:09Buona sera! Vorrei confezionare questo modello con il filato Karisma, filato del gruppo B, ma lana. In genere mi affido alla taglia M, per la lana e la S per i capi in cotone. Mi potete consigliare gentilmente, quale taglia seguire, per avere una buona vestibilità, considerando anche il motivo. Grazie infinite per la risposta.
23.01.2023 - 15:28DROPS Design answered:
Buonasera Giuliana, per trovare la taglia più adatta, in fondo alla pagina può trovare uno schema con le misure finali da confrontare con un capo simile in suo possesso. Buon lavoro!
23.01.2023 - 21:47