
Populaarsed kategooriad
Otsid lõnga?


|
|||||||||||||||||||||||||||||||||||||||||||||||||||||||||||||||||||||||||||||||||||||
Butterfly Queen |
|||||||||||||||||||||||||||||||||||||||||||||||||||||||||||||||||||||||||||||||||||||
 |
 |
||||||||||||||||||||||||||||||||||||||||||||||||||||||||||||||||||||||||||||||||||||
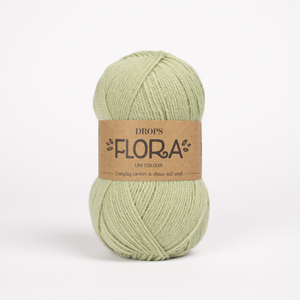
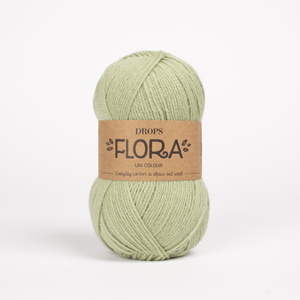
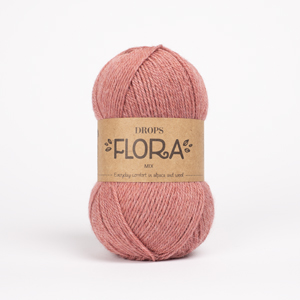
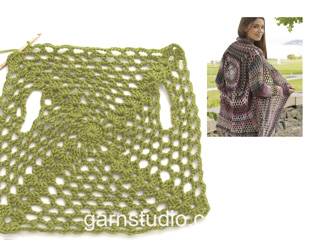
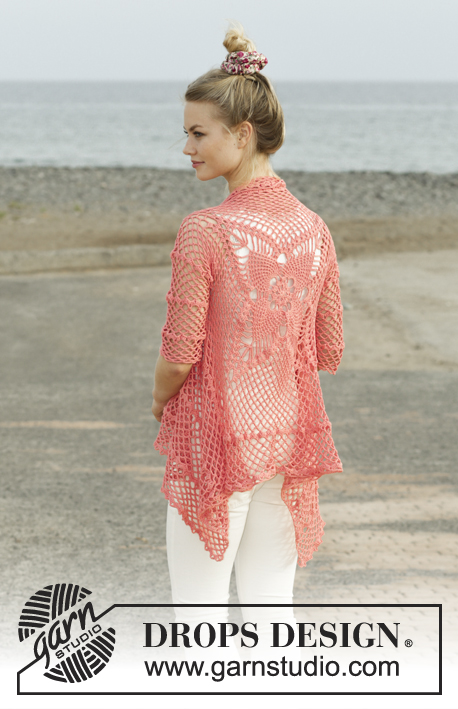
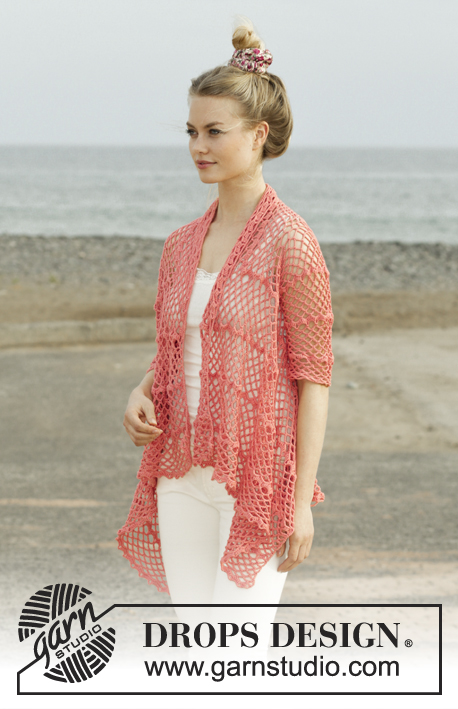
DROPS Flora lõngast heegeldatud pitsmustriga jakk suurustele S kuni XXXL
DROPS 186-11 |
|||||||||||||||||||||||||||||||||||||||||||||||||||||||||||||||||||||||||||||||||||||
|
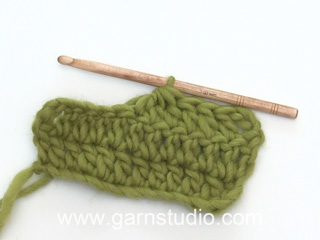
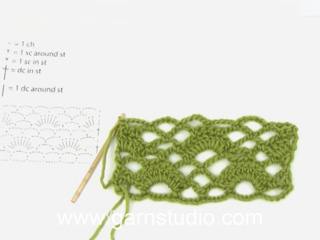
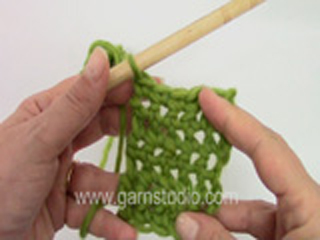
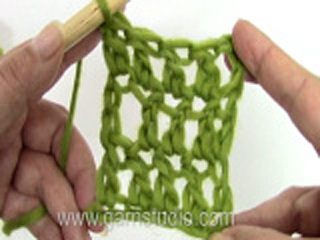
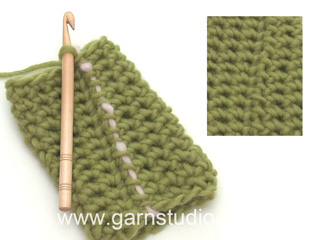
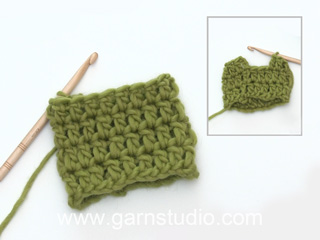
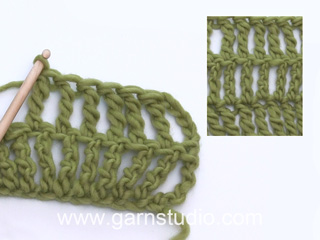
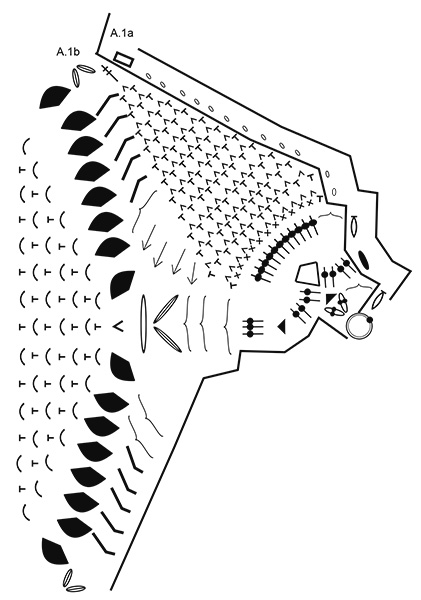
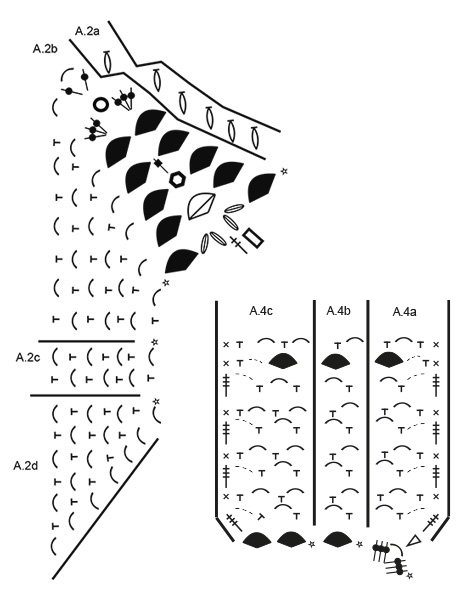
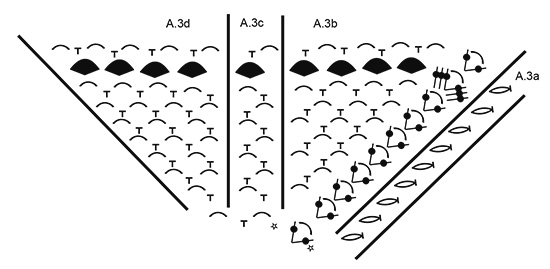
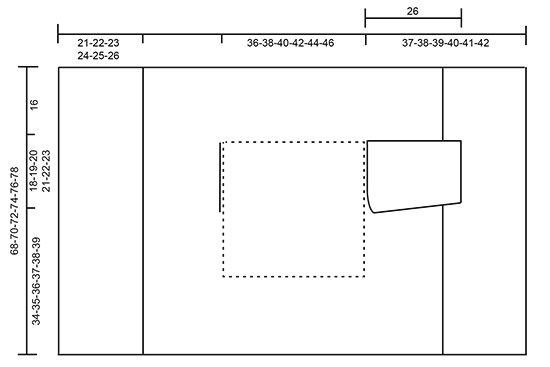
JUHEND MUSTER Vaata skeeme A.1 kuni A.4. HEEGELDAMISE INFO (skeem A.4) Asenda esimene kinnissilmus 1 ahelsilmusega. Asenda esimene kolmekordne sammas 5 ahelsilmusega. KAHANDAMISE NIPP (varruka siseküljel) Tee 5 ahelsilmust, jäta vahele 1 kinnissilmus + 1 ahelsilmustest kaar, tee 1 kinnissilmus ümber järgmise ahelsilmustest kaare + 1 ahelsilmustest kaar (= 1 mustrikordus kahandatud), jätka mustriga nagu enne, kuni jääb 1 ahelsilmustest kaar + 1 kinnissilmus eelmisel real, jäta need vahele, lõpus tee 1 kahekordne sammas esimesse ahelsilmusesse rea alguses (= 1 mustrikordus kahandatud). ---------------------------------------------------------- KAMPSUN Heegeldatakse ringselt seljaosa keskelt alustades, väljapoole siis jätka edasi-tagasi hõlmadega. Varrukad tehakse edasi-tagasi, pärast õmmeldakse kokku. Tee 4 ahelsilmust Flora lõngaga ja 3,5 mm heegelnõelaga, ning ühenda ringiks 1 aassilmusega esimesse ahelsilmusesse. Siis heegelda ringselt skeemi A.1b kokku 4 korda ringil (skeem A.1a näitab, kuidas ring algab ja lõppeb ning tehakse lisaks skeemile A.1b). JÄLGI HEEGELDAMISE TUGEVUST! Kui skeemid A.1a ja A.1b on tehtud, katkesta lõng. Alusta järgmist ringi ümber ahelsilmustest kaare viimase sambagrupi vahel, kinnita lõng 1 aassilmusega sellesse ahelsilmustest kaarde. Nüüd heegelda ringselt skeemi A.2 järgmiselt: * tee skeemi A.2b, korda skeemi A.2c kokku 6 korda laiuses, tee skeemi A.2d *, korda * kuni * kokku 4 korda ringil – skeem A.2a näitab, kuidas ring algab ja lõppeb ning tehakse lisaks skeemile A.2b/c/d. Kui skeemid A.2a ja A.2b on tehtud, on ruudu läbimõõt umbes 36 x 36 cm. Nüüd on 14 ahelsilmustest kaart igal küljel ja 4 nurka ahelsilmustest kaartega (1 ühekordne sammas + 6 ahelsilmust + 1 ühekordne sammas). LOE JÄRGNEV LÄBI ENNE JÄTKAMIST! Jätka nii: * tee skeemi A.3b ümber nurga ahelsilmustest kaare, korda skeemi A.3c kuni jääb 1 ahelsilmustest kaar enne nurka, tee skeemi A.3d ümber järgmise ahelsilmustest kaare *, korda * kuni * kokku 4 korda ringil – skeem A.3a näitab, kuidas ring algab ja lõppeb ning tehakse lisaks skeemile A.3b/c/d. SAMAL AJAL, kui töö kõrgus on umbes 36-38-40-42-44-46 cm x 36-38-40-42-44-46 cm, tee käeaugud järgmiselt: heegelda skeemi A.3 nagu enne kuni esimese nurgani, heegelda ümber ahelsilmustest kaare nagu enne. Nüüd tee ahelsilmuseid kuni järgmise külje keskele (st. külg 1. ja 2. nurga vahel) järgmiselt: tee 1 ahelsilmus iga vahelejäetud ahelsilmuse/ kinnissilmuse kohta. Siis jätka mustriga nagu enne, kuni poole küljeni 3. ja 4. nurga vahel. Tee ahelsilmuseid kuni 4. nurgani järgmiselt: tee 1 ahelsilmus iga vahelejäetud ahelsilmuse/ kinnissilmuse kohta, heegelda ümber nurga ahelsilmustest kaare, ning lõpeta ülejäänud ring nagu enne. Järgmisel ringil heegelda skeemi A.3 nagu enne kõigil silmustel (st. säti muster käeaugu ahelsilmuste kohale nii, et ringi muster ilusti jookseks). Jätka ringselt skeemi A.3 (korda 9 ringi vertikaalselt), kuni töö mõõt on umbes 68-70-72-74-76-78 cm x 68-70-72-74-76-78 cm (st. umbes 16 cm käeaugust kõikidel suurustel) – lõpeta pärast sammastegrupi ringi. Katkesta lõng ja paigalda 1 silmusemärkija (küljele 1. ja 2. nurga vahele). ESIOSA Nüüd heegelda edasi-tagasi 1. ja 2. nurga vahel. NB! Ära tee kasvatusi. Loe HEEGELDAMISE INFOT! Tee skeemi A.4a ümber nurga, korda skeemi A.4b kuni jääb 1 ahelsilmustest kaar enne nurka, tee skeemi A.4c ümber selle ahelsilmustest kaare ja ümber nurga. Jätka mustriga nagu näidatud skeemil ning korda skeemi A.4 vertikaalselt, kuni sammastegrupi rida on tehtud 2 korda kokku vertikaalselt; siis korda ainult ahelsilmustest kaartega ridu, kuni töö pikkus on umbes 19-20-21-22-23-24 cm silmusemärkijast, siis heegelda sammastegrupi rida 1 kord kõikidel suurustel. Töö pikkus on 21-22-23-24-25-26 cm silmusemärkijast. Katkesta ja kinnita lõng. Heegelda samamoodi teine hõlm (st. edasi-tagasi 3. ja 4. nurga vahele). VARRUKAD Heegelda varrukad käeaugu külge edasi-tagasi, ülevalt alla ning õmble pärast kokku. Alusta varruka alt ja heegelda järgmiselt: Loe HEEGELDAMISE INFOT! Tee skeemi A.4a ümber esimese ahelsilmustest kaare, korda skeemi A.4b kokku 15-16-17-18-19-20 korda laiuses (jaga muster A.4b ühtlaselt ümber käeaugu, st. kas tee 2 ahelsilmustest kaart ühte kaarde või jäta 1 kaar vahele), tee skeemi A.4c ümber viimase 2 ahelsilmustest kaare. Jätka skeemiga A.4 edasi-tagasi, SAMAL AJAL, kui töö pikkus on 4 cm (järgmine rida tee ahelsilmuseid/kinnissilmuseid), kahanda 1 mustrikordus mõlemal küljel - loe KAHANDAMISE NIPPI. Kahanda nii umbes iga 8-8-8-6-6-6 cm järel kokku 3-3-3-4-4-4 korda = 12-13-14-15-16-17 ahelsilmustest kaart 6 silmusega pärast viimast kahandust. Jätka niimoodi heegeldamist, kuni töö on umbes 28 cm kõikidel suurustel, lõpeta pärast ahelsilmustest kaartega rida. Katkesta ja kinnita lõng. Tee teine varrukas samamoodi. VIIMISTLUS Õmble kokku varruka alune õmblus läbi ääresilmuste – jälgi, et õmblus ei jääks kiskuma. |
|||||||||||||||||||||||||||||||||||||||||||||||||||||||||||||||||||||||||||||||||||||
Skeemi seletused |
|||||||||||||||||||||||||||||||||||||||||||||||||||||||||||||||||||||||||||||||||||||
|
|||||||||||||||||||||||||||||||||||||||||||||||||||||||||||||||||||||||||||||||||||||
|
|||||||||||||||||||||||||||||||||||||||||||||||||||||||||||||||||||||||||||||||||||||
|
|||||||||||||||||||||||||||||||||||||||||||||||||||||||||||||||||||||||||||||||||||||
|
|||||||||||||||||||||||||||||||||||||||||||||||||||||||||||||||||||||||||||||||||||||
|
|||||||||||||||||||||||||||||||||||||||||||||||||||||||||||||||||||||||||||||||||||||
|
Oled teinud selle või mõne meie teise disaini? Lisa oma piltidele sotsiaalmeedias silt #dropsdesign , et me näeksime neid pilte. Vajad abi selle mustriga?Garnstudio.com kodulehel on õppevideot, küsimuste/vastuste osa ja muudki. © 1982-2024 DROPS Design A/S. Kõik õigused kaitstud. See dokument, ning selle alajaotused on kaitsud autoriõigustega. Loe rohkem, mida meie mustritega võib teha, iga mustrilehe alt meie kodulehel. |
|||||||||||||||||||||||||||||||||||||||||||||||||||||||||||||||||||||||||||||||||||||


Tegeledes üle 40 aasta kudumise ja heegeldamise disainidega, pakub DROPS Design ühte suurimat tasuta mustrite kollektsiooni internetis - tõlgituna 17 keelde. Tänaseks on meil 304 kataloogi ja 11422 mustrit - millest 8521 on tõlgitud Eesti keelde.
Me anname endast parima, et tuua teieni kõike mida kudumine ja heegeldamine võib pakkuda - inspiratsiooni, nõuandeid ning ka kvaliteetseid lõngu parima hinnaga! Soovid kasutada mustreid muukski, kui ainult oma tarbeks? Loe infot meie Copyright osas iga lehekülje all. Rõõmsat loomist!
Kommentaarid / Küsimused (85)
Nourhan Osama wrote:
My queastion about the step between 5th and 6th round .....in th 5th round in figure A.1b i will make 3 chains 12 times between every single crochet in stitches ,, but do i make 3 chain then slip stitch it or make single crochet ? and Then i finish it,,and go above the 5 chain stitches do i make slip stitches in it also or make 5 chain st ?
28.04.2018 - 22:28DROPS Design answered:
Dear Mrs Osama, on round 5 you repeat only 11 times (1 sc, 3 ch), then work 1 sc in last ch-space and work now 5 ch and repeat round from beg: (1 sc, 3 ch) x 11, 1 sc in last ch-space, 5 ch. At the end of round, after the last 5 ch, work 1 sl st in 1st ch from beg of round, then work sl st to the first ch-space (as at the beg of round 4). Happy crocheting!
30.04.2018 - 10:24Nourhan Osama wrote:
What is the different between those two symbols?? /symbols/069.gif= round begins with 3 chain stitches and finishes with 1 slip stitch in 3rd chain stitch at beginning of round\r\n = round begins with 3 chain stitches and finishes with 1 slip stitch in 3rd chain stitch at beginning of round, then work slip stitches until first chain space\r\n\r\ni can\'t understand it clearly .. and thank you for your effort
25.04.2018 - 22:15DROPS Design answered:
Dear Mrs Osama, in the first one you start with 3 ch and finish with 1 sl st in 3rd ch from beg of round, for the 2nd one you will start the same way but at the end of round, after joining with a sl st in 3rd ch from beg of round you will now work sl st until first ch-space so that next round starts in the first ch-space on previous round. Happy crocheting!
26.04.2018 - 08:45Nourhan Osama wrote:
What is thw diffrenet between these two symbol i don't understand it clearly can u help me please ,, and thank you for your effort
25.04.2018 - 22:09Patsy Gadberry wrote:
You have double treble as the last stitch in the point of the pineapple in both the US and British patterns. I noticed my stitch looked longer than your photo. I assume this should have been just a treble or triple crochet for the US version.
18.04.2018 - 17:03Patsy Gadberry wrote:
I know how to crochet all the stitches, but have extreme difficulty with your pattern charts. Do you have any instruction online as to how your crochet pattern charts are read? I am trying to get started with the Butterfly Queen. I made Isla Bonita, but used instructions and photos from Nathalie on the forum.
17.04.2018 - 18:03DROPS Design answered:
Dear Mrs Gadberry, each symbol = one stitch/group of st. In A.1, start on black dot on ring of chain then work A.1a (= how to begin/end each round) and repeat A.1b a total of 4 times in width. Follow each round in diagram round after round reading diagram always from the right towards the left (as for Isla Bonita). Happy crocheting!
18.04.2018 - 09:12Where can I find a list of definitions for all the different stitches? What is double crochets, for example?
16.04.2018 - 06:13DROPS Design answered:
Dear Gyda, you can find the explanation of all the stitches in the tips and helps section of our site. Also you can find a demo / tutorial of these stitches in the video section heret. Happy Crocheting!
16.04.2018 - 08:26Re butterfly queen pattern...I don't see any measurements to help in selecting what size I need. Can you help. Thanks Linda
13.04.2018 - 00:37DROPS Design answered:
Dear Linda, you will find measurement chart at the very bottom of the pattern, below diagrams. Happy crocheting!
13.04.2018 - 08:17I've tried to add this & another two patterns to my favorites. It keeps giving me error message "backend connection failed". Could you please help me with this. Thanks.
07.04.2018 - 20:02DROPS Design answered:
Dear RG, we had an issue that night but it is now working, you can try again! Happy crocheting!
09.04.2018 - 10:12Este gráfico es un auténtico infierno. Sería genial que utilizárais los símbolos más utilizados universalmente. Hay que estar siempre mirando la leyenda porque se representan las cosas de una manera diferente. No está claro el principio y final de cada vuelta, y tampoco está el texto escrito. A falta de un gráfico mejor, sería de ayuda tener un vídeo explicativo. Gracias.
02.04.2018 - 01:16Is there a PDF pattern I can print? The diagram patterns are confusing to me. I just can’t get used to them. Thank you.
25.03.2018 - 16:18DROPS Design answered:
Dear Sandi, there is a pattern for printing in PDF format, if you click the print icon right above the pattern instructions, and then click to the text on the upper right side ("Continue to print the pattern"). However, it will have the same text and charts what is on the web page. If you get stuck with the chart, you can alsways ask for help in person in teh store you bought your DROPS yarn from. Happy Crafting!
25.03.2018 - 23:08