Sea Foam Sweater |
|
 |
 |
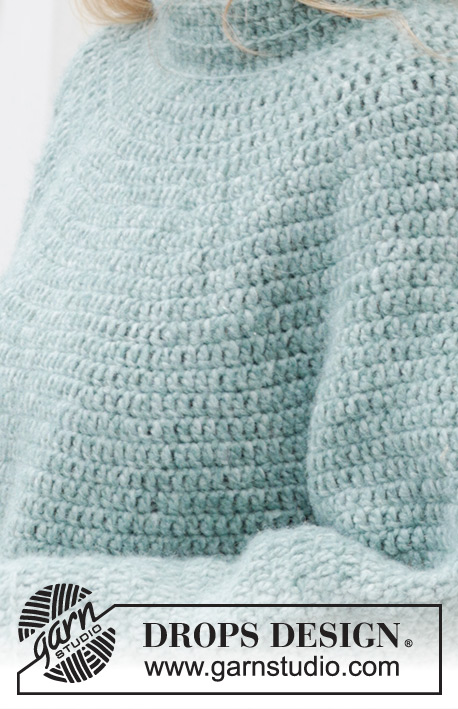
Crocheted jumper in DROPS Air. The piece is worked top down, with round yoke and double neck. Sizes S - XXXL.
DROPS 243-14 |
|
|
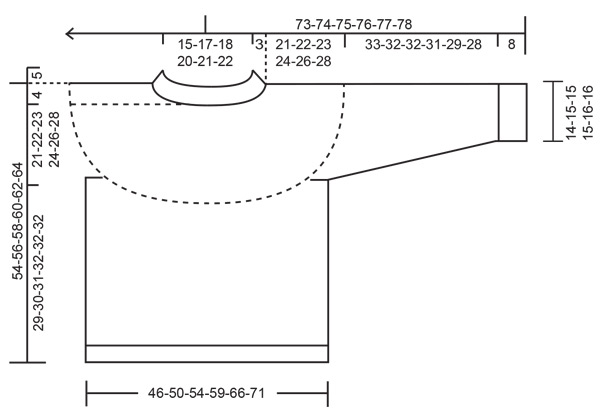
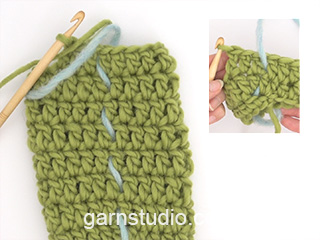
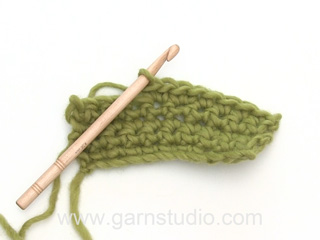
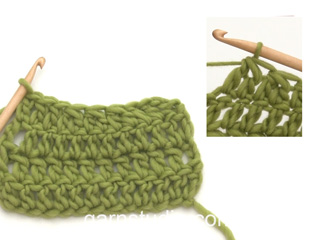
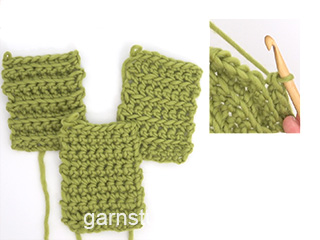
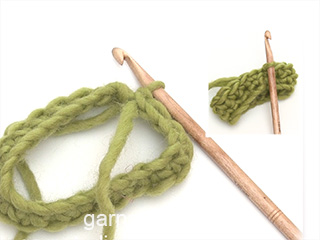
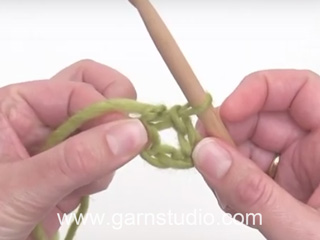
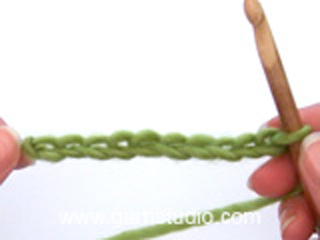
------------------------------------------------------- EXPLANATIONS FOR THE PATTERN: ------------------------------------------------------- INCREASE TIP (evenly spaced): Increase 1 treble crochet by working 2 treble crochets in the same stitch. To work out how to increase evenly, count the total number of stitches on the round (e.g., 69 stitches) and divide by the number of increases to be made (e.g., 11) = 6.27. In this example, increase in approx. each 6th stitch. CHAIN STITCH: If you work outermost on the hook the chain stitch will often be too tight; 1 chain stitch should be as long as 1 treble crochet is wide. CROCHET INFORMATION-1 (working round and round): Work in the round without finishing each round: Insert 1 marker-thread at the beginning of the round so you can see where each round begins. On round 2 work the first treble crochet in the 2nd chain stitch from the beginning of round 1, work all the half-treble crochets as described in the text. Do not finish the round but work the first treble crochet on the new round in the first treble crochet on the previous round. Continue like this round and round. On the final round at the bottom of the body and sleeves, to avoid a «jump», work as follows: Work until there are 2 treble crochets left on the round, work 1 half-treble crochet in the next treble crochet, 1 double crochet in the last treble crochet and finish with 1 slip stitch in the first treble crochet on the round. CROCHET INFORMATION-2 (for neck): At the beginning of each round of treble crochets, work 3 chain stitches which replace the first treble crochet. Finish the round with 1 slip stitch in the 3rd chain stitch at the beginning of the round. DECREASE TIP (for sleeves): When working in the round, the beginning of the round will be displaced as you continue working. Insert a marker-thread mid-under the sleeve, between 2 stitches, and allow it to follow your work onwards down the sleeve, adjusting the thread to keep it vertical. Lay the piece flat regularly, to make sure the marker-thread stays mid-under the sleeve as you decrease. Decrease on each side of 2 treble crochets by the marker-thread as follows: Work until there are 3 treble crochets left before the marker-thread, *make 1 yarn over, insert the hook through the next stitch, pick up the strand, make 1 yarn over and pull it through the first 2 loops on the hook *, work from *-* a total of 2 times, make 1 yarn over and pull it though all 3 loops on the hook, (1 stitch decreased). Work 1 treble crochet in each of the next 2 treble crochets (marker-thread sits between these 2 stitches), repeat from *-* 2 times in total, make 1 yarn over and pull it through all 3 loops on the hook (1 stitch decreased). You have decreased 2 stitches on the round. ------------------------------------------------------- START THE PIECE HERE: ------------------------------------------------------- JUMPER – SHORT OVERVIEW OF THE PIECE: The yoke is worked in the round, top down. The yoke is divided for body and sleeves and the body and sleeves continued separately in the round. The neck is worked to finish. YOKE: Work 67-70-73-77-80-84 CHAIN STITCHES – read description above, with hook size 5 mm and DROPS Air. Form them into a ring with 1 slip stitch in the first chain stitch. ROUND 1: Work 2 chain stitches (replaces the first half-treble crochet), work 1 half-treble crochet in each of the remaining chain stitches, work 2 half-treble crochets around the 2 chain stitches at the beginning of the round = 69-72-75-79-82-86 half-treble crochets. Insert 1 marker; the yoke is measured from here! Continue with treble crochets. Read CROCHET INFORMATION before starting! ROUND 2: Work 1 treble crochet in each half-treble crochet and increase 11-18-25-31-38-44 treble crochets evenly spaced - read INCREASE TIP = 80-90-100-110-120-130 treble crochets. ROUND 3: Work 1 treble crochet in each treble crochet. ROUND 4: Work treble crochets and increase 16-18-20-22-24-26 treble crochets evenly spaced = 96-108-120-132-144-156 treble crochets. ROUND 5: Work treble crochets and increase 16-18-20-22-24-26 treble crochets evenly spaced = 112-126-140-154-168-182 treble crochets. REMEMBER THE CROCHET TENSION! ROUND 6: Work treble crochets and increase 16-18-20-22-24-26 treble crochets evenly spaced = 128-144-160-176-192-208 treble crochets. Continue as follows in the different sizes: SIZES S, M, L and XL: = 128-144-160-176 treble crochets. ROUND 7: Work 1 treble crochet in each treble crochet. ROUND 8: Work treble crochets and increase 16-18-20-22 treble crochets evenly spaced. Work rounds 7-8, 2-2-2-2 more times = 176-198-220-242 treble crochets. SIZES XXL and XXXL: = 192-208 treble crochets. ROUND 7: Work 1 treble crochet in each treble crochet. ROUND 8: Work 1 treble crochet in each treble crochet. ROUND 9: Work treble crochets and increase 24-26 treble crochets evenly spaced. Work rounds 7-9, 2-2 more times = 264-286 treble crochets. ALL SIZES: = 176-198-220-242-264-286 treble crochets. Work 1 treble crochet in each treble crochet until the yoke measures 21-22-23-24-26-28 cm from the marker. Divide for the body and sleeves as follows: Work 26-28-31-35-39-43 treble crochets, 1 half-treble crochet (half back piece), work 11 chain stitches (under the sleeve), skip 34-40-45-49-51-54 treble crochets for the sleeve, work 1 half-treble crochet, 52-57-63-70-79-87 treble crochets, 1 half-treble crochet (front piece), work 11 chain stitches (under the sleeve), skip 34-40-45-49-51-54 treble crochets for the sleeve, work 1 half-treble crochets, 26-29-32-35-40-44 treble crochets (half back piece). The body and sleeves are finished separately. BODY: = 130-140-152-166-184-200 stitches. Continue with 1 treble crochet in each stitch (on round 1 work 1 treble crochet in each of the 11 chain stitches under each sleeve) until the piece measures 29-30-31-32-32-32 cm from the division - remember CROCHET INFORMATION-1 when finishing the last round. Cut and fasten the strand. The jumper measures approx. 54-56-58-60-62-64 cm from the shoulder. SLEEVES: Work the 34-40-45-49-51-54 skipped stitches on one side of the piece as follows: Fasten the strand with 1 double crochet in the 6th of the 11 chain stitches worked under the sleeve, then 1 treble crochet in each of the next 4 chain stitches, work 2 treble crochets together as follows: work 1 treble crochet in the last chain stitch but wait with the last yarn over and pull-through, work 1 treble crochet in the same way through the half-treble crochet in the transition between the body and sleeve, make 1 yarn over and pull it through all 3 loops on the hook – this avoids a large gap in the transition between the body and sleeves. Work 1 treble crochet in each treble crochet as far as the chain stitches on the other side, work 2 treble crochets together in the same way in the transition and 1 treble crochet in each of the last chain stitches = 45-51-56-60-62-65 stitches. Work round and round without finishing each round, in the same way as on the body, starting the next round by working 1 treble crochet in the first double crochet on the previous round, then continuing round and round. Work 1 treble crochet in each treble crochet until the sleeve measures 3 cm from the division. Now decrease 2 treble crochets under the sleeve – read DECREASE TIP! Decrease like this every 11-5½-3½-2½-2½-2 cm a total of 3-5-7-9-9-10 times = 39-41-42-42-44-45 stitches. Work until the sleeve measures 33-32-32-31-29-28 cm (8 cm left to finished length). Work 1 treble crochet in the back loop of each treble crochet on the round. Continue like this until the sleeve measures 41-40-40-39-37-36 cm – remember CROCHET INFORMATION-1 when finishing the last round. Cut and fasten the strand. Work the other sleeve in the same way. DOUBLE NECK: Use crochet hook size 5 mm and DROPS Air. Fasten the strand with 1 slip stitch approx. mid-back. Read CROCHET INFORMATION-2 in explanations above. ROUND 1: Work 1 treble crochet between each half-treble crochet (from round 1) = 67-70-73-77-80-84 treble crochets. ROUND 2: Work 1 treble crochet in the back loop of each treble crochet. ROUND 3: Work 1 treble crochet in each treble crochet (through both loops). ROUND 4: Work 1 treble crochet in the back loop of each treble crochet. ROUND 5: Work 1 treble crochet in each treble crochet (through both loops). ROUND 6: Work 1 treble crochet in the back loop of each treble crochet. ROUNDS 7-9: Work 1 treble crochet in each treble crochet (through both loops). Cut the strand, pull it through the last loop. Fold the neck double to the inside and fasten down with a couple of stitches. |
|
|
|
|
Have you made this or any other of our designs? Tag your pictures in social media with #dropsdesign so we can see them! Do you need help with this pattern?You'll find tutorial videos, a Comments/Questions area and more by visiting the pattern on garnstudio.com. © 1982-2024 DROPS Design A/S. We reserve all rights. This document, including all its sub-sections, has copyrights. Read more about what you can do with our patterns at the bottom of each pattern on our site. |
|








Comments / Questions (40)
Hallo, wat ik niet helemaal begrijp zijn de herhalingen van de toeren 7-8 (maat L). Zoals ik het lees, moeten die toeren 4x gemaakt worden maar gezien de hoeveelheid stokjes aan het eind, lijkt het dat de toeren 3x gemaakt worden (160+20+20+20=220). Lees ik het verkeerd?
28.10.2024 - 08:03DROPS Design answered:
Dag Franka,
Je haakt toer 7 tot en met 9 in totaal 3 keer. Dus er moet eigenlijk staan haak toeren 7-8 nog 2 keer. Je hebt dan 3 keer 20 steken gemeerderd, dus in totaal komen er 60 steken bij. Ik zal een correctie doorvoeren zodat het er duidelijker staat.
31.10.2024 - 20:387.+8. omgang skal jeg (som jeg læser svar på samme spørgsmål her i opskriften) gentage 3 gange. Men jeg forstår ikke at 3-3-3-3 skulle være lig med 3. gentagelser af 7.+8. omgang! Er der et sted jeg kan læse mere om betydning af 3-3-3-3 eller kan I beskrive det lidt mere forståeligt? Hvorfor står der fire 3-taller? Og hvis jeg har forstået det korrekt skal der være ialt 4 gange 7.+8. omgang.
24.10.2024 - 21:12DROPS Design answered:
Hej Mai-Britt, jo når vi skriver 3-3-3-3 er 3 gange i hver af de 4 størrelser vi beskriver i det afsnit. Så uanset hvilken størrelse du hækler 7. og 8.omgang 3 gange :)
25.10.2024 - 10:31Merci pour le conseil mais j'aimerais surtout savoir si je dois ajouter un autre fil à l Alpaca Brushed Silk que j'ai choisi, car vous, vous associez 2 laines pour la réalisation de ce joli pull. Est ce que je dois associer un autre fil ou je peux le réaliser avec juste cette laine, l Alpaca Brushed silk ? Merci 😀
08.10.2024 - 22:11DROPS Design answered:
Bonjour Mme Cattaneo, dans ce modèle précisément, nous ne crochetons qu'avec 1 seul fil DROPS Air, vous pouvez toutefois également associer un autre fil à Brushed Alpaca Silk notez toutefois qu'il vous faudra bien conserver la même tension, ajouter un fil même du groupe A va jouer sur la texture pour le même échantillon, il va vous falloir faire des essais pour trouver la texture que vous aimez et qui vous convient. Sinon vous pouvez simplement crocheter 1 fil Brushed Alpaca Silk - notez juste que le résultat sera différent car ces 2 laines ont des compositions différentes. Bon crochet!
09.10.2024 - 08:26Bonjour et merci pour ces précisions Concernant les mesures : est ce que la taille M ne sera pas trop grande ou faut il un S pour la stature de ma fille qui mesure 1.70 m. J J hésite entre le S et le M. ☹️ Et aussi, en choisissant la laine laine Alpaca Brushed Silk, je n'ai pas besoin de la mélanger avec un autre fil comme vous l'avez fait avec la laine Drops Air (pourquoi d'ailleurs Avez vous mélanger ces 2 laines ?).
08.10.2024 - 09:58DROPS Design answered:
Bonjour Caroline, mesurez un pull qu'elle aime pour vérifier les mesures et ajustez si besoin, c'est la meilleure façon de trouver la taille à l'aide des mesures du schéma. Vous pouvez effectivement utiliser 1 fil Brushed Alpaca Silk pour remplacer 1 fil Air car ces 2 laines sont du même groupe, la texture sera juste différente car les 2 laines sont différentes. Retrouvez la quantité nécessaire en fonction de la taille grâce au convertisseur. Bon tricot!
08.10.2024 - 16:20Bonjour, je souhaiterais réaliser ce pull pour ma fille mais avec la laine Alpaca Brushed Silk . Pourriez vous me confirmer que l'alternative est bonne (j'ai consulté votre convertisseur) ? Est ce que la taille M correspond bien à un 38 (ma fille mesure 1.70) ? Il me faudrait du coup 14 pelotes (ça fait beaucoup..) ? Merci pour votre réponse.
07.10.2024 - 13:33DROPS Design answered:
Bonjour Caroline, retrouvez la méthode de calcul ici (ou bien essayez le convertissesur), les 2 laines sont du même groupe, calculez le métrage total, soit en M: 7 pelotes Air x 150 m la pelote = 1050/140 m la pelote Brushed = 7,5 pelotes soit 8 pelotes Brushed Alpaca Silk; Pensez juste à bien vérifier et à conserver la même tension que pour Air; notez que la texture du pull sera différente. Vérifiez la taille et ajustez les mesures si besoin grâce à cette leçon. Bon tricot!
07.10.2024 - 16:00Bonjour, je vous envoie ce commentaire parce que je réalise se pull en laine, mais je comprend pas quand il faut faire les 11 mailles en l’air pour l’emplacement des bras, j’étais pourtant au bon nombre de brides j’ai compter avant de faire ce tour, et la les 11 mailles en l’air, après sauter 45 mailles et refaire une bride , j’ai fais les deux et au final l’emplacement des bras n’est pas du tout centrer c’est plus court devant que derrière entre le devant et le dos …
29.09.2024 - 01:16DROPS Design answered:
Bonjour Mme Huguerre, edit: votre nombre de mailles doit être juste (j'avais mal compté), vous devez bien avoir les manches de chaque côté, ainsi en L (220 mailles): 31 brides +1 demi-bride (32) pour le demi-dos; 45 brides sautées pour la manche, 1 demi-bride +63 brides+1 demi-bride pour le devant (65), 45 sautées pour la manche et 1 demi-bride+32 brides (33 m pour le demi-dos+les 32du début du tour= 65 pour le dos aussi), ainsi, les manches doivent être bien symétriques, avec 65 au milieu pour le devant et le dos et 45 de chaque côté remplacées par 11 ml) pour les manches. Bon crochet!
30.09.2024 - 09:03Hei, hva betyr «Hekle som 7.-8.omgang totalt 3-3-3-3 ganger.»?
03.09.2024 - 15:54DROPS Design answered:
Hei Victoria, Dette betyr at du gjentar omganger 7 og 8 (ikke de andre omgangene) 3 ganger (6 omganger heklet totalt). God fornøyelse!
04.09.2024 - 06:28Ønsker denne strikket med raglanfelling, og håper den vil komme som strikkeoppskrift? Veldig fin genser, men dumt at jeg ikke kan hekle, så får ikke strikket den uten oppskrift! Håper på strikkeoppskrift på akkurat denne genseren Sea Foam Sweater.
02.09.2024 - 22:54DROPS Design answered:
Hei Sol, Siden denne oppskriften er heklet, er det ikke mulig å ha en genser som er helt lik når den er strikket. Hvis du klikker på Gratis Oppskrifter på toppen av siden og velger Dame gensere i menyen, får du sett all genseroppskrifter vi har for øyeblikket. God fornøyelse!
03.09.2024 - 06:35Bonjour, Si je comprends bien, la chaînette que l'on monte au début est le début de l'empiècement mais aussi le début du col ? Donc, si notre tête ne passe pas, il faut monter plus de mailles chaînette ? Merci pour votre réponse.
31.07.2024 - 00:10DROPS Design answered:
Bonjour Anne, la chaînette de base au début de l'ouvrage/de l'empiècement correspond à l'encolure, si votre tension est juste, votre 1er tour doit faire entre 48 et 60 cm et être donc suffisamment large pour passer la tête, utilisez un crochet d'une taille au-dessus pour la chaînette de base pour avoir plus d'élasticité si besoin - à la fin, on crochète le col de bas en haut, à partir de la chaînette de base. Bon crochet!
31.07.2024 - 07:36I used much thinner yarn (480m/100g) and 3,5 mm hook - the swatch was just right for the zarn and hook. The jumper fits perfect.
05.07.2024 - 09:57