
Popular categories
Looking for a yarn?


|
||||||||||||||||
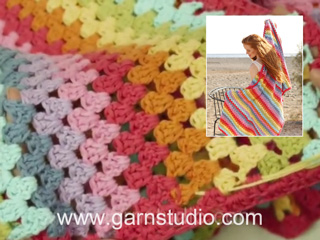
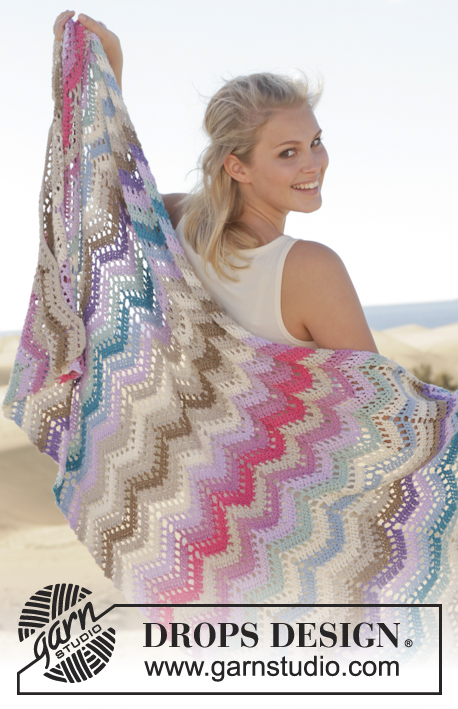
Taste of Rainbow |
||||||||||||||||
 |
 |
|||||||||||||||
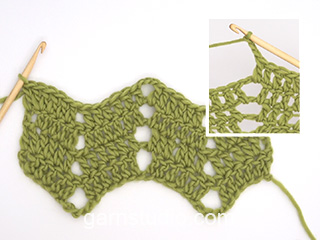
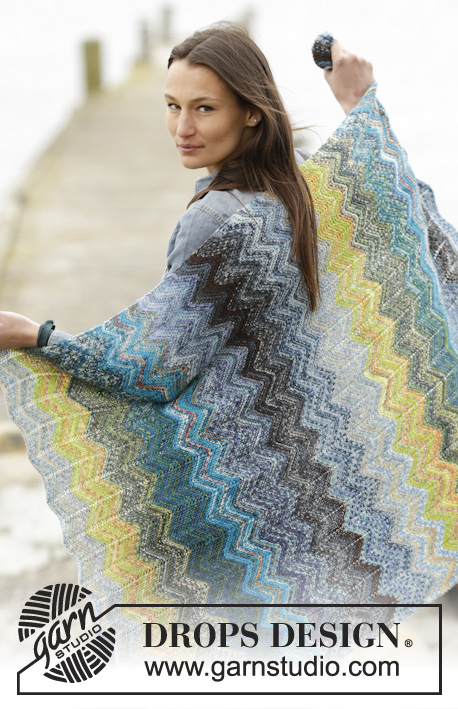
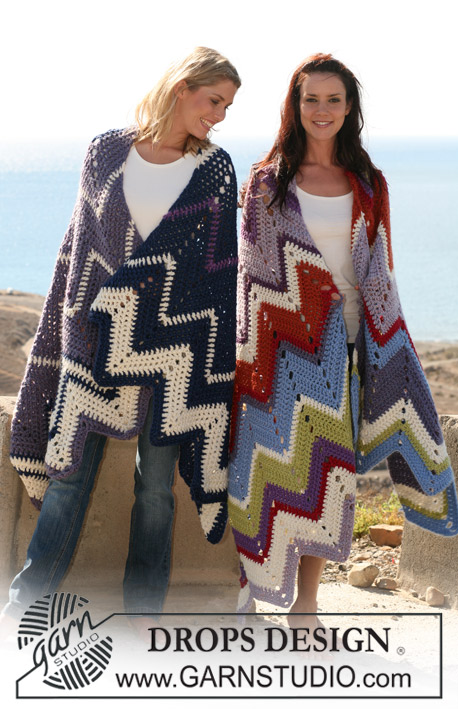
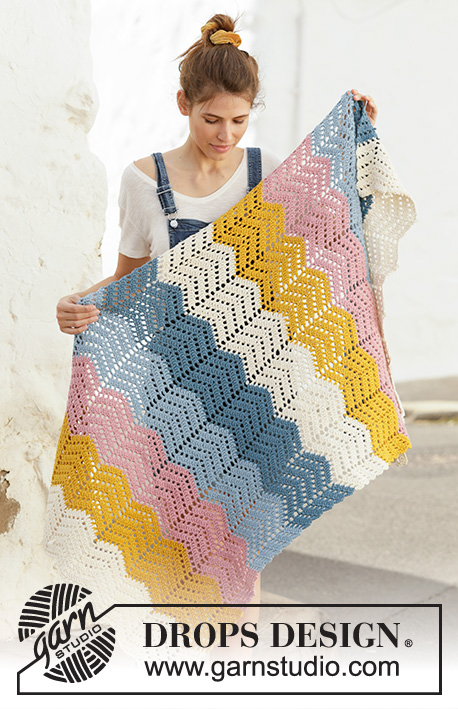
Crocheted blanket with zig-zag pattern in DROPS Paris.
DROPS 198-2 |
||||||||||||||||
|
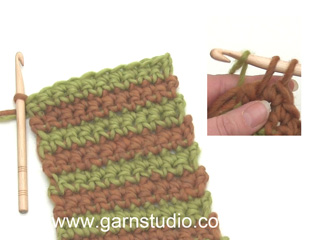
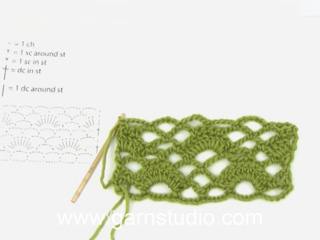
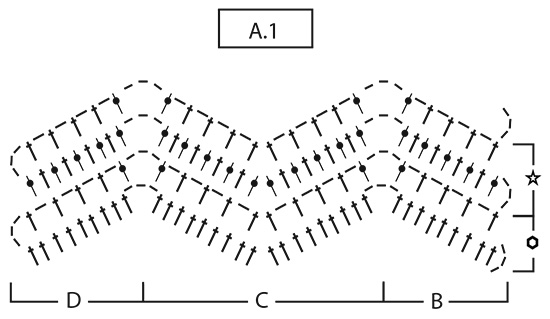
---------------------------------------------------------- EXPLANATION FOR THE PATTERN: ---------------------------------------------------------- PATTERN: See diagram A.1. STRIPES: Work approx. 12 to 12.5 cm of each colour in the following order: off white, spray blue, light blue, old pink, mustard, off white, spray blue, light blue, old pink, mustard, off white. ---------------------------------------------------------- START THE PIECE HERE: ---------------------------------------------------------- BLANKET - SHORT OVERVIEW OF THE PIECE: Worked back and forth. Work pattern and stripes at the same time. BLANKET: Work 194 LOOSE chain stitches (including 3 chain stitches to turn with) on hook size 4.5 mm with off white. See explanation of STRIPES above. Then work according to diagram A.1 where ROW 1 is worked as follows: Work 1 treble crochet in 4th chain stitch from hook, 1 treble crochet in each of the next 2 chain stitches, * skip 1 chain stitch, 1 treble crochet in each of the next 3 chain stitches, skip 1 chain stitch, 1 treble crochet in each of the next 3 chain stitches, 3 chain stitches, skip 1 chain stitch, 1 treble crochet in each of the next 3 chain stitches, skip 1 chain stitch, 1 treble crochet in each of the next 3 chain stitches, skip 1 chain stitch, 1 treble crochet in each of the next 3 chain stitches, skip 5 chain stitches, work 1 treble crochet in each of the next 3 chain stitches *, repeat from *-* 5 more times, skip 1 chain stitch, 1 treble crochet in each of the next 3 chain stitches, skip 1 chain stitch, 1 treble crochet in each of the next 3 chain stitches, 3 chain stitches, skip 1 chain stitch, 1 treble crochet in each of the next 3 chain stitches, skip 1 chain stitch, 1 treble crochet in each of the next 3 chain stitches, skip 1 chain stitch, 1 treble crochet in each of the next 3 chain stitches = 126 treble crochets. There are 7 zig-zags in total. Turn piece. 2ND ROW IN DIAGRAM: 3 chain stitches (these 3 stitches replace first treble crochet), * 1 treble crochet in next treble crochet, 1 chain stitch, skip 1 treble crochet, 1 treble crochet in next treble crochet, 1 chain stitch, skip 1 treble crochet, 1 treble crochet in next treble crochet, 1 chain stitch, skip 1 treble crochet, 1 treble crochet in next treble crochet, 1 chain stitch, 1 treble crochet around chain space, 3 chain stitches, 1 treble crochet around same space, 1 chain stitch, skip 1 treble crochet, 1 treble crochet in next treble crochet, 1 chain stitch, skip 1 treble crochet, 1 treble crochet in next treble crochet, 1 chain stitch, skip 1 treble crochet, 1 treble crochet in next treble crochet, 1 chain stitch, skip 1 treble crochet, 1 treble crochet in next treble crochet, skip 2 treble crochets *, repeat from *-* 6 more times = 70 treble crochets. Turn piece. ROW 3: See diagram A.1. Work B 1 time, repeat C 6 times. Finish row by working D 1 time. ROW 4: See diagram A.1. Work D 1 time, repeat C 6 times and finish row by working B 1 time. Repeat ROW 3 and 4, at the same time change colour as explained in STRIPES above. Finish blanket here. Piece measures approx. 125 cm. |
||||||||||||||||
Diagram explanations |
||||||||||||||||
|
||||||||||||||||
|
||||||||||||||||
|
Have you made this or any other of our designs? Tag your pictures in social media with #dropsdesign so we can see them! Do you need help with this pattern?You'll find tutorial videos, a Comments/Questions area and more by visiting the pattern on garnstudio.com. © 1982-2024 DROPS Design A/S. We reserve all rights. This document, including all its sub-sections, has copyrights. Read more about what you can do with our patterns at the bottom of each pattern on our site. |
||||||||||||||||


With over 40 years in knitting and crochet design, DROPS Design offers one of the most extensive collections of free patterns on the internet - translated to 17 languages. As of today we count 304 catalogues and 11422 patterns - 11422 of which are translated into English (UK/cm).
We work hard to bring you the best knitting and crochet have to offer, inspiration and advice as well as great quality yarns at incredible prices! Would you like to use our patterns for other than personal use? You can read what you are allowed to do in the Copyright text at the bottom of all our patterns. Happy crafting!
Comments / Questions (24)
Goedemorgen, Op advies van de video over rechte randen, haak ik i.p.v. de 3 l bij keren, het aparte stokje. Echter, daarmee heb ik te veel stokjes (incl. het keerstokje) op mijn toeren: Toer 2: Bij D 6 i.p.v. 5 Toer 3: B 10 i.p.v. 9, D 11 i.p.v. 9 Toer 4: B&D 6 i.p.v. 5 Nu wil ik beginnen aan toer 5, en dan zou ik bij B 12 stokjes hebben ipv 9 (incl. het keer stokje). Klopt dit? Kan ik hier wel mee verder, of kan ik beter de 3 keerlossen gebruiken? Groeten, Yara
17.12.2019 - 11:02DROPS Design answered:
Dag Yara,
Als je in plaats van de 3 keerlossen, haakt zoals aangegeven in de video, zou het aantal steken niet af moeten wijken. Als je te veel steken hebt, dan haak je toch ergens te veel steken.
18.12.2019 - 19:34It makes no sence skipping 5 slip stitches in row 2. It looks strange and I changed it to 3 slip stitches which looked much better.
26.10.2019 - 16:36Hei. Er det riktig å hoppe over 5 masker? Synes det blir så stor løkke da og ser ut som at jeg skal hekle i 5.maske for å få den ene kanten.
14.08.2019 - 22:13DROPS Design answered:
Hej Anniken, Hvor er du i opskriften, jeg finder ikke hvor vi skriver at du skal hoppe over 5 masker.... Har du set vores video?
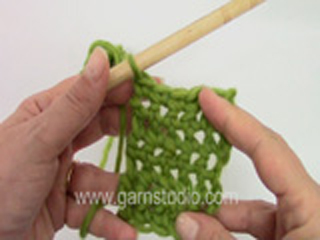
How to crochet a zigzag pattern from Garnstudio Drops design on Vimeo.
04.12.2019 - 11:45Tak for svaret men forstår det ikke. Iflg. diagrammet på 4. række mangler der da en maske eller hvad? Kan ikke få det til at passe!
09.08.2019 - 09:55DROPS Design answered:
Hej igen Gitte, jo det stemmer, du har 9 masker på 4.række og du har 10 masker på 3.række. God fornøjelse!
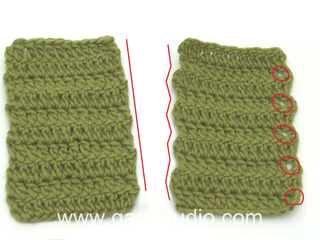
09.08.2019 - 10:29Hvordan får man kanten lige? Iflg. diagrammet række 3 og 4 som skal gentages kommer man jo til at mangle 1 maske i kanten. Jeg fatter det ikke, er ellers en rutineret hækler. .
08.08.2019 - 23:14DROPS Design answered:
Hej Gitte, jo du hækler 10 stangmasker (incl lm du vender med) hver gang du hækler 3.række. God fornøjelse!
09.08.2019 - 08:20Hallo ich möchte gern diese Decke größer häkeln. Breit 120cm Lang 160 cm Wieviel Garn brauche ich dazu und wie viele Maschen müsste ich anschlagen?
05.08.2019 - 14:56DROPS Design answered:
Liebe Frau Degener, leider können wir nicht jede Anleitung nach jeder individuellen Anfrage anpassen, gerne wird Ihnen aber Ihr DROPS Laden weiter helfen - auch telefonisch oder per E-Mail. Viel Spaß beim häkeln!
07.08.2019 - 10:51Ik wil de deken graag iets kleiner maken. Breedte ongeveer 60 cm. Met hoeveel lossen moet ik dan beginnen?
31.07.2019 - 12:28DROPS Design answered:
Dag Melissa,
Je zou dan bijvoorbeeld 1 of 2 herhalingen van C in de breedte minder kunnen doen. Een herhaling van is 18 stokjes op de 1e toer en omdat je na iedere 3 stokjes in de eerste toer een losse over slaat en daarnaast nog een keer 5 stokjes, kom ik op 24+5 = 29 lossen minder opzetten, per herhaling die je minder wilt doen.
31.07.2019 - 17:55Als ik de foto van deze deken zie, dan loopt de zijkant van de deken recht af, maar als ik het patroon volg dan worden de zijkanten van de deken steeds smaller...ik kom er niet uit...ben een beginnend haakster😊
24.07.2019 - 13:43DROPS Design answered:
Dag Maartje,
Als je het patroon precies volgt, dan zou de deken niet smaller moeten worden. Kan het zijn dat je per ongeluk steeds strakker begint te haken, waar door het bij elkaar trekt?,
24.07.2019 - 20:29Hej. Der er vel ikke en mulighed for, at I kunne lægge dette mønster ind, skrevet på dansk. Jeg vil så frygtelig gerne hækle denne, men får intet ud af videoen på YouTube, og det er det eneste sted jeg har fundet den. Den hedder: Crochet Wave: Hugs & Kisses Stitch - Blanket Mange hilsner Benthe
02.03.2019 - 18:40Muy linda la manta y la combinación de colores. Muchas gracias por compartirnos el esquema.
21.02.2019 - 05:05