
Popular categories
Looking for a yarn?


|
|||||||||||||||||||
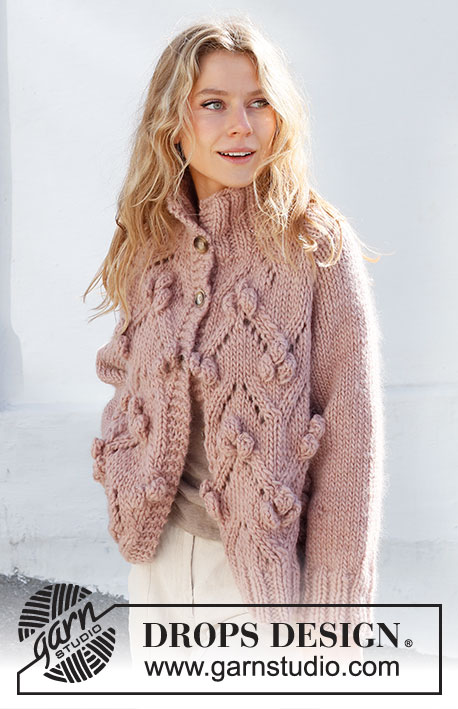
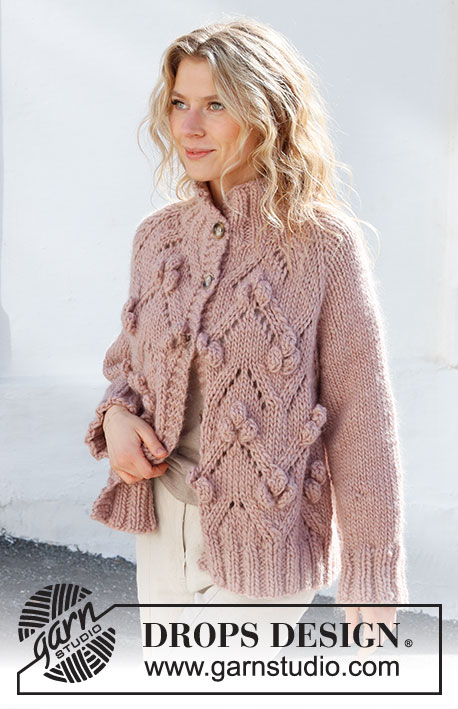
Rosé Bubbles Jacket |
|||||||||||||||||||
 |
 |
||||||||||||||||||
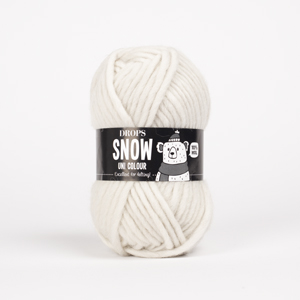
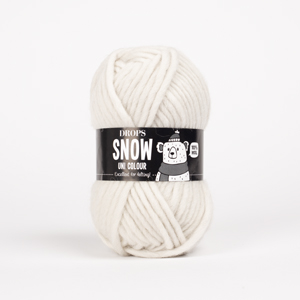
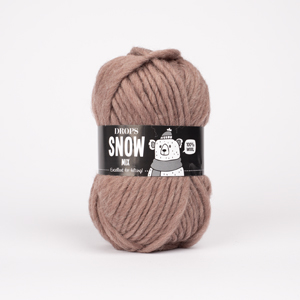
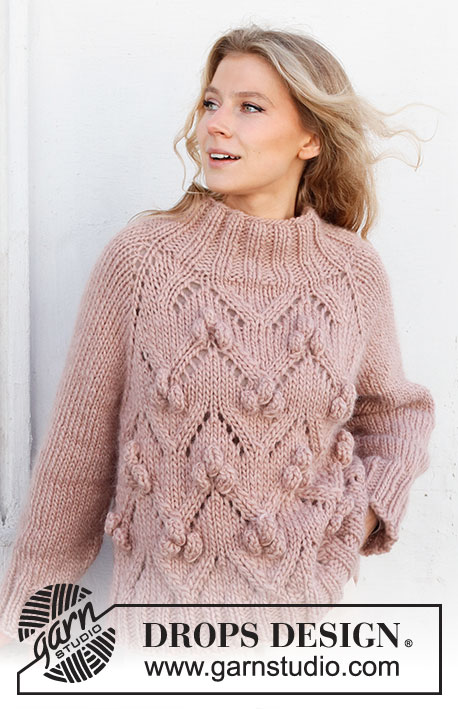
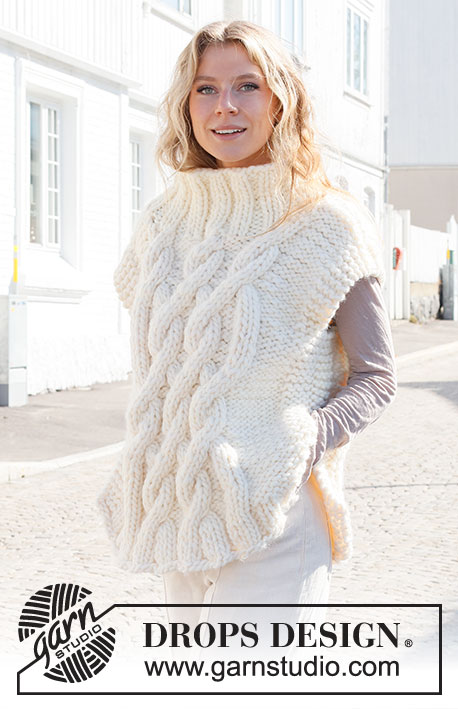
Knitted jacket in DROPS Snow or DROPS Wish. The piece is worked top down with raglan and lace pattern. Sizes S - XXXL.
DROPS 227-23 |
|||||||||||||||||||
|
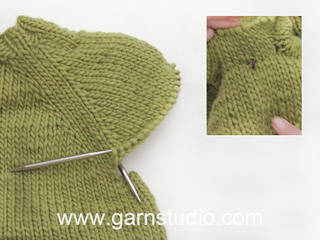
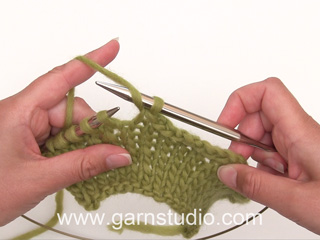
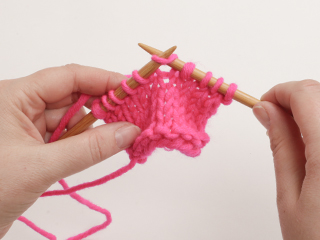
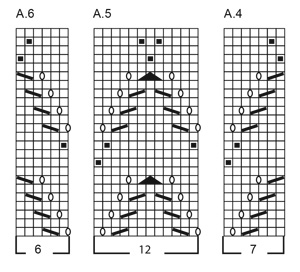
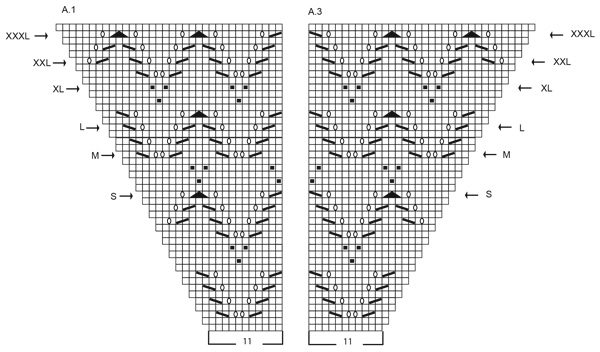
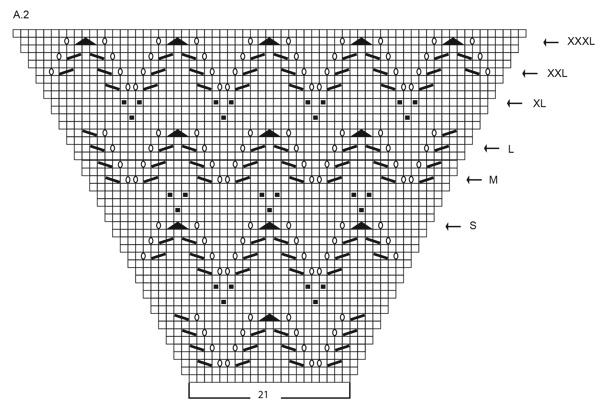
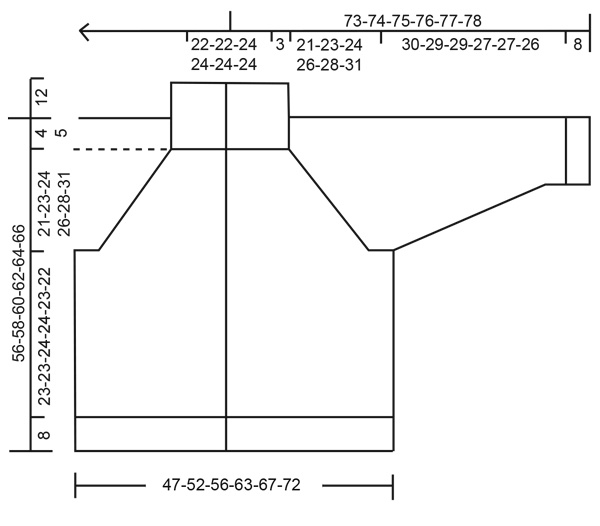
------------------------------------------------------- EXPLANATIONS FOR THE PATTERN: ------------------------------------------------------- RIDGE/GARTER STITCH (worked back and forth): Knit all rows. 1 ridge = knit 2 rows. RAGLAN: Increase by making 1 yarn over on each side of 1 knitted stitch (raglan-line), in each transition from body to sleeves (= 8 stitches increased on the row). On the next row (wrong side) work the yarn overs as follows: BEFORE RAGLAN-LINE: Purl in the back loop. No hole. AFTER RAGLAN-LINE: Slip the yarn over from the left needle and put it back the other way (insert the left needle from the back when placing it back on the needle). Purl in the front loop. No hole. Then work the increased stitches in stockinette stitch on the sleeves and in pattern on the front/back pieces. PATTERN: See diagrams A.1 to A.6. The diagrams show all rows in the pattern from the right side. INCREASE TIP (evenly spaced): To work out how to increase evenly, count the total number of stitches on the needle (e.g. 111 stitches) minus the bands (e.g. 8 stitches) and divide the remaining stitches by the number of increases to be made (e.g. 11) = 9.4. In this example, increase by making 1 yarn over after approx. each 9th stitch. Do not increase on the bands. On the next row work the yarn overs twisted to avoid holes. BINDING-OFF TIP: To avoid the bind-off edge being tight you can bind off with a larger size needle. If the edge is still tight, make 1 yarn over after approx. each 4th stitch at the same time as binding off; the yarn overs are bind off as normal stitches. DECREASE TIP (for sleeves): Decrease 1 stitch on either side of the marker thread as follows: Work until there are 3 stitches left before the marker thread, knit 2 together, knit 2 (marker thread sits between these 2 stitches), slip 1 stitch as if to knit, knit 1 and pass the slipped stitch over the knitted stitch (2 stitches decreased). BUTTONHOLES: Work buttonholes on the right band (when the garment is worn). Work from the right side when there are 3 stitches left on the row as follows: Make 1 yarn over, knit 2 together and knit 1. On the next row, knit the yarn over to leave a hole. The first buttonhole is worked when the rib on the neck measures 9 cm = 3½". Then work the other 4-4-5-5-5-5 buttonholes with approx. 9-9-8-8½-8½-9 cm = 3½"-3½"-3⅛"-3¼"-3¼"-3½" between each one. ------------------------------------------------------- START THE PIECE HERE: ------------------------------------------------------- JACKET - SHORT OVERVIEW OF THE PIECE: The neck, yoke and body are worked with circular needle, back and forth from mid-front. The sleeves are worked in the round with short circular needle/double pointed needles, top down. NECK: Cast on 74-74-78-78-82-82 stitches (including 4 band stitches on each side towards mid-front) with circular needle size 7 MM = US 10.75 and DROPS Snow or DROPS Wish. Purl 1 row from the wrong side, then work as follows from the right side: 4 band stitches in GARTER STITCH – read explanation above, * knit 2, purl 2 *, repeat *-* until there are 6 stitches left, knit 2 and 4 band stitches in garter stitch. Work this rib for 12 cm = 4¾". Remember the BUTTONHOLES on the right band. Purl 1 row from the wrong side where you decrease 3 stitches evenly spaced (do not decrease on the bands) = 71-71-75-75-79-79 stitches. Change to circular needle size 8 MM = US 11. Insert 1 marker, THE YOKE IS MEASURED FROM HERE! YOKE: Work as follows from the right side: 4 band stitches in garter stitch, A.1, 1 yarn over, knit 1 (= raglan-line), 1 yarn over, knit 8-8-10-10-12-12, 1 yarn over, knit 1 (= raglan-line), 1 yarn over, work A.2, 1 yarn over, knit 1 (= raglan-line), 1 yarn over, knit 8-8-10-10-12-12, 1 yarn over, knit 1 (= raglan-line), 1 yarn over, work A.3 and 4 band stitches in garter stitch. The first increase to RAGLAN – read description above, is now finished. Continue this pattern and increase to raglan every 2nd row (i.e. each row from the right side) a total of 11-14-16-19-21-23 times (see arrow for your size in A.1, A.2 and A.3). REMEMBER THE KNITTING GAUGE! After the last increase there are 159-183-203-227-247-263 stitches. Continue the pattern without further increases until the yoke measures 21-23-24-26-28-31 cm = 8¼"-9"-9½"-10¼"-11"-12¼" from the marker. The next row is worked as follows from the wrong side: Work 27-30-32-35-37-39 as before (= front piece), place the next 30-36-42-48-54-58 stitches on 1 thread for the sleeve, cast on 6-6-6-8-8-10 stitches (= in side under sleeve), purl 45-51-55-61-65-69 (= back piece), place the next 30-36-42-48-54-58 stitches on 1 thread for the sleeve, cast on 6-6-6-8-8-10 stitches (= in side under sleeve), work the last 27-30-32-35-37-39 stitches as before (= front piece). THE PIECE IS NOW MEASURED FROM HERE! BODY: = 111-123-131-147-155-167 stitches. Start on the rows in A.4 - A.6 which match the stitches from A.1 - A.3 and work as follows from the right side: 4 band stitches in garter stitch, A.4, A.5 is worked 1-1-1-1-2-2 times, A.6, knit 2-8-12-20-0-6, A.4, A.5 is worked 3-3-3-3-5-5 times, A.6, knit 2-8-12-20-0-6, A.4, A.5 is worked 1-1-1-1-2-2 times, A.6 and 4 band stitches in garter stitch. Continue this pattern until the body measures 23-23-24-24-23-22 cm = 9"-9"-9½"-9½"-9"-8¾" from the division. There is 8 cm = 3⅛" left to finished length; try the jacket on and work to desired length. To avoid the following rib being tight, knit 1 row from the right side where you increase 11-15-15-15-15-15 stitches evenly spaced – read INCREASE TIP = 122-138-146-162-170-182 stitches. Change to circular needle 7 and work the next row as follows from the wrong side: 4 band stitches in garter stitch, * purl 2, knit 2 *, repeat *-* until there are 6 stitches left, purl 2 and 4 band stitches in garter stitch. Continue this rib for 8 cm = 3⅛". Loosely bind off with garter stitch over garter stitch, knit over knit and purl over purl – read BINDING-OFF TIP. The jacket measures approx. 56-58-60-62-64-66 cm = 22"-22¾"-23⅝"-24⅜"-25¼"-26" from the shoulder down. SLEEVES: Place the 30-36-42-48-54-58 stitches from the thread on the one side of the piece on short circular needle size 8 MM = US 11 and knit up 1 stitch in each of the 6-6-6-8-8-10 stitches cast on under the sleeve = 36-42-48-56-62-68 stitches. Insert a marker thread in the middle of the new stitches under the sleeve. Start at the marker thread and work stockinette stitch in the round for 3 cm = 1⅛". Now decrease 2 stitches under the sleeve – read DECREASE TIP. Decrease like this every 15-8-8-4-3½-3 cm = 6"-3⅛"-3⅛"-1½"-1¼"-1⅛" a total of 2-3-4-6-7-8 times = 32-36-40-44-48-52 stitches. Continue working until the sleeve measures 30-29-29-27-27-26 cm = 11¾"-11⅜"-11⅜"-10⅝"-10⅝"-10¼" from the division. There is approx. 8 cm = 3⅛" left; try the jacket on and work to desired length – NOTE! Shorter measurements in larger sizes due to wider neck and longer yoke. Change to double pointed needles size 7 MM = US 10.75 and work rib (knit 2, purl 2) for 8 cm = 3⅛". Bind off with knit over knit and purl over purl – remember BINDING-OFF TIP! The sleeve measures approx. 38-37-37-35-35-34 cm = 15"-14½"-14½"-13¾"-13¾"-13⅜" from the division. Work the other sleeve in the same way.. ASSEMBLY: Sew the buttons onto the left band. |
|||||||||||||||||||
Diagram explanations |
|||||||||||||||||||
|
|||||||||||||||||||
|
|||||||||||||||||||
|
|||||||||||||||||||
|
|||||||||||||||||||
|
|||||||||||||||||||
|
Have you made this or any other of our designs? Tag your pictures in social media with #dropsdesign so we can see them! Do you need help with this pattern?You'll find tutorial videos, a Comments/Questions area and more by visiting the pattern on garnstudio.com. © 1982-2024 DROPS Design A/S. We reserve all rights. This document, including all its sub-sections, has copyrights. Read more about what you can do with our patterns at the bottom of each pattern on our site. |
|||||||||||||||||||


With over 40 years in knitting and crochet design, DROPS Design offers one of the most extensive collections of free patterns on the internet - translated to 17 languages. As of today we count 304 catalogs and 11422 patterns - 11417 of which are translated into English (US/in).
We work hard to bring you the best knitting and crochet have to offer, inspiration and advice as well as great quality yarns at incredible prices! Would you like to use our patterns for other than personal use? You can read what you are allowed to do in the Copyright text at the bottom of all our patterns. Happy crafting!
Comments / Questions (27)
Buongiorno, ho eseguito la prima riga dello sprone (taglia M) =79 m, quando faccio la 3 riga (4+12+1+8+1+23+1+8+1+....)dello sprone avanzano 4 m...fatto gettati e diminuzioni nel modo corretto...cosa sbaglio?
30.12.2022 - 09:49DROPS Design answered:
Buonasera Patrizia, gli aumenti per il raglan si trovano prima e dopo la maglia che rappresenta la linea del raglan, quindi dove lavorava 8 maglie alla riga a diritto successiva ci saranno 10 maglie e cosi via. Buon lavoro!
01.01.2023 - 21:52Buongiorno! Sto eseguendo lo sprone del lavoro (taglia XL), ho completato correttamente il 1°aumento per il RAGLAN e il successivo ferro a rovescio. Tuttavia, dopo aver seguito lo stesso motivo sulla terza riga del diagramma, mi sono trovata alla fine del ferro con 4 maglie in più PRIMA del bordo a legaccio. Il numero totale di maglie (91) è coerente con gli 8 aumenti appena eseguiti, ma come mai trovo queste maglie in più alla fine del ferro? Vi ringrazio!
06.11.2022 - 16:51DROPS Design answered:
Buonasera Cecilia, ha eseguito correttamente i gettati e le diminuzioni nella terza riga dei motivi? Buon lavoro!
28.12.2022 - 19:59Hello! I can't get the raglan division right. I'm starting the charts at the bottom, is this the right place? If so, there are too many sts on the needle. I tried again but instead of 1 st (raglan line) I made 2 sts but this meant there were too few sts.
20.08.2022 - 13:37DROPS Design answered:
Dear Maya, all charts are read from the bottom up. For the first row of the raglan, work as follows (for size S, for example)= 4 sts (edge) + A.1 (= 11 sts) + 1 st (raglan line) + 8 sts (sleeve) + 1st (raglan line) + A.2 (= 21 sts, back) + 1 st (raglan line) + 8 sts (sleeve) + 1 st (raglan line) + A.3 (= 11 sts) + 4 sts (edge) = 71 sts. Happy knitting!
21.08.2022 - 20:44Can I use thread San Pedro 40g each ball100% crylor Acrylic 12 ply I have 14 balls for size L is that enough\r\nOr mcmahon’s Pastiche 50 g I have 22 balls please advice\r\nThanks
19.06.2022 - 11:54DROPS Design answered:
Dear Seham, you can use our patterns with other yarns by ensuring to work with the same gauge as stated in the pattern. To see how much yarn you would need, you can follow the instructions in the following lesson: https://www.garnstudio.com/lesson.php?id=14&cid=19. Happy knitting!
19.06.2022 - 17:00Ich habe meinen Fehler gefunden. Ich dachte A4 wird auch 3* gestrickt, aber da ist ja ein Komma. 3 * steht ja nur für A5. Nun passt es 😃
26.04.2022 - 09:22Wenn ich beim Rumpteil 123M.habe und im Rückenbereich A4 und A5 mit je 19 M. 3 mal stricke und dann A6. Mit 6M. 1mal stricke fehlen mir 14M. 4 Blendenm. Vorderteil 25M. und 8M. dass passt alles aber Rückenteil habe ich zu wenig Maschen. Zuvor bei der Rückreihe bei der Aufteilung hat alles gepasst von der Maschenanzahl.
25.04.2022 - 21:14DROPS Design answered:
Liebe Frau Kuboth, so stricken Sie Rumpfteil: 4 Blenden-Maschen, A.4 (= 7 M), A.5 (= 12 M), A.6 (= 6 M) (= Vorderteil 4+7+12+6= 29 M), 8 Maschen glatt rechts (1 M von Vorderteil + die 6 neuen Maschen + 1 M Rückenteil), A.4 (= 7 M), A.5 3x (= 12x3= 36 M), A.6 (= 6M), (= Rückenteil = 49 M), dann 8 Maschen glatt rechts (= 1 M vom Rückenteil + die 6 neuen Maschen + 1 M vom Vorderteil), A.4, A.5, A.6, 4 Blenden-Maschen (=7+12+6+4=29 M) = 29+8+49+8+29=123 Maschen. Viel Spaß beim stricken!
26.04.2022 - 09:57Hallo, vielen Dank erstmal für Ihren Antworten. Nun habe ich aber leider schon wieder eine Frage. Ich bin jetzt bei der Ärmelabteilung, da steht die nächste Rückreihe wie folgt stricken....30 M. wie zuvor stricken = Vorderteil---> meinen sie damit links stricken, weil beim Rückenteil steht links da. Wie stricke ich denn die beiden Vorderteile? Vielen Dank schonmal für ihre Mühe und Antwort
25.04.2022 - 12:19DROPS Design answered:
Liebe Frau Kuboth, die Verteilungsreihe ist eine Rückreihe, dann stricken Sie die Blenden-Maschen rechts wie zuvor, dann stricken Sie die nächsten 26 Maschen links (= 30 M für das 1. Vorderteil) usw, dh die Maschen beim Rückenteil + Vorderteil stricken Sie links + die Blenden-Maschen rechts. Viel Spaß beim stricken!
25.04.2022 - 13:58Hallo, Ich stricke Gr. M und habe alle Zunahmen beendet , es fehlen noch wenige cm. Ich stricke nun ohne Zunahmen im Muster weiter. Nun eine Frage... Das Muster hat aber mehr Maschen, es geht doch jetzt nicht mehr auf mit meiner Maschenanzahl, muss ich jetzt alles verschieben und wie mache ich das? Geht das Muster jetzt in den Ärmeln rein die rechts gestrickt wurden?
24.04.2022 - 22:26DROPS Design answered:
Liebe Frau Kuboth, jetzt stricken Sie dann nur die Maschen für Ihre Größe in den Diagrammen, dh die ersten 25 M in A.1, die mittleren 49 M in A.2 und die letzten 25 M in A.3 - wenn das Muster nicht passt (z.B. wenn Sie nicht 1 Abnahme + 1 Umschlag) stricken können, dann stricken Sie einfach rechts. Viel Spaß beim stricken!
25.04.2022 - 08:32Hallo liebes Drops Team, Ich verstehe nicht ganz die Rückreihe bei den Raglanzunahmen. Wie stricke ich die Umschläge vor und nach der Raglanmasche ab? Gibt es ein Video dazu, oder kann ich auch die beiden Umschläge links verschränkt abstricken?
20.04.2022 - 19:38DROPS Design answered:
Liebe Frau Kuboth, damit die Umschläge sich nach der richtigen Richtung neigen, werden sie unterschiedlich gestrickt, bei den Rückreihen stricken Sie die Umschläge vor der Raglanlinie links verschränkt; nach der Raglanlinie stricken Sie so: der Umschlag abheben, als ob er links gestrickt würde, dann die linke Nadel von hinten einstechen, so wird der Umschlag anders aussehen, dh wie der aufgefassenen Faden (time code 05:35 in diesem Video), dann stricken Sie den Umschlag links, also ganz normal. Viel Spaß beim stricken!
21.04.2022 - 07:37Witam, Karczek: baza pod karczek ma mieć 71 oczek ale ze schematów A1+A2+A3 wynika że potrzebujemy 75 oczek. Skąd wziąć te 4 oczka ? Nie rozumiem dlaczego na schemacie jA1 jest 11 oczek ale tam gdzie rozpoczynamy wzór jest 12 oczek :( . Skąd się wzięło jedno oczko więcej? Pozdrawiam Anna
26.01.2022 - 17:23DROPS Design answered:
Witaj Aniu, masz 71 o. Po dodaniu na reglan po raz pierwszy, wg opisu (patrz początek w części karczek) masz 79 oczek (71+8 dodanych oczek na reglan). Część schematów jest przerabiana na takiej samej liczbie oczek (A.4-A.6), ale w części (A.1-do A.3 ) liczba oczek się zwiększa, ponieważ dodajemy oczka na reglany i z czasem przerabiamy ponad nimi kolejne motywy schematu. Miłej pracy!
31.01.2022 - 16:19