
Categorie popolari
State cercando un filato?


Come aumentare le maglie facendo un piccolo buchino
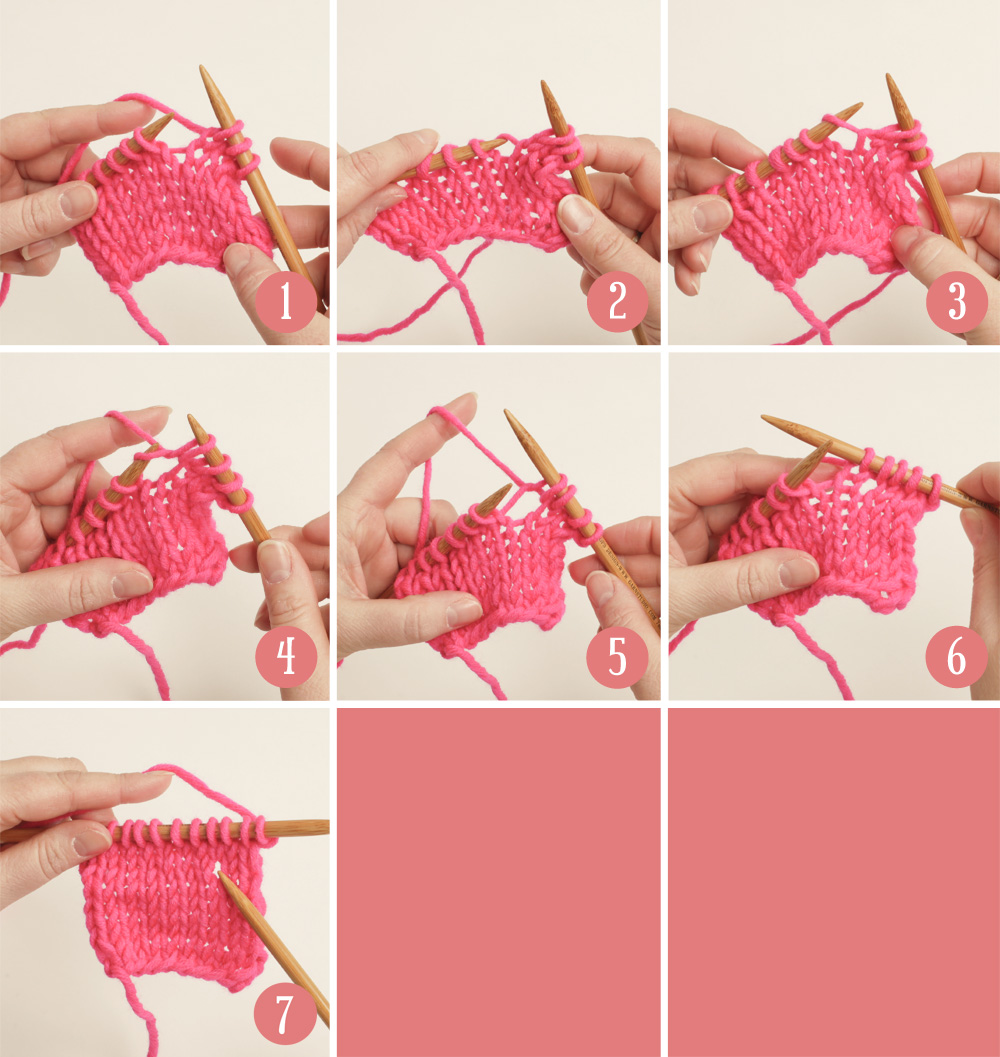
Questo è il modo per aumentare le maglie riprendendo il filo tra 2 maglie del ferro precedente. Apparirà un piccolo buchino sotto la nuova maglia:
Figura 1: Lavorare fino a dove volete fare il vostro aumento e ottenere la vostra nuova maglia.
Figura 2: Usando la punta del vostro ferro sinistro, dal davanti verso il dietro, sollevate il filo tra le maglia sul ferro sinistro e quella sul ferro destro.
Figura 3: Ora avete una nuova maglia sul ferro sinistro.
Figura 4: Inserite il vostro ferro destro nella nuova maglia come per lavorarla a diritto e fate passare il filo attraverso l'occhiello.
Figura 5: Avete lavorato una nuova maglia che ora è sul vostro ferro destro e ora potete lasciarla scivolare giù dal ferro sinistro.
Figura 6: Continuate e lavorate la maglia seguente sul vostro ferro sinistro.
Figura 7: Lavorate un paio di ferri e vedrete che apparirà un piccolo buchino dove avete fatto l'aumento.
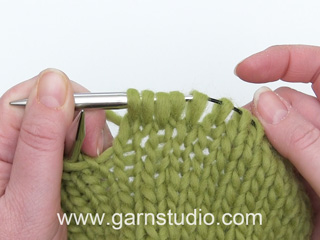
Questa tecnica di aumento è un modo carino di modellare il vostro lavoro linea retta o diagonale. Il buchino non sarà grande ma indicherà il vostro aumento.Guardate questo video per un aiuto in più


Con oltre 40 anni di esperienza nel design di modelli di maglia e uncinetto, DROPS Design offre la più estesa collezione di modelli gratuiti su internet - tradotti in 17 lingue. Ad oggi vi possiamo fornire 314 cataloghi e 11822 modelli - 9093 dei quali sono tradotti in Italiano.
Ci stiamo impegnando molto per darvi il meglio che vi possiamo offrire in termini di maglia e uncinetto, ispirazioni e consigli così come filati di grande qualità ad un prezzo incredibile! Volete utilizzare i nostri modelli per qualcosa d'altro oltre al vostro uso personale? Potete leggere tutto ciò che è consentito nel testo sul Copyright in basso su tutte le pagine dei nostri modelli. Buon lavoro!
De plaatjes en de tekst komen niet overeen. Plaatje 2 laat zien hoe een steek gemaakt wordt door de naald van achter naar voor te steken, terwijl de tekst het omgekeerde zegt. Ook wordt niet vermeld of er voor of achter in de lus gebreid moet worden en of dit een naar links of naar rechts vallende meerdering is.
19.03.2016 - 14:42