
Popular categories
Looking for a yarn?


Comments / Questions (24)
![]() Anna wrote:
Anna wrote:
Please ignore my previous question!
02.07.2025 - 18:46
![]() Anna wrote:
Anna wrote:
Do you have visual explanations for the following instructions: :Sew in outermost sts in moss st inside crochet border so that the crochet border is loose on the outside of seam:.
02.07.2025 - 18:16DROPS Design answered:
Dear Anna, you can use this video to sew the pocket, just note that the seam shouldn't covert/ sewm the crochet edge that shouldn't be fixed to the dress, only the pocket should be sewn. Happy Assembly!
04.07.2025 - 11:46
![]() Anna wrote:
Anna wrote:
If we follow the instruction to cast off 6 stitches then work 60 and then cast off 6 stitches and then work 60: then the front piece would have 6 bound off stitches on one side and back piece would have 6 bound-off stitches on the other side. Wouldn't this create a form problem? Meaning that the front piece would have a gap on one side and the back piece on one side? Is what I am saying clear?
20.05.2025 - 17:53DROPS Design answered:
Dear Anna, the round starts here 3 sts before the left side of dress, cast off the first 6 sts on the round for armhole, then work front piece (60 sts in total), then cast off the next 6 sts for armhole (right side of dress) and finish with stitches for back piece (60 sts in total); you have now 2 gaps, one on each side dividing front and back pieces. Finish each side separately back and forth on needle. Can this help? Or do I still misunderstand what you mean here?
21.05.2025 - 08:12
![]() Anna wrote:
Anna wrote:
If we follow the instruction to cast off 6 stitches then work 60 and then cast off 6 stitches and then work 60: the piece will not be even. Shouldn't we casting off on both sides? Can you explain that part? Thank you
20.05.2025 - 08:09DROPS Design answered:
Dear Anna, in the first size you have 132 sts on the needle: cast off the first 6 sts for armhole, work 59 sts (= the remaining stitch on needle + the next 59 sts = 60 sts for front piece), cast off 6 sts for armhole, andn work the remaining stitches (= 59 sts + the remaining st on needle = 60), so that you get 6+60+6+60=132 sts. Happy knitting!
20.05.2025 - 10:28
![]() Anna wrote:
Anna wrote:
Hello, I want to make sure that I understand well the following instruction: "ROUND 1: * K 1, P 1 *, repeat from *-*. ROUND 2: K over P and P over K. Repeat 2nd round." So 1st round: K1 and P2; 2nd round: P over K and K over P; and there is a 3rd round where we repeat the previous round? Thank you!
18.05.2025 - 11:14DROPS Design answered:
Dear Anna, it means that the next rounds after round 2 (so rounds 3, 4, 5, 6, e.t.c) will be worked as round 2; round 1 is only worked once. Happy knitting!
18.05.2025 - 13:07
![]() Gabriele Bohn wrote:
Gabriele Bohn wrote:
Wie viel Wolle brauche ich für die kleinste Grösse ? Danke für eine rasche Antwort
10.03.2025 - 09:40DROPS Design answered:
Liebe Frau Bohn, die Garnmenge für jede Größe finden Sie oben unter Tab "Anleitung", dh in die kleinste Größe 300 g DROPS Merino Extra Fine/50 g das Knäuel = 6 Knäuel. Viel Spaß beim Stricken!
10.03.2025 - 10:35
![]() Petra wrote:
Petra wrote:
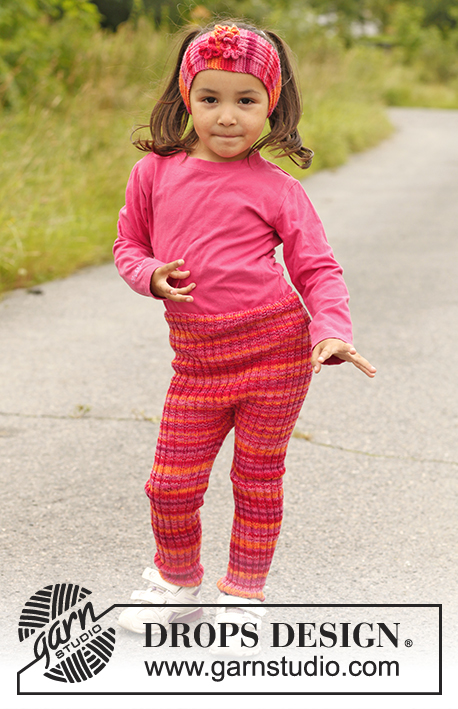
Liebes Drops-Team, mit welcher Wolle und Farbe wurde die Strickhose angefertigt, die das Mädchen zu. Kleid, Drops-Children 22-10, trägt? Ich freue mich auf Ihre Antwort. Schöne Grüße aus Xanten Petra Körbes
30.11.2021 - 10:26DROPS Design answered:
Liebe Petra, die Strickhose wird mit DROPS Fabel Nr 310, sunset gestrickt - hier finden Sie die Anleitung. Viel Spaß beim stricken!
30.11.2021 - 16:40
![]() Cecilia wrote:
Cecilia wrote:
Divino patrón, muchas gracias. Lo hice en agujas rectas. Les agradezco si pueden dar las explicaciones para agujas rectas en otros patrones. Gracias!
16.11.2020 - 04:31
![]() Caja Harsdorf wrote:
Caja Harsdorf wrote:
Jeg har aldrig fået svar på mit spørgsmål. Det første svar var overhovedet ikke relevant, og det næste, har I ikke svaret på. Dårlig servece
18.09.2019 - 16:29
![]() Caja Harsdorf wrote:
Caja Harsdorf wrote:
Når jeg har brugt 100 gr. og kun har 9 cm. , kan jeg jo kun få strikket 45 cm, og skal strikke 49 inden jeg skal begynde at tage ind, så der vil da være en manko. Jeg har lavet strikkeprøve inden start, og den passede perfekt, så det er ikke der det er galt. Når I ser på mønstret, kan I så ikke regne ud, hvor meget jeg skal bruge mere. Med venlig hilsen Caja harsdorf
12.09.2019 - 20:54DROPS Design answered:
Hej Caja, Vi har lagt et nøgle til i den største størrelse. God fornøjelse!
26.09.2019 - 15:57
|
|
Lyrah#lyrahdress |
|
 |
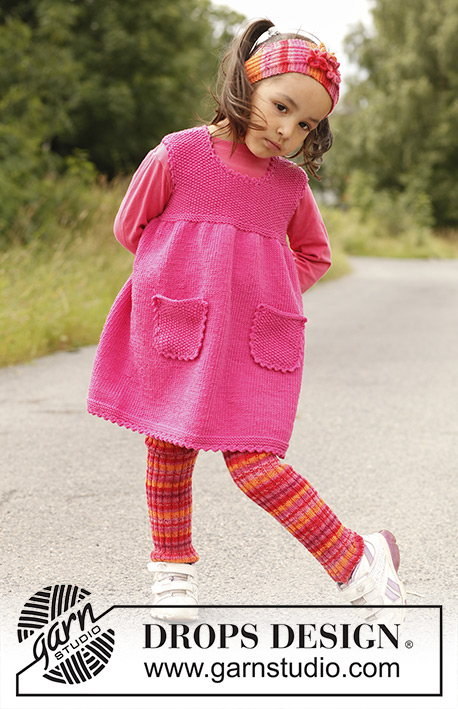 |
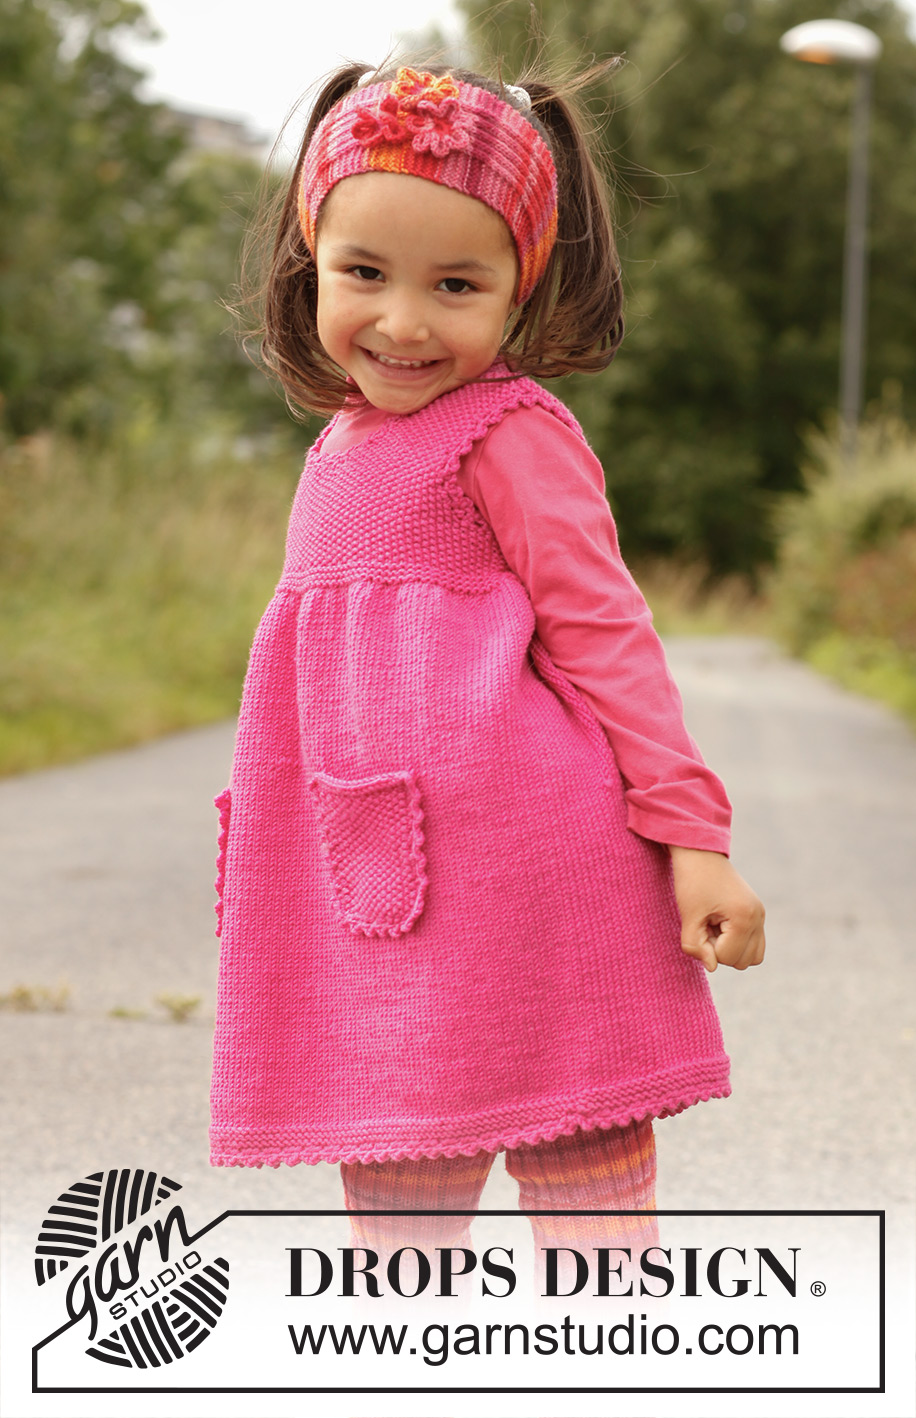
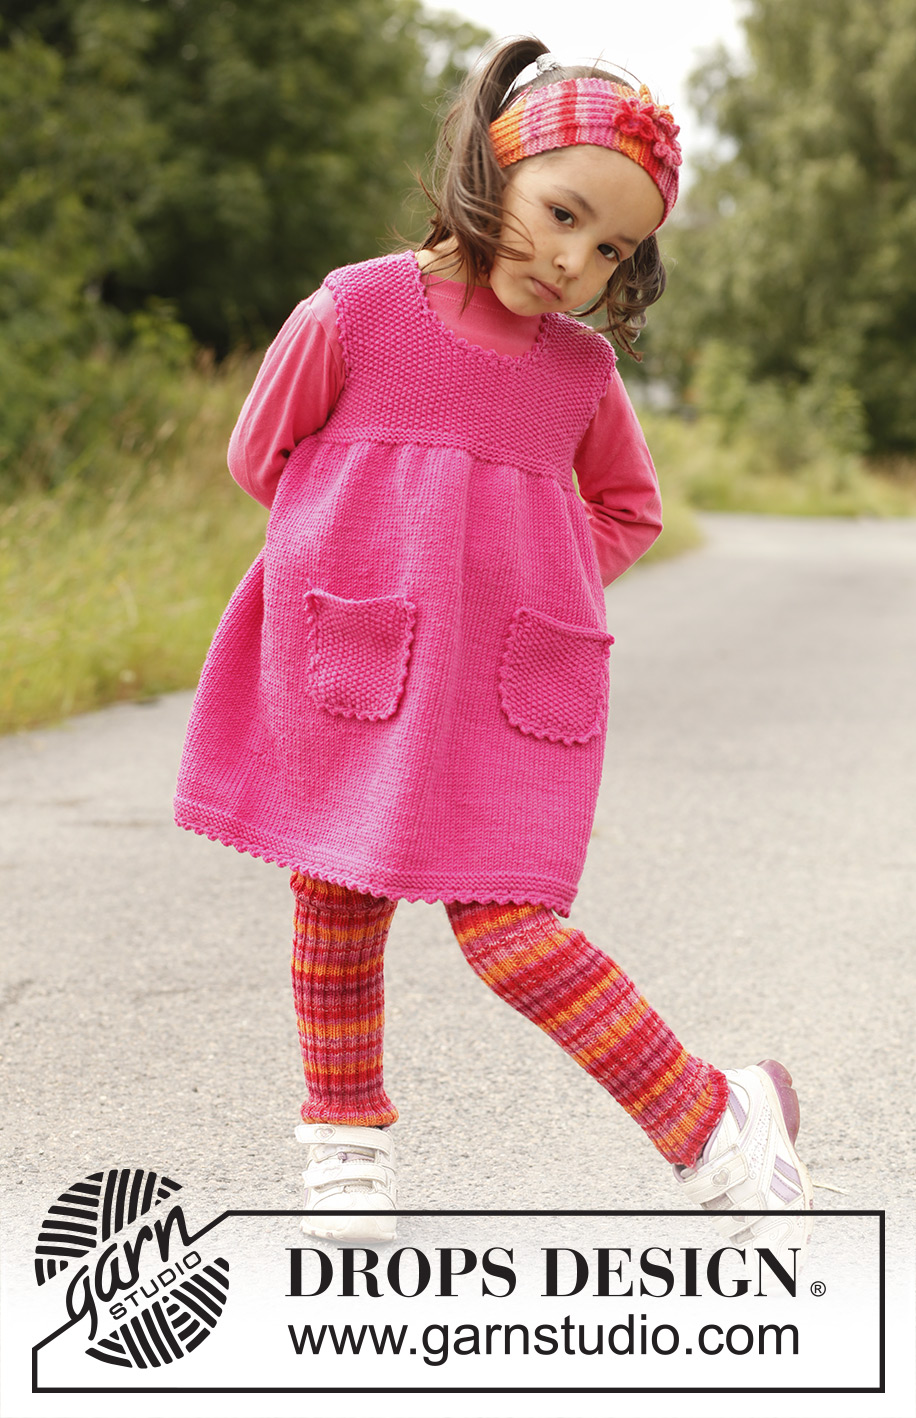
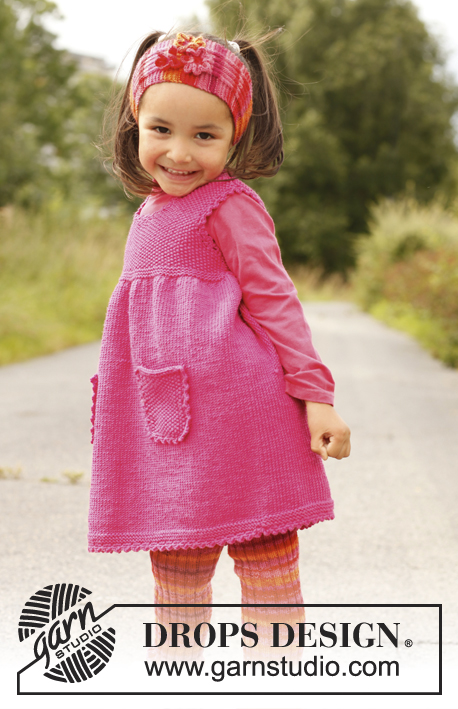
Knitted tunic in DROPS Merino Extra Fine, with pockets and yoke in seed st. Size children 3 to 12 years.
DROPS Children 22-10 |
|
|
SEED ST: ROUND 1: * K 1, P 1 *, repeat from *-*. ROUND 2: K over P and P over K. Repeat 2nd round. PICOT BORDER: Work on hook size 3.5 mm/E/4 with Merino as follows: 1 sc in first st, * ch 3, 1 dc in first ch, skip 1 cm / ⅜", fasten with 1 sc *, repeat from *-*. When working in the round, finish with 1 sl st in first sc (instead of working last sc). --------------------------------------------------------- BODY: Worked in the round on circular needle. Cast on 198-210-228-234-240 sts on circular needle size 3.5 mm / US 4 with Merino. K 1 round, P 1 round, K 1 round, P 1 round, K 1 round and P 1 round. Switch to circular needle size 4 mm / US 6 and work in stockinette st. REMEMBER THE GAUGE! When piece measures 32-36-39-43-46 cm / 12½"-14¼"-15¼"-17"-18", work next round as follows: * K 4, K 2 tog *, repeat from *-* the entire round = 165-175-190-195-200 sts. Work next round as follows: * K 3, K 2 tog *, repeat from *-* = 132-140-152-156-160 sts. Switch to circular needle size 3.5 mm / US 4. P 1 round, K 1 round, P 1 round, K 1 round and P 1 round. Switch back to circular needle size 4 mm / US 6, K 1 round, then work in SEED ST until finished measurements – see explanation above! AT THE SAME TIME when piece measures 37-41-45-49-53 cm / 14½"-16⅛"-17¾"-19¼"-21", work next round as follows: bind off 6 sts for armhole, work 60-64-70-72-74 sts (= front piece), bind off 6 sts for armhole, work the rest of row (= back piece). Finish front and back piece separately. BACK PIECE: = 60-64-70-72-74 sts. Continue with seed st back and forth on needle – AT THE SAME TIME bind off for armholes at the beg of every row: 1 st 4-4-5-5-5 times in each side = 52-56-60-62-64 sts. When piece measures 48-53-58-63-68 cm / 19"-21"-22¾"-24¾"-26¾", bind off the middle 18-20-24-26-28 sts for neck and finish each shoulder separately. Then bind off on every row starting from neck: 1 st 2 times = 15-16-16-16-16 sts remain on shoulder. Bind off when piece measures 50-55-60-65-70 cm / 19¾"-21⅝"-23⅝"-25½"-27½". FRONT PIECE: = 60-64-70-72-74 sts. Bind off for armholes as on back piece. When piece measures 41-45-49-53-57 cm / 16⅛"-17¾"-19¼"-21"-22½", bind off the middle 12-14-16-18-18 sts for neck and finish each shoulder separately. Then bind off on every row starting from neck: 2 sts 1 time and 1 st 3-3-4-4-5 times = 15-16-16-16-16 sts remain on shoulder. Bind off when piece measures 50-55-60-65-70 cm / 19¾"-21⅝"-23⅝"-25½"-27½". POCKET: Worked back and forth on circular needle. Cast on 18-18-20-20-22 sts on circular needle size 4 mm / US 6. Work in seed st for 9-9-10-10-11 cm / 3½"-3½"-4"-4"-4½". Then K 1 row from RS and K 1 row from WS, then bind off with K sts from RS. Crochet a PICOT BORDER – see explanation above, along both sides and bottom edge of pocket (not along bind off edge). Knit another pocket. ASSEMBLY: Sew the shoulder seams. Crochet a PICOT BORDER – see explanation above, around the armholes, along the entire neckline and at the bottom of body. Place the pockets on front piece, approx. 12-13-14-15-16 cm / 4¾"-5⅛"-5½"-6"-6¼" from cast on edge, and so that they are approx. 10-11-12-14-15 cm / 4"-4⅜"-4¾"-5½"-6" apart. Sew in outermost sts in seed st inside crochet border so that the crochet border is loose on the outside of seam. |
|
 |
|
Have you finished this pattern?Tag your pictures with #dropspattern #lyrahdress or submit them to the #dropsfan gallery. Do you need help with this pattern?You'll find 12 tutorial videos, a Comments/Questions area and more by visiting the pattern on garnstudio.com. © 1982-2026 DROPS Design A/S. We reserve all rights. This document, including all its sub-sections, has copyrights. Read more about what you can do with our patterns at the bottom of each pattern on our site. |
|


With over 40 years in knitting and crochet design, DROPS Design offers one of the most extensive collections of free patterns on the internet - translated to 17 languages. As of today we count 325 catalogs and 12298 patterns - 12288 of which are translated into English (US/in).
We work hard to bring you the best knitting and crochet have to offer, inspiration and advice as well as great quality yarns at incredible prices! Would you like to use our patterns for other than personal use? You can read what you are allowed to do in the Copyright text at the bottom of all our patterns. Happy crafting!
Post a comment to pattern DROPS Children 22-10
We would love to hear what you have to say about this pattern!
If you want to leave a question, please make sure you select the correct category in the form below, to speed up the answering process. Required fields are marked *.