
Popular categories
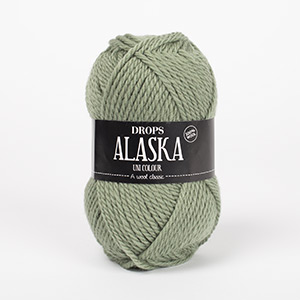
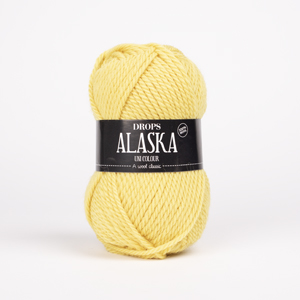
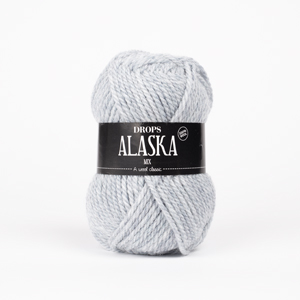
Looking for a yarn?


|
|
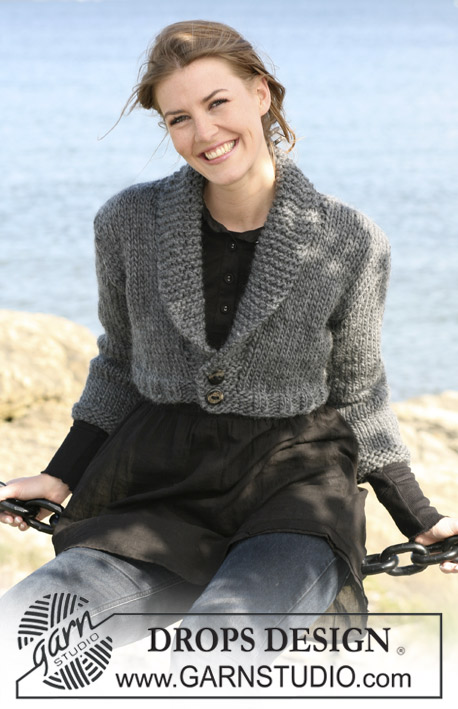
Daphne Cardigan |
|
|
|
|
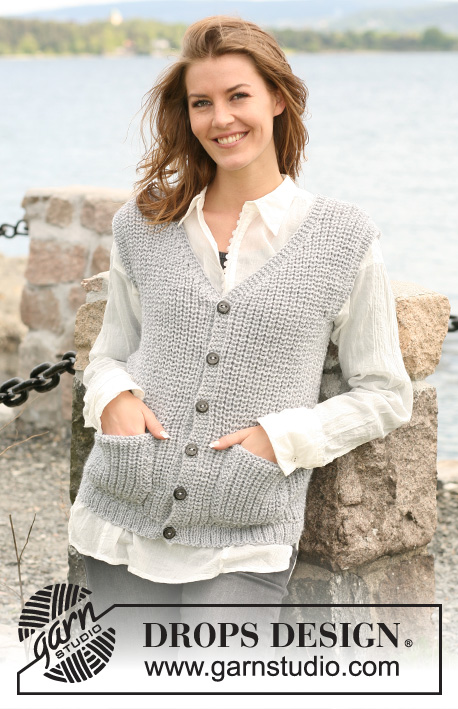
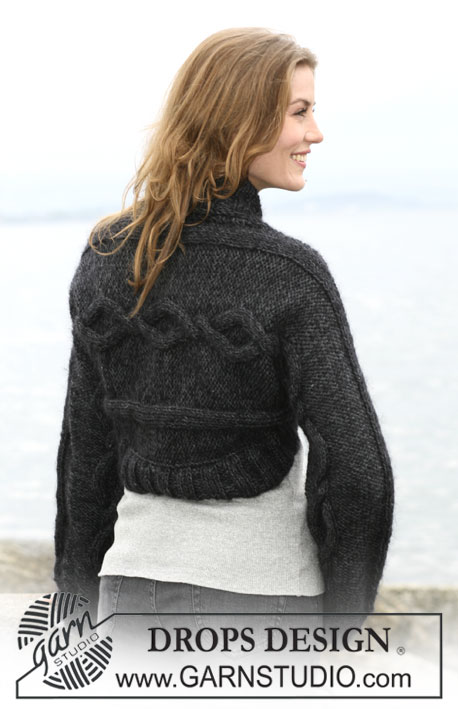
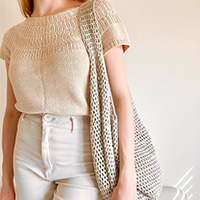
DROPS jacket in ”Alaska” with English Rib and raglan finish. Size: S to XXXL
DROPS 104-33 |
|
|
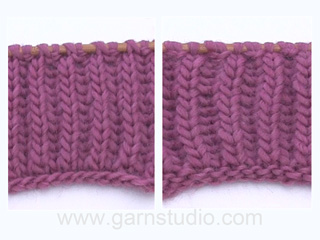
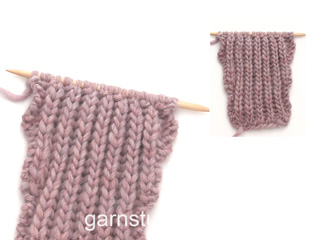
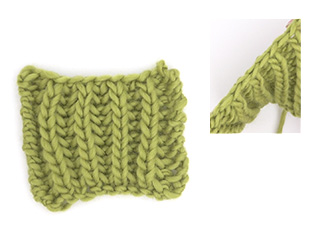
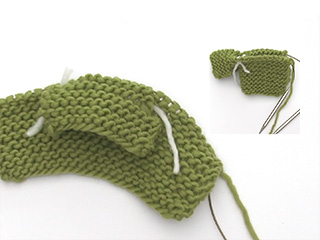
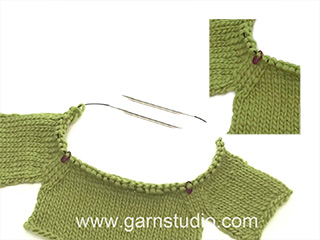
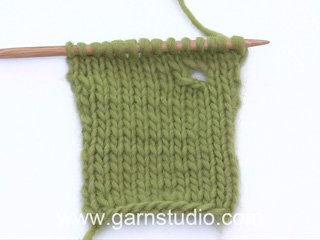
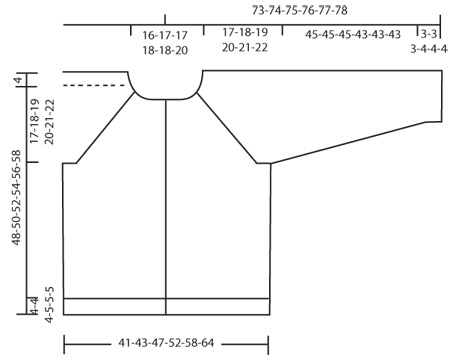
Knitting gauge: 16 sts x 27 rows English rib = 10 x 10 cm [4" x 4"] English rib: Knit English rib as follows: 1st row (RS): * K1, P1 *, repeat from *-*. 2nd row back and front pieces: *P1, yo, slip 1 sts as if to K*, repeat from*-*. 2nd row sleeve: *Yo, slip 1 sts as if to K, P1*, repeat from*-*. 3rd row: *K1, P tog yo and lose sts from last row*, repeat from *-*. Continuing, repeat 2nd and 3rd rows. Garter st: Knit all rows. Decreasing tip (applies to raglan): Dec as follows from RS: Start 2 sts before sts with marking thread: K2 tog, K1 (marking thread or stitch marker placed in this sts), slip 1 st as if to knit, K1, psso. NOTE: Due to English rib it will sometimes be YO and lose sts from previous row that is bind off. Yo and lose sts are then counted as 1. Buttonhole: Bind off for buttonhole on right front band. 1 buttonhole = bind off 3rd sts on front band. On next row cast on 1 new sts over bind off sts. Bind off for buttonhole when piece measures: Size S: 2, 10, 19, 27 and 36 cm [3/4"-4"-7½"-10⅝" and 14 ¼"]. Size M: 2, 10, 17, 24, 31 and 38 cm [3/4"-4"-6 ¾"-9½"-12 ¼" and 15"]. Size L: 2, 10, 17, 25, 33 and 40 cm [3/4"-4"-6 ¾"-9 ¾"-13" and 15¾"]. Size XL: 3, 11, 18, 26, 34 and 41 cm [1⅛"-4⅜"-7"-10 ¼"-13⅜" and 16⅛"]. Size XXL: 3, 11, 19, 27, 35 and 43 cm [1⅛"-4⅜"-7½"-10⅝"-13 ¾" and 17"]. Size XXXL: 2, 10, 17, 24, 31, 38 and 45 cm [3/4"-4"-6 ¾"-9½"-12 ¼",15" and 17 ¾"]. Bind off for last buttonhole on neck edge after sts are knit up around neck. Back and front pieces: Knit piece back and forth on circular needles from mid front. Cast on 165-180-198-216-240-264 sts (includes 5 edge sts on each side mid front) on needles size 5 mm [US 8] with Alaska. Then knit as follows (1st row = RS): 5 front edge sts (K these on each row until completed measurement), * K2, P1 *, repeat from *-* and finish with the 2 K and front edge sts. Continue with K over K and P over P until piece measures 4-4-4-5-5-5 cm [1½"-1½"-1½"-2"-2"-2"]. Remember to bind off for button holes – see explanation above. Now knit 2 rows garter sts at the same time as dec 26-33-39-41-45-49 sts on 1st row evenly = 139-147-159-175-195-215 sts (do not dec on front edge sts). Continue in English rib – see explanation above - until complete measurement. Remember knitting gauge! When piece measures 31-32-33-34-35-36 cm [12 ¼"-12½"-13"-13⅜"-13 ¾"-14 ¼"] knit next row as follows: 5 front edge sts, 28-30-33-37-42-47 sts English rib as previously, bind off 8 sts (= armhole), 57-61-67-75-85-95 sts English rib as earlier, bind off 8 sts (= armhole), 28-30-33-37-42-47 sts English rib as earlier and 5 front edge sts = 123-131-143-159-179-199 sts in total on needle. Leave piece to one side and knit sleeves. Sleeve: Knit piece back and forth on needle. Cast on 44-47-50-53-56-56 sts (incl 1 edge sts on each side) on needle size 5 mm [US 8] with Alaska. Knit Rib K2/P1 with 1 edge sts on each side until piece measures 3-3-3-4-4-4 cm [1⅛"-1⅛"-1⅛"-1½"-1½"-1½"]. Now knit 2 rows garter sts at the same time as dec 6-7-8-9-10-10 sts on 1st row evenly = 38-40-42-44-46-46 sts. Continue English rib to finished measurement. When piece measures 6 cm [2⅜"] inc 1 sts on each side on every 4 -4 -4 -3.5- 3.5 -3 cm [1½"-1½"-1½"-1 ¼"-1 ¼"-1⅛"] 11-11-11-12-12-13 times in total = 60-62-64-68-70-72 sts (knit new sts into English rib continuously). When piece measures 48-48-48-47-47-47 cm [19"-19"-19"-18½"-18½"-18½"] bind off 5 sts on each side = 50-52-54-58-60-62 sts left on row. Leave piece to one side, knit another sleeve. Yoke: Slip sleeves onto same circular needle as back and front pieces where sts are bind off for armhole = 223-235-251-275-299-323 sts. Insert 1 marking thread or stitch marker in all transition between sleeve and back and front pieces. (Insert marking thread or stitch marker in first and last sts on sleeve) = 4 marking threads or stitch marker. Knit 1 round English rib as earlier, but knit stockinette sts over 3 sts in each transition between back and front pieces and sleeves (i.e. with marking thread or stitch marker being the middle sts of the 3 sts stockinette sts). Continue as follows at the same time as starting dec for raglan: Dec 1 sts on each side of 3 stockinette sts (= 8 dec) – read Decreasing tips. Dec on every 4th row 7 times and on every 2nd row 11-12-13-15-16-17 times. At the same time when piece measures 43-45-47-48-50-52 cm [17"-17 ¾"-18½"-19"-19 ¾"-20½"] slip 6-6-7-8-8-12 sts mid front on 1 thread or stitch holder for neck. Continuing bind off 2 sts 2-3-4-4-7-7 times to shape neckline and 1 sts 4-3-2-3-0-0 times. At completion of all dec for raglan there are 51-53-57-61-71-79 sts left on row. Piece measures approx 52-54-56-58-60-62 cm [20½"-21 ¼"-22"-22 ¾"-23⅝"-24⅜"] to shoulder. Neck: Pick up 1 sts from RS in each sts (incl sts on thread or stitch holder) on front piece where sts are bind off for neck = 79-83-91-99-115-131 sts. K1 row from WS at the same time as dec 3-5-11-13-27-39 sts evenly = 76-78-80-86-88-92 sts. Knit 6 rows garter sts – see explanation above - at the same time, on 1st row bind off for 1 buttonhole above the others on right front edge. Bind off loosely. Assembly: Sew tog sleeve seams within 1 edge st. Sew openings under arms. Sew in buttons. Belt: Cast on 10 sts on needle size 5 mm [US 8] with Alaska. Knit garter sts but slip first stitch on each row as if to knit and P last sts on each row (this is done to ensure a neat edge). When belt measures approx 170 to 200 cm [66"-80"] bind off loosely. |
|
|
|
|
Have you made this or any other of our designs? Tag your pictures in social media with #dropsdesign so we can see them! Do you need help with this pattern?You'll find tutorial videos, a Comments/Questions area and more by visiting the pattern on garnstudio.com. © 1982-2024 DROPS Design A/S. We reserve all rights. This document, including all its sub-sections, has copyrights. Read more about what you can do with our patterns at the bottom of each pattern on our site. |


With over 40 years in knitting and crochet design, DROPS Design offers one of the most extensive collections of free patterns on the internet - translated to 17 languages. As of today we count 304 catalogs and 11422 patterns - 11417 of which are translated into English (US/in).
We work hard to bring you the best knitting and crochet have to offer, inspiration and advice as well as great quality yarns at incredible prices! Would you like to use our patterns for other than personal use? You can read what you are allowed to do in the Copyright text at the bottom of all our patterns. Happy crafting!
Comments / Questions (12)
Wat bedoelen ze met 2de nld voorpand en 2de nld achterpand? Welke 2 nld moet ik nu herhalen
12.05.2021 - 19:43DROPS Design answered:
Dag Lauryssens,
Oeps... een foutje met vertaling van het patroon. De eerste beschrijving voor de tweede naald is voor het achterpand en de voorpanden en de tweede beschrijving voor de mouwen. Het is nu aangepast.
15.05.2021 - 14:37When the pattern says to continue in English rib after two garter stitch rows, do I knit a K1, P1 row first, then repeat rows 2 and 3? Or do I start the English Rib with row 2? Also, the English rib shown in the pattern is worked over an even number of stitches. But after decreasing in the garter stitch rows, there is an uneven number of stitches. How do I knit the pattern with an uneven number of stitches?
19.12.2020 - 02:53Möchte gerne diese Jacke in big Merino stricken, muss ich etwas besonderes beachten ? Weil diese Wolle sehr elastisch ist ?
05.11.2018 - 15:31DROPS Design answered:
Liebe Frau Kraft, am besten stricken Sie zuerst eine Maschenprobe und waschen Sie sie, dann die Massen prüfen, am besten mit dünneren Nadeln stricken, aber zwar wird das Ergebnis unterschiedlich sein, da beide Wolle unterschiedlich sein. Nehmen Sie Kontakt mit Ihrem DROPS Laden auf, sie werden Ihnen auch gerne weiterhelfen und vielleicht noch eine andere Alternative vorschlagen - auch telefonisch oder per E-mail. Viel Spaß beim stricken!
05.11.2018 - 16:06Ik heb een vraag over patroon 104-33 vest met raglan mouw: wat betekent het stippellijntje in het patroon? (linkerschouder). a Alvast bedankt voor uw reactie
16.05.2017 - 15:14DROPS Design answered:
Dit is de hoogte vanaf waar de raglanlijn stopt tot de bovenkant van de schouder.
17.05.2017 - 11:30Jeg strikker ermer på strømpe- og rundpinner med liketall og halvpatent som rettsiden. 1p. (retten): * 1 r/ 1 vr *, gjenta fra *-*. 2.p : * 1 r, 1 kast, ta 1 m løst av p som om den skulle strikkes vr*, gjenta fra *-*. 3.p: * 1 r, (kast + løs m fra forrige p) strikkes vr sm *, gjenta fra *-*. Gjenta 2. og 3.p. Øk 1 maske i beg og slutten av 1.m hver 6.p. Strikk slik at det fortsatt blir halvpatent rundt, dvs annenhv. øking før en rettmaske og annenhv øking før en vr m.
24.03.2015 - 13:12Tack för snabbt svar. Inkl. kan också stå för inkluderar och då inräknas ju kantmaskorna i de 165. Mvh E-M
21.05.2013 - 17:33DROPS Design answered:
Du har ingen kantmaskor paa denne kofta - kun de 5 framkantsm i varje sida. Dvs, du stickar 2 rm, 1 am over 153 och afslutar med 2 rm och 5 framkantsm.
20.06.2013 - 12:11Tja, inkl. brukar ju betyda inklusive, eller?
19.05.2013 - 18:39Om jag lägger upp 165 m i stl S, (inkl. 5 framk.maskor i varje sida mot mitt fram)så är min fråga: inkluderas dessa framkantsmaskor i de 165 eller lägger jag till dom utöver?
19.05.2013 - 08:24DROPS Design answered:
De 5 framkantsm inkluderas i de 165 m. Lycka till!
20.05.2013 - 08:58Lonny Mortensen wrote:
Meget flot og godt tænkt i kompossitionen. Venlig hilsen L. Mortensen
16.08.2007 - 10:34Valkyrja wrote:
As a novice sweater knitter I love this sweater for it's simple elegance and would LOVE to have this pattern made available for my next attempt.
10.07.2007 - 04:02