
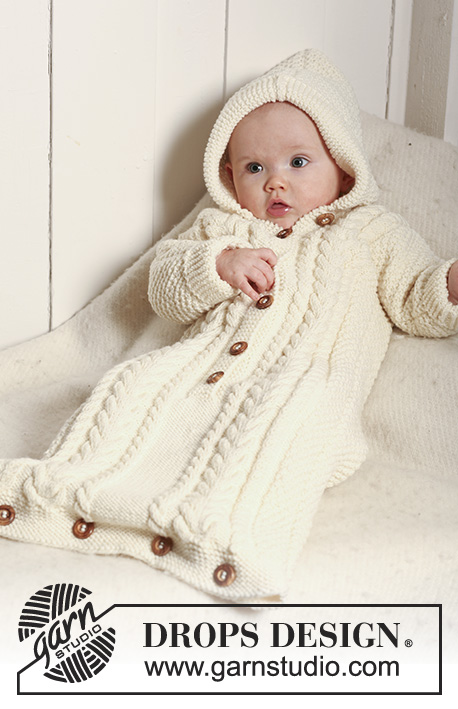
Popular categories
Looking for a yarn?


|
|||||||
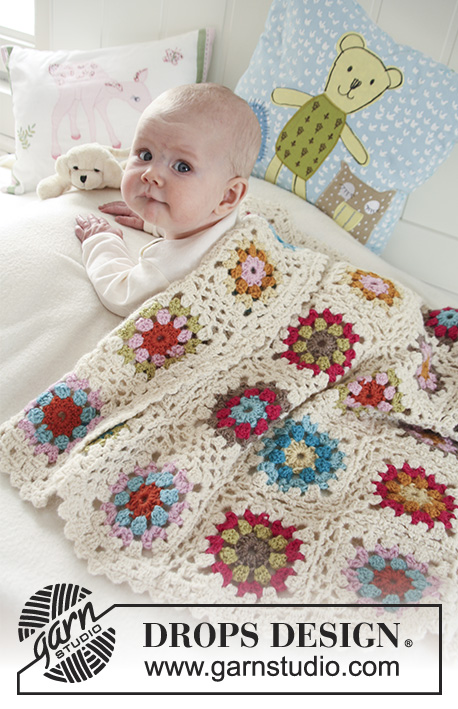
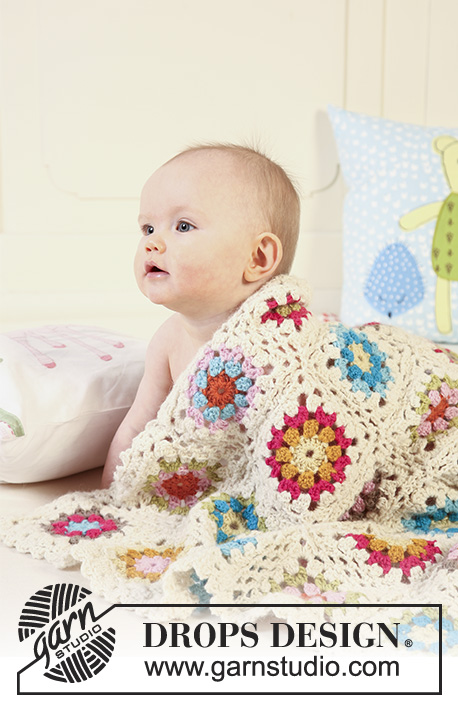
Granny's Little Girl |
|||||||
 |
 |
||||||
Colourful crochet baby blanket with granny squares in 2 threads DROPS Alpaca.
DROPS Baby 19-22 |
|||||||
|
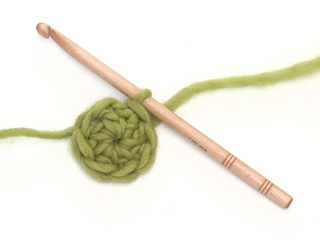
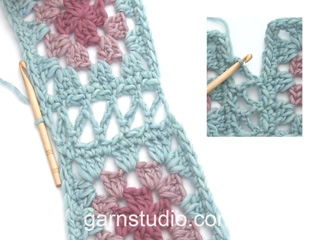
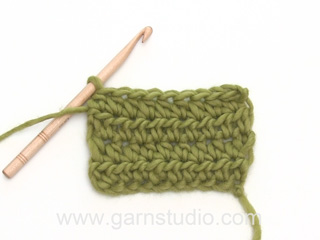
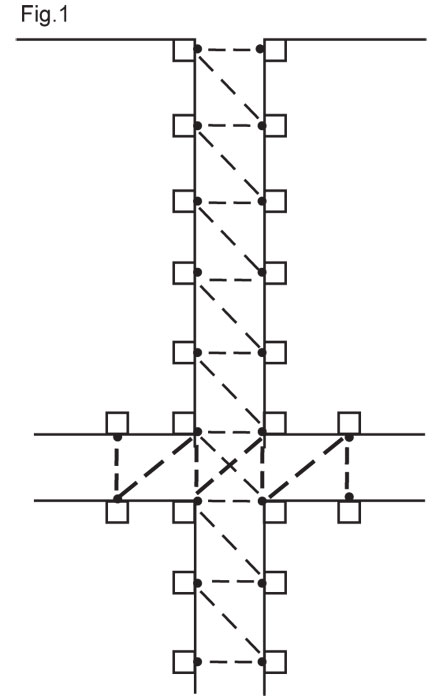
BLANKET: TIP: When crocheting the sl st at the end of a round, do it with the colour of next round. COLOURS OF SQUARES: A (make 3): Beg + round 1 = light pink, round 2 = goldenrod, round 3 = wheat, round 4 and 5 = off-white. B (make 5): Beg + round 1 = wheat, round 2 = dark turquoise, round 3 = lime, round 4 and 5 = off-white. C (make 5): Beg + round 1 = orange, round 2 = light pink, round 3 = lime, round 4 and 5 = off-white. D (make 3): Beg + round 1 = turquoise, round 2 = pink, round 3 = light beige mix, round 4 and 5 = off-white. E (make 4): Beg + round 1 = wheat, round 2 = dark turquoise, round 3 = turquoise, round 4 and 5 = off-white. F (make 5): Beg + round 1 = orange, round 2 = turquoise, round 3 = light pink, round 4 and 5 = off-white. G (make 3): Beg + round 1 = wheat, round 2 = goldenrod, round 3 = pink, round 4 and 5 = off-white. H (make 5): Beg + round 1 = goldenrod, round 2 = light pink, round 3 = light beige mix, round 4 and 5 = off-white. I (make 2): Beg + round 1 = light beige mix, round 2 = lime, round 3 = pink, round 4 and 5 = off-white. = a total of 35 squares. --------------------------------------------------------- --------------------------------------------------------- SQUARE: Crochet 6 ch with 2 threads Alpaca and crochet hook size 5 mm and form a ring with 1 sl st in first ch. ROUND 1: 3 ch, 15 tr in ring, finish with 1 sl st in 3rd ch from beg of round = 16 tr, turn piece. ROUND 2: 3 ch, 2 tr in first tr, * 2 ch, skip 1 tr, 3 tr in next tr *, repeat from *-* a total of 7 times and finish with 2 ch and 1 sl st in 3rd ch from beg of round = 8 tr-groups, turn piece. ROUND 3: 3 ch, 1 tr in first ch-loop, 1 ch, 2 tr in the same ch-loop, * 1 ch, 2 tr in next ch-loop, 1 ch, 2 tr in the same ch-loop *, repeat from *-* a total of 7 times and finish with 1 ch and 1 sl st in 3rd ch from beg of round, turn piece = 8 tr-groups. ROUND 4: 2 ch, 2 htr in first ch-loop, 1 ch, * 3 tr in next ch-loop, 3 ch, 3 tr in next ch-loop, 1 ch, 3 htr in next ch-loop, 1 ch, 3 htr in next ch-loop, 1 ch *, repeat from *-* a total of 3 times, 3 tr in next ch-loop, 3 ch, 3 tr in next ch-loop, 1 ch, 3 htr in next ch-loop, 1 ch and finish with 1 sl st in 2nd ch from beg of round, turn piece. ROUND 5: Crochet sl sts to the middle of ch-loop, * 2 ch, 1 dc in next ch-loop, 2 ch, in next ch-loop crochet: 1 htr, 2 tr, 3 ch, 2 tr and 1 htr (= corner), 2 ch, 1 dc in next ch-loop, 2 ch, 1 dc in next ch-loop *, repeat from *-* a total of 3 times, 2 ch, 1 dc in next ch-loop, 2 ch, in next ch-loop crochet: 1 htr, 2 tr, 3 ch, 2 tr and 1 htr (= corner), 2 ch, 1 dc in next ch-loop, 2 ch, finish with 1 sl st in sl st from beg of round. ASSEMBLY: Place squares with 5 squares horizontally and 7 squares vertically – see photo for colour combination. Crochet squares tog with 2 threads off-white Alpaca and crochet hook size 5 mm – beg crochet squares horizontally, place 2 squares on top of each other WS towards WS and crochet tog through both layers as follows (also see fig.1): 1 dc in first ch-loop (= corner) on first square, 2 ch, 1 dc in corner on second square, * 3 ch, 1 dc in next ch-loop on first square, 2 ch, 1 dc in next ch-loop on second square *, repeat from *-* a total of 4 times, 3 ch, 1 dc in last ch-loop (= corner) on first square, 2 ch, 1 dc in last ch-loop (= corner) on second square, 3 ch, 1 dc in corner of third square, 2 ch, 1 dc in corner of fourth square etc across the row until 5 squares have been crochet tog. Crochet the other rows of squares tog 5 by 5. When all squares have been crochet tog horizontally crochet the rows tog vertically in the same way. CROCHET BORDER: Crochet a border round the whole blanket with crochet hook size 5 mm and 2 threads off-white Alpaca as follows: ROUND 1 (crochet from WS): Crochet 3 tr in each ch-loop and crochet 2 ch between each tr-group (also crochet 1 tr-group in each transition between squares). In each corner crochet 3 tr, 3 ch and 3 tr in the same ch-loop, turn piece. ROUND 2: Crochet 1 dc in first ch-loop, * 3 ch, 1 tr in the first of the 3 ch, 1 dc in next ch-loop *, repeat from *-*. NOTE: In each corner crochet 1 extra loop to make the corner sit nicely. |
|||||||
Diagram explanations |
|||||||
|
|||||||
|
|||||||
|
Have you made this or any other of our designs? Tag your pictures in social media with #dropsdesign so we can see them! Do you need help with this pattern?You'll find tutorial videos, a Comments/Questions area and more by visiting the pattern on garnstudio.com. © 1982-2024 DROPS Design A/S. We reserve all rights. This document, including all its sub-sections, has copyrights. Read more about what you can do with our patterns at the bottom of each pattern on our site. |
|||||||


With over 40 years in knitting and crochet design, DROPS Design offers one of the most extensive collections of free patterns on the internet - translated to 17 languages. As of today we count 304 catalogues and 11422 patterns - 11422 of which are translated into English (UK/cm).
We work hard to bring you the best knitting and crochet have to offer, inspiration and advice as well as great quality yarns at incredible prices! Would you like to use our patterns for other than personal use? You can read what you are allowed to do in the Copyright text at the bottom of all our patterns. Happy crafting!
Comments / Questions (42)
Bonjour, je ne comprends pas comment crocheter le 2e tour de la bordure, les arceaux ont 2 mailles sauf dans les coins. Pouvez-vous expliquer plus précisément svp?
13.06.2020 - 09:29DROPS Design answered:
Bonjour Mme O'Connor, crochetez le 2ème tour comme dans la vidéo ci-dessous, chaque maille serrée doit être dans un arceau de 2 mailles en l'air du 1er tour. Bon crochet!
15.06.2020 - 08:27Hvorfor skal arbejdet vendes for hver omgang? og hvordan ser man så hvad der er ret og vrang siden?
24.05.2020 - 18:22DROPS Design answered:
Hej Britte, det er for at få det pænt på begge sider. Hvis du hellere vil hækle rundt, så gør du bare det :)
26.05.2020 - 15:03Ska HELA mönstret virkas med två trådar, eller är det bara när det står att det ska vara det (ringen, kanten och monteringen) som man ska använda två trådar? Tack!
08.04.2019 - 11:15DROPS Design answered:
Hei Stephanie. Hele teppet hekles med 2 tråder. God fornøyelse
08.04.2019 - 13:34Ik heb een vraag over de gehaakte rand: die is me niet duidelijk. Is er een video van? Ik heb het dekentje gehaakt met Nepal garen, erg mooi!
04.03.2016 - 11:57DROPS Design answered:
Hoi José. Nee, we hebben hier geen specifiek video van, maar wel deze over een picot (3 l met 1 stk in eerste l)
07.03.2016 - 16:59Many colours in the same time but looks great
11.12.2015 - 12:27Febe wrote:
Sätt in diagrammet, snälla!!!
24.08.2015 - 18:14Hallo, misschien kijk ik eroverheen, maar wat is de afmeting van de sprei al hij af is?
21.06.2015 - 15:44DROPS Design answered:
Hoi Renata: ongeveer 70 x 100 cm (staat bovenaan het patroon onder Maten)
23.06.2015 - 11:57Hallo, kann ich diese Decke auch mit einem anderen Garn häkeln, z.B. Baby Merino oder Baby Alpaka Silk? Wenn ja, bräuchte ich von beiden die gleiche Menge? Danke!
03.04.2015 - 20:54DROPS Design answered:
Beide Garne sind als Alternativen möglich. Sie können alle Garnalternativen (alle Garne der Gruppe A) sehen, wenn Sie oben im Kopf neben dem Foto auf "Garnalternativen" klicken. Für die Menge berechnen Sie die Gesamtmeterzahl, die Sie vom Originalgarn benötigen (Alpaca: 50 g = 167 m) und rechnen das dann für das Ersatzgarn um. Bei BabyAlpaca Silk gelten die gleichen Mengen, da die Lauflänge identisch ist. Baby Merino hat eine Lauflänge von 175 m / 50 g. Da die Mindestmenge bei allen Farben außer natur 50 g ist, benötigen Sie dies auch bei Baby Merino. Von natur benötigen Sie 1169 m, umgerechnet auf 175 m macht das 6,7 Knäule, also auch 7 Knäule. Die Mengen bleiben damit gleich. Wichtig ist, die Maschenprobe einzuhalten.
03.04.2015 - 21:10Jeg har hæklet sammen på tværs nu, og skal til at hækle sammen på langs. Har det noget at sige, hvilken ende/side, man begynder i? Sammenhæklingen trækker det hele lidt skævt, hvilket man også godt kan se på jeres billede, men kan man modvirke det alt efter hvilken retning man hækler sammen på langs til sidst?
30.01.2015 - 22:59DROPS Design answered:
Hej Marie, Nej det har ikke noget at sige, det vil du ikke kunne se når arbejdet er færdigt. God fornøjelse!
02.02.2015 - 13:45Hi, how do I work with two threads, when the pattern calls for one ball of each colour? Thanks!
24.12.2014 - 18:06DROPS Design answered:
Dear Jane, the video below shows you how to make 2 balls from 1 ball to work with 2 threads hold together. Happy crocheting!
30.12.2014 - 12:59