
Popular categories
Looking for a yarn?


|
|
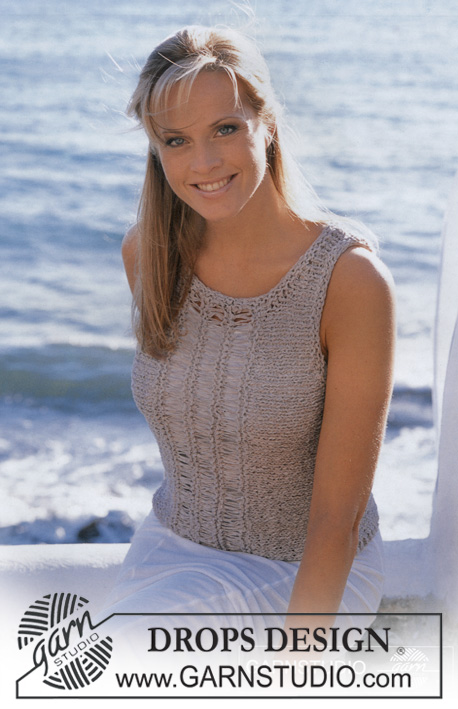
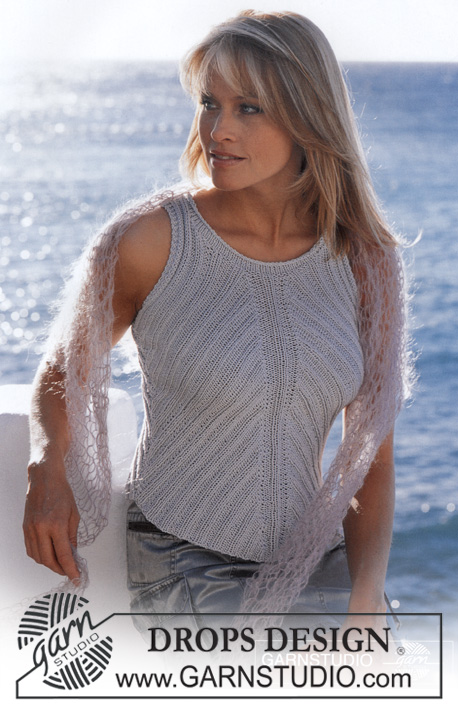
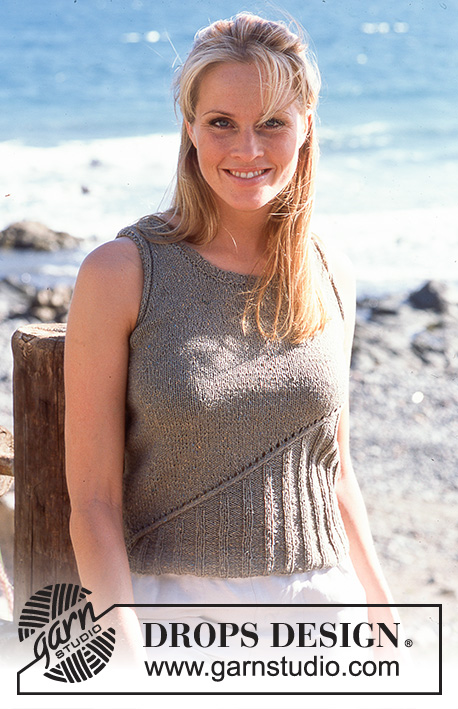
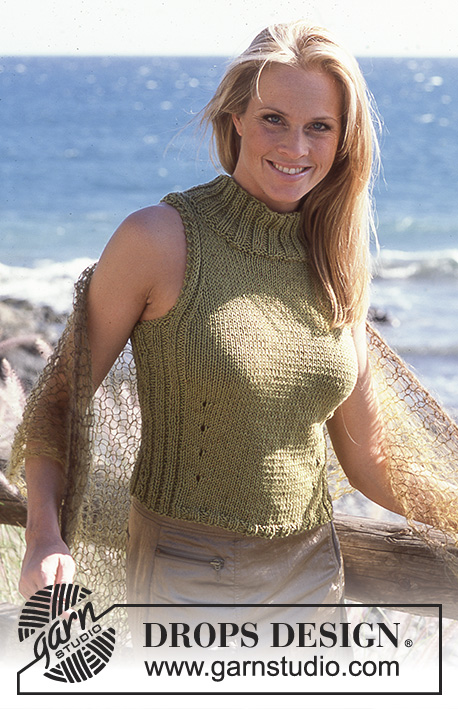
Sea Crossing |
|
|
|
|
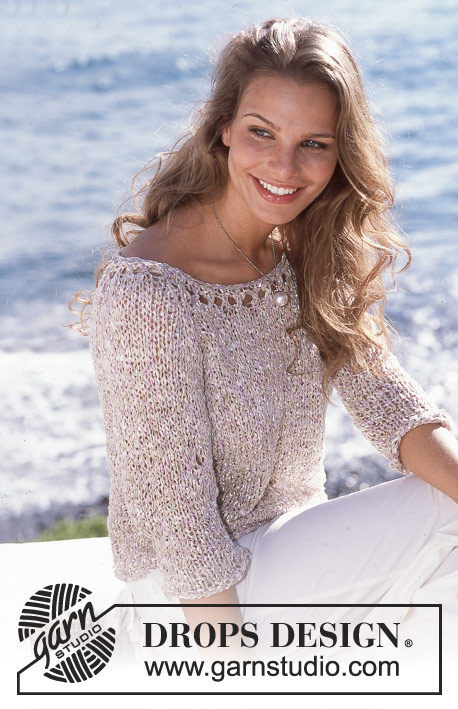
DROPS Jumper in Silke-tweed and Cotton Viscose with wrap-round at front
DROPS 81-28 |
|
|
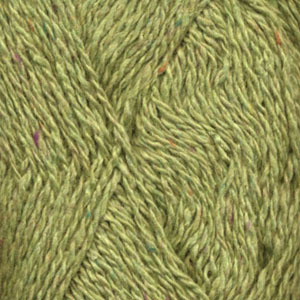
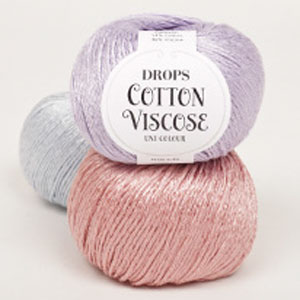
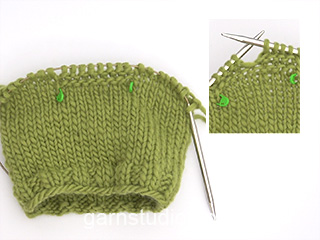
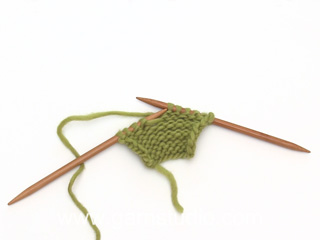
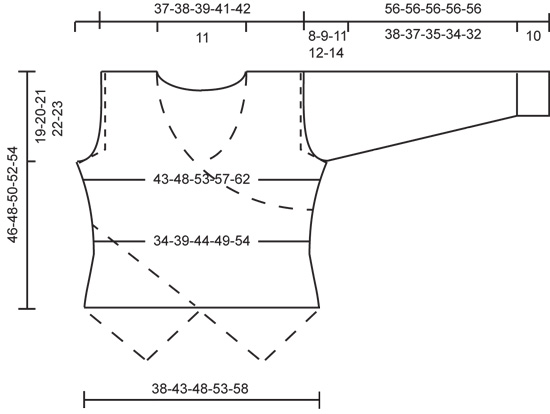
Knitting Tension: 16 stitches x 20 rows using 5.5mm needle and 1 thread of each wool type in stocking stitch = 10 x 10 cm Increasing: (applies when referred to in pattern). All increases are done form the right side of the jumper within 3 garter sts as follows: yarn round needle, on next row, purl yarn round needle in order not to create a hole. Decreasing: (applies when referred to in pattern). All decreases are done from the right side of the jumper within 3 garter sts as follows: after 3 garter sts: slip st as if to knit, knit 1, psso, before 3 garter sts: knit 2 together. Back: Cast on 63-71-79-87-95 sts (incl 1 edge st each side) using 1 thread Silke-tweed + 1 thread Cotton Viscose and 5.5mm needle. Knit 4 rows garter stitch and continue in stocking stitch. When back measures 5, 7 and 9 cm, decrease 1 st each side = 57-65-73-81-89 sts. When back measures 12 cm, increase 1 st each side every 2-2-2-2.5-2.5 cm a total of 7-7-7-6-6 times = 71-79-87-93-101 sts. When back measures 27-28-29-30-31 cm, decrease for armhole each side on every other row as follows: 3 sts 1 time, 2 sts 1-2-3-4-5 times and 1 st 1-2-3-3-4 times = 59-61-63-65-67 sts. When back measures 43-45-47-49-51 cm knit 4 rows garter stitch over the middle 23 sts. Then cast off the middle 17 sts for neck = 21-22-23-24-25 sts left on each shoulder. Finish each shoulder separately, knitting the 3 sts on neck in garter on all rows. Cast off when back measures 46-48-50-52-54 cm. Right Front: Knitted diagonally! Read all of the following before knitting it: Cast on 22-24-26-28-30 using 1 thread Silke-tweed + 1 thread Cotton Viscose and 5.5mm needle. Knit 4 rows garter stitch and continue in stocking stitch, but 3 sts in garter on left side (= 1st side = mid front/bottom edge). At the same time, after 2 rows garter stitch, cast on, on right side (= 2nd side = side seam) on every other row as follows: 1 st 5-6-7-8-9 times, 2 sts 4 times, 3 sts 2 times and 4 sts 1 time = 45-48-51-54-57 sts. Right front measures approx 12-13-14-15-16 cm. Continue with 3 garter sts each side and decrease on 2nd side - see Decreasing – 1 st on every 4th row 6-7-11-12-13 times and 1 st on every 6th row 4-4-2-2-2 times = 35-37-38-40-42 sts. The front piece measures approx 36-39-42-45-48 cm. Now increase on 2nd side – see Increasing - 1 st on every 4th row 6-5-4-3-1 times and 1 st on every other row 4-6-9-11-15 times. At the same time, when front piece measures 40-44-48-52-56 cm, (from cast on edge), cast off on side-1 on every other row: 1 st 7 times (decrease at the edge, after the 3 garter sts have been cast off, knit stocking stitch over all sts). The front piece measures approx 47-51-55-59-63 cm. On next row, cast off 8-10-13-16-18 sts for armhole on 1st side and then 1 st x 20-20-20-20-21 as follows: *decrease on every row 3 times, knit one row without decreasing*, repeat from *-* (decrease from edge). After the last increase on 2nd side, the front piece measures approx 51-54-58-61-65 cm. Now decrease on 2nd side, 1 st (from the edge) on every other row until all sts have been decreased. The front piece measures approx 60-64-68-72-76 cm from casting on edge to outer shoulder. Left Front: Cast on and knit as right front, but mirrored. Sleeves: Cast on 36-38-40-42-42 sts (incl 1edge st each side) using 1 thread Silke-tweed + 1 thread Cotton Viscose and 5.5mm needle. Knit 4 rows garter stitch and continue as follows: *2 rows stocking stitch, purl 1 row l*. Repeat from *-* until sleeve measures 10 cm. Now continue in stocking stitch. When sleeve measures 13 cm, increase 1 st each side every 3.5-3-3-2.5-2 cm a total of 10-11-11-12-14 times = 56-60-62-66-70 sts. When sleeve measures 48-47-45-44-42 cm, decrease for armhole each side on every other row as follows: 3 sts 1 time, 2 sts 3 times, 1 0-1-3-4-6 times and thereafter 2 sts each side until sleeve measures 55 cm. Cast off 3 sts each side, knit 1 row and cast off remaining sts. Sleeve measures approx 56 cm. To make up: Join shoulders and set in sleeves. Place right front piece over the left front piece and stitch both layers to back piece. |
|
|
|
|
Have you made this or any other of our designs? Tag your pictures in social media with #dropsdesign so we can see them! Do you need help with this pattern?You'll find tutorial videos, a Comments/Questions area and more by visiting the pattern on garnstudio.com. © 1982-2024 DROPS Design A/S. We reserve all rights. This document, including all its sub-sections, has copyrights. Read more about what you can do with our patterns at the bottom of each pattern on our site. |


With over 40 years in knitting and crochet design, DROPS Design offers one of the most extensive collections of free patterns on the internet - translated to 17 languages. As of today we count 304 catalogues and 11422 patterns - 11422 of which are translated into English (UK/cm).
We work hard to bring you the best knitting and crochet have to offer, inspiration and advice as well as great quality yarns at incredible prices! Would you like to use our patterns for other than personal use? You can read what you are allowed to do in the Copyright text at the bottom of all our patterns. Happy crafting!
Comments / Questions (50)
Hallo, wie nehme ich beim Vorderteil nach den 3 re. krausmaschen 2, 3 und 4 Maschen zu? Bei 1 M zunehmen mache ich einen Umschlag , aber wie mache ich es bei mehr Maschen? Danke Veronika
06.01.2024 - 15:59DROPS Design answered:
Liebe Veronika, in diesem Video zeigen wir, wie man neuen Maschen an der Seiten zunimmt bzw anschlägt, beim rechten Vorderteil werden diese Maschen am Ende einer Rück-Reihe angeschlagen, und bei der nächsten Reihe glatt rechts gestrickt, die 3 Randmaschen bei dieser Seite werden erst ab 12-13-14-15-16 cm krausrechts gestrickt. Viel Spaß beim stricken!
08.01.2024 - 10:13Ik wil patroon 'sea crossing' breien met Drops Alpaca Mix 7815. Het oorspronkelijke garen is er niet meer. Hoeveel bollen heb ik nodig voor een damesmaat 40?
29.11.2023 - 14:33DROPS Design answered:
Dag Corry,
Met behulp van de garenvervanger (zie link onderaan de materialenlijst bij het patroon) kun je berekenen hoeveel je nodig hebt als je een vervangend garen wilt gebruiken. Als je de benodigde hoeveelheid van het oorspronkelijke garen invult komt er een lijst met alternatieven tevoorschijn met de hoeveelheden erbij.
29.11.2023 - 19:18Me disculpo porque hice una pregunta sin leer todo y ver la imagen. Ya comprendí la duda que tenía de los aumentos en la parte delantera. gracias
21.09.2023 - 17:11Mi pregunta es sobre los aumentos del frente derecho. El patrón dice; (Aumentar en la orilla lateral cada 2 hileras; 1 pt 5-6-7-8-9 veces, 2 pts 4 veces, 3 pts 2 veces y 4 pts 1 vez . cuando es un punto no veo problema porque es una lazada de los 3 de musgo, pero cuando son 2 ,3 y 4 aumentos como o dondo los hago ?
21.09.2023 - 17:03DROPS Design answered:
Hola Guadalupe, aquí no aumentas, aquí estás montando puntos. Aumentas: 1 pt 5-6-7-8-9 veces. El resto de puntos los montas:2 pts 4 veces, 3 pts 2 veces y 4 pts 1 vez, lo más cerca posible hacia el lateral.
25.09.2023 - 01:03In sea crossing pattern… Back says to cast on 63 stiTches and then after garter edge decrease 1 stitch each side which would make 61 …yet the pattern says 57?.?HELP Thank you
10.03.2023 - 11:50DROPS Design answered:
Dear Mrs Strauss, you should decrease 1 stitch on each side when piece measures 5, 7 and 9 cm (= 3 times in total x 2 sts = 6 sts decreased), so that there are 63-6=57 sts left. Happy knitting!
10.03.2023 - 13:37Bonjour pourriez vous m envoyer un schéma explicatif détaillé car je ne comprends pas le montage et le tricotage des devants à partir de la fin des augmentations au niveau 1m tout les 4 rangs 12x et 3 x tous les 6rangs taille xl Pourquoi la hauteur totale des devants est plus haute que celle du dos : 62 et 52 ? Merci beaucoup et désolée d être confuse
17.02.2023 - 19:43L’ouvrage mesure environ 47-51-55-59-63 cm. Au rang suivant, rabat 8-10-13-16-18 mailles du côté 1 pour l’emmanchure, puis 20-20-20-20-21 fois 1 m comme suit : diminuer tous les rangs pendant 3 rangs, puis tricoter 1 rang sans diminutions. Bonjour, je ne comprends pas comment faire ces diminutions 20 fois 1 maille pendant 3 rangs. pouvez vous m'éclairer s'il vous plait ? Merci pour votre réponse. Cordialement. Chantal Maugan
04.01.2023 - 13:18DROPS Design answered:
Bonjour Mme Maugan, vous diminuez 1 m à chacun des 3 rangs suivants (= sur l'endroit et sur l'envers), puis tricotez 1 rang sans diminuer. Répétez ces 4 rangs jusqu'à ce que les 20 mailles aient été rabattues (autrement dit répétez 5 fois ces 4 rangs, puis diminuez 1 m aux 2 rangs suivants). Vous pouvez diminuer en tricotant 2 m ens à l'end sur l'end/2 m ens à l'env sur l'envers ou en rabattant 1 m au début du rang sur l'endroit/sur l'envers - dans ce cas-là, on peut faire l'une ou l'autre des 2 techniques. Bon tricot!
04.01.2023 - 14:14Ont ne fait pas les emmanchures comme le dos un peu difficile de comprendre
21.04.2022 - 11:51DROPS Design answered:
Bonjour Mme Grosemans, il est normal de ne pas former les emmanchures pour les devants comme pour le dos car on ne les tricote de la même façon. Suivez attentivement les indications pour votre taille; mesurez bien au bon endroit et rabattez sur le côté-1 ou diminuez sur le côté-2 comme indiqué. Bon tricot!
21.04.2022 - 13:23Avez vous de la laine acrylique, et peux t on tricoter ce modèle avec des aiguilles numéro 5.merci
13.04.2021 - 14:45DROPS Design answered:
Bonjour Mme Rivière, vous trouverez ici toutes les infos sur les alternatives ; vous pouvez également utiliser notre convertisseur pour voir les alternatives proposées. Bon tricot!
13.04.2021 - 15:26Vad rekommenderar ni för garn istället för de som utgått?
10.04.2021 - 18:28DROPS Design answered:
Hej Karin, Vi anbefaler 1 tråd DROPS Safran og 1 tråd DROPS Alpaca. Prøv vores garnomregner. Vælg Silke-Tweed, vælg garnforbrug i din størrelse og vælg 1 tråd. Gør det samme med Cotton-Viscose så får du garnforbruget i de forskellige kvaliteter :)
12.04.2021 - 14:34