
Popular categories
Looking for a yarn?


Comments / Questions (29)
![]() Popote wrote:
Popote wrote:
Bonjour, 🙋🏻♀️ pourrait-on m'aider je suis sur la taille M, j'ai fait les 42 lignes du diagramme, comment répéter le schéma pour que les légendes correspondent. Merci Bonjour, 🙋🏻♀️, je suis sur la taille M, j'ai fait mes 42 lignes, comment répéter la légende diagramme pour avoir le même schéma à la suite de mon tricot jusqu'à l'encolure. Merci
06.06.2026 - 14:02DROPS Design answered:
Bonjour Popote, cf. Réponse ci-dessous - notez que vous devez avoir toujours 5 rangs entre chacune des petites torsades de M.1B et 15 rangs entre chacune des grandes torsades. Bon tricot!
08.06.2026 - 08:58
![]() Popote wrote:
Popote wrote:
Bonjour, c'est la première fois que je travaille avec vous, au sujet du diagramme taille M une fois tout en haut du M1B pour reprendre la légende, je suis perdue, pour que le schéma correspond. Merci
05.06.2026 - 16:13DROPS Design answered:
Bonjour Popote, toutes les torsades de M.1B et de M.2B ne se répètent pas sur le même nombre de rangs en hauteur, autrement dit, lorsque vous arrivez au bout du diagramme dans les 3 petites torsades, reprenez au 1er rang et continuez la grande torsade comme dans le diagramme et quand celle ci est terminée, reprenez la au 1er rang autrement dit, le diagramme ne se répète pas entièrement en hauteur à chaque fois mais vous devez toujours avoir le bon nombre de rangs entre chaque torsades. Bon tricot!
08.06.2026 - 07:49
![]() Popotte wrote:
Popotte wrote:
Bonjour, j'ai monté 52 mailles j'ai fait mes 6 mailles de bordure, ensuite tricoter "4 mailles envers 3 mailles endroit" je me retrouve avec 4 mailles envers suivi de mes 7 mailles restantes.sur les 7 mailles est-ce que je refais 4 m envers, 2m endroit, 1 m lis. Donc je me retrouve avec 4 m envers + 4 m envers 2m...... Merci.
03.06.2026 - 08:30DROPS Design answered:
Bonjour Popote, tricotez vos 52 m ainsi: 6 m point mousse, puis 25 mailles de M.1A soit (1 m env, 4 m end, 3 m env, 3 m end, 4 m env, 3 m end, 3 m env, 4 m end), puis tricotez 2 fois (4 m env, 3 m end) et terminez par 4 m env, 2 m end, 1 m point mousse = 6+25+14+4+2+1=52. Bon tricot!
03.06.2026 - 09:07
![]() Popote wrote:
Popote wrote:
Bonjour, 🙋🏻♀️ j'ai monté mais 94 mailles donc je suis sur l'endroit du travail je ne comprends pas tricoter un rang envers sur envers et continuer en côte ainsi ( 1 rg = end) : peut-on m'aider Merci
21.05.2026 - 18:43
![]() Popote wrote:
Popote wrote:
Bonjour, 🙋🏻♀️ j'ai monté mais 94 mailles donc je suis sur l'endroit du travail je ne comprends pas tricoter un rang envers sur envers et continuer en côte ainsi ( 1 rg = end) : peut-on m'aider Merci
21.05.2026 - 18:42DROPS Design answered:
Bonjour Popote, ici, le 1er rang doit être tricoté sur l'envers pour que l'on ait 1 rang jersey endroit, vu sur l'endroit, avant les côtes qui commenceront elles sur l'endroit. Bon tricot!
22.05.2026 - 08:04
![]() Marianne wrote:
Marianne wrote:
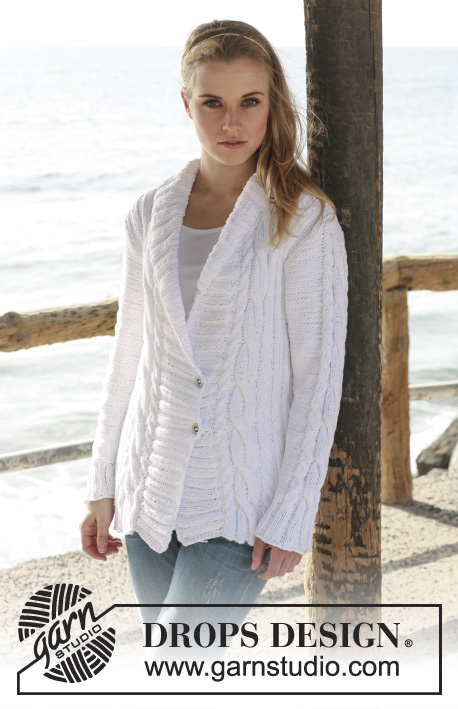
Moet het rugpand ook met kabels
26.03.2026 - 13:29DROPS Design answered:
Dag Marianne,
Nee, de kabels zitten alleen op het voorpand.
26.03.2026 - 21:46
![]() Marianne wrote:
Marianne wrote:
Moet het rugpand ook met kabels
26.03.2026 - 13:28
![]() Mariete wrote:
Mariete wrote:
Hallo, Welke maat is knoop 533? Deze is niet meer te verkrijgen en ik zoek een passend alternatief
22.01.2026 - 14:30DROPS Design answered:
Dag Mariete,
Deze knoop is inderdaad uit de handel, maar hij heeft een diameter van 20 mm.
05.02.2026 - 19:47
![]() Lena wrote:
Lena wrote:
Hej, Jag har lagt upp 45 maskor till höger framstycke i stl. S och ska nu börja med resåren *4 am, 3 rm* och upprepa till det är 7 maskor kvar. Gör jag så har jag 4 am när jag kommer fram till 7 sista. Står det rätt i beskrivningen? Börjar jag med 4 rm blir det rätt… Tacksam för svar!
19.01.2026 - 22:59DROPS Design answered:
Hei Lena. Du har 45 masker, så strikkes det 6 stolpemasker, M.1A (25 masker), så strikkes det 4 vrang og 3 rett = det er nå strikket over 38 masker og det er 7 masker igjen. Avslutt med 4 vrang, 2 rett og 1 kantmaske i RILLE. 4 am, 3 rm strikkes bare 1 gang (i str. S). mvh DROPS Design
30.01.2026 - 09:34
![]() Lillan wrote:
Lillan wrote:
Hello, I've been wanting to knit this vest for a long time and here I am..... The pattern is very difficult to see because of the white yarn! My problem is: when decreasing after 11 stitches on front band, this moves into the small cable and eventually into the large cable. When do I stop trying to keep making these cable patterns. Also, very difficult to make and concerned I'm doing this completely wrong. Thanks for your assistance. Lillan
31.05.2024 - 03:04DROPS Design answered:
Dear Lillian, when decreasing for neck just work the stitches that cannot be worked into a cable just K over K from RS. Happy knitting!
31.05.2024 - 07:46
|
||||||||||||||||
Ocean Mist Cardigan#oceanmistcardigan |
||||||||||||||||
 |
 |
|||||||||||||||
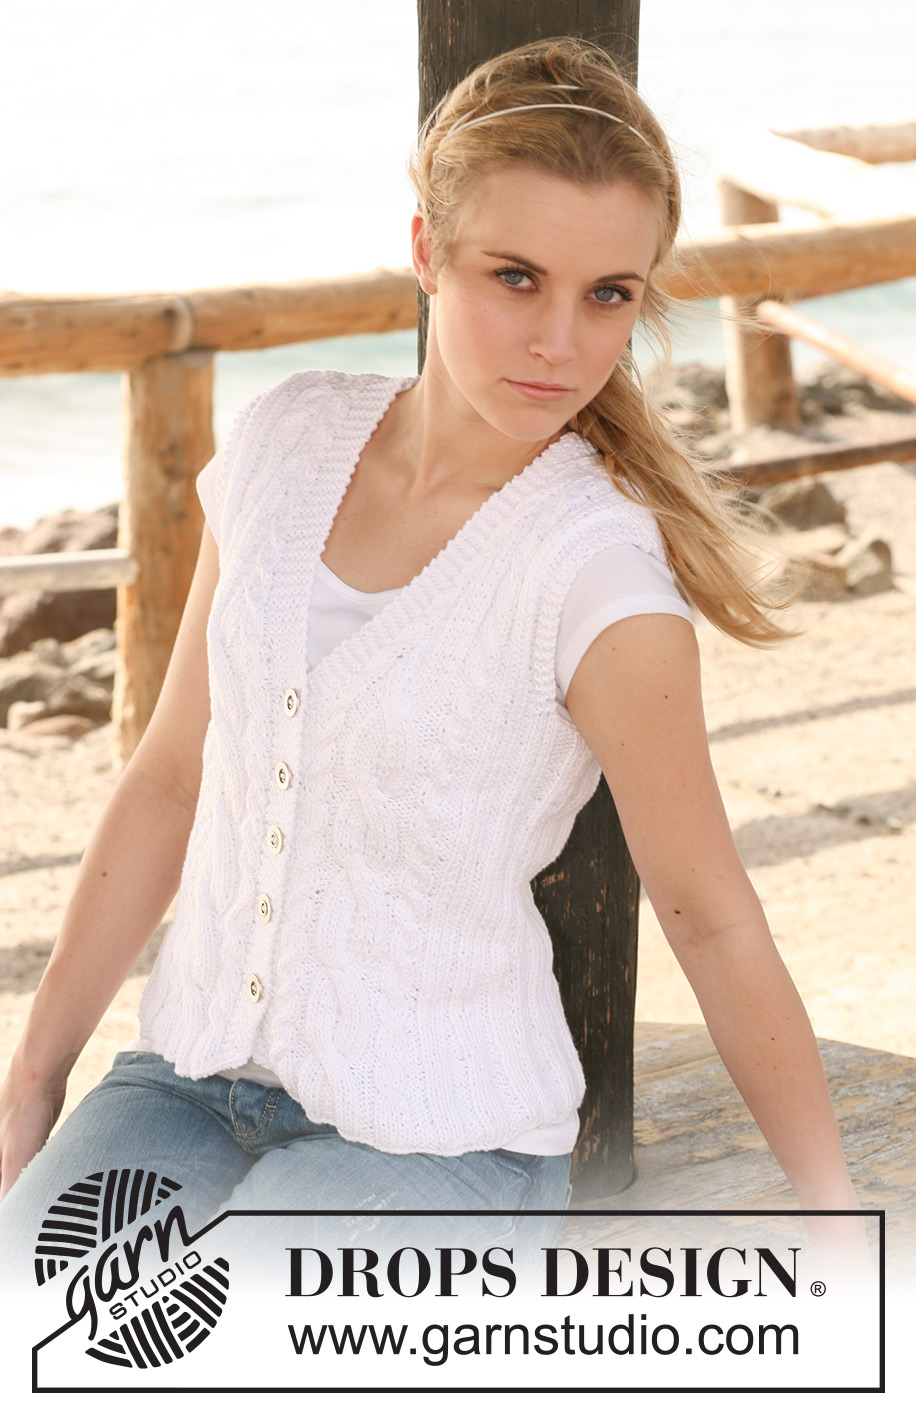
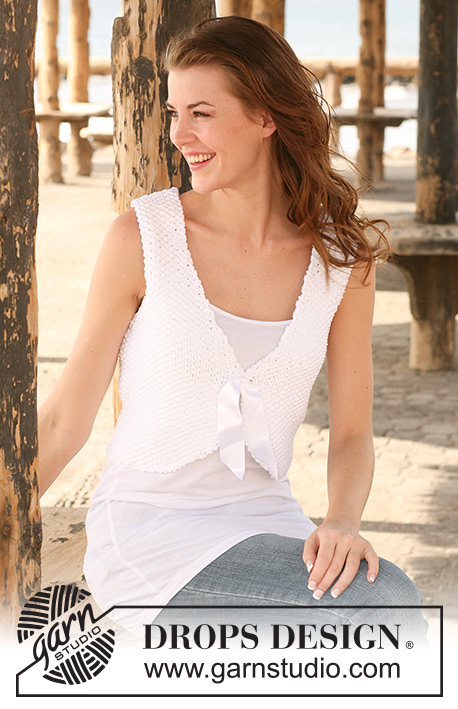
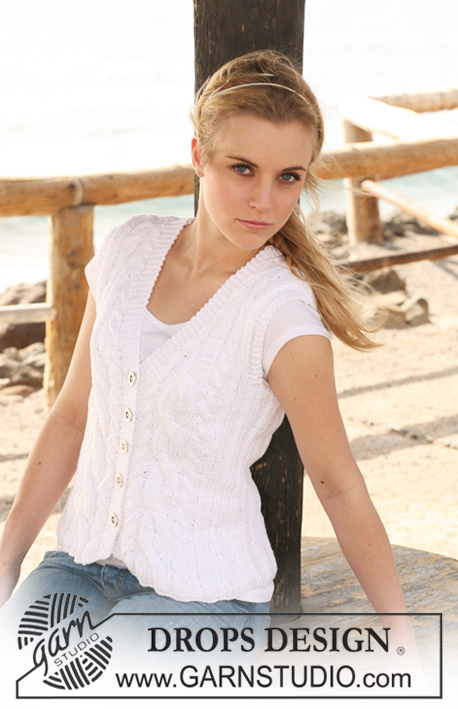
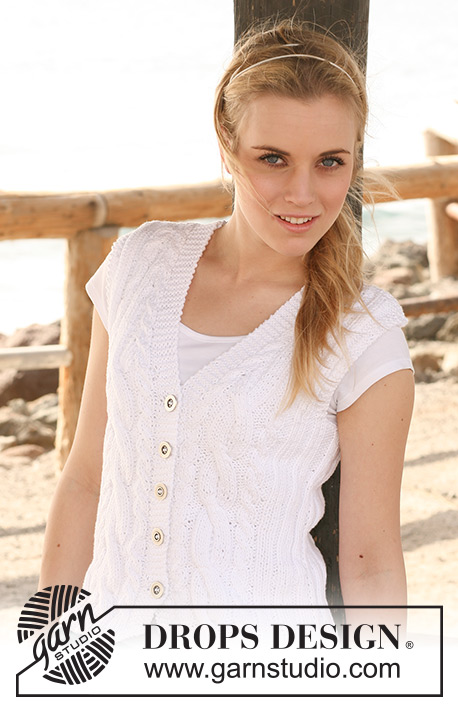
Knitted DROPS sleeveless top with rib and cables in ”Paris”. Size S to XXXL.
DROPS 120-21 |
||||||||||||||||
|
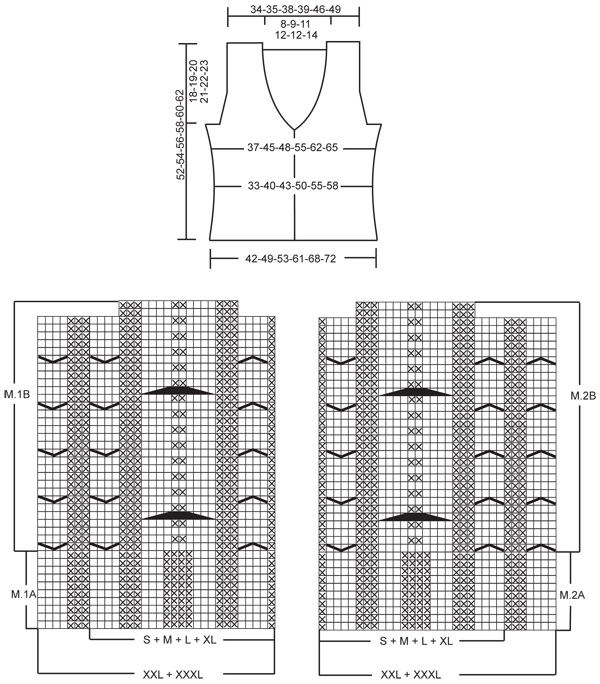
GARTER ST (back and forth on needle): K all rows. DECREASING TIP-1 (applies to armhole): Make all dec from RS inside 3 garter sts. Dec as follows after 3 garter sts: Slip 1 st as if to K, K1, psso. Dec as follows 2 sts before 3 garter sts: K2 tog. DECREASING TIP-2 (applies to neckline): Dec inside 6 front band sts in garter st + 5 sts in pattern (= 11 sts). Make all dec from RS! Dec as follows after 11 sts: P2 tog. Dec as follows 2 sts before 11 sts: P2 tog into back of loop. PATTERN: See diagram M.1 and M.2. Diagrams show the pattern from RS. BUTTONHOLES: Make buttonholes on right front band. 1 buttonhole = cast off 4th front band st from mid front and cast on 1 new st on next row. Make buttonholes when piece measures: Size S: 6, 12, 18, 24 and 30 cm. Size M: 7, 13, 19, 25 and 31 cm. Size L: 8, 14, 20, 26 and 32 cm. Size XL: 8, 13, 18, 23, 28 and 33 cm. Size XXL: 7, 12, 18, 23, 29 and 34 cm. Size XXXL: 8, 13, 19, 24, 30 and 35 cm. --------------------------------------------------------- --------------------------------------------------------- BACK PIECE: Cast on 80-94-101-115-129-136 sts (includes 1 edge st each side) on needle size 4 mm with Paris. P 1 row from WS and continue in rib as follows (first row = RS): 1 edge st in GARTER ST - see above, K2, * P4, K3 *, repeat from *-* until 7 sts remain and finish with P4, K2 and 1 edge st in GARTER ST. When piece measures 4 cm work next row as follows from RS: 1 edge st in garter st, K2, * P4, K3 *, repeat from *-* a total of 2-2-2-2-3-3 times, P4, 10-17-17-24-24-24 stocking sts, * P4, K3 *, repeat from *-* a total of 2-2-3-3-3-4 times, P4, 10-17-17-24-24-24 stocking sts, * P4, K3 *, repeat from *-* a total of 2-2-2-2-3-3 times, P4, K2 and 1 edge st in garter st. Continue like this with K over K, P over P and edge sts in garter st. REMEMBER THE KNITTING TENSION! When piece measures 7 cm dec as follows from RS: dec all P4 (= 9-9-10-10-12-13 times) to P3 by P tog the 2 first P sts = 71-85-91-105-117-123 sts. When piece measures 14 cm dec the same 9-9-10-10-12-13 P-sections (from RS) from P3 to P2 by P tog the last 2 P sts = 62-76-81-95-105-110 sts. When piece measures 22-23-24-25-26-27 cm inc as follows from RS: inc all P2 to P3 (= 9-9-10-10-12-13 times) by making 1 YO between the 2 P sts = 71-85-91-105-117-123 sts. On next row K YO into back of loop to avoid a hole. When piece measures 32-33-34-35-36-37 cm work garter st on 6-6-6-12-12-12 sts each side, with remaining sts as before. Continue like this until piece measures 34-35-36-37-38-39 cm. Now cast off 3-3-3-9-9-9 sts each side for armhole (i.e. cast off at beg of the next 2 rows) and cast off to shape the armhole– see DECREASING TIP-1: 1 st on every row from RS a total of 0-6-6-6-6-6 times = 65-67-73-75-87-93 sts. Continue with K over K, P over P and 3 garter sts each side. When piece measures 49-51-53-55-57-59 cm - adjust so that next row is from RS – dec 5-5-7-7-7-9 sts evenly on the middle 15-15-21-21-21-27 sts (i.e. dec P3 to P2 and dec K3 to K2 mid back), work remaining sts as before = 60-62-66-68-80-84 sts. On next row (= WS) continue in garter st on the middle 28-30-32-34-34-38 sts with remaining sts as before. When piece measures 50-52-54-56-58-60 cm cast off the middle 16-18-20-22-22-26 sts for neck = 22-22-23-23-29-29 sts left on each shoulder and complete each shoulder separately. Continue with K over K, P over P, 6 garter sts towards neck and 3 garter sts towards armhole until piece measures 52-54-56-58-60-62 cm. Cast off with K over K and P over P. RIGHT FRONT PIECE: Cast on 45-52-59-66-73-73 sts (includes 1 edge st at the side and 6 front band sts towards mid front) on needle size 4 mm with Paris. P 1 row from WS and continue in rib as follows from mid front (first row = RS): 6 front band sts in GARTER ST, M.1A (= 25-25-25-25-32-32 sts), * P4, K3 *, repeat from *-* until 7 st remain, and finish with P4, K2 and 1 edge st in GARTER ST. When piece measures 4 cm work M.1B instead of M.1A (with remaining sts as before). REMEMBER BUTTONHOLES ON FRONT BAND - see above. When piece measures 7 cm dec as follows from RS: dec all P4 (= 2-3-4-5-5-5 times) to P3 by P tog the 2 first P sts = 43-49-55-61-68-68 sts. When piece measures 14 cm dec the same 2-3-4-5-5-5 P-sections (from RS) from P3 to P2 by P tog the last 2 P sts = 41-46-51-56-63-63 sts. When piece measures 22-23-24-25-26-27 cm inc as follows from RS: Inc all P2 to P3 (2-3-4-5-5-5 times) by making 1 YO between the 2 P sts = 43-49-55-61-68-68 sts. On next row K YO into back of loop to avoid a hole. NOW READ ALL OF THE FOLLOWING SECTION BEFORE CONTINUING! When piece measures approx 31-32-33-34-35-36 cm (approx 1 cm after last buttonhole on front band) K 2 rows back and forth on the 6 front band sts only. Continue on all sts as before, AT THE SAME TIME on first row from RS dec 1 st towards mid front for neck – see DECREASING TIP-2, and repeat the dec on every other row a total of 10-10-17-17-16-16 times and then on every 4th row a total of 6-6-4-4-5-5 times. AT THE SAME TIME when piece measures 32-33-34-35-36-37 cm work garter st on 6-6-6-12-12-12 sts at the side (work remaining sts as before). Continue like this until piece measures 34-35-36-37-38-39 cm (adjust so that next row is from WS). Now cast off 3-3-3-9-9-9 sts at the side for armhole. On next row (from RS) cast off 1 st to shape the armhole – see DECREASING TIP-1, and repeat the dec on every row from RS a total of 0-6-6-6-6-6 times. When all dec for armhole and neck are complete there are 24-24-25-25-32-32 sts left on shoulder. Continue with K over K, P over P, 6 garter sts towards neck and 3 garter sts towards armhole until piece measures 51-53-55-57-59-61 cm. Now dec 1 st each of the 2-2-2-2-3-3 cables in M.1 = 22-22-23-23-29-29 sts left on needle. Cast off with K over K and P over P when piece measures 52-54-56-58-60-62 cm. LEFT FRONT PIECE: Like right front piece but mirrored and work M.2 instead of M.1 in order to mirror the pattern mid front. ASSEMBLY: Sew shoulder seams. Sew side seams - sew in outer loops of sts. Sew on buttons. |
||||||||||||||||
Diagram explanations |
||||||||||||||||
|
||||||||||||||||
 |
||||||||||||||||
Have you finished this pattern?Tag your pictures with #dropspattern #oceanmistcardigan or submit them to the #dropsfan gallery. Do you need help with this pattern?You'll find 16 tutorial videos, a Comments/Questions area and more by visiting the pattern on garnstudio.com. © 1982-2026 DROPS Design A/S. We reserve all rights. This document, including all its sub-sections, has copyrights. Read more about what you can do with our patterns at the bottom of each pattern on our site. |
||||||||||||||||


With over 40 years in knitting and crochet design, DROPS Design offers one of the most extensive collections of free patterns on the internet - translated to 17 languages. As of today we count 325 catalogues and 12298 patterns translated into English (UK/cm).
We work hard to bring you the best knitting and crochet have to offer, inspiration and advice as well as great quality yarns at incredible prices! Would you like to use our patterns for other than personal use? You can read what you are allowed to do in the Copyright text at the bottom of all our patterns. Happy crafting!
Post a comment to pattern DROPS 120-21
We would love to hear what you have to say about this pattern!
If you want to leave a question, please make sure you select the correct category in the form below, to speed up the answering process. Required fields are marked *.