
Popular categories
Looking for a yarn?


|
|
Miss Spring |
|
 |
 |
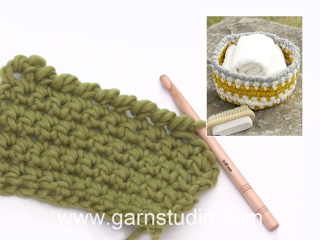
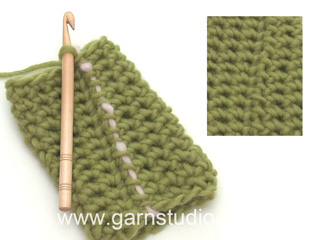
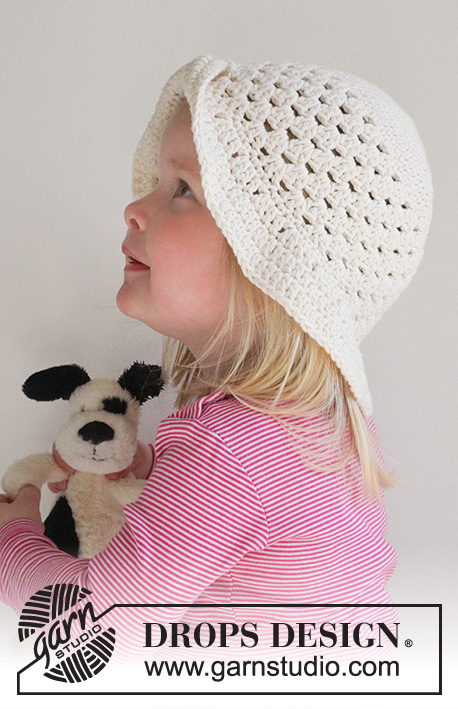
Crochet cap for children in DROPS Nepal.
DROPS Children 24-16 |
|
|
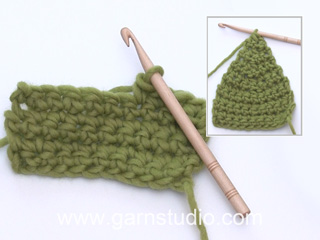
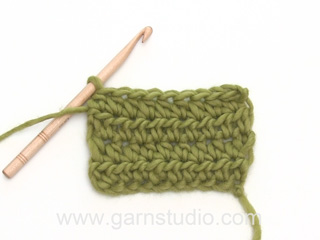
US/UK: This pattern is in US English. There are different crochet terms in British and US English. Conversion - see page 4. CROCHET INFO: Replace first sc on every round with 1 ch. Finish every round with 1 sl st in ch from beg of round. DECREASE TIP: * Insert hook in next st, get yarn *, repeat from *-* one more time, make a YO and pull yarn through all 3 sts on hook. REVERS CROCHET: Work as sc but backwards. I.e. crochet around from left to right ---------------------------------------------------------- CAP: Read US/UK above! Ch 4 on hook size 6 mm / J/10 with Nepal and form a ring with 1 sl st in 1st ch. ROUND 1: Work 6 sc in ch-ring. READ CROCHET INFO! ROUND 2: 2 sc in every sc = 12 sc. REMEMBER THE CROCHET TENSION/GAUGE! ROUND 3: * 1 sc in first sc, 2 sc in next sc *, repeat from *-* = 18 sc. ROUND 4: * 1 sc in each of the first 2 sc, 2 sc in next sc *, repeat from *-* = 24 sc. ROUND 5: * 1 sc in each of the first 3 sc, 2 sc in next sc *, repeat from *-* = 30 sc. ROUND 6: * 1 sc in each of the first 4 sc, 2 sc in next sc *, repeat from *-* = 36 sc. ROUND 7: * 1 sc in each of the first 5 sc, 2 sc in next sc *, repeat from *-* = 42 sc. ROUND 8: * 1 sc in each of the first 6 sc, 2 sc in next sc *, repeat from *-* = 48 sc. ROUND 9: * 1 sc in each of the first 7 sc, 2 sc in next sc *, repeat from *-* = 54 sc. ROUND 10: * 1 sc in each of the first 8 sc, 2 sc in next sc *, repeat from *-* = 60 sc. ROUND 11: * 1 sc in each of the first 9 sc, 2 sc in next sc *, repeat from *-* = 66 sc. ROUND 12: Work 1 sc in every sc while at the same time inc 0-2-6 sc evenly = 66-68-72 sc. ROUND 13-17: 1 sc in every sc. ROUND 18: Work 1 sc in every sc while at the same time dec 5-4-5 sc evenly = 61-64-67 sc - READ DECREASE TIP. Continue with 1 sc in every sc until hat measures 16-17-18 cm / 6 1/4"-6 3/4"-7". BRIM: Then work brim over the middle 14-16-16 sts at the front (i.e. in opposite side of beg of round) at follows: ROW 1: Work 1 sc in every sc. Turn piece. ROW 2: Work ch 1, 2 sc in first sc, 1 sc in each of the next 12-14-14 sc and 2 sc in last sc = 16-18-18 sc. Turn piece. ROW 3: Work ch 1, 3 sc in first sc, 1 sc in every sc until last sc, 3 sc in last sc, 1 sl st in the next free sc from hat edge to fasten the brim for hat = 20-22-22 sc. Turn piece. ROW 4: Work ch 1, 3 sc in first sc, 1 sc in every sc until last sc, 3 sc in last sc, 1 sl st in the next free sc from hat edge as on row 3 = 24-26-26 sc. Turn piece. ROUND 5: Work ch 1, 1 sc in every sc over the entire brim and continue around the entire hat. ROUND 6: Work REVERSE CROCHET – see explanation above, around the entire hat and the brim. Fasten off. CROCHET FLOWER: Ch 6 on hook size 6 mm / J/10 with cerise and form a ring with 1 sl st in first ch. ROUND 1: ch 2 (= first hdc), 2 hdc in ch-ring, * ch 5, 1 sc in last hdc made, 3 hdc in ch-ring *, repeat from *-* a total of 5 times and finish with 5 ch and 1 sl st in 2nd ch from beg of round = 6 ch-spaces with 3 hdc between each. Fasten off. ROUND 2: Switch to red. Work 1 sc in the middle of the first 3 hdc on round, * 10 dc in ch-space, skip 1 hdc, 1 sc in next hdc, skip 1 hdc *, repeat from *-* the entire round and finish with 1 sl st in first sc from beg of round. Fasten off. Sew the flower to the side of the cap. |
|
|
Have you made this or any other of our designs? Tag your pictures in social media with #dropsdesign so we can see them! Do you need help with this pattern?You'll find tutorial videos, a Comments/Questions area and more by visiting the pattern on garnstudio.com. © 1982-2024 DROPS Design A/S. We reserve all rights. This document, including all its sub-sections, has copyrights. Read more about what you can do with our patterns at the bottom of each pattern on our site. |
|


With over 40 years in knitting and crochet design, DROPS Design offers one of the most extensive collections of free patterns on the internet - translated to 17 languages. As of today we count 304 catalogues and 11422 patterns - 11422 of which are translated into English (UK/cm).
We work hard to bring you the best knitting and crochet have to offer, inspiration and advice as well as great quality yarns at incredible prices! Would you like to use our patterns for other than personal use? You can read what you are allowed to do in the Copyright text at the bottom of all our patterns. Happy crafting!
Comments / Questions (35)
Bonjour, Je ne vois pas les différents modèles selon la taille ? Il n’y a qu’une seul modèle Merci pour votre aide
18.05.2020 - 14:00DROPS Design answered:
Bonjour Mme Anaos, ce modèle est décliné en 3 tailles, mais il va se crocheter de la même façon dans toutes les tailles jusqu'au 18ème tour. Bon crochet!
18.05.2020 - 15:49En suivant vos explications pour la visière je n'obtiens pas le résultat de votre modèle. Afin de pouvoir achever cette casquette, vous est-il possible de m'adresser un complément d'information. Merci de votre réponse. Cordialement
02.02.2020 - 22:33DROPS Design answered:
Bonjour Liliane, l'idéel serait de montrer votre ouvrage à votre magasin (même en photo par mail), on pourra ainsi vous aider plus facilement. Vous pouvez également demander de l'aide sur le groupe DROPS Workshop en y publiant votre photo. Bon crochet!
03.02.2020 - 10:27Merci pour vos explications de ce super modèle. Bien expliqué pour une débutante qui regarde plutôt les tutos vidéo mais je sais tricoter avec des explications livres
06.12.2019 - 19:32Hej! Jag undrar vilken diameter mössan ska ha i storlek 54/58 efter varv 12? Med vänlig hälsning, Julia
10.07.2018 - 01:30DROPS Design answered:
Hej Julia, du skall ha 13 fm på 10 cm. På varv 12 har du 72fm. 72/1,3=ca 55 cm i omkreds. God fornøjelse!
10.07.2018 - 09:57Hej! Jag undrar vilken garntjocklek jag ska använda? Att det står virknål nr 6 hjälper inte så mkt. Hur pass glest får maskorna bli? Jag virkar ganska hårt. Mvh Julia
09.06.2018 - 20:13DROPS Design answered:
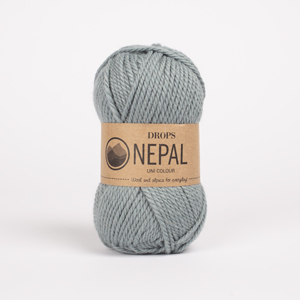
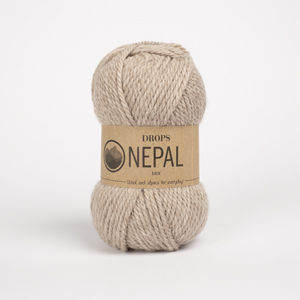
Hej, mössan virkas i DROPS Nepal, du kan även välja något annat garn från garngrupp C.
11.06.2018 - 17:56Bonjour, pour la visière ça me semble étrange aussi en voyant la photo ça semble pas assez long et pas la bonne forme... L'arrondit se fait mais rien à voir avec la photo merci
23.03.2018 - 18:50DROPS Design answered:
Bonjour Mme Michoud, vérifiez bien votre tension pour bien avoir la bonne forme - n'hésitez pas à rajouter un ou 2 rangs si vous la trouvez trop courte. Bon crochet!
26.03.2018 - 10:40Danke für die Antwort, das hilft mir bei dem Schild allerdings nicht weiter. Beende ich die Arbeit nach 16cm und fange auf der Gegenüberliegenden Seit mit dem Schild an oder beginne ich das Schild am Rundenanfang?
10.08.2017 - 09:52DROPS Design answered:
Liebe Melanie, Schirm wird auf der anderen Seite des Rd-Beginns angefangen. Wenn Sie diese "Naht" vermeiden wollen, schauen Sie mal ob Sie die Blume über diese Naht nähen können. Häkeln Sie zuerst die Blume und so entscheiden Sie, wie es am besten für Sie wird, Schirm zu häkeln. Viel Spaß beim häkeln!
10.08.2017 - 11:06Hallo, habe diese Mütze nahezu problemlos gehäkelt, bis zu dem Teil mit dem Schirm... Ersteinmal verschiebt sich meine hintere Mittelnaht immer weiter nach rechts, was aber nicht weiter auffällt, mir aber komisch vorkommt. Habe nun 16cm gehäkelt und wie setzte ich den Schirm an? Sind die 14 mittleren Maschen auf der gegenüberliegenden Seite der "Naht", so das die Naht hinten ist? Muss ich bis dorthin Kettmaschen machen oder neu ansetzten?
09.08.2017 - 12:49DROPS Design answered:
Liebe Melanie, diese Mittelnaht kann man nur vermeiden, wenn man spiralförmig in Runden häkelt, dh nach der letzten fM der Rd mit der zweiten Runde fortfahren und 1 fM in jede fM häkeln. Markieren Sie den Anfang der Runde und lassen Sie die Markierung der Arbeit folgen. Viel Spaß beim häkeln!
09.08.2017 - 12:53Hallo, ich habe eine Frage zur Länge der Mütze. am Ende der Beschreibung steht:weiter mit 1fm in jede Familie bis die Mütze 17cm misst.Von wo aus gesehen 17 cm?von der Mitte der Mütze aus?
02.08.2016 - 05:38DROPS Design answered:
Liebe Chrissy, die 17 cm werden ab Lm-Anschlag, also von der Mitte aus gemessen.
03.08.2016 - 16:03Hallo, ich habe eine Frage zur Länge der Mütze. Am Ende der Beschreibung steht :weiter mit 1fm in jede fm bis die Mütze 17cm misst.Von wo aus gesehen 17cm.von der Mitte aus?
31.07.2016 - 19:03